Utilities
92 files
-
-

Blender Jedi Academy Plugin Suite
By mrwonko
This is a plugin for Blender to import and export 3D models from Jedi Academy and Jedi Outcast (Ghoul2 GLM, MD3, etc.) This is a compilation of all my Blender plugins, ported to modern Blender versions 2.64 and above:
MD3 Exporter (originally by Xembie, forked a couple of versions ago) ROFF Importer & Exporter ASE Importer & Exporter (specifically for GtkRadiant/Q3Map2 - very simplistic) .map patch exporter - i.e. export as patches GLM/GLA Importer & Exporter and animation.cfg exporter with support for everything, including creation of new playermodels and animations.
New version! Check out my GitHub for the latest pre-release, which supports newer Blender versions and addresses various shortcomings. A new JKHub release will follow at some point.
A manual is included, make sure to read it if you're having problems.
Installation:
Go to the Blender User Preferences, select "Install Addon" and select this zip.
8,128 downloads
-
Noesis
By RichW
Noesis is a tool for previewing and converting between hundreds of model, image, and animation formats. It utilizes a robust plugin system, with support for native extension modules and Python scripts. The plugin/script API features hundreds of functions and interfaces which assist in developing new formats, tools, and visualization aids.
This program has an inbuilt auto-update option which is recommended you utilize to get the most up-to-date fixes.
6,372 downloads
- 3D Modelling & Animation
- JK2
- (and 1 more)
-
Q3E Minimizer
By TiM
Author: TiM
Website: http://www.ubergames.net
Permission: https://jkhub.org/images/iasiSjw.png
Uploaded by: @Caelum
Description:
Quake 3 Engine Minimizer (or Q3E Minimizer for short) is a small desktop utility designed to allow users to forcibly minimize any games that were built on the idTech 3 engine, using a set of predefined hotkeys.
For technical reasons, all Quake 3 based games disable the Alt-Tab key command when they are in full screen mode (Presumably this is because the engine takes control of the display's hardware gamma in order to render the game at higher contrast. More on that here). Suffice it to say, this can sometimes be quite frustrating especially if you have any programs you want to reach in the background (such as a music player).
To help get around this, Q3E Minimizer was created to let users set hotkeys that will forcibly minimize the game engine window, and return them to the desktop.
Features of Q3E Minimizer include:
Operates entirely out of the system tray, so it's as invisible as possible.
Can be set to open upon Windows login.
A dynamic detector that determines what idTech 3 games are being played on the system.
A dynamic resolution modifier that will change your screen resolution between desktop and game modes.
Instructions
Open Q3EMinimizerv151_Setup.exe and follow the on-screen instructions.
Once installed, and upon opening Q3E minimizer, the main window will appear. In the drop-down menu located near the bottom of the window, choose which game you would like the minimizer to currently focus on, or leave it at Auto Game Detection, if you wish.
Start up that game as you would normally.
To minimize the game, press the default keys: Control-Z
To restore, press Shift-Control-Z
To configure the hot keys, right-click on your current game's icon in the system tray, and choose "Settings...". From there, use the interface to select your new keys.
To exit the program, right-click on the Q3E Minimizer icon in the system tray and choose 'Exit'.
I hope you enjoy using Q3E Minimizer and that it makes your gaming experience all the more better.
Happy Fragging!!!!!
-TiM
8,300 downloads
-
-
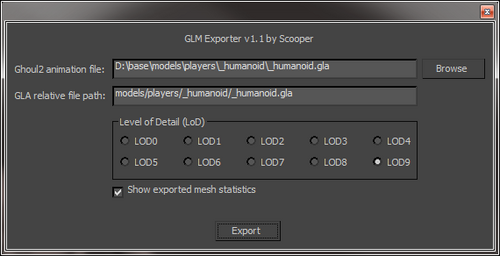
Autodesk 3DS Max 6-2025 GLM Importer/Exporter Plugins
By Scooper
These plugins were created on request by Milamber, with a lot of cooperation from him for testing and feature requirements.
They allow you to import .glm models to Autodesk 3DS Max 2010 - 2022, both 32bit and 64bit versions. (32bit support was discontinued from 3DS Max 2014 and up, so there are no 32bit versions of those.)
GLM models that are weighted to a skeleton can be imported with a skeleton if you have the matching .GLA file. If you do not have one, you can cancel that step and you will have an unweighted model imported.
The plugins have been tested with creating/modifying for Jedi Academy:
- Player models
- Creature models (Non-player usable models, such as rancor and wampa)
- Sabers
- Vehicles
- Weapons
Should probably work for Jedi Outcast as well, but this has not been tested.
The plugins have been tested and verified with the following 3DS Max versions:
- 3DS Max 2011 32bit
- 3DS Max 2011 64bit
- 3DS Max 2012 64bit
- 3DS Max 2015 64bit
Installation:
Pick the required plugin matching your 3DS Max installation, and put it into your 3DS Max plugins folder.
Example: 64bit
You have 3DS Max 2015 (64bit, since there is no 32bit) installed at the following location:
"C:\Program Files\Autodesk\3ds Max 2015\"
Move the following files:
GLM_Exporter_2015_x64.dle
GLM_Importer_2015_x64.dli
into
"C:\Program Files\Autodesk\3ds Max 2015\plugins\"
Example: 32bit
You have 3DS Max 2011 32bit installed at the following location:
"C:\Program Files (x86)\Autodesk\3ds Max 2011\"
Move the following files:
GLM_Exporter_2011_Win32.dle
GLM_Importer_2011_Win32.dli
into
"C:\Program Files (x86)\Autodesk\3ds Max 2011\plugins\"
How To Use
Milamber has created a tutorial on JKHub:
http://jkhub.org/tutorials/article/196-3ds-max-glm-tutorial-characters-creatures-vehicles-sabers-and-weapons/
Credits
- Milamber. For requesting the plugins. And being the tester verifying all the functionality, and making the requirements. And being the prime motivator and reason for this project being completed at all.
- Archangel35757. For providing necessary assets. And at this point being the owner of this and providing updated versions.
1,853 downloads
-
xNormal
By JKHub
Q: What is xNormal?
A: xNormal is an application to generate normal / ambient occlusion / displacement maps. It can also project the texture of the highpoly model into the lowpoly mesh ( complete texture transfer, even with different topologies ). It also includes an interactive 3D viewer ( with advanced shaders and realtime soft shadows / glow effect ), some Photoshop filters and importers/exporters for 3dsmax (Max7-2013) and Maya (8.5-2013). It supports high levels of parallelism using multicore/multithreading, distributed/parallel rendering, ray tracing and advanced GPGPU techniques. (NOTE: The latest version 3.19.2 available for download at www.xnormal.net deprecated all x86 plugins for older versions of 3ds Max and Maya that are still heavily used by this modding community-- these x86 plugins are last available in version 3.17.16 and thus my reason for making this tool available here as it is no longer possible to download it or its SDK on the internet. Additionally, v3.19.2 no longer supports the dotXSI file format. So we must use v3.17.16 if we want to bake normal maps using dotXSI files).
Q: How much xNormal costs?
A: Absolutely nothing. It's free for any use, including commercial one. No price and no fees at all. If you like it, please, help them by sending bugs/feedback, examples of your art or mention xNormal in your project.
Q: I can't use other normal mappers because they calculate their own tangent space and they only allow to use a kind of mesh format. Does xNormal include a SDK to make my own importers, exporters and plugins?
A: Yes, xNormal includes a complete and easy-to-use C++ SDK to write plug-ins. You can make image or mesh importers/exporters,etc... One of the key features of the xNormal SDK is the ability to customize the tangent basis. Please, take a look at this link to know why it's so important: http://wiki.blender.org/index.php/Dev:Shading/Tangent_Space_Normal_Maps (NOTE: I've also included the 3.17.16 SDK since it is no longer available to download).
Tutorials for using XNormal can be found here: http://www.xnormal.net/Tutorials.aspx
Finally, if you get an error on program start about missing an OpenRL dll then simply rename the extension on the MapRenderer_OpenRL.dll to .bak in the x86 and x64 plugins folders. It isn't needed and the program can function without it. Or you could try to reinstall the OpenRL runtime if you're using a graphics card that requires it.
2,031 downloads
-
GTK Radiant 1.6.4
By JKHub
This is the most recent pre-release build of GTK Radiant (ZeroRadiant) (v1.6.4)
Noteable improvements:
64-bit q3map2 support
Inbuilt JA support (No need to download a separate gamepack)
Install
Simply extract the contents of the .zip archive to a folder of your choice and run radiant.exe. No install required at present. Select Jedi Academy from the list and point the path to your /GameData folder.
=============================
GtkRadiant is the official level design toolchain for games powered by id Tech engines from id Software, and is maintained by a community of volunteers. GtkRadiant is powered by the GTK+ Project and released under a GPL license.
Repository - https://github.com/TTimo/GtkRadiant
Release notes:
http://icculus.org/pipermail/gtkradiant/2013-August/011885.html
1,682 downloads
-

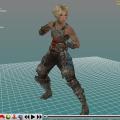
Dragon
By JKHub
Author: Wudan
-1- General Information
To put it simply, Dragon is an animation creation and editing tool for the Ghoul2 animation file format, .gla, used in both Jedi Knight II: Jedi Outcast and Jedi Knight: Jedi Academy (hereafter referred to as JKA). It's primary purpose is to create animations and write them in to the .gla format, which can then be merged with the existing JKA animations (or other .gla files) for use in-game with little knowledge needed.
Dragon has been created on a machine utilizing an AMD Duron 950, 256 MB ram and an ATI Radeon 9200 videocard, which is a fairly low-end system by today's standards. As such, most computers should be able to handle Dragon program smoothly (but, because of Dragon's avatar system, it is possible to put too much strain on any system.)
Dragon features:
A drag-able and transparant UI
An Avatar system
A Console to do nifty things!
A Complete Bone List to animate
A Standard model
A few example animations
Light Saber Rendering (extremely nifty)
Weapon Rendering (blasters rockets etc)
A floor tile, for better animations
Save and load system
A blending option
And probably much more
-2- Installation
The current release (0.1.0) is just a .zip file - you will need a program such as WinZip or WinRAR to extract Dragon. When you extract Dragon, it is important that you keep the folder hierarchy as it is in the .zip file. If you extract Dragon to C:\, the program will be in C:\Dragon\ All you'd need to do is navigate to that folder using Windows Explorer and double-click Dragon.exe. As of 0.1.0, Dragon has a default model that is loaded using the default Avatar, so you should see a shiny little guy, ready to animate.
-3- Getting Started / Basic Usage
Ok, you've gone through the trouble of downloading Dragon, extracting it, and running the core executeable - now what?
You should see a shiny little gray dude, a box that says "BoneList" and a box that says "SliderBox". Below the gray dude is a little stick thing, made of a white, green, and blue sticks. You still with me? Cool.
Let's focus on the BoneList, since it's basic use is pretty easy. You see a list of bones - model_root is in the middle - the active bone is dislplayed in the middle of this box. You can click on any of the bones listed above or below to switch to those bones - as you change bones you will notice that the stick thing (the white, green, and blue sticks mentioned earlier) change position and orientation.
Ok, now you're ready to do some fun stuff. See that slider box that you've been itching to mess with? This is the heart of Dragon - You have several things in here that are noteworthy - a Reset Button (completely obliterates any posing you've done of the current bone), and two sets of 'Sliders'. The sliders on the left are the important ones - the ones on the right we'll get to in a minute.
Go ahead and select the r_femur_YZ bone in the BoneList. Next, click on the green slider on the left - and hold your mouse down - and move your mouse left or right. You should see the gray guy's leg swing back and forth. You can now try moving the blue slider - his leg will sway from side to side.
Getting from here to making a cool stance is actually pretty easy - it's like playing with GI Joes, or some such action figure - you just pose the model how you want it. It might take some getting used to, but you're on your way
-3- Console Commands / Advanced Usage
Dragon uses a console, designed to be somewhat familiar to people who've played a game based on the Quake3 engine. First up to bring down the console press ` (you may need to enter ASCII code 0126).
Console Commands:
screenshot
Takes a screenshot - saved in the 'screenshots' folder.
fnext
Go to next frame (Hotkey: K)
NOTE: Also used to create frames, hotkey does NOT create a frame
fprev
Go to previous frame (Hotkey: L)
fdel
Delete frame - (deletes the current frame.) After deleting, Dragon will go to either the next frame (if there is one), or the previous frame (if there is not one.)
fcpy <number>
Frame Copy - Copies a specific frame number.
fcpyprev
Frame Copy Previous - Copies the frame before this frame. If there isn't one, it does nothing.
fcpynext
Frame Copy Next - Copies the frame after this frame. If there isn't one, it does nothing.
fspeed <number>
Frame speed, if you want your frames play at a higher rate, you need a high fspeed, you want a slower rate, u need a small fspeed. Default fspeed is 20. Usage: fspeed 20
fblend <number>
This is what makes the animation smooth. Its simple to use once u get used to it. Usage: in frame 1 is a stance in frame 2 is a different stance. U want the switch between stances to be fast, so 10 frames should be right. Bring down the console and type: fblend 8. now u should have a smooth switch from stance to stance. NOTE: To prevent odd bugs from happening cycle trough the animation mannually once before clicking the preview button! Always substract the amount of frames u already have for example if u want an animation to last for 20 frames and u have 5 frames animated than its 20-5 = 15 , fblend 15. Hope that makes sense play around with it.
finsa
Inserts a new frame after the current one.
finsb
Inserts a new frame before the current one.
save <name>
Saves a .cfg file to Dragon's directory. This file describes the animation you are currently working on. You do not need to add the .cfg, Dragon does this for you. So, 'save myanim' creates myanim.cfg in the Dragon directory.
load <name>
Loads an animation over the current animation, creates the necessary number of frames (but doesn't nuke any frames - so if you load a 5 frame anim and have 10 frames, you'll have 5 frames on the end of your workspace that you probably don't need. Use fdel to nuke 'em.
savegla <name>
Saves a .gla file in Dragon's directory under your given name. Usage: savegla my_stance
impframe <number> <number>
Import frames from the loaded .gla - so that you can edit previously finished animations. The first <number> is the starting frame number for your import, and the second <number> is how many frames to import.
It is recommended that you use the save and load commands to work on animations, as saving to gla and reimporting several times introduces compression artifacts - in layman's terms, your animation will be broken and you may need to re-do the entire thing. Importing from the original should be fine, as that's what the target executeable (in most cases, Jedi Academy) does anyway.
NOTE: To load up a gla you have to edit an avatar file, or make a new one. More on this in the avatar section.
-4- Avatar System
The Avatar System is one of the more robust components of Dragon. With it, you can animate multiple models at once, bolt models to those model's bones, change the saber's color, and length. So, how to access this advanced functionality? Listen well, young traveller, for a world of infinite possibility awaits those with a steady hand and an open ear.
Dragon, in 0.1.0b, comes with "avatar/default.cfg". (Now might be a good time to set Notepad to be the default editor for .cfg's, if it isn't already.) Opening that file shows:
Wudan{{org 0.0 0.0 0.0gla _JAhumanoid.glaglm models/players/stormtrooper/model.glmskin models/players/stormtrooper/model_default.skinbolt models/weapons2/saber_dual_5/saber_dual_5.glm rhang_tag_bonecolor 0.05 0.15 0.05length 32.0}}
The syntax is fairly similar to .shader file format, so skinners won't be at a total loss here. There are three main, must-have parts of an avatar file, the 'org', the 'gla', and the 'glm' lines. Oh, and the 'skin' line is fairly important. That said, a basic template to follow for creating new avatars would be:
AvatarName{{org 0.0 0.0 0.0gla INSERT_NAME_OF_ANIMATION_FILEglm INSERT_NAME_OF_MODEL_FILEskin INSERT_NAME_OF_SKIN_FILE}}
The org line has three floating point values past it. These tell Dragon where you want to draw the model at. This is useful because adding multiple models would be confusing if they all were at the '0.0 0.0 0.0' location. The gla line has a filename after it. By default it is _JAhumanoid.gla, which is a really small, single frame animation file that contains all of the skeleton file info. The glm line has a filename after it. This can be any .glm file, it is highly recommended that it be a .glm that was made to work with the gla you've selected. The skin line points to a skin file specifically created for the glm that you have selected. As of 0.0.1b, not loading a .skin file results in a crash.
-5- Tutorial: Replacing Animations
So the reason u downloaded dragon was not to read allot of crap but to get urself some animations done! So here we go! This is much easier than u think, Thanks to dragon. Its not hard either. Ive just written allot of text so it would be clear First we create our workspace. Extract /models/players/_humanoid/ (assets1.pk3) to a easy to find place. I've created:
"C:/Base/Models/Players/_humanoid/"
NOTE: /Base/ has to be there. if not ull get errors Check the _humanoid folder, see if u can see the .gla and the animations.cfg files. Now download GLAmerge written by Ask.
Now, create your animation in Dragon. That's easier said than done, right? Well, once you have a completed animation, you can move on to the next step.
However, before you export to the .gla format, there are a few things to consider - for one, have you saved the file (save command), so you can edit the original animation later? If so, excellent. save, then savegla - I think a good idea would be to automatically save when savegla is called - this could be done for the next release - any thoughts?
Ok, now the tricky part is that you'll need the very first frame of animation be empty - it technically doesn't matter, but you need to understand that this buffer needs to be there because other animators, using packages like XSI and 3dsMax, weren't able to keep the skeleton in-tact when exporting to gla and merging, unless they had made the first frame of their animations the base pose, otherwise the animation could not be successfully merged in with glamerge. Dragon does maintain the skeleton's structure, but uses the same merging program as everyone else.
Anyway, the tricky part is that Dragon currently has a blending system that 'wraps' around the animation - if the last frame of animation has blended bones in it, they blend with the first frame. This helps with walk cycles, but makes exporting to gla format pretty tricky. Since 'unblending' bones does not destroy their position, save your animation, then unblend each bone of the first and last frames, then finsb on frame 0 - you should now have a blank frame 0 and the rest of the frames are working fine - but, because Dragon is finicky about frames, cycle through all the frames before you export. You're ready to export - lucky you!
To export, enter the console and put in
savegla YOURFILENAME
(do not append .gla, Dragon does this already.) Ok, you're done with Dragon, go ahead and exit (you did save, right?)
In the folder where Dragon is located, you will find YOURFILENAME.gla - copy the .gla to the humanoid folder mentioned earlier. Than create a new text document. In that document type the following:
@ECHO OFF"glamerge.exe" "_humanoid.gla" "<gla>" -oPAUSEEXIT
This is a basic setting. replace <gla> with whatever your gla is called. i got this: @ECHO OFF "glamerge.exe" "_humanoid.gla" "my_run.gla" -o PAUSE EXIT (if u are an advanced modder, see the readme of glamerge for more options) Save the txt file as gla_merge.txt Now rename the file to gla_merge.bat (the .bat file tells the program what files to merge) now double click on the .bat file (make sure the following files are in the _humanoid directory. Glamerge, _humanoid.gla, your GLA.) It should now ask u for an output name. I suggest humanoid.gla (NOT _humanoid.gla!). Because this way u can rename the humanoid.gla or delete it when it isnt good while keeping the original (of course its just a copy of the original located in assets1.pk3). But for now lets do new.gla Now create the same directory somewhere else (no need for /base/ now) c:/models/players/_humanoid/ copy the other _humanoid files and paste them here. delete everything except Animations.cfg and new.gla Now rename new.gla to _humanoid.gla. Open up the animations.cfg with good old notepad. Now find the running animation. (U can use modview) k now its time for some small time scripting (not 2 hard dont worry) Now uve found the animation u want to replace BOTH_RUN1 12305 26 0 40 (name) (beginframe) (frames) (loop) 40(framespeed) K now. we have to leave the name the same. Now we find out what the last frame is, if u scroll down a bit ull see that ROOT is the last frame on frame: 21374 and it lasts 2 frame wich comes to a total of 21376.Now we know what to fill in the first, now for the second. How many frames is your animation? really simple if u've paid attention when gla merge was busy you shouldve noticed it counted the frames So there. I got 20 frames. Next is wether u want it too loop or not. 0 = yes, -1=no. We have a running anim so i would say 0, yes. And finally the framespeed. This one u can set whatever u like. in dragon the speed was 20 and i liked it so ill use 20 There we're done analyzing. So lets do this ! BOTH_RUN1 21376 20 0 20 Ahh yes were done! Pack /models/players/_humanoid/ in a .pk3 (the same way u would pack a skin) and place it in your base. Launch JKA. play a game and look at your new animation! NOTE: your next animation has to start on a different frame, see the last frame is 21376, plus the 20 frames u used wich would become 21396 I hope u get the point. Delete the .pk3 and yer jka is back to normal, Isnt it simple? Its only simple thanks to Dragon:The Ghoul2 Animation Tool
-6- Contact
If you need help or got questions or want to report a bug (TO SQUASH!) you can contact Wudan on the following ways:
Mt-Wudan
Dragon Forum
Mail: Wudan07 -AT- gmail.com
Aim: Wudan07
Remember! Report Bugs As soon as u find them! And also please fill in the crash/bug form included! You are able to control how good the next version will be if u go on bug-hunting or if u think of things that could be improved
Credits
Jedi Knight Jedi Academy.......................................LucasArts, Raven, Activision
Ask................................................................................GLAmerge
Wudan......................................................Dragon:The Ghoul2 Animation Tool
Shady-D.........................................................Doing some background stuff
You..........................For reading this and for (hopefully) reporting if u find a bug
661 downloads
-

ModView (for Windows and Mac)
By Xycaleth
What is ModView?
ModView is a tool to view models used by Jedi Knight II and Jedi Academy. It was originally created by Raven Software and now being improved by the OpenJK developers.
ModView currently supports only .glm model format.
What's different?
The original ModView runs only on Windows. This ModView currently runs on Windows and Mac with some functionality disabled. Going forward, ModView will see more functionality restored, and changes to improve usability and to aid the process of getting models into JK2/JKA.
If you are able to run the original ModView on Windows without problems, I recommend people to continue using ithe original if you don't want any reduced functionality.
How to use
Extract all the files to a folder of your choosing.
Run ModView.exe (Windows) or Modview.app (Mac)
Known Issues
Currently, some of the ModView features are missing as changes are made to add Linux and Mac support. These features will be added back in the future, along with improvements!
Attached models don't show up in the control on the left side of the window.
No way of adjusting the floor position
1,248 downloads
-
GtkRadiant
By JKHub
Gtk Radiant is the official level design toolchain for id Tech 3 by id Software and is maintained by a community of volunteers. Gtk Radiant is powered by the Gtk+ Project and released under a GPL license.
Features
Simple, Intuitive Interface
Enhanced texture browser
Entity inspector
Portal viewer
Wavefront .obj export
Game Engine-Independent
Dark Places
Doom 3
Half-Life
Heretic II
Nexiuz
Prey
Quake
Quake II
Quake III Arena
Quake 4
Return to Castle Wolfenstein
Wolfenstein: Enemy Territory
Soldier of Fortune II: Double Helix
Star Trek: Voyager Elite Force
Star Wars Jedi Knight II: Jedi Outcast
Star Wars Jedi Knight: Jedi Academy
Tremulous
UFO: Alien Invasion
Urban Terror
War§ow
and more...
Powered by Q3Map2
2,321 downloads
-
Jedi Academy File Manager
By Key
Jedi Academy File Manager
JAFM Beta Version 00.01.01
Introduction
Jedi Academy File Manager (JAFM) is a utility for easily keeping track of PK3's/Packages, Mods, and CFG's for your Jedi Academy game. You can install new PK3's and mods, view / edit their in-depth properties, and even remove them from your game folder. Currently it's in beta, there are features being added and tweaked as development goes on. All criticism, enthusiasm, evaluation, etc. is appreciated. (if you find an issue, please PM me directly on JKhub!)
Features
- Enable/Disable PK3's
- Detailed PK3 support for modders
- Dynamic mod installation & management
- CFG (scripts and configs) editor.
- JASP/JAMP launcher with argument support.
- Profile system for keeping multiple sets of gamedata folders and selections of active packages.
- Large amount of backgrounds to choose from, all from JA! (reason the DL is so big, sorry)
- Automatic PK3-type name parsing (authors and version #'s require jafm_info.txt files)
Installation
1. Download JAFM.
2. Put the application wherever you want, and start it up. It does not need to be in a certain directory.
3. Use as you see fit!
Planned Features
- PK3 packaging tool & editor for quick fixes / access
- MAC AND LINUX SUPPORT
- List sorting
- Skins and more customization
- More ergonomic CFG editor and modder support
Things That Don't Work & Disclaimers
- If you have a steam installation of JA, due to the way steam works you will be unable to launch multiplayer from JAFM. Sorry!
- This application must be ran in administrator mode for people who have installed JA into their "x:\Program Files" and "x:\Program Files (x86)" directories.
- Mac & Linux aren't supported yet.
- I'm confident JAFM won't destroy your game or folders, however if you don't believe me - back up your GameData folder before use.
Further Notes
- I've been working on versions of this for nearly two years, inspired by the likes of NMM and MO.
- Just recently started learning how to use WPF, this is my first project with it.
Modder Support
1. Download a copy of the jafm_info.txt file found here: clicky clicky OR download from the JKH link, there'll be a folder named "sample jafm_info"
2. Fill out your mod's details inside.
3. Put the jafm_info.txt into your PK3's top directory or next to it inside a ZIP file.
4. JAFM will attempt to look for a jafm_info.txt and a read-me.txt during analysis.
5. A plethora of Read-Me file names are searched to cover multiple possibilities of you messing up
Credits
- Thanks to MasterM, he has been my most dedicated tester.
- Thanks to Fal & Zab for the support & encouragement.
481 downloads
-
3ds Max Quake III MD3 Exporter Multi-Version Pack
Exporters for the Quake III .MD3 model format.
This was a tag-team effort between DT85 and myself... and at times we called on outside experts to help us overcome some of our coding challenges.
3ds Max versions Supported:
**********************************
6 (32-bit)
7 (32-bit)
8 (32-bit)
9 (32-bit/64-bit)
2008 (32-bit/64-bit)
2009 (32-bit/64-bit)
2010 (32-bit/64-bit)
2011 (32-bit/64-bit)
2012 (32-bit/64-bit)
2013 (32-bit/64-bit)
2014 (64-bit)
2015 (64-bit)
2016 (64-bit)
2017 (64-bit)
2018 (64-bit)
2019 (64-bit)
2020 (64-bit)
2021 (64-bit)
2022 (64-bit)
2023 (64-bit)
2024 (64-bit)
2025 (64-bit)
For v2.4 features, installation and usage instructions please see the included "MD3 v2.4 readme.pdf" file.
Exporting Process:
**********************
- Make your model.
- Apply your texture using the 'standard' material only.
- Make sure your texture is in a 'models' folder (e.g.: models/map_objects/ships/ship.jpg ),
*** or alternatively name your material slots with the relative path and check "Use material name..." -- this new feature does not require a "models" folder in the path name.
- Make sure the destination folder has 'models' in it (e.g.: models/map_objects/ships ).
- Export it with 'Smart paths' checked and/or 'Use material name...'
- For a static model (no animation) just leave the default value of '0' in the 'frames' field.
Known Issues:
*****************
- None.
Credits:
*********
Pop'N'Fresh (original code)
DT (code enhancements)
Archangel35757 (code enhancements)
1,183 downloads
-
GMax / 3dsMax4.x Plugin Pack
A collection of over 50 Freeware Max-scripts, Plugins and Suites to extend Gmax v1.2 and 3DSmax v4+ File I/O capabilities.
Supported Apps/Games/Engines/Formats:
3DS, AutoCAD, AutoDesk, Battlezone, C Language Format, Command & Conquer Renegade, Dragon's Age Origins, DirectX, Fly3D, Gamebryo/Netimmerse Engine, Ghoul2 Engine, Ghoul2 Engine, Granny Engine, GTA, Halflife, Kingpin, Lightwave, Maya, Milkshape, Morrowind Oblivion, NWN, NWN2, OpenGL, PowerVR, Quake2, Quake3, ReelMotion, Return to Castle Wolfenstein, Total Annihilation, Unreal Tournament 2003, VRML, Wavefront, xFrog, ZenGin Engine
Gmax Specific Plugins:
3DS - 3ds importer v1.1 - gmax
AutoCad - Dxf importer v1.1 - gmax
GTA - Importer/Exporter - Gmax
NWN - NWmax .8 for Gmax (conflicts with Waylands MaxScript)
NWN - Waylands Import/Export MaxScript for Gmax (conflicts with NWmax)
Quake2 - md2 importer v1.1 - gmax
Quake3 - MD3 exporter beta v1.0 - gmax
Quake3 - md3 importer beta0.1 - gmax
Quake3 - md3 importer v1.0 - gmax
Return To Castle Wolfenstein - mdc importer v1.1 - gmax
Wavefront - OBJ importer v1.1 - gmax
Wavefront - OBJ importer v1.1a - gmax
Gmax & 3DS Max Mixed-Support Plugins:
AutoCad - DFX Importer (importdxf.zip) gmax/max
3DS - 3DS Importer v1.0 (max42-imp3DS.zip) gmax/max
Gamebryo/NetImmerse - NIF Import / Export (niftools-max-plugins-3.4.2.4632.7z) gmax/3dsmax
Granny Engine - .GR2 Skeleton and Animation import Plugin (3ds Max / GMax)
GTA - Kam's Max Scripts Import/export for 3DS Max & GMax
Half-Life - SMD importer v1.0 - gmax/3d max 4.2+
Kingpin mdx importer v1.0- gmax/max4
Milkshape - (ms3dImportExport_ver1_0.zip.zip) gmax/max
Return To Castle Wolfenstein - MDS importer v1.0 - gmax/3d max 4.2
3DS Max v4+ Plugins:
(Note: Althought supposedly some 3DSMax4 maxscripts and plugins can work for gmax12, (as Gmax is based off 3DSMax v4.0,) most are still largly untested, so please post if something doesn't work or seems buggy.)
Autodesk - Game Export Interface v1.122 (IGame_v_1.122.zip) max4
C&C Renegade - W3DImporter.zip
Dragon's Age Online - Import/Export
DirectX - Exporter v1.0.0.1 (efx_xout.zip)
Fly3D - Fly3D Mesh Import/Export v3.0 (fly3d3_plugins.zip)
Quake3 - MD3 Exporter v6.1 beta (MD3 Model Exporter v6.1 beta)
Quake3 - MD3 exporter - 3d max 6
Quake3 - MD3 exporter v2.0.1 - 3ds max 4.2/5
TotalWar - ms3dImportExport_ver1_0 (ms3dImportExport_ver1_0.zip)
UT2003 - Jamlander v3.01 (jamlander_301.zip)
3DS Max v4+ Specific Plugins:
(known to cause startup errors in Gmax)
AutoCad - DFX Export - HDXFEXP v4.0 (HDxfExp4.zip)
AutoCad - Material Lib Import - MLI to MAX v4.0 (mli2max4.zip)
Autodesk - Ascii Mdl Importer (asciiimporter.zip)
Battlezone - GEO Import/Export v1.0 VDF Import v1.0 (BZImportExport.zip) 3ds max
Battlezone -SDF Import v1.0 (SDFImport_max45.zip) 3ds max4
Ghoul2 Engine - Model Importer v0.2 (max4glmimport2.zip)
Half-Life - SMD exporter v1.0 3d - 3ds max 4.2+ only
Lightwave - LWO Importer LWOImpR4_043.zip
Lightwave - LWO2 Importer v0.90 (lwo2imp.zip)
Maya - Max2Maya ASCII v0.0 Exporter (Max2MayaAscii.zip)
Morrowind - NIF Importer v1.0 (NifImport.rar) max4
NWN - MDL Plugin Suite (MDLPluginSuite1.1b2Max5.zip) max 5
NWN2 - MDB Importer / Exporter v2.3.0(nwn2utilsmaxplugins2.3.0.rar/exe)
OpenGL (.c) - ESM Importer/Exporter v0.1 (Esmexp42.zip)
PowerVR - Exporter (PVRexp4.zip)
Quake3 - MD3 Importer v1.01 (md3imp.zip)
ReelMotion (ReelMotionMAX4.zip)
Total Annihilation - 3DO Import/Export v1.0 (3dopluginr4.zip+tatextures.zip) max4
Valve - Skeletal Model Exporter v4.1.3.0 (smdlexp_4130_max4_5.zip) 3ds max
VRML - 2.0 Export v4.4.1.0 (3dsmax4vrmlexp.exe) 3ds max
Wavefront - OBJ Importer v4.2 (Objimp42.zip) 3ds max
XFrog - Importer v1.0 (xfrog_maxplug.zip) 3ds max
Specificity, the following plugin's won't load with Gmax (so install to 3DSMax v4+ only):
3doexport.dle, 3doimport.dli, asciiimp.dli, Esmexport.dlu, GEOExport.dle, GEOimport.dli, ghoul2imp.dli, HDxfExp.dle, lwo2imp.dli, Max2MayaAsciiExp50.dle, Max2MayaAsciiExp60.dle, md3imp.dli, Mli2Max.dli, NifImport.dli, NWN2Utils.dlu, objimp.dli, PVRExp_v4.dle, SDFImport.dli, smdlexp.dle, VDFImport.dli, vrmlexp.dle (stdplugs dir), and xfrog.dlo
This is something I've had in my plugin archives and I thought I would share here since most of these can't be found online anymore. Hope they help, and happy modding!
P.S. - Also, there has been a rendering plugin created for GMax a long time ago ...for those who'd like to render images of their masterpieces. Just do an internet search for "GMax Renderer" and you should find it.
1,531 downloads
-
JK2/JKA Server browser
By Grenixal
Server browser for JO/JA with many supported masterservers. You can also customize the masterserver settings in settings.ini.
You are able to join server directly from the browser. The browser includes favourite list and a server guard, which will inform you when someone has joined the guarded server.
For further instructions please read Oobah's comment below.
You need Java to run this server browser.
https://java.com/en/download/
627 downloads
-
Map Object Models - Image Reference Library for JK2/JKA
By Szico VII
This is a complete compressed (.zip) file containing screenshot references of all the JK2 and JKA model assets, located in the base/models/map_objects folder. This should make it easier for modders of the game to browse the models and decide which to use without manually loading each and every model in radiant to check.
You should unzip the entire library to your computer so you can utilise your OS's inbuilt thumbnail viewer.
You can find the wiki page of all of these images easily viewable in a table format here
===========
Notes
===========
- Some models are broken - i.e they are missing texture assets. These are clearly labelled.
- Some models are for JK2 only, so you will need the JK2 asset files for the models to display correctly.
- The above also applies to JK3.
- Some screenshots were taken ingame to better illustrate their ingame appearance, so if they appear
differently in radiant do not be alarmed.
- Any model with a _b suffix in its name was designed for use as a misc_model_static. It is otherwise identical
to its normal counterpart, so there are no screenshots of these models.
---------------------------------------------------------------------------------
IMPORTANT!!!!
---------------------------------------------------------------------------------
I spent a great deal of time compiling this library together so please leave credit if you find it useful in your projects!
You may not redistribute these images or use them for anything other than personal use only.
NO ELEMENTS OF THIS FILE CAN BE RIPPED!
557 downloads
- jk2
- 3d modelling & animation
- (and 2 more)
-
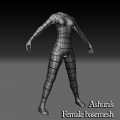
Ashura's female basemesh
By AshuraDX
A simple female basemesh I made to build Jedi Academy or Jedi Outcast models around
Feel free to use it, but if you do please mention me in your models read me, happy modeling!
328 downloads
-
GtkRadiant 1.5 Complete Version
By Pande
This version of GtkRadiant, which is now no longer available due to the absence of the old QeRadiant website, is the most complete and bugless version of GtkRadiant 1.5 available. Many users complain about 1.5 bugs and therefor tout the 1.4 editor as being better. Anytime I have helped fix the bug, this particular .msi has always done the trick.
Note that the features included in this version are but not limited to:
ShaderPlug
bobtoolz
brushexport2 (convert brushes into .obj)
prtview (view portal divisions, very useful!)
Maya style Translation, Scale, and Rotate (always snap to grid after using these!)
1,334 downloads
-

Blender 2.62 - GLM Importer & Exporter
By mrwonko
Import and export of .glm and .gla work in Blender 2.62, bones rolled 90 degrees for better handling
Note: Check out the Blender Plugin Suite for updates and support for more recent Blender versions.
1,493 downloads
-
Q3Map2Toolz
By JKHub
Q3Map2Toolz is an alternative front-end application for Ydnar's Q3Map2 to q3map2build. It is larger than it's build counterpart but for current days still small.
It's main advantage is that it has an included mapacker by Equim which greatly reduces effort in making the .pk3 files.
Additionally, it allows the use of more BSP switches than Q3map2 GUI.
1,505 downloads
(1 review)0 comments
Updated
-
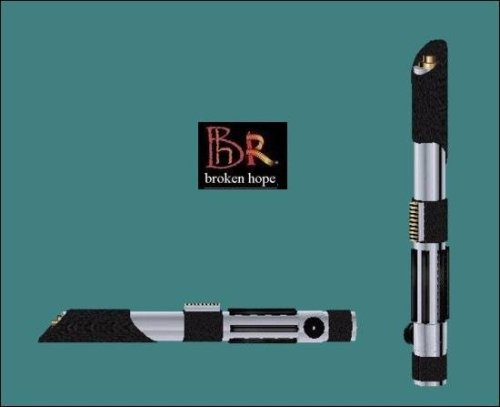
DEvaheb 2.0
By Interface
DEvaheb can open IBI files and convert them back into text file scripts you can open and edit with BehavED.
DEvaheb 2.0 is command line only. However, it can open a text editor of your choosing when it has decompiled (such as notepad, BehavED,VS Code, etc.).
https://github.com/jorisdg/DEvaheb/blob/v2.0-beta.1/Usage.md
Quick Start
The DEvahebOpen.cmd file wraps the executable and opens notepad. You can use this cmd file instead of the .exe to open your IBI files. You can edit the .CMD file in notepad (right-click Edit in Windows explorer) and instead of opening "notepad" you can point it to the location of BehavED.exe on your system, etc.
Find the source code, file issues and ask questions at https://github.com/jorisdg/DEvaheb/
807 downloads
-
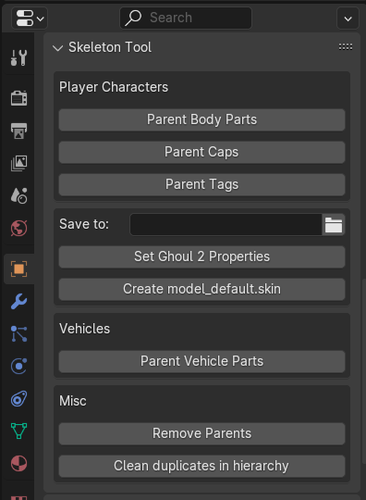
Blender - Skeleton Tool (your future All In One addon for JKA models)
By Maui
Blender Version: 4.1
Idea behind it:
I used to do Frankenstein Modelling for hours each day and I was thinking about simplifying these steps. How do I make it less time consuming to parent everything and set names, create .skin files and so on. That's when I got into Python coding and learned how to use the Blender API thanks to @Milamber.
He has been my inspiration source for years.
I want to keep updating the code so it looks more neat and make it an All in One addon for modelling in general.
ALWAYS CHECK GITHUB FOR THE LATEST CHANGES AND FOR THE README FILE, THIS WILL BE UPDATED ALONG THE ADDON
Visit me on Github: https://github.com/Mauii/
281 downloads
-
Q3map2 (>2GB Memory Usage)
By JKHub
Ydnar's official q3map2 program updated to use >2GB Ram during compiles to avoid safe_malloc error. No other changes,
Requires a 64-bit OS.
667 downloads
-
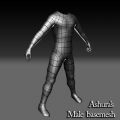
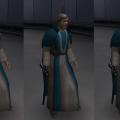
Ashura's male basemesh
By AshuraDX
A simple male basemesh I made to build Jedi Academy or Jedi Outcast models around
Feel free to use it, but if you do please mention me in your models readMe, happy modeling!
261 downloads
-

Mr Wonko's MD3View
By mrwonko
MD3View is an OpenGL based application useful for viewing model files from Jedi Knight. In this version glm export is fixed - tags were offset a little.
878 downloads
(3 reviews)0 comments
Updated
.thumb.jpg.5dcb19c4514c273ccb909b62bb79a3e3.jpg)


-

-
For an extensive list of mods we recommend for Jedi Academy for new or old players.
-
Latest Activity
-
0
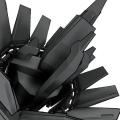
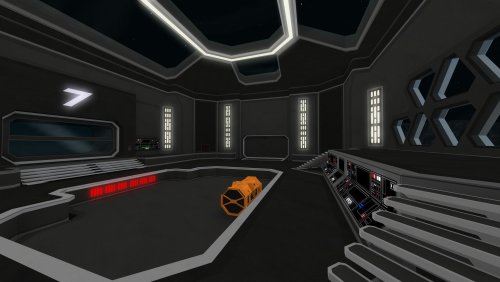
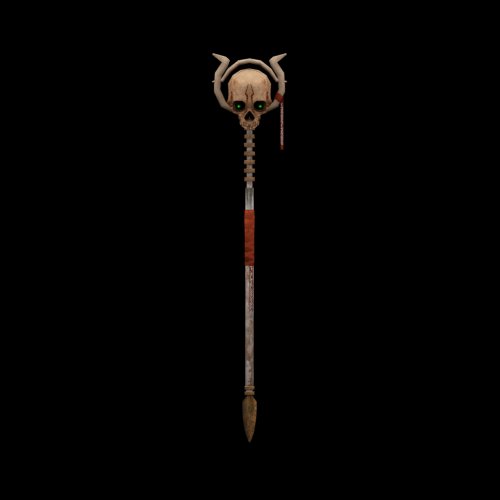
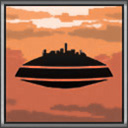
Imperial Data Disc
It is so great to see some good props hitting the weapons folder! This is a huge win for RP groups and film makers. Very good to see!- 1
-

-
1
-
148
Jedi Academy: Enhanced
I have an issue with lightsaber customization. It won't show hilt options. What can I do about it? -
0
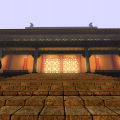
Imperial Data Disc
.thumb.png.053fed0bde4d93770c561af1841c0c3e.png)
Version 1.1
8 downloads
Imperial Data Disc Featured in the Bad Batch "Truth and Consequences" episode, and modeled after images from the concept art gallery for the episode. Equipable as a saber. -
1
-
6
-
22
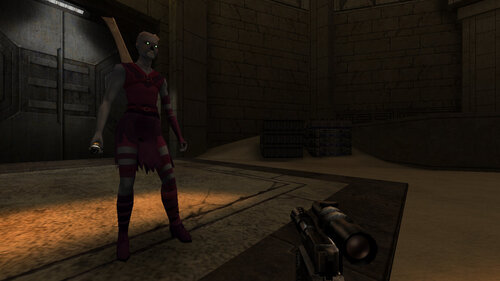
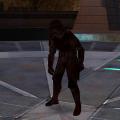
Gothic Girl
Reminds me of a VtMB character. Well done (and yes, I know this is an almost ten year old mod). -
148
Jedi Academy: Enhanced
Could you adapt this to Jk3 android version "jedi touch"? the android version seems to read very well pkg files.,and since this is a small mod...but the feature that i wish most was the "saber holst" system.So if you could work on just it and release would be great cause there is no mod until this day that can replicate is.
-
-
Download Statistics


.png.b45fd3adaf2bab06eb748c2b5fd4c84d.png)