
JKHub
-
Posts
616 -
Joined
-
Last visited
8 Followers


-
Version 1.1
24 downloads
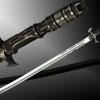
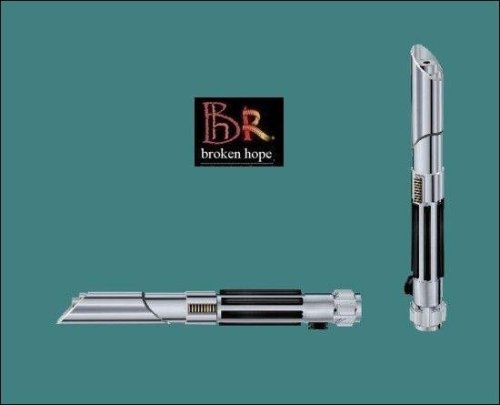
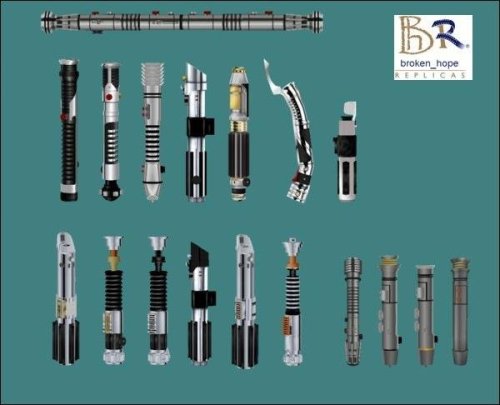
Sith Master Hilt Author- broken_hope This is my final hilt for JA because there really isnt much left to do & i dont have the time to put into the models as you can tell in my last couple of releases. This was made for my Sith character its a variation of the Jedi Master hilt & like before as ive said i make these hilts for myself & i stick to a more practical design for realism. Hope you guys like it as it is my last release, I wish i could have spent more time on it, the black actually has a grain in it, I dont if it shows up on others cpu's. Installation- Put pk3 in your Jedi Academy/gamedata/base folder Credit to Alaris for the housing part. Update by Circa for adding an optional pk3 that does not overwrite the Arbiter hilt like the original pk3 did. /saber smaster -
Version 1.1
21 downloads
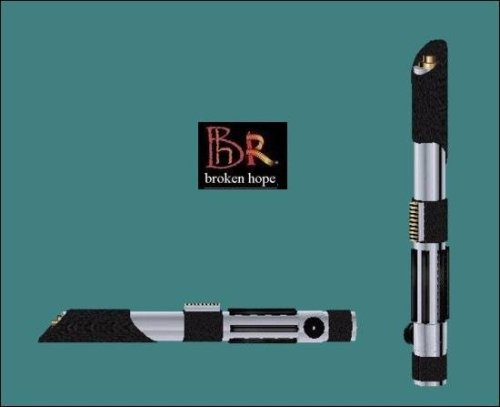
Author- broken_hope This is my new lightsaber, This one i will be using permenantly as it is fit for a Jedi master. This is by far my favorite hilt i ever built. Installation- put pk3 in your Jedi Academy/gamedata/base folder. The hilt replaces the Arbiter Credit to Alaris for a model part. Updated by Circa for a non-overwrite pk3 option to not overwrite Arbiter. -
10 downloads
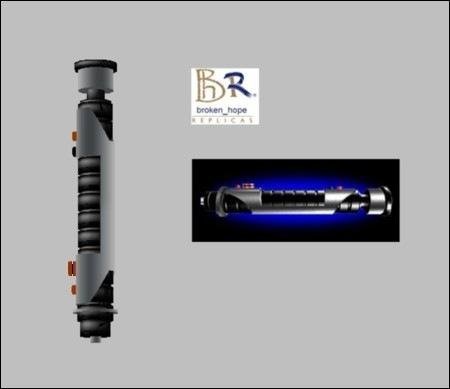
Mark IV Staff Hilt Author- broken_hope This is a hilt i wanted to create for a long time for personal use, thought id share it. Replaces the Champion hilt (dual_4) Installation- Put pk3 in your Jedi Acadmey gamedata/base folder Credit to Khaliban for some model parts -
12 downloads
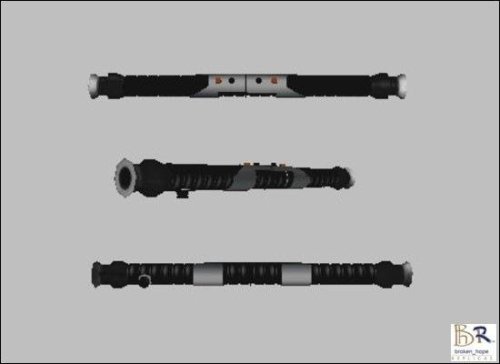
Mark VII Staff Hilt Author- broken_hope Inspired by Qui-gon Jinn & Ulic Qel-Droma. I also included 2 pk3's, 1 that overwrites the default Vindicater staff hilt & 1 that stands alone by itself like all hilts. The pk3 that overwrites the default can be used on any server & the pk3 that stands alone needs to have the server running it. I included the 2 because people were requesting that i dont overwrite the defaults, this way you can have both. Installation- Put pk3 of your choice in your Jedi Academy/gamedata/base folder Command to use: /saber Mark_VII -
43 downloads
Star Wars Saga Ultimate Hilt Pack Author- broken_hope This is every Hilt from all 6 movies minus the Sidious hilt due to the fact that there arent any good images of it yet. Half of these hilts have been re-modelled & scaled correctly to actual appearence & the other half built from scratch. I included two versions, One for the servers to run & one that overwrites defaults for use on any server. Although many of the hilts use the same number i recommend you use one at a time when using default overwrites. The Hilts... Quigon Obiwan Ep1,Ep2,Ep3 & Ep4 Windu Ep1 & Ep2 Maul Anakin Ep2 & Ep3 Dooku Yoda 5 Prequel Hilts Vader Luke Ep5 Luke Ep6 Installation- Put pk3's of your choice in your Jedi Academy/gamedata/base folder Credit to Alaris, MoneyKungFu & The Fallenangel for model parts.-
- 1
-

-
- lightsaber based weapon
- staff
- (and 1 more)
-
Version 2.1
66 downloads
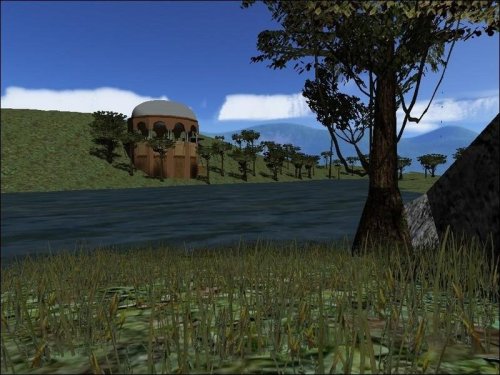
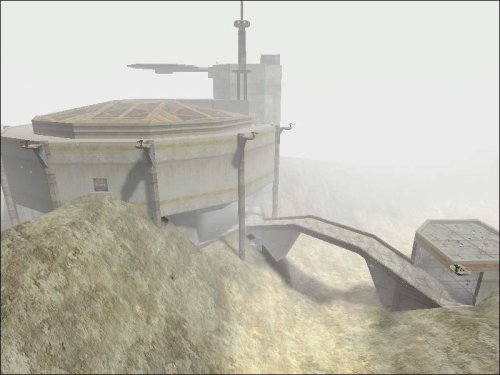
NABOO HILLS version 2.1 by Darth Zappa Sept. 19, 2004 This is a vehicle warfare map on a large open hilly area. It is good for general FFA, team FFA and CTF games, and also supports duel and powerduel games. There is a base with vehicles, weapons and ammo in each far corner of the map. In a CTF or TFFA game, the teams will each start at one of these bases. In FFA mode players will start at the gazebo building next to the lake. use the eopie spawning station nearby to get transportation to the far bases. Scattered throughout the map are stations with health, shields, ammo and other vehicles. Although the map is somewhat symetrical, the layouts of the two bases are quite different. Some people like this sort of thing for CTF games, some hate it. CTF support was shoe-horned in at the last minute and may have some problems; your mileage may vary. Bot-routing support is also included and is of questionable quality; the bots wont drive the vehicles anyhow, so their route will stay around the gazebo area. Naboo base - weapons, powerups, N-1 Starfighter, combat swoops Trade fed base - weapons, powerups, droid fighter* hailfire, droideka, sith speeder Additional vehicle types are available at the powerup stations throughout the map. Each of the orange console switches in the map spawns a vehicle of some sort. Not all vehicles perform well in water; mind the lake. Due to the large number of vehicles in this map, you will find that you can't spawn any new ones on here unless you are running a mod that allows for more vehicles on both the client AND server sides. Don't try it, you'll just crash. If you are missing textures on the ground, then remove the pre-release jedicouncilgc and forest sanctuary maps from your base folder, as well as any other maps that have been converted from JK2 to JKA. There is a problem with the way some folks are converting their older maps that causes a texture conflict. The only solution is to remove the offending maps from the your base folder. Vehicle models by Duncan_10158, Monsoontide, tFighterpilot and Neomars1; some are further customized. (See below for full details.) Skybox by Whiteshdw, courtesy of Shadriss's dotf map. Installation ------------ Before installing any of the naboohills21 files, first remove *ALL* other vehicle pk3s and vehicle-related map pk3s from your base folder, including older versions of these vehicles. Also remove any older versions of this map. Once you've done that, put everything in the 'put_all_this_in_base' folder into your base folder.If you dont have any other vehicles or maps with built-in custom vehicles (like KOTOR flight) in there, then everything should be fine. After that, you can take out individual vehicle pk3 files if you want to remove certain custom vehicles (they wont spawn from the buttons then.) All the vehicles must be on the server for all the switches to function properly. The 'read me' files for all the original vehicles are included in a separate folder. Files Included - filename (npc vehicle) info -------------- naboohills21.pk3 (naboohills21) map file hailfire_droid06.pk3 (hailfire_droid) trade fed rolling rocket launcher maulspeeder.pk3 (maulspeeder) sith bomber speeder bike, customized ojp_eopie_saddle.pk3 (eopie) the butt-ugly but loveable riding horse-anteater-thing OJP_droideka_06.pk3 (droideka) the trade fed rolling destroyer droid gunshipVM.pk3 (gunshipx) republic clone gunship N2.pk3 (n2) naboo N-1 starfighter, customized sb-bikes.pk3 (swoop_bike1, swoop_bike3, swoop_bike5) heavy duty customized combat/racing swoops bdc-cloudcar.pk3 (bdc-cloudcar) customized bespin cloud car, currently acting as a stand-in for a trade fed fighter this map uses a compatible vehicle set with BDC Racing Club v1.2. If you are running this map, you can run tha one too without changing any vehicles around. Misc. Notes ----------- - Changes from 2.0 version - optional black reskin for the N2 included in separate folder - new Trade Fed Lander base design, more accurate to the ship in the movie - fixed CTF spawn points - models now clipped correctly, you cant shoot through them anymore - more trees - N1 naboo fighter now has a proper bounding box, and is easier to hit - some vehicles now have custom radar icons, where i was allowed (cough) to add them - new dueling area with good fps under the starting gazebo - deeper lake is now more dangerous to fly in, watch those rocks - fixed weapons on sith speeder and combat swoop bikes - some other minor very minor tweaks - Changes From 1.2 version - skybox from dotf (thanks shadriss) - added droideka, gunship, more swoops, eopie; removed atst, rancor, tauntauns - map area now twice as big (perhaps too big now), new trade fed. base position - CTF support and bot-routing (sort of) - larger area of view (fps suffers a bit) - replaced tauntauns with faster eopies - re-arranged powerup stations - other minor tweaks and such - Stuff That Needs Fixin' - better lookin terrain and detailing in general - siege? perhaps. - Wish List (stuff i would like to add to this map, but doesn't exist yet) - Trade federation AAT battle tank (sadly this was abandoned by duncan. if it gets finished, i'll use it) - Trade federation fighter plane thingies (the cloudcar is currently filling in for this until it is ready.) - Lasers on the gunship (i've given up hope for this. thanks, you know who you are.) - gungan ridable kaatu (under construction, or so they say) - In a perfect world, i would like this map to have episode 1 and/or naboo-specific vehicles only. - For lots of great movie character skins and other vehicle models go to www.jedimoves.com - darth maul, obi-wan, qui-gon, battledroid, gungan, mace windu skins and much more - Also make sure to check out the Open Jedi Project, at http://ojp.jediknight.net Credits ------- map designed and constructed by Darth Zappa (darthzappa@blackdeathclan.net) hailfire droid, sith speeder and droideka, and N-1 vehicle models by Duncan_10158 (http://io.meskinaw.net/) and Monsoontide (http://home.earthlink.net/~monsoontide) republic gunship vehicle model by NeoMarz1 (http://www.geocities.com/neomarz1@sbcglobal.net) N1 vehicle customized by Nexus of OmNi clan (nexplanet.tk) Sith speeder customized by Nexus of OmNi clan (nexplanet.tk) with further tweaks by me Bespin Cloud Car converted to JA vehicle model by tFighterPilot, and further customized by me swoop bike (swoop_bike1,swoop_bike3,swoop_bike5) vehicle files modified by myself and McCleod of DX clan (www.dxgaming.net/jka) eopie, droideka vehicle models from the open jedi project (http://ojp.jediknight.net) skybox texture by WhiteShdw (kal_el23@hotmail.com) courtesy of Shadriss from his Duel of The Fates map for JKA. Copyright info -------------- This map and related files were not made or supported by Raven or LucasArts or any of those sorts of professionals. This is amateur hour all the way, baby. All Star Wars related intellectual property rights are reserved by their proper owners, as noted here with these fine copyright notices. © 2003 LucasArts Entertainment Company LLC. © 2003 Lucasfilm Ltd. & TM or Æ as indicated. All rights reserved. Used under authorization. LucasArts and the LucasArts logo are trademarks of Lucasfilm Ltd. © Raven Software LTD 2003, Activision- 3 comments
- 3 reviews
-
- 3
-
-
- botroute support
- roleplaying
- (and 3 more)
-
Version v1.2
24 downloads
BDC Racing Club v1.2 a FFA and Racing Map for Jedi Academy by Darth Zappa (zappa@blackdeathclan.net) Aug 25, 2004 BDC Clan Website: www.blackdeathclan.net READ THE INSTALLATION INSTRUCTIONS BELOW! YOU'RE GONNA HAVE PROBLEMS IF YOU DON'T! 1.2 Update: ----------- removed lap counter and probe droids to lower the entity count. this should make the map MUCH more stable. Also, many of the posters have been replaced with low-res versions to help with loading times. (sigh. oh well.) They dont look as nice now unless you have your texture quality set to 'very high'. There have been some other minor fixes and adjustments made as well. Description: ------------ This map started out as a simple 'slap together' dirt race track for some basic swoop racing. That was last October; since then, it got completely out of hand, and mutated into the behemoth you see here. This is a 'clan map' of course, but I like to think it is something different from the usual 'hall of boxes' that so many clan maps are. BDC Clan-related decorations have been kept to a minimum (mostly all in one hallway, but there's alot in there) so as to appeal to a wide audience. Some of the vehicle files here are updates to the ones included with NabooHills 2.0. You should replace the older versions with these new ones on both your server and in your base folder. Naboo Hills 2.1 will include the same updated vehicles as this, as well as an updated N1 fighter. INSTALLATION INSTRUCTIONS: *** READ THIS!!! *** ------------------------- Before installing any of these files, first remove *ALL* other vehicle pk3s and vehicle-related map .pk3 filss from your base folder. This includes vehicles from previous versions of this map, and naboohills. the ojp_vehicles_002.pk3 in particular is now redundant. Also, remove any older versions of this map. Once you've done that, put everything in the 'put_all_this_in_base' folder into your base folder. If you dont have any other vehicles or maps with built-in custom vehicles (like KOTOR flight) in there, then everything should be fine. After that, you can take out individual vehicle pk3 files if you want to remove certain custom vehicles (they wont spawn from the buttons then.) To Run This Map with NabooHills 2.0 ----------------------------------- If you want this map and naboohills 2.0 on your server at the same time, you must remove the ojp_vehicles_002.pk3 from your server and replace it with ojp_eopie_saddle.pk3. this will disable the stap speeder on naboohills 2.0 (it has been removed from 2.1) The only other additional vehicle on NabooHills that isn't on this map is the customized N1 Naboo Fighter, but there is room to have it in your base folder with this map installed too. Once you get this map working properly, you can add the N1 starfighter (n2.pk3, not included here) back to your base folder to play naboo hills 2.0 and leave it in if you like. files included: filename (npc vehicle name) info --------------- bdc-racing.pk3 (bdc-racing) map file hailfire_droid06.pk3 (hailfire_droid) trade fed rolling rocket launcher maulspeeder.pk3 (maulspeeder) *UPDATED* sith bomber speeder bike, customized *UPDATED* ojp_eopie_saddle.pk3 (eopie) butt-ugly riding beast-thing *REPLACES OJP_VEHICLES_002* OJP_droideka_06.pk3 (droideka) the trade fed rolling destroyer droid gunshipVM.pk3 (gunshipx) republic clone gunship bdc-cloudcar.pk3 (bdc-cloudcar) customized combat cloud car with turbo and heavy guns sb-bikes.pk3 (swoop_bike1, swoop_bike3, swoop_bike5) *UPDATED* heavy duty customized combat/racing swoops *UPDATED* The 'read me' files for all the original vehicles are included in a separate folder. Misc. Notes ------------ * this map uses most of the available vehicle slots; cheat/admin spawning of vehicles and NPC's is not recommended. You're gonna crash your server if you mess around too much on here. * the sniper rifle scope is of limited use in the dense fog, as are the binoculars. * only one race with lap counting can be run using the start switches in the control room. this is due to an absolutely asinine restriction of the target_counter entity. (it deletes itself when finished counting! Why???) if you want to run multiple 'counted' races, you need to restart the map each time. I realize this is ridiculous, but its the best I could do for now. As an alternative, you can use the 'no lap count' buttons in the racing command center to 'fake a starting line' and have the players count themselves. * the track lap counting works, but only barely. Improvements in that system will come at a later date when I get my brain wrapped around scripting. (Nothing is scripted in this map at the moment, it is all entities and triggers.) Right now, the first person around a lap is messaged that they are the leader for that lap, or the winner for the final lap. * The lap-counted race takes 10 laps to complete. * Players who aren't racing should stay off the track during a lap-counted race; it is possible (but unlikely) for a non-racer to accidentally trip one of the 'checkpoint' triggers, which will botch things up. * hit 'use' at the bars on the map to get a bacta drink. if there is a bartender, he can hit 'use' to give a big bacta drink to 'customers'. the 'taco stand' features other novelties. * the droid spawning at the merc base should be kept to a minimum, or you will eventually crash your server, as with all npc spawning on any map. * there are fighter auto-turn zones in the sky at the edges of the map, however this map isnt really big enough (!) to give enough room to do a complete u-turn in time. if you approach the edge of the sky from an angle (instead of 'head on') you'll turn fine. if you fly full-speed into the sides or top of the map, you're still gonna crash. * The lighting is not wonderful. It was sorta too late to scrap it all and start over, once i realized what third-rate cheese I was making. Much of the lighting was done 'on the go' in order to get this map out at all. Future updates will improve on this. * BDC High Council member 'The Eye' had no idea that I was gonna do that to his office. I hope he doesn't mind. Credits: -------- hailfire droid, sith speeder and droideka models by Duncan_10158 (http://io.meskinaw.net/) and Monsoontide (http://home.earthlink.net/~monsoontide) sith speeder customized by Nexus Bespin cloud car model converted to vehicle class by tFighterPilot (http://www.gamingforums.com), new vehicle definition file by me (darth zappa) republic gunship vehicle model by NeoMarz1 (http://www.geocities.com/neomarz1@sbcglobal.net) eopie model courtesy of the Open Jedi Project (http://ojp.jediknight.net) some of the extra map models are from www.map-center.com the BDC logo sign was designed by Xemoka-sama special thanks to Nexus for helping out with the custom .veh files and various other bits and doodads, such as the word "furrito". {DX}McCleod also did quite a bit of work on tweaking the racing swoops. Many of the clan member's posters were made by the players themselves, the rest I did in a big hurry. The Star Wars pictures and posters were all scavenged from various fan sites. I tried to pick interesting ones. I cribbed the legal disclaimer (below) from one of sith j cull's map read-me files, since it's short and to the point. Legal Flotsam: -------------- THIS LEVEL IS NOT MADE, DISTRIBUTED, OR SUPPORTED BY LUCASARTS ENTERTAINMENT COMPANY LLC. ELEMENTS TM & � LUCASARTS ENTERTAINMENT COMPANY LLC AND/OR ITS LICENSORS.- 1 review
-
- 2
-
-
- botroute support
- desert
- (and 1 more)
-
28 downloads
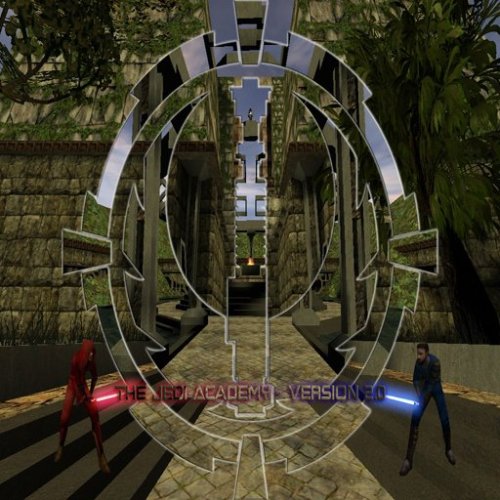
New version V3 available here: https://jkhub.org/files/file/138-the-academy/ --- Title : The Jedi Academy Official Map Version : 2.0 Author : Virtue E-Mail : virtue@thejediacademy.net OR rain_down_af@hotmail.com Website : http://www.thejediacademy.net File Name : the_academy_v2.pk3 File Size : 23 MB before zipping Date Released : December 16th, 2004 Description : Official Map for the Jedi Academy (http://www.thejediacademy.net). Heavily modified update of my last map - 'the_academy', many areas are either new or have been totally redesigned. This map was built specifically for training and socialising. The Jedi Academy has numerous training facilities each used for training in different areas of skill. There are three Jedi Duelling rooms which can be used for engaged duelling or Full Force battles, each have an observation deck with health and shield pickups. A 'Pit' room where people can duel/ffa on small ledges which are scattered around - be careful though, if you fall off, you don't come back. A gunning battleground, which is a large, open area with a few obstacles, littered with weapons and ammo for all your 'blow up every dude on the Server' pleasures. There is a Bar, a Ceremonial Hall, a Combo training facility, two NPC spawning areas and an administrator's area whereby you can lock down certain areas of the map and change the map music. One section of the Map has been dedicated to a dear friend of ours at the JA, Vladarion - This great man was tragically taken away from us as a result of a car accident on Boxing day, 2003. - Rest in Peace, my Brother. Find out more about Vladarion here: - http://www.thejediacademy.net/articles_detail_page.php?f_id=5 Since v1, there have been alot of addresses where FPS is concerned. With this version, FPS should remain solid and high in all areas. The buttons that are labelled I, II and III in the control room will control the locks for the privacy booths in the bar. Install : Unzip the *.pk3 file into your GAMEDATA/BASE folder #################### #Additional Credits# #################### DJ Sith: For Editing the Bar Music and making it compatible with the game and map. Thanks DJ. Odan-Wei: For making many of the custom textures that you will see in the Map. Darth_Mobility: For making all of the sign textres in the Administrator area and making the splash/loading screen image. Jaiko D'Kana: For providing the sounds to our Lightsaber Hilts. Mirael D'Kana: For editing the Ceremonial music to be compatible with the game and the map. And for being the undisputed queen of the Universe. Sared: For skinning the new NPCs. --- Standard Saber NPC Voice : Huxley Dual Saber NPC Voice : Jacen Aratan Staff Saber NPC Voice : Mirael D'Kana- 1 review
-
- 3
-
-
- clanmap
- botroute support
- (and 3 more)
-

43 downloads
NetRadiant-custom (also seen as NRC) is a fork of NetRadiant which itself is a fork of GTKRadiant, the map making utility made to create maps in games like Jedi Academy, Jedi Outcast, Quake 3, etc. (GtkRadiant 1.4→massive rewrite→1.5→NetRadiant→this) This is generally considered the best tool to make maps in the modern era, with it being more stable on modern hardware and operating systems and containing tons of quality of life features and additions. If you are familiar with GTKRadiant, it is similar enough to learn quickly though some default keybinds may be different than you are used to. Created and maintained by GARUX Supported games Main focus is on Quake, Quake3 and Quake Live. Though other normally supported games should work too. Releases include configs for the following games: Alien Arena, Darkplaces, Doom 3, Doombringer, Wolfenstein: Enemy Territory, Heretic II, Half-Life, Jedi Knight Jedi Academy, Jedi Knight II: Jedi Outcast, Kingpin, Neverball, Nexuiz, Open Arena, Project::OSiRiON, Prey, Quake II, Q3Rally, Quake 4, Quetoo, Smokin' Guns, Soldier of Fortune II - Double Helix, Star Trek Voyager : Elite Force, Tremulous, Turtle Arena, UFO:Alien Invasion, Unreal Arena, Unvanquished, Urban Terror, Warfork, Warsow, Return To Castle Wolfenstein, World of Padman, Xonotic, ZEQ2 Lite. Features Development is focused on smoothing and tweaking editing process. Random feature highlights WASD camera binds Fully supported editing in 3D view (brush and entity creation, all manipulating tools) Uniform merge algorithm, merging selected brushes, components and clipper points Free and robust vertex editing, also providing abilities to remove and insert vertices UV Tool (edits texture alignment of selected face or patch) Autocaulk Model browser Brush faces extrusion Left mouse button click tunnel selector, paint selector Numerous mouse shortcuts (see help->General->Mouse Shortcuts) Focus camera on selected (Tab) Snapped modes of manipulators Draggable renderable transform origin for manipulators Quick vertices drag / brush faces shear shortcut Simple shader editor Texture painting by drag Seamless brush face<->face, patch<->face texture paste Customizable keyboard shortcuts Customizable GUI themes, fonts MeshTex plugin Patch thicken All patch prefabs are created aligned to active projection Filters toolbar with extra functions on right mouse button click Viewports zoom in to mouse pointer 'all Supported formats' default option in open dialogs Opening *.map, sent via cmd line (can assign *.map files in OS to be opened with radiant) Texture browser: show alpha transparency option Texture browser: search in directories and tags trees Texture browser: search in currently shown textures CSG Tool (aka shell modifier) Working region compilations (build a map with region enabled = compile regioned part only) QE tool in a component mode: perform drag w/o hitting any handle too Map info dialog: + Total patches, Ingame entities, Group entities, Ingame group entities counts Connected entities selector/walker Build->customize: list available build variables 50x faster light radius rendering Light power is adjustable by mouse drag Anisotropic textures filtering Optional MSAA in viewports New very fast entity names rendering system Support 'stupid quake bug' Arbitrary texture projections for brushes and curves Fully working texture lock, supporting any affine transformation Texture locking during vertex and edge manipulations Brush resize (QE tool): reduce selected faces amount to most wanted ones Support brush formats, as toggleable preference: Axial projection, Brush primitives, Valve 220 Autodetect brush type on map opening Automatic AP, BP and Valve220 brush types conversion on map Import and Paste New bbox styled manipulator, allowing any affine transform (move, rotate, scale, skew) rendering of Q3 shader based skyboxes Incredible number of fixes and options Q3Map2: q3map_remapshader remaps anything fine, on all stages Automatic map packager (complete Q3 support) Report full / full pk3 path on file syntax errors Allowed simultaneous samples+filter use, makes sense -brightness 0..alot, def 1: mimics q3map_lightmapBrightness globally -contrast -255..255, def 0: lighting contrast -saturation light option -bouncecolorratio 0..1 (ratio of colorizing light sample by texture) -nolm - no lightmaps -novertex works, (0..1) sets globally -vertexscale New area lights backsplash algorithm (utilizing area lights instead of point ones) -backsplash (float)scale (float)distance: adjust area lights globally (real area lights have no backsplash) New slightly less careful, but much faster lightmaps packing algorithm (allocating... process) -extlmhacksize zero effort external lightmaps for Q3 Valve220 mapformat autodetection and support Consistent brush content deduction with mixed face parameters Model shaders paths deduction Fixed model autoclip, added 20 new clipping modes Support negative misc_model scale Assimp model loading library (40+ formats) -json bsp export/import -mergebsp injects one bsp to another No shaderlist.txt mode: load all shaders see changelog-custom.txt for more -
27 downloads
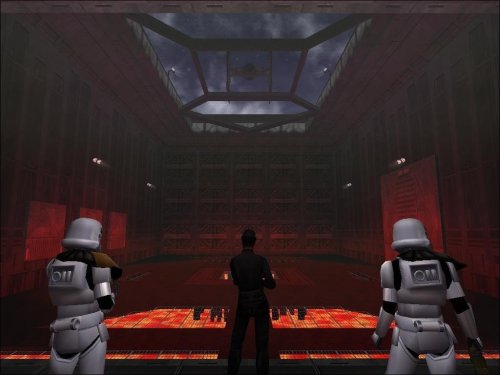
AUTHOR: JediMurderer/MeatsOfEvil DATE RELEASED: 19 October 2009 CREDITS: I would like to thank a number of people who made this possible, starting of course with Lucasarts and Ravensoft for making such a moddable game. In addition the good people of the jk3files forums deserve my thanks for various tips and suggestions. The tutorials of mappers RichDiesal, Szico and Bubba were also instrumental in teaching me what I know. Thanks to SpPwn for suggesting an alternate lava shader, and AshuraDX for providing said upgrade. All textures in the lava folder and the shaders are property of AshuraDX. I also want to thank in particular NAB622, for putting up with my noobish-ness on the jk3files forums, pushing me in the right direction when I had almost lost hope on getting my map to work properly and even providing me ideas for future modifications. NAB622, you have saved this map. Lastly, I want to thank all the people who tested my map before it's release: My Brother My Mom cloudflint PANIC98 SpPwN martinfaulkes NAB622 General Jaxun AshuraDX Anyone who did not post their name on the forums but tested it anyway INSTALLATION INSTRUCTIONS: Place malevolence.pk3 in your base folder. The base folder is located in the gamedata folder, which is in the folder you installed the game in. DESCRIPTION: Malevolence is a duel/powerduel map designed (in my opinion) to make these modes more interesting. The duels that I have observed tend to be rather dull, as the two duelists swing at each other, dodge out of the way, and repeat. What if the battleground itself was also hazardous? Even better, what if the environment was actively trying to kill you while you fought? This is where Malevolence comes in. An Imperial officer and his bodyguards watch as you and other prisoners fight to the death while avoiding the obstacles of the arena itself. Dare to fight on this map to find out what dangers await. Your only warning of the impending doom will be the double siren that sounds before your death. Enjoy! BUGS: I have seen bots defy death on one or two occasions where a normal player would be reduced to rubble...since I have no idea how they do it I have no hope of fixing it. Also despite my best attempts at bot-routing, the AI will still act pants-on-head stupid at times and we will just have to live with that. Also, the alarm and the taunts from the Imperials interrupt each other. COMMENTS: Everything the map throws at you CAN BE AVOIDED. Pay attention to what is happening and you will see a way to escape. Also do not go near the observation box unless you want to be insulted by your executioner. Lastly, this is my first map ever! Yay! PERMISSIONS: Ask me before using any of my assets. Also, the lava textures and shaders belong to AshuraDX so I cannot authorize anyone to use them.- 1 review
-
- 1
-
-
- roleplaying
- co-op
- (and 1 more)
-
Version V2
118 downloads
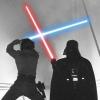
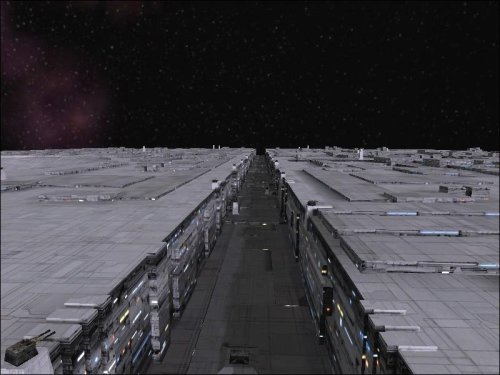
Author: Darth Zappa Original Release Date: 12-07-2004 The deathstar trench. Pretty self explanatory i guess. This is a team ffa dogfightin' map, with turrets on the surface. There is an exhaust port that goes kaplooie and awards 25 points to the first rebel that shoots it, but the entire map does not explode or anything like that. beware flying over the large deathstar gun dish - the gun is ARMED! if you fly into its shot path, it will fire. you will go kaplooie. This map will NOT WORK WELL in FFA MODE. I STRONGLY RECOMMEND TFFA GAMES on HERE. to change to TFFA, set your server's g_gametype to 6. This map is huge. In fact, it's as big as it can possibly be. If you had trouble running star destroyer siege, then don't bother with this. There is no 'inside' to the deathstar, other than the tie-fighter hangars. I have no plans to add the interior to this map. I may add siege in the future; for now it's TFFA. There are two versions of the map included: deathstar_trench_v1 - has just basic x-wing and tie-fighter vehicles. this version is good for folks who dont want to add any custom vehicles to their servers. deathstar_trench_v2 - has several custom vehicles added to the map - tie-advanced - darth vader's tie fighter - tie-defender - a deluxe tie fighter from the EU novels and games - tie-interceptor - the improved tie fighter from ROTJ - y-wing - the rebel heavy fighter - a-wing - small heavily armed fighter from ROTJ - b-wing - the large heavy fighter from ROTJ - millenium falcon (yt-1300) - heavy armed freighter, which is only enabled if the rebels make it to the far end of the trench ** IMPORTANT ** READ THIS ABOUT VEHICLE LIMITS ** This map uses many custom vehicles, and you might hit the limit allowed by JA. I STRONGLY RECOMMEND RUNNING A MOD such as 'ASTEROIDS MOD' or 'JAPLUS v2.2' which enables the server and client to have extra vehicles installed in your base folder. If you do not use a mod like this, you need to clean out your base folder of any other vehicles that you are not using on this map to run it. If you are running a Mod that allows for extra vehicles, you can also install your vehicles in that mod's folder. For example, if you are running japlus, then you can put extra vehicles in the gamedata/japlus folder and they will only be available when you are on a server running that mod. This is a good method to keeping your base folder tidy and conflict-free. ** INSTALLATION ** put the deathstar_trench.pk3 into your base folder. If you are going to run the v2 version of the map with extra vehicles, put the vehicle .pk3 files into either your base folder, or (recommended) your mod folder, such as gamedata/japlus or gamedata/asteroids (whatever one you are using.) vehicles installed into a mod folder are only available during games that are running that mod. Credits: -------- map design and construction by darthzappa custom vehicle models credits: b-wing vehicle by Hatrus and Manquesa tie defender vehicle by Hatrus a-wing vehicle by Astromash and Manquesa y-wing vehicle by Manquesa and Andy 867 tie interceptor vehicle by 7IM and Michael 'Chang Khan' Gummelt tie advanced X1 vehicle by Raven Software, NeoMarz1 and Manquesa yt-1300 vehicle by Raven Software and Manquesa all original vehicle read-me files are included in a separate folder. Several of these vehicles are from the Asteroids Mod pack, to ensure compatibility with that mod. Portions of this map were copy/pasted from Raven's star destroyer siege map, but i changed them around quite a bit. -
Version final
90 downloads
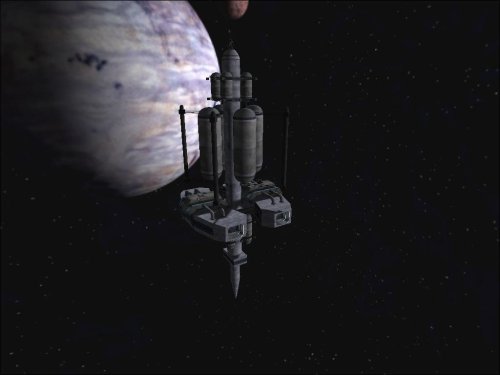
Author(s): KOTORMRJay & War_Shark Original Release Date: 03-02-2007 Two simple bases connected by a wormhole FSF is set up with a few different features. This map has turrets that have a variable, the server/host must state the ones he has in use ( AI or player controlled ). All players must conform to the host turret choice. To control the Player turret you must hold the "BACK" direction to unlock full rotation. There are NPC's in map as well as many secrets and bonuses to find ( like a NPC based saber challenge ). FSF also has a user variable. Each player can pick the ships they want to use for the "bonus ships" for Rebs. there is the B-WING_REB and the Y-Wing_reb for Imp. there is the VADER-TIE_IMP and the SLAVE-1_IMP. These are mainly examples as long as the basic VEH and NPC files remain mostly the same and the ship you choose to create has the appropriate amount of tags almost any ship can be created as a "bonus ship". Every player can have their choice of bonus ship for example... Server has the b_wing and the vader_tie in his base folder, player 1 has the y_wing and the slave_1 in his base folder they can both play. When the players meet in space the server will see player 1 flying a b_wing and himself in a vader tie. Player 1 will see the server flying a slave_1 and himself in a Y_wing. Basically you will see the ship in your base folder. Extract info and basic tutorial of how to switch out ships. extracted data extract to base folder: BASE: FSF.PK3 TURRET_PLAYER.PK3 VADER-TIE_IMP.PK3 B-WING_REB.PK3 FOLDER(bonus_ships_imp) VADER-TIE_IMP.PK3 SLAVE-1_IMP.PK3 FOLDER(bonus_ships_reb) B-WING_REB.PK3 Y-Wing_reb.PK3 FOLDER(Turret_variants) TURRET_EXTREME_MODE_A-I.PK3 TURRET_PLAYER.PK3 Let say the server is running AI turrets... BASE: FSF.PK3 (TURRET_PLAYER.PK3) delete me VADER-TIE_IMP.PK3 B-WING_REB.PK3 FOLDER(bonus_ships_imp) VADER-TIE_IMP.PK3 SLAVE-1_IMP.PK3 FOLDER(bonus_ships_reb) B-WING_REB.PK3 Y-Wing_reb.PK3 FOLDER(Turret_variants) (TURRET_EXTREME_MODE_A-I.PK3) copy me TURRET_PLAYER.PK3 Now simply paste the copied pk3 into base folder... BASE: FSF.PK3 (TURRET_EXTREME_MODE_A-I.PK3) paste me here VADER-TIE_IMP.PK3 B-WING_REB.PK3 FOLDER(bonus_ships_imp) VADER-TIE_IMP.PK3 SLAVE-1_IMP.PK3 FOLDER(bonus_ships_reb) B-WING_REB.PK3 Y-Wing_reb.PK3 FOLDER(Turret_variants) TURRET_EXTREME_MODE_A-I.PK3 TURRET_PLAYER.PK3 Lets say you want to switch to the Y-wing... BASE: FSF.PK3 TURRET_PLAYER.PK3 VADER-TIE_IMP.PK3 (B-WING_REB.PK3) delete me FOLDER(bonus_ships_imp) VADER-TIE_IMP.PK3 SLAVE-1_IMP.PK3 FOLDER(bonus_ships_reb) B-WING_REB.PK3 (Y-Wing_reb.PK3) copy me FOLDER(Turret_variants) TURRET_EXTREME_MODE_A-I.PK3 TURRET_PLAYER.PK3 Now simply paste the copied pk3 into base folder... BASE: FSF.PK3 TURRET_PLAYER.PK3 VADER-TIE_IMP.PK3 (Y-Wing_reb.PK3) paste me here FOLDER(bonus_ships_imp) VADER-TIE_IMP.PK3 SLAVE-1_IMP.PK3 FOLDER(bonus_ships_reb) B-WING_REB.PK3 Y-Wing_reb.PK3 FOLDER(Turret_variants) TURRET_EXTREME_MODE_A-I.PK3 TURRET_PLAYER.PK3 You can NOT have the b_wing and y_wing or vader_tie and slave_1 in the base at the same time, only one bonus ship for a side (reb or Imp) and you MUST always make sure you have the same turret set up as the host but once again your bonus ship is your choice. The map is FFA TFFA and CTF. The map does come with a basic bot support Bots do not fly Good luck and have fun. -
169 downloads
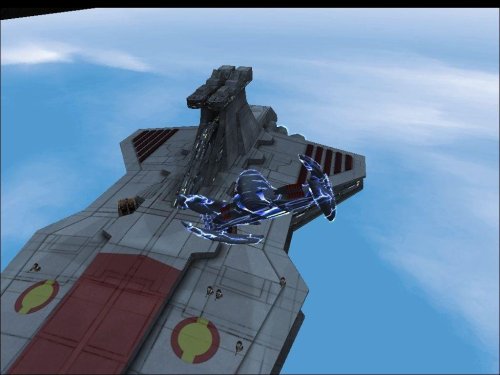
Author: XOFT CORP Original release date: 12-24-2012 Version: 1.0 STORY By the second year of the Clone Wars, the Outer Rim world of Quell, the principal planet of the Quell system had become a contested site between the Galactic Republic and the opposing Confederacy of Independent Systems. However, Quell's state of contention soon escalated when capital ship forces from both sides of the ongoing war met in the highest levels of the planet's atmosphere to engage in battle. The Sky Battle of Quell took place in the second year of the Clone Wars in the skies over the contested world of Quell when Jedi General Aayla Secura and her Republic fleet were ambushed by a Confederate Navy flotilla. Meeting in Quell's upper atmosphere, each faction launched starfighter squadrons that engaged their enemies in combat. Although both sides took losses, it was Secura's forces that suffered greater casualties when two of her three Star Destroyers fell to the Confederate frigates' heavy turbolaser fire. As the Separatist tactical droid commander, TF-1726, dispatched B2-RP battle droids to board Secura's crippled command ship, the Liberty, Jedi General Anakin Skywalker arrived with reinforcements aboard his own flagship, the Resolute. Launching in LAAT/i gunships, Skywalker boarded the Liberty with his Padawan, Ahsoka Tano, and troops of the 501st Legion led by Clone Captain CT-7567 to evacuate the cruiser before it could be destroyed. INSTALLATION Place all pk3 files included into C:/Program Files/LucasArts/Star Wars Jedi Knight Jedi Academy/GameData/base Notes: This pack was tested succesfully in the following Jedi Academy modifications: - JediMoves JA+ Mod v2.3 Full Distrib - ForceMod III Movie Battles Edition CREDITS ________________ Special Edition ---------------- -Phase I Conception: : Lui-Gon-Jinn Venator outer Modeling : o.o-LAOSS.FFA.MEX and Lui-Gon-Jinn Sky : JOE++ Compilation : o.o-LAOSS.FFA.MEX and Lui-Gon-Jinn -Phase II Attack Cruiser v2 Remodeling : Lui-Gon-Jinn Map Object Modeling : Lui-Gon-Jinn Texture & Shader Design : Lui-Gon-Jinn Coding : Lui-Gon-Jinn Munificent Ship Modeling : Lui-Gon-Jinn Compilation : Lui-Gon-Jinn -Phase III Beta Testers : Lui-Gon-Jinn Compilation & Packaging : Lui-Gon-Jinn ________________ Original Credits ---------------- Title : Attack Cruiser v2 Author : LuB E-mail : lu8@gmx.net Website : www.luza-leveldesign.dl.am File : acv2tjt.pk3 Filesize : 9.47 MB Release date : 11/04/2006 --- Title : Siege/FFA/Observation Deck - Battle over Coruscant Source Files Author : Darth NormaN E-mail : darth-norman@gmx.de MSN : darth-norman@gmx.de ICQ : 262187088 Web : www.normansblog.de Filename : Siege_BoC_Source.zip Filesize : 4.20 MB Release date : 12/2009 --- Title : Movie Battles II Version : Version Zero Author : Movie Battles Team Website : www.moviebattles.com Forums : www.moviebattles.com/forums Release date : 09/14/2008 Disclaimer: ----------- The Venator Star Destroyer Team does not take any credit for the following vehicles. They have been created by the respective authors mentioned below. The vehicles have not been altered except for improve radars in some models. Contents: --------- This pack includes the following vehicles: Title : Republic Gunship Vehicle Imports : Mars Marshall "NeoMarz1" Modeling : Mars Marshall "NeoMarz1" E-Mail : neomarz1@sbcglobal.net Website : http://www.geocities.com/neomarz1@sbcglobal.net/ File Name : gunshipVM.pk3 File Size : 981KB Release date : 11/25/2003 --- Title : V-19 Torrent Clone Starfighter Model by : Zymotico Vehicle by : Hatrus Animation by : Manquesa Skins by : Zymotico File Name : v-19.pk3 File Size : 4.46MB Release date : 06/05/2005 --- Title : V-Wing Starfighter Model by : Minilogoguy18 Vehicle by : Minilogoguy18 Animation by : Minilogoguy18 Skins by : Dark_Cuillere File Name : miniVWing.pk3 File Size : 1.81MB Release date : 10/29/2005 --- Title : ARC-170 Clone Starfighter Model by : Minilogoguy18, Dark_Cuillere Vehicle by : Minilogoguy18, Dark_Cuillere Animation by : Minilogoguy18 Skins by : Dark_Cuillere File Name : mini_arc.pk3 File Size : 6.52MB Release date : 08/18/2005 --- Title : Vulture-class Advanced Droid Starfighter Model by : Hatrus Vehicle by : Hatrus File Name : droidfighter.pk3 File Size : 6.62MB Release date : 06/05/2005 --- Title : Jedi Starfighter Model by : Unknown Vehicle by : Unknown File Name : jsfighter.pk3 File Size : 780KB Release date : Unknown-
- 2
-
-
- star wars related
- space
- (and 1 more)
-
151 downloads
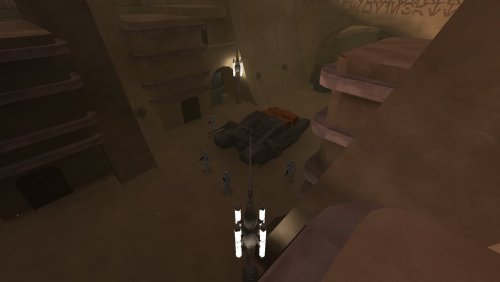
This is a re-upload of a map made by PyroTechnics. As he has since retired from the modding community, don't expect any official updates and support. *********************************** Jedi Knight: Jedi Academy *********************************** TITLE: Jedha City AUTHOR: PyroTechnics FILENAME: mb2_jedha.pk3 FILESIZE: 36.270 kb DATE RELEASED: 11th of November 2020 CREDITS: George Lucas/ Raven, and any people that worked on the game, and stories. -------------------------------------------------------------------------------- INSTALLATION INSTRUCTIONS: Install the pk3 file in your MBII folder... \Jedi Academy\GameData\MBII -------------------------------------------------------------------------------- DESCRIPTION: This is the FFA version of Jedha City. Here is the original readme: Hey guys, I made a map based on Rogue One's Jedha City for the Moviebattles 2 mod. If you want to play this map you need to have the Moviebattles 2 mod installed for JK3. Download Moviebattles 2 The objectives for the rebel team is that they have to hack the imperial occupier tank, The Imperials have to defend it. The rebels have a rooftop advantage, the Imperials a ground advantage. All the textures, models, map and FA are made by me. This music is a custom mix from the movie soundtrack to suit the 5 min rounds. I recommend a fast pc that can handle high fps, and haven't had any feedback from any one conserning performance, but it should be doable for a modern pc. I hope you can play this without any errors, because I'm not planning to support this project any further in the future. It was fun making it, and I hope you enjoy it. See you when I see ya, PyroTechnics. -------------------------------------------------------------------------------- BUGS: *few patches not fitting properly, *some z-ing at the connection points of curved patches, *some fps issues on older pcs. -------------------------------------------------------------------------------- COMMENTS: No hidden areas or death pits this time. -------------------------------------------------------------------------------- Beta Testers: *None -
 JKHub changed their profile photo
 -
Version 1.01
184 downloads
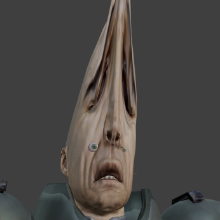
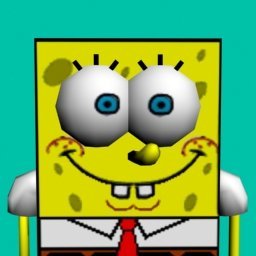
Author: unknown (if you are the author or know who the author is, please let staff know) This is a very old model of Spongebob that has circulated among the JKA community for decades but as far as we know, was never publicly released on JK3Files or JKHub. It's possible it was from pcgamemods. The author is unknown, so if you are the author, please reach out to JKHub staff to give you credit. It now has bot, team, and NPC support. There are 2 NPCs, one good and one bad, depending on if you want to fight him or alongside him. /npc spawn spongebob /npc spawn spongebob_bad -===================- -!|!- CREDITS -!|!- -===================- @Circa for NPC support, bot edits, team support and sound fix @disneyaintcanon13 for bot support and upload -========================- -!|!- INSTALLATION -!|!- -========================- Put the pk3 in the base folder of your Jedi Academy GameData directory (Jedi Academy/Gamedata/base)