Utilities
92 files
-
3ds Max 2025 dotXSI 3.0 Exporter
Re-compiled for 3ds Max 2025. See the included readme and FAQ for installation and usage.9 downloads
(0 reviews)0 comments
Updated
-
3ds Max 2024 dotXSI 3.0 Exporter
Re-compiled for 3ds Max 2024. See the included readme and FAQ for installation and usage.6 downloads
(0 reviews)0 comments
Updated
-
3ds Max 2023 dotXSI 3.0 Exporter
This is an overhaul of the original Softimage Company's dotXSI 3.0 exporter v1.7 for 3dsMax 6-- adding support for 3ds Max 2023. The original source code can be found here: http://sourceforge.net/projects/dotxsi4max/files/
Re-compiled for 3ds Max 2023. See the included readme and FAQ for installation and usage.30 downloads
(0 reviews)0 comments
Updated
-
GLAMerge
This program written by Alex Shapiro (aka ASk) allows for merging 2 .gla files, something that is a must when making animations for characters in this game. I take absolutely no credit for this, just uploading since the original authors website is no longer in existence and strongly feel that it is something that cannot be forgotten about.
Original Readme
//========================================================================
//
// GLA Merger version 1.2b
//
// Copyright 2003 by Alex Shapiro (aka ASk)
//
// Additional credits go to (in no particular order):
//
// Wudan, RazorAce, JaiiDerHerr,
// Tchouky,CortoMaltes, Jedistone
// and anyone that I have forgotten
//
//========================================================================
==========================================================================
==
== DISCLAIMER:
== THIS MODIFICATION IS NOT MADE, DISTRIBUTED, OR SUPPORTED BY ACTIVISION,
== RAVEN, OR LUCASARTS ENTERTAINMENT COMPANY LLC. ELEMENTS TM & © LUCASARTS
== ENTERTAINMENT COMPANY LLC AND/OR ITS LICENSORS.
==
== THE AUTHOR IS NOT TO BE HELD RESPONSIBLE FOR ANY DAMAGE THAT THIS PROGRAM
== MAY CAUSE TO USER'S COMPUTER, INCLUDING BUT NOT LIMITED TO: DATA LOSS,
== CRASHES AND INSTABILITY.
== REMEMBER: USE OF THIS PROGRAM IS OF YOUR OWN RISK.
==
==========================================================================
============================= Instructions ==============================
****************** BACKUP FILES BEFORE USING THIS PROGRAM ****************
1) Put the 2 .gla files into the same directory as the program
User .gla file must contain the 'base' pose (the DaVinci pose) as first frame, it will be ignored during merge.
2) Invoke the program as "glamerge.exe firstfile secondfile [-o]|[-l]"
- If invoked in this format, 2 user .gla's may be merged into 1.
- If invoked in "glamerge.exe file" format, _humanoid.gla from the current dir is used as first file.
- The optional -l switch makes the program dump the bone data (hierarchy) from both gla files, then quit.
- The optional -o switch makes the program eliminate any redundant bone data (producing .gla files comparable to the ones produced with carcass.
- If both -o and -l are specified, the second of two (in the order they are specified) will be ignored
- The program rearranges the bones in the correct order, so as long as the hierarchy/origins are the same, it should work
3) Enter the name of output file
4) Add your animations to animations.cfg file
5) Enjoy
404 downloads
-
NetRadiant Custom
By JKHub
NetRadiant-custom (also seen as NRC) is a fork of NetRadiant which itself is a fork of GTKRadiant, the map making utility made to create maps in games like Jedi Academy, Jedi Outcast, Quake 3, etc. (GtkRadiant 1.4→massive rewrite→1.5→NetRadiant→this)
This is generally considered the best tool to make maps in the modern era, with it being more stable on modern hardware and operating systems and containing tons of quality of life features and additions. If you are familiar with GTKRadiant, it is similar enough to learn quickly though some default keybinds may be different than you are used to.
Created and maintained by GARUX
Supported games
Main focus is on Quake, Quake3 and Quake Live.
Though other normally supported games should work too. Releases include configs for the following games: Alien Arena, Darkplaces, Doom 3, Doombringer, Wolfenstein: Enemy Territory, Heretic II, Half-Life, Jedi Knight Jedi Academy, Jedi Knight II: Jedi Outcast, Kingpin, Neverball, Nexuiz, Open Arena, Project::OSiRiON, Prey, Quake II, Q3Rally, Quake 4, Quetoo, Smokin' Guns, Soldier of Fortune II - Double Helix, Star Trek Voyager : Elite Force, Tremulous, Turtle Arena, UFO:Alien Invasion, Unreal Arena, Unvanquished, Urban Terror, Warfork, Warsow, Return To Castle Wolfenstein, World of Padman, Xonotic, ZEQ2 Lite.
Features
Development is focused on smoothing and tweaking editing process.
Random feature highlights
WASD camera binds Fully supported editing in 3D view (brush and entity creation, all manipulating tools) Uniform merge algorithm, merging selected brushes, components and clipper points Free and robust vertex editing, also providing abilities to remove and insert vertices UV Tool (edits texture alignment of selected face or patch) Autocaulk Model browser Brush faces extrusion Left mouse button click tunnel selector, paint selector Numerous mouse shortcuts (see help->General->Mouse Shortcuts) Focus camera on selected (Tab) Snapped modes of manipulators Draggable renderable transform origin for manipulators Quick vertices drag / brush faces shear shortcut Simple shader editor Texture painting by drag Seamless brush face<->face, patch<->face texture paste Customizable keyboard shortcuts Customizable GUI themes, fonts MeshTex plugin Patch thicken All patch prefabs are created aligned to active projection Filters toolbar with extra functions on right mouse button click Viewports zoom in to mouse pointer 'all Supported formats' default option in open dialogs Opening *.map, sent via cmd line (can assign *.map files in OS to be opened with radiant) Texture browser: show alpha transparency option Texture browser: search in directories and tags trees Texture browser: search in currently shown textures CSG Tool (aka shell modifier) Working region compilations (build a map with region enabled = compile regioned part only) QE tool in a component mode: perform drag w/o hitting any handle too Map info dialog: + Total patches, Ingame entities, Group entities, Ingame group entities counts Connected entities selector/walker Build->customize: list available build variables 50x faster light radius rendering Light power is adjustable by mouse drag Anisotropic textures filtering Optional MSAA in viewports New very fast entity names rendering system Support 'stupid quake bug' Arbitrary texture projections for brushes and curves Fully working texture lock, supporting any affine transformation Texture locking during vertex and edge manipulations Brush resize (QE tool): reduce selected faces amount to most wanted ones Support brush formats, as toggleable preference: Axial projection, Brush primitives, Valve 220 Autodetect brush type on map opening Automatic AP, BP and Valve220 brush types conversion on map Import and Paste New bbox styled manipulator, allowing any affine transform (move, rotate, scale, skew) rendering of Q3 shader based skyboxes Incredible number of fixes and options Q3Map2:
q3map_remapshader remaps anything fine, on all stages Automatic map packager (complete Q3 support) Report full / full pk3 path on file syntax errors Allowed simultaneous samples+filter use, makes sense -brightness 0..alot, def 1: mimics q3map_lightmapBrightness globally -contrast -255..255, def 0: lighting contrast -saturation light option -bouncecolorratio 0..1 (ratio of colorizing light sample by texture) -nolm - no lightmaps -novertex works, (0..1) sets globally -vertexscale New area lights backsplash algorithm (utilizing area lights instead of point ones) -backsplash (float)scale (float)distance: adjust area lights globally (real area lights have no backsplash) New slightly less careful, but much faster lightmaps packing algorithm (allocating... process) -extlmhacksize zero effort external lightmaps for Q3 Valve220 mapformat autodetection and support Consistent brush content deduction with mixed face parameters Model shaders paths deduction Fixed model autoclip, added 20 new clipping modes Support negative misc_model scale Assimp model loading library (40+ formats) -json bsp export/import -mergebsp injects one bsp to another No shaderlist.txt mode: load all shaders see changelog-custom.txt for more
42 downloads
(0 reviews)0 comments
Updated
-
EffectsEd
By JKHub
This is the EffectsEd utility provided with the Jedi Academy SDK. It is used to create the EFX files that provide the visual effects for many of the games weapons and environments.
DISCLAIMER:
PLEASE READ THIS DISCLAIMER CAREFULLY BEFORE INSTALLING OR USING THE BINARIES AND ASSETS. IF YOU DO NOT AGREE TO BE BOUND BY THE TERMS OF THIS DISCLAIMER, DO NOT INSTALL OR USE THE BINARIES AND ASSETS. These binaries, assets and source code are released by Raven Software Corporation ("Raven") as a non-supported product. Since these binaries and assets are a non-supported product, neither Raven's, nor LucasArts Entertainment Company LLC's ("LucasArts") nor Activision Inc.'s ("Activision") respective technical support centers can answer or help with any issues you may encounter with this release or these binaries and assets. These assets and binaries have received minimal developer testing and may crash your computer or cause other undesirable effects! Raven, LucasArts and Activision make no representation or warranty to you of any kind regarding these assets and binaries or your success in using them. You expressly acknowledge and agree that your use of the assets and binaries is at your sole risk. The binaries and assets and any related documentation or materials are provided "AS IS" and without warranty of any kind. RAVEN, LUCASARTS, AND ACTIVISION EACH EXPRESSLY DISCLAIMS ALL WARRANTIES, EXPRESS AND IMPLIED, INCLUDING, BUT NOT LIMITED TO, THE IMPLIED WARRANTIES OF MERCHANTABILITY, FITNESS FOR A PARTICULAR PURPOSE AND NONINFRINGEMENT. RAVEN, LUCASARTS AND ACTIVISION DO NOT WARRANT THAT THE FUNCTIONS CONTAINED IN THE BINARIES AND ASSETS WILL MEET YOUR COMPUTER'S SYSTEM REQUIREMENTS, THAT THE OPERATION OF THE BINARIES AND ASSETS WILL BE UNINTERRUPTED OR ERROR-FREE, OR THAT DEFECTS IN THE BINARIES AND ASSETS WILL BE CORRECTED. THE ENTIRE RISK AS TO THE RESULTS AND PERFORMANCE OF THE BINARIES AND ASSETS IS ASSUMED BY YOU AND YOU (AND NOT RAVEN, LUCASARTS OR ACTIVISION) ASSUME ANY OF THE COST OF ALL SERVICING, REPAIR AND/OR CORRECTION. SOME JURISDICTIONS DO NOT ALLOW THE EXCLUSION OF IMPLIED WARRANTIES, SO THE ABOVE EXCLUSION MAY NOT APPLY TO YOU.
UNDER NO CIRCUMSTANCES INCLUDING NEGLIGENCE SHALL RAVEN, LUCASARTS OR ACTIVISION, OR THEIR RESPECTIVE DIRECTORS, OFFICERS, EMPLOYEES, LICENSORS OR AGENTS, BE LIABLE TO YOU FOR ANY INCIDENTAL, INDIRECT, SPECIAL OR CONSEQUENTIAL DAMAGES (INCLUDING DAMAGES FOR LOSS OF BUSINESS PROFITS, BUSINESS INTERRUPTION, LOST DATA, LOSS OF BUSINESS INFORMATION, AND THE LIKE) ARISING OUT OF THE POSSESSION, USE, OR MALFUNCTION OF THESE BINARIES OR ASSETS, INCLUDING WITHOUT LIMITATION DAMAGE TO PROPERTY AND, TO THE EXTENT PERMITTED BY LAW, DAMAGES FOR PERSONAL INJURY, EVEN IF RAVEN, LUCASARTS OR ACTIVISION OR AN AUTHORIZED REPRESENTATIVE OF RAVEN, LUCASARTS OR ACTIVISION HAS BEEN ADVISED OF THE POSSIBILITY OF SUCH DAMAGES OR LOSS. SOME JURISDICTIONS DO NOT ALLOW THE LIMITATION OR EXCLUSION OF LIABILITY FOR INCIDENTAL OR CONSEQUENTIAL DAMAGES, SO THE ABOVE LIMITATION OR EXCLUSION MAY NOT APPLY TO YOU. YOU AGREE THAT THE LIABILITY OF RAVEN, LUCASARTS OR ACTIVISION ARISING OUT OF ANY KIND OF LEGAL CLAIM (WHETHER IN CONTRACT, TORT, OR OTHERWISE) WILL NOT EXCEED THE AMOUNT YOU ORIGINALLY PAID FOR THE USE OF THE SOFTWARE.
396 downloads
-
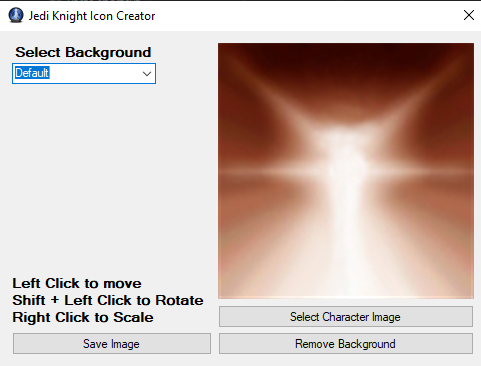
Jedi Knight Icon Creator
By SlavicPickle
Made using Ruxith's Default icons pack.
HOW TO USE:
Open your model with ModView and change the background to a bright colour (pure green is best) then save a photo. Open the Jedi Knight Icon Creator and select your image. Click "Remove Background" and select the bright colour you want to remove. Hold Left Mouse Button and drag to move the image. Hold Shift and the Left Mouse Button and drag to rotate. Hold Right Mouse Button to scale. Pick your favourite background from the list. Save the image and call it "icon_default.png" or red/blue. Place it in your PK3 with your model to have your characters available to use in Multiplayer! HAVE FUN! Video tutorial coming soon!
77 downloads
-
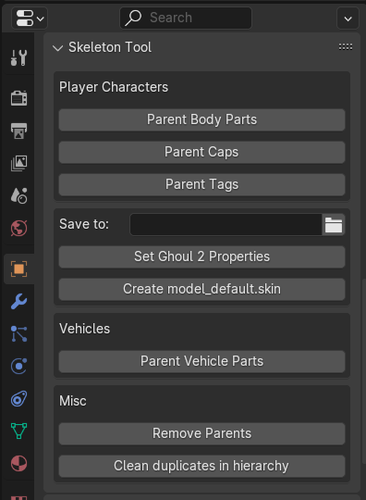
Blender - Skeleton Tool (your future All In One addon for JKA models)
By Maui
Blender Version: 4.1
Idea behind it:
I used to do Frankenstein Modelling for hours each day and I was thinking about simplifying these steps. How do I make it less time consuming to parent everything and set names, create .skin files and so on. That's when I got into Python coding and learned how to use the Blender API thanks to @Milamber.
He has been my inspiration source for years.
I want to keep updating the code so it looks more neat and make it an All in One addon for modelling in general.
ALWAYS CHECK GITHUB FOR THE LATEST CHANGES AND FOR THE README FILE, THIS WILL BE UPDATED ALONG THE ADDON
Visit me on Github: https://github.com/Mauii/
280 downloads
-
3ds Max Quake III MD3 Exporter Multi-Version Pack
Exporters for the Quake III .MD3 model format.
This was a tag-team effort between DT85 and myself... and at times we called on outside experts to help us overcome some of our coding challenges.
3ds Max versions Supported:
**********************************
6 (32-bit)
7 (32-bit)
8 (32-bit)
9 (32-bit/64-bit)
2008 (32-bit/64-bit)
2009 (32-bit/64-bit)
2010 (32-bit/64-bit)
2011 (32-bit/64-bit)
2012 (32-bit/64-bit)
2013 (32-bit/64-bit)
2014 (64-bit)
2015 (64-bit)
2016 (64-bit)
2017 (64-bit)
2018 (64-bit)
2019 (64-bit)
2020 (64-bit)
2021 (64-bit)
2022 (64-bit)
2023 (64-bit)
2024 (64-bit)
2025 (64-bit)
For v2.4 features, installation and usage instructions please see the included "MD3 v2.4 readme.pdf" file.
Exporting Process:
**********************
- Make your model.
- Apply your texture using the 'standard' material only.
- Make sure your texture is in a 'models' folder (e.g.: models/map_objects/ships/ship.jpg ),
*** or alternatively name your material slots with the relative path and check "Use material name..." -- this new feature does not require a "models" folder in the path name.
- Make sure the destination folder has 'models' in it (e.g.: models/map_objects/ships ).
- Export it with 'Smart paths' checked and/or 'Use material name...'
- For a static model (no animation) just leave the default value of '0' in the 'frames' field.
Known Issues:
*****************
- None.
Credits:
*********
Pop'N'Fresh (original code)
DT (code enhancements)
Archangel35757 (code enhancements)
1,181 downloads
-
BSP Entity Edit
By SomaZ
Description: This is an id tech 3 bsp entity editor. It can render opened bsp files with vertex colors, you can pick entities in the render with a simple click, you can edit the entity string, you can save the bsp file afterwards or choose to save as .ent file instead. The preview is updated when you click the button under the viewport.
Credits: illwieckz for some lines of code, Jon Wright for pyopengltk, Insidious for his simple text editor tutorial
Source: https://github.com/SomaZ/BSP-Entity-Edit
Viewport Controlls:
W - Move camera forward
A - Move camera to the left
S - Move camera backwards
D - Move camera to the right
SPACE - Move camera upwards
C - Move camera downwards
LMC - Select Object under the cursor
RMC Hold and Drag - Rotate view
Mouse Scrolling - Move camera forwards or backwards
H - Hide currently selected entity
Alt-H - Unhide all entities
ESC - Deselect entity
* How to install *
I build an exe for ease of use. It's build via pyinstaller with following command:
pyinstaller --noconfirm --onefile --windowed --name "BSP Entity Edit" --add-data "C:/Users/.../Desktop/BspEntityEdit/pyidtech3lib;pyidtech3lib/" --hidden-import "numpy" --hidden-import "ctypes" --hidden-import "pyopengltk" --add-data "C:/Users/.../Desktop/BspEntityEdit/edit_menu.py;." --add-data "C:/Users/.../Desktop/BspEntityEdit/file_menu.py;." --add-data "C:/Users/.../Desktop/BspEntityEdit/format_menu.py;." --add-data "C:/Users/.../Desktop/BspEntityEdit/help_menu.py;." --add-data "C:/Users/.../Desktop/BspEntityEdit/ogl_fbo.py;." --add-data "C:/Users/.../Desktop/BspEntityEdit/ogl_frame.py;." --add-data "C:/Users/.../Desktop/BspEntityEdit/ogl_objects.py;." "C:/Users/.../Desktop/BspEntityEdit/main.py"
I included the full source code, so you can build it yourself or run it in your python environment of your choice. You need to install following packages to run the code: numpy, ctypes, pyopengltk
Tk must be installed too, but usually it's part of the standard python install
You can run the code afterwards with:
python main.py
Supported games (or at least tested game bsp files):
Star Wars Jedi Outcast
Star Wars Jedi Academy
Star Trek Elite Force
Quake 3
Xonotic
291 downloads
-
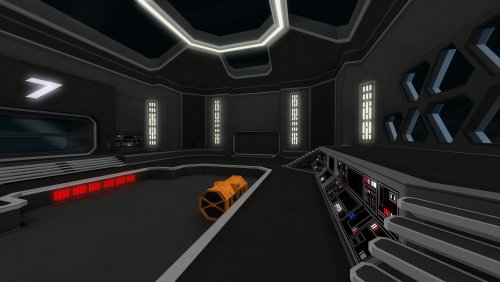
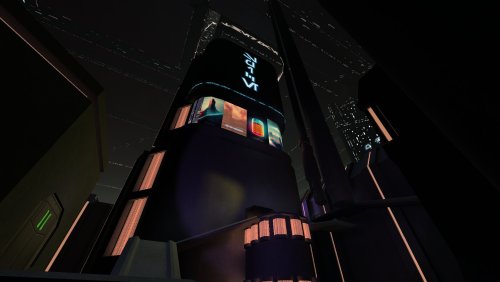
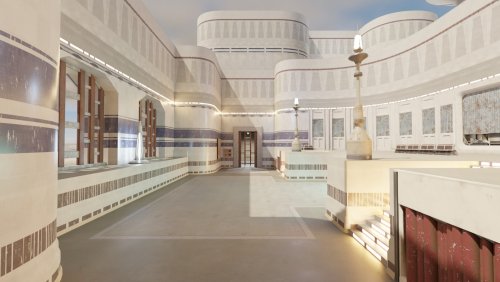
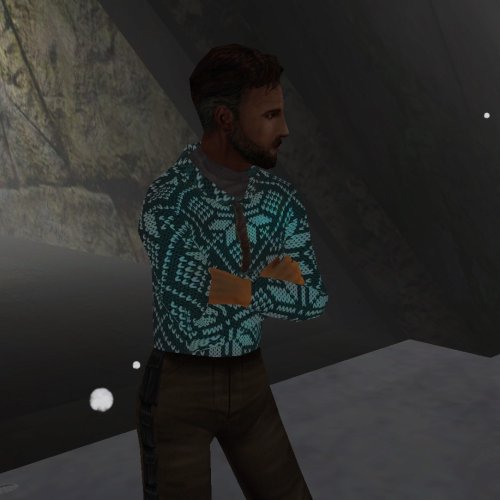
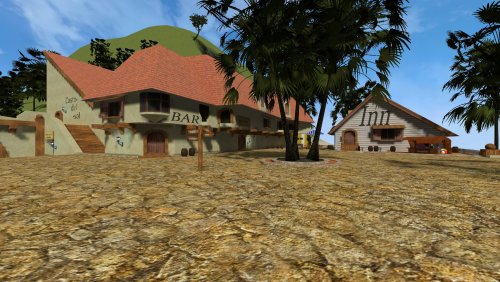
JKA in Minecraft: MineAcademy [DEMO]
By MrLaay
THIS IS NOT A MOD FOR JEDI ACADEMY
THIS IS A MOD FOR MINECRAFT
For the recent Hekathon speedrunning event, DrMeowington, a fellow jka speedrunner, and I have recreated the first act of the JKA Singleplayer along the Speedrun route. You can see us run the map for an unknowing crowd of JKA speedrunning legends.
https://www.twitch.tv/videos/1807641558?t=05h50m5s (at the Timestamp 5:50:05)
We have implemented Quicksave/Quickload mechanics, Force Jump I, as well as other small gags and references.
In addition, we have found an old Minecraft mod kept alive by ZeithComms that implements Quake1 movement into Minecraft. Since the Mod was open-source I have adjusted it to replicate Quake3 movement instead.
Here is a more in-depth Showcase of the map
39 downloads
-
DEvaheb 2.0
By Interface
DEvaheb can open IBI files and convert them back into text file scripts you can open and edit with BehavED.
DEvaheb 2.0 is command line only. However, it can open a text editor of your choosing when it has decompiled (such as notepad, BehavED,VS Code, etc.).
https://github.com/jorisdg/DEvaheb/blob/v2.0-beta.1/Usage.md
Quick Start
The DEvahebOpen.cmd file wraps the executable and opens notepad. You can use this cmd file instead of the .exe to open your IBI files. You can edit the .CMD file in notepad (right-click Edit in Windows explorer) and instead of opening "notepad" you can point it to the location of BehavED.exe on your system, etc.
Find the source code, file issues and ask questions at https://github.com/jorisdg/DEvaheb/
806 downloads
-
Blender Jedi Academy Plugin Suite
By mrwonko
This is a plugin for Blender to import and export 3D models from Jedi Academy and Jedi Outcast (Ghoul2 GLM, MD3, etc.) This is a compilation of all my Blender plugins, ported to modern Blender versions 2.64 and above:
MD3 Exporter (originally by Xembie, forked a couple of versions ago) ROFF Importer & Exporter ASE Importer & Exporter (specifically for GtkRadiant/Q3Map2 - very simplistic) .map patch exporter - i.e. export as patches GLM/GLA Importer & Exporter and animation.cfg exporter with support for everything, including creation of new playermodels and animations.
New version! Check out my GitHub for the latest pre-release, which supports newer Blender versions and addresses various shortcomings. A new JKHub release will follow at some point.
A manual is included, make sure to read it if you're having problems.
Installation:
Go to the Blender User Preferences, select "Install Addon" and select this zip.
8,114 downloads
-
3ds Max 2022 dotXSI 3.0 Exporter
Re-compiled for 3ds Max 2022. See the included readme and FAQ for installation and usage.
78 downloads
(0 reviews)0 comments
Updated
-
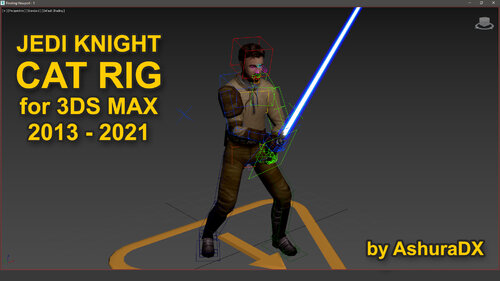
Jedi Knight CAT Rig for 3ds Max 2013+
By AshuraDX
This is something that I've been working on since like 2017. But I finally got around to rebuilding this thing for the third time - this time properly and with all bones for Jedi Academy, Jedi Outcast and even Soldier of Fortune 2.
Most of you are probably like "What the Hell is this?", so let me explain:
What is CAT and what can I do with it?
CAT Is a very versatile Rigging and Animation System for 3ds Max. It allows you to quickly and comfortably make high quality Animations, after setting up a Rig that is equally quick to build. This Video (and this Channel in General) explain what CAT is and what it can do really well:
This rig comes in a 3ds max scene with the original Jedi Knight Game bones constrained to it. This means that when you move any part of the rig, the bones of the character move accordingly. It is also organized in layers and comes with a couple of useful premade selection sets to streamline animating and exporting your animations to the game.
How do I use it?
To export animations and get them ingame you will need the Jedi Academy SDK Repack and the dotXSI Exporter for your version of 3ds max. (I linked the exporter for 3ds max 2021 underneath - check the authors other uploads for alternate versions)
When CAN I use it?
The file has already been uploaded and approved here on JKHub and I hope to get a tutorial written up and recorded until next weekend. WC3Tutorial from the JKCommunity Discord, who has been Alpha-Testing the initial Version of the Rig heavily, might beat me to recording a tutorial - if that happens I'll link it here. I'd be happy to hear any questions you might have upfront that might help make the tutorial better and easier to understand.
If you fancy messing around with this rig before the tutorial is up - don't be shy to reach out to WC3Tutorial or me on the JK Community Discord #modding channel.
264 downloads
(1 review)0 comments
Updated
-
Dragon
By JKHub
Author: Wudan
-1- General Information
To put it simply, Dragon is an animation creation and editing tool for the Ghoul2 animation file format, .gla, used in both Jedi Knight II: Jedi Outcast and Jedi Knight: Jedi Academy (hereafter referred to as JKA). It's primary purpose is to create animations and write them in to the .gla format, which can then be merged with the existing JKA animations (or other .gla files) for use in-game with little knowledge needed.
Dragon has been created on a machine utilizing an AMD Duron 950, 256 MB ram and an ATI Radeon 9200 videocard, which is a fairly low-end system by today's standards. As such, most computers should be able to handle Dragon program smoothly (but, because of Dragon's avatar system, it is possible to put too much strain on any system.)
Dragon features:
A drag-able and transparant UI
An Avatar system
A Console to do nifty things!
A Complete Bone List to animate
A Standard model
A few example animations
Light Saber Rendering (extremely nifty)
Weapon Rendering (blasters rockets etc)
A floor tile, for better animations
Save and load system
A blending option
And probably much more
-2- Installation
The current release (0.1.0) is just a .zip file - you will need a program such as WinZip or WinRAR to extract Dragon. When you extract Dragon, it is important that you keep the folder hierarchy as it is in the .zip file. If you extract Dragon to C:\, the program will be in C:\Dragon\ All you'd need to do is navigate to that folder using Windows Explorer and double-click Dragon.exe. As of 0.1.0, Dragon has a default model that is loaded using the default Avatar, so you should see a shiny little guy, ready to animate.
-3- Getting Started / Basic Usage
Ok, you've gone through the trouble of downloading Dragon, extracting it, and running the core executeable - now what?
You should see a shiny little gray dude, a box that says "BoneList" and a box that says "SliderBox". Below the gray dude is a little stick thing, made of a white, green, and blue sticks. You still with me? Cool.
Let's focus on the BoneList, since it's basic use is pretty easy. You see a list of bones - model_root is in the middle - the active bone is dislplayed in the middle of this box. You can click on any of the bones listed above or below to switch to those bones - as you change bones you will notice that the stick thing (the white, green, and blue sticks mentioned earlier) change position and orientation.
Ok, now you're ready to do some fun stuff. See that slider box that you've been itching to mess with? This is the heart of Dragon - You have several things in here that are noteworthy - a Reset Button (completely obliterates any posing you've done of the current bone), and two sets of 'Sliders'. The sliders on the left are the important ones - the ones on the right we'll get to in a minute.
Go ahead and select the r_femur_YZ bone in the BoneList. Next, click on the green slider on the left - and hold your mouse down - and move your mouse left or right. You should see the gray guy's leg swing back and forth. You can now try moving the blue slider - his leg will sway from side to side.
Getting from here to making a cool stance is actually pretty easy - it's like playing with GI Joes, or some such action figure - you just pose the model how you want it. It might take some getting used to, but you're on your way
-3- Console Commands / Advanced Usage
Dragon uses a console, designed to be somewhat familiar to people who've played a game based on the Quake3 engine. First up to bring down the console press ` (you may need to enter ASCII code 0126).
Console Commands:
screenshot
Takes a screenshot - saved in the 'screenshots' folder.
fnext
Go to next frame (Hotkey: K)
NOTE: Also used to create frames, hotkey does NOT create a frame
fprev
Go to previous frame (Hotkey: L)
fdel
Delete frame - (deletes the current frame.) After deleting, Dragon will go to either the next frame (if there is one), or the previous frame (if there is not one.)
fcpy <number>
Frame Copy - Copies a specific frame number.
fcpyprev
Frame Copy Previous - Copies the frame before this frame. If there isn't one, it does nothing.
fcpynext
Frame Copy Next - Copies the frame after this frame. If there isn't one, it does nothing.
fspeed <number>
Frame speed, if you want your frames play at a higher rate, you need a high fspeed, you want a slower rate, u need a small fspeed. Default fspeed is 20. Usage: fspeed 20
fblend <number>
This is what makes the animation smooth. Its simple to use once u get used to it. Usage: in frame 1 is a stance in frame 2 is a different stance. U want the switch between stances to be fast, so 10 frames should be right. Bring down the console and type: fblend 8. now u should have a smooth switch from stance to stance. NOTE: To prevent odd bugs from happening cycle trough the animation mannually once before clicking the preview button! Always substract the amount of frames u already have for example if u want an animation to last for 20 frames and u have 5 frames animated than its 20-5 = 15 , fblend 15. Hope that makes sense play around with it.
finsa
Inserts a new frame after the current one.
finsb
Inserts a new frame before the current one.
save <name>
Saves a .cfg file to Dragon's directory. This file describes the animation you are currently working on. You do not need to add the .cfg, Dragon does this for you. So, 'save myanim' creates myanim.cfg in the Dragon directory.
load <name>
Loads an animation over the current animation, creates the necessary number of frames (but doesn't nuke any frames - so if you load a 5 frame anim and have 10 frames, you'll have 5 frames on the end of your workspace that you probably don't need. Use fdel to nuke 'em.
savegla <name>
Saves a .gla file in Dragon's directory under your given name. Usage: savegla my_stance
impframe <number> <number>
Import frames from the loaded .gla - so that you can edit previously finished animations. The first <number> is the starting frame number for your import, and the second <number> is how many frames to import.
It is recommended that you use the save and load commands to work on animations, as saving to gla and reimporting several times introduces compression artifacts - in layman's terms, your animation will be broken and you may need to re-do the entire thing. Importing from the original should be fine, as that's what the target executeable (in most cases, Jedi Academy) does anyway.
NOTE: To load up a gla you have to edit an avatar file, or make a new one. More on this in the avatar section.
-4- Avatar System
The Avatar System is one of the more robust components of Dragon. With it, you can animate multiple models at once, bolt models to those model's bones, change the saber's color, and length. So, how to access this advanced functionality? Listen well, young traveller, for a world of infinite possibility awaits those with a steady hand and an open ear.
Dragon, in 0.1.0b, comes with "avatar/default.cfg". (Now might be a good time to set Notepad to be the default editor for .cfg's, if it isn't already.) Opening that file shows:
Wudan{{org 0.0 0.0 0.0gla _JAhumanoid.glaglm models/players/stormtrooper/model.glmskin models/players/stormtrooper/model_default.skinbolt models/weapons2/saber_dual_5/saber_dual_5.glm rhang_tag_bonecolor 0.05 0.15 0.05length 32.0}}
The syntax is fairly similar to .shader file format, so skinners won't be at a total loss here. There are three main, must-have parts of an avatar file, the 'org', the 'gla', and the 'glm' lines. Oh, and the 'skin' line is fairly important. That said, a basic template to follow for creating new avatars would be:
AvatarName{{org 0.0 0.0 0.0gla INSERT_NAME_OF_ANIMATION_FILEglm INSERT_NAME_OF_MODEL_FILEskin INSERT_NAME_OF_SKIN_FILE}}
The org line has three floating point values past it. These tell Dragon where you want to draw the model at. This is useful because adding multiple models would be confusing if they all were at the '0.0 0.0 0.0' location. The gla line has a filename after it. By default it is _JAhumanoid.gla, which is a really small, single frame animation file that contains all of the skeleton file info. The glm line has a filename after it. This can be any .glm file, it is highly recommended that it be a .glm that was made to work with the gla you've selected. The skin line points to a skin file specifically created for the glm that you have selected. As of 0.0.1b, not loading a .skin file results in a crash.
-5- Tutorial: Replacing Animations
So the reason u downloaded dragon was not to read allot of crap but to get urself some animations done! So here we go! This is much easier than u think, Thanks to dragon. Its not hard either. Ive just written allot of text so it would be clear First we create our workspace. Extract /models/players/_humanoid/ (assets1.pk3) to a easy to find place. I've created:
"C:/Base/Models/Players/_humanoid/"
NOTE: /Base/ has to be there. if not ull get errors Check the _humanoid folder, see if u can see the .gla and the animations.cfg files. Now download GLAmerge written by Ask.
Now, create your animation in Dragon. That's easier said than done, right? Well, once you have a completed animation, you can move on to the next step.
However, before you export to the .gla format, there are a few things to consider - for one, have you saved the file (save command), so you can edit the original animation later? If so, excellent. save, then savegla - I think a good idea would be to automatically save when savegla is called - this could be done for the next release - any thoughts?
Ok, now the tricky part is that you'll need the very first frame of animation be empty - it technically doesn't matter, but you need to understand that this buffer needs to be there because other animators, using packages like XSI and 3dsMax, weren't able to keep the skeleton in-tact when exporting to gla and merging, unless they had made the first frame of their animations the base pose, otherwise the animation could not be successfully merged in with glamerge. Dragon does maintain the skeleton's structure, but uses the same merging program as everyone else.
Anyway, the tricky part is that Dragon currently has a blending system that 'wraps' around the animation - if the last frame of animation has blended bones in it, they blend with the first frame. This helps with walk cycles, but makes exporting to gla format pretty tricky. Since 'unblending' bones does not destroy their position, save your animation, then unblend each bone of the first and last frames, then finsb on frame 0 - you should now have a blank frame 0 and the rest of the frames are working fine - but, because Dragon is finicky about frames, cycle through all the frames before you export. You're ready to export - lucky you!
To export, enter the console and put in
savegla YOURFILENAME
(do not append .gla, Dragon does this already.) Ok, you're done with Dragon, go ahead and exit (you did save, right?)
In the folder where Dragon is located, you will find YOURFILENAME.gla - copy the .gla to the humanoid folder mentioned earlier. Than create a new text document. In that document type the following:
@ECHO OFF"glamerge.exe" "_humanoid.gla" "<gla>" -oPAUSEEXIT
This is a basic setting. replace <gla> with whatever your gla is called. i got this: @ECHO OFF "glamerge.exe" "_humanoid.gla" "my_run.gla" -o PAUSE EXIT (if u are an advanced modder, see the readme of glamerge for more options) Save the txt file as gla_merge.txt Now rename the file to gla_merge.bat (the .bat file tells the program what files to merge) now double click on the .bat file (make sure the following files are in the _humanoid directory. Glamerge, _humanoid.gla, your GLA.) It should now ask u for an output name. I suggest humanoid.gla (NOT _humanoid.gla!). Because this way u can rename the humanoid.gla or delete it when it isnt good while keeping the original (of course its just a copy of the original located in assets1.pk3). But for now lets do new.gla Now create the same directory somewhere else (no need for /base/ now) c:/models/players/_humanoid/ copy the other _humanoid files and paste them here. delete everything except Animations.cfg and new.gla Now rename new.gla to _humanoid.gla. Open up the animations.cfg with good old notepad. Now find the running animation. (U can use modview) k now its time for some small time scripting (not 2 hard dont worry) Now uve found the animation u want to replace BOTH_RUN1 12305 26 0 40 (name) (beginframe) (frames) (loop) 40(framespeed) K now. we have to leave the name the same. Now we find out what the last frame is, if u scroll down a bit ull see that ROOT is the last frame on frame: 21374 and it lasts 2 frame wich comes to a total of 21376.Now we know what to fill in the first, now for the second. How many frames is your animation? really simple if u've paid attention when gla merge was busy you shouldve noticed it counted the frames So there. I got 20 frames. Next is wether u want it too loop or not. 0 = yes, -1=no. We have a running anim so i would say 0, yes. And finally the framespeed. This one u can set whatever u like. in dragon the speed was 20 and i liked it so ill use 20 There we're done analyzing. So lets do this ! BOTH_RUN1 21376 20 0 20 Ahh yes were done! Pack /models/players/_humanoid/ in a .pk3 (the same way u would pack a skin) and place it in your base. Launch JKA. play a game and look at your new animation! NOTE: your next animation has to start on a different frame, see the last frame is 21376, plus the 20 frames u used wich would become 21396 I hope u get the point. Delete the .pk3 and yer jka is back to normal, Isnt it simple? Its only simple thanks to Dragon:The Ghoul2 Animation Tool
-6- Contact
If you need help or got questions or want to report a bug (TO SQUASH!) you can contact Wudan on the following ways:
Mt-Wudan
Dragon Forum
Mail: Wudan07 -AT- gmail.com
Aim: Wudan07
Remember! Report Bugs As soon as u find them! And also please fill in the crash/bug form included! You are able to control how good the next version will be if u go on bug-hunting or if u think of things that could be improved
Credits
Jedi Knight Jedi Academy.......................................LucasArts, Raven, Activision
Ask................................................................................GLAmerge
Wudan......................................................Dragon:The Ghoul2 Animation Tool
Shady-D.........................................................Doing some background stuff
You..........................For reading this and for (hopefully) reporting if u find a bug
660 downloads
-
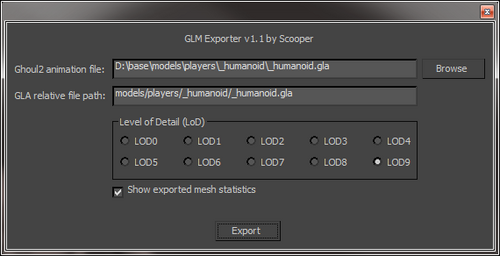
Autodesk 3DS Max 6-2025 GLM Importer/Exporter Plugins
By Scooper
These plugins were created on request by Milamber, with a lot of cooperation from him for testing and feature requirements.
They allow you to import .glm models to Autodesk 3DS Max 2010 - 2022, both 32bit and 64bit versions. (32bit support was discontinued from 3DS Max 2014 and up, so there are no 32bit versions of those.)
GLM models that are weighted to a skeleton can be imported with a skeleton if you have the matching .GLA file. If you do not have one, you can cancel that step and you will have an unweighted model imported.
The plugins have been tested with creating/modifying for Jedi Academy:
- Player models
- Creature models (Non-player usable models, such as rancor and wampa)
- Sabers
- Vehicles
- Weapons
Should probably work for Jedi Outcast as well, but this has not been tested.
The plugins have been tested and verified with the following 3DS Max versions:
- 3DS Max 2011 32bit
- 3DS Max 2011 64bit
- 3DS Max 2012 64bit
- 3DS Max 2015 64bit
Installation:
Pick the required plugin matching your 3DS Max installation, and put it into your 3DS Max plugins folder.
Example: 64bit
You have 3DS Max 2015 (64bit, since there is no 32bit) installed at the following location:
"C:\Program Files\Autodesk\3ds Max 2015\"
Move the following files:
GLM_Exporter_2015_x64.dle
GLM_Importer_2015_x64.dli
into
"C:\Program Files\Autodesk\3ds Max 2015\plugins\"
Example: 32bit
You have 3DS Max 2011 32bit installed at the following location:
"C:\Program Files (x86)\Autodesk\3ds Max 2011\"
Move the following files:
GLM_Exporter_2011_Win32.dle
GLM_Importer_2011_Win32.dli
into
"C:\Program Files (x86)\Autodesk\3ds Max 2011\plugins\"
How To Use
Milamber has created a tutorial on JKHub:
http://jkhub.org/tutorials/article/196-3ds-max-glm-tutorial-characters-creatures-vehicles-sabers-and-weapons/
Credits
- Milamber. For requesting the plugins. And being the tester verifying all the functionality, and making the requirements. And being the prime motivator and reason for this project being completed at all.
- Archangel35757. For providing necessary assets. And at this point being the owner of this and providing updated versions.
1,851 downloads
-
3ds Max 2021 dotXSI 3.0 Exporter
Re-compiled for 3ds Max 2021. See the included readme and FAQ for installation and usage.
125 downloads
(0 reviews)0 comments
Updated
-
3ds Max 2020 dotXSI 3.0 Exporter
Re-compiled for 3ds Max 2020. See the included readme and FAQ for installation and usage.
50 downloads
(0 reviews)0 comments
Updated
-
JKA Max Vert Calculator
By AshuraDX
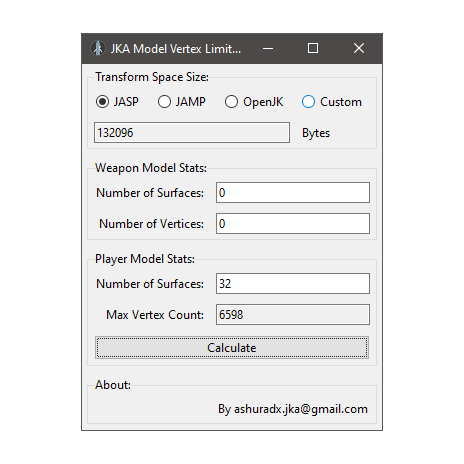
A small calculator to help determine the max amount of vertices for your playermodel before you start seeing the famous "ran out of transform space" error.
Choose the game executable you are using to check against their transform spaces or enter the transform space for your custom game executable if you are running a mod that changes this value.
The calculation works as follows:
'max verts' = ('transform space' - 4 * ('playermodel surface count' + 'weapon surface count')) / 20) - 'weapon vertex count'
Included is the raw *.py python script, aswell as a packed *.exe for those that prefer simplicity and ease of use.
If anybody wants to modify this script to work in blender go ahead ?
136 downloads
(2 reviews)0 comments
Updated
-
3ds Max 2019 dotXSI 3.0 Exporter
Re-compiled for 3ds Max 2019 (Recompiled Jan 3, 2021 to fix internal version number) See the included readme and FAQ for installation and usage.
61 downloads
(0 reviews)0 comments
Updated
-
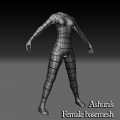
Ashura's female basemesh
By AshuraDX
A simple female basemesh I made to build Jedi Academy or Jedi Outcast models around
Feel free to use it, but if you do please mention me in your models read me, happy modeling!
328 downloads
-
Noesis
By RichW
Noesis is a tool for previewing and converting between hundreds of model, image, and animation formats. It utilizes a robust plugin system, with support for native extension modules and Python scripts. The plugin/script API features hundreds of functions and interfaces which assist in developing new formats, tools, and visualization aids.
This program has an inbuilt auto-update option which is recommended you utilize to get the most up-to-date fixes.
6,363 downloads
- 3D Modelling & Animation
- JK2
- (and 1 more)





![More information about "JKA in Minecraft: MineAcademy [DEMO]"](https://jkhub.org/screenshots/monthly_2023_05/2023-03-14_02_33_06.thumb.png.e487c7c6eb4da4facd231be80082aa6d.png)






.thumb.jpg.5dcb19c4514c273ccb909b62bb79a3e3.jpg)
