Key
-
Posts
92 -
Joined
-
Last visited
Content Type
News Articles
Tutorials
Forums
Downloads
Everything posted by Key
-
-

-
-
-
-
-
-
-

-

-
-
-
-
-
-

-
 uhhh probably ... you can set launch arguments (going to make it more obvious how in an update), so if the mod has an fs_game type (as I'm pretty sure all mods do) I'm sure you can.
 -
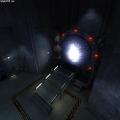
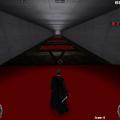
As Jedi_Mediator said, you have to use a decent value for it to be visible. Case closed, the ambient key does work.
-
@The Punisher, you can use zips to install PK3's with - you do not need to extract PK3's in order to use them in this application! JAFM will extract them for you if you give it a ZIP. @Onsyfx, 1. no drag and drop yet, my previous versions had it but suffered whenever it was forced to run in Admin mode (for some reason). 2. Yes, it is necessary to keep a storage bin - however I was playing around with the idea that I don't need to have it copy PK3's but rather just move them. This can be dangerous if you lose a file though. Applications like Mod Organizer and Nexus Mod Manager have "storage bins" as well, in fact it's worse - they're virtual installs basically. All the mods for Skyrim or Fallout (or whatever game) you have are extracted into one directory per profile. So we should be thankful that PK3's aren't really that big of a hassle. I'm going to be making a thread for this to discuss new features and such here in a bit.
-
Version 00.01.01
480 downloads
Jedi Academy File Manager JAFM Beta Version 00.01.01 Introduction Jedi Academy File Manager (JAFM) is a utility for easily keeping track of PK3's/Packages, Mods, and CFG's for your Jedi Academy game. You can install new PK3's and mods, view / edit their in-depth properties, and even remove them from your game folder. Currently it's in beta, there are features being added and tweaked as development goes on. All criticism, enthusiasm, evaluation, etc. is appreciated. (if you find an issue, please PM me directly on JKhub!) Features - Enable/Disable PK3's - Detailed PK3 support for modders - Dynamic mod installation & management - CFG (scripts and configs) editor. - JASP/JAMP launcher with argument support. - Profile system for keeping multiple sets of gamedata folders and selections of active packages. - Large amount of backgrounds to choose from, all from JA! (reason the DL is so big, sorry) - Automatic PK3-type name parsing (authors and version #'s require jafm_info.txt files) Installation 1. Download JAFM. 2. Put the application wherever you want, and start it up. It does not need to be in a certain directory. 3. Use as you see fit! Planned Features - PK3 packaging tool & editor for quick fixes / access - MAC AND LINUX SUPPORT - List sorting - Skins and more customization - More ergonomic CFG editor and modder support Things That Don't Work & Disclaimers - If you have a steam installation of JA, due to the way steam works you will be unable to launch multiplayer from JAFM. Sorry! - This application must be ran in administrator mode for people who have installed JA into their "x:\Program Files" and "x:\Program Files (x86)" directories. - Mac & Linux aren't supported yet. - I'm confident JAFM won't destroy your game or folders, however if you don't believe me - back up your GameData folder before use. Further Notes - I've been working on versions of this for nearly two years, inspired by the likes of NMM and MO. - Just recently started learning how to use WPF, this is my first project with it. Modder Support 1. Download a copy of the jafm_info.txt file found here: clicky clicky OR download from the JKH link, there'll be a folder named "sample jafm_info" 2. Fill out your mod's details inside. 3. Put the jafm_info.txt into your PK3's top directory or next to it inside a ZIP file. 4. JAFM will attempt to look for a jafm_info.txt and a read-me.txt during analysis. 5. A plethora of Read-Me file names are searched to cover multiple possibilities of you messing up Credits - Thanks to MasterM, he has been my most dedicated tester. - Thanks to Fal & Zab for the support & encouragement. -
 little concerned for any dab[man] that's not brown
- 16 comments
-
- 1
-

-
- npc support
- personal skin or model
- (and 8 more)
-
Yes, I haven't touched the project since I made this post. The RGB colors shouldn't be a problem, I understand how those work - maybe it's the lighting value. The guide I found said to use "23" ... so I was using 23, then bumped it up to 30 on a test map, then 40 where I stopped because I couldn't see much of any difference. I'll try something ridiculous like 100 just to see, but if you're saying it works that's all I need to hear. Figured I was just doing it wrong. Thx
-
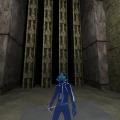
 having the _humanoid folder with all its contents in the GameData\base\models\players folder next to your working model's folder does not fix the issue for "missing .GLA" in Blender 2.77. Does anyone have a fix for this before I try to revert and install Blender ~2.64? edit: installed 2.64 because I am very doubtful when it comes to these things. Still was unable to open a GLM, even with my file structure set in accordance to a Blender tutorial and the above comments. So either I'm retarded or something is just not right. The console says it can't find "models/players/_humanoid/_humanoid.gla" ... Isn't it supposed to be "\" not "/"? Or does that not matter for Blender?...