Boothand
-
Posts
935 -
Joined
-
Last visited
Recent Profile Visitors
12,647 profile views


Boothand's Achievements
")

-
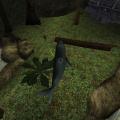
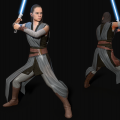
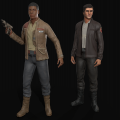
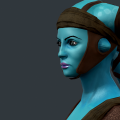
2019 DISCLAIMER: This tutorial was not written in 2018, but in 2014. This should be considered outdated material (and probably contains shady artistic and technical advice). I recommend looking into how to do this with Blender nowadays. Welcome, welcome. In this tutorial, I will teach you some things to keep in mind when modeling for Jedi Knight, and how to get your model working in game using 3DS Max. I'm going to let you follow along as I create the character Horseton Legged and make him work in-game, which should give you some input on both human concerns and animal concerns in modeling land. I must admit I haven't been to all the corners of modeling land, and certainly not the sewers. Some of the most daunting tasks of rigging your character is automated and easy-made by some tools, and the theory behind that will not be covered in this tutorial, but can be found in others... just to save you the trouble – and myself, as I don't know what I'd do without them. We'll get there. This tutorial will be divided into different spoilers, sections with different aspects of the process depending on what you need to do. You will see that some parts are absolutely necessary to get it in game, but that there are also optional parts which might not be relevant for you. This way, you can focus on one thing at a time or select what you need. Spoilers also serve as a tool to keep your mind and milt intact, so that the tutorial won't feel like it's 20 meters long. Now, to begin. What you will definitely need for this tutorial: A 3DS Max version with an available XSI exporter (2010 plugins work on 2011). JK2 Editing Tools v1.0 JK2 Editing Tools v2.0 Psyk0Sith's hierarchy auto-linker. Psyk0Sith's prepared JA skeleton (even if you're modeling for JK2) Patience to try things more than one time. What you can have for this tutorial: Other modeling softwares for the modeling itself. Photoshop and/or reference images. Zbrush (very handy for texturing seamlessly, and making normal maps for your character) Other tutorials, such as Tim Appleby's, or others on the subject. However, some things have changed since the early 2000's, and if I'm doing this right, you should be able to make it through the tutorial you're currently reading. About these tools: 1. Setting up the work path 2. Planning the model Reference pictures 3. Modeling 4. Finishing off and UV mapping 5. Weighting the model 6. Segmenting your model into parts and naming them 7. Linking the hierarchy and giving birth to your model 8. Exporting the .xsi and compiling your .glm 9. Making the .skin files 10. Testing the model 11. Making a .pk3 Troubleshooting The information used in this tutorial has been collected from several places, and joined together in this one. A big thanks to Psyk0sith for a lot of this information!
-
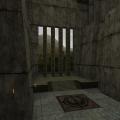
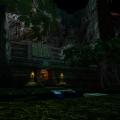
A video tutorial showing some of the bumps you can run into when exporting .MD3, and also shows what to do to your .ASE to make it functional. I recommend generally using .ASE instead of MD3 for map objects, as it gives greater freedom of editing textures and the placement of your textures in your pk3. However, if you need LOD support for your models, you need MD3. This is good for models with relatively high polycounts. MD3 exporter for Max 2010/2011 MD3 exporter for Max 2014 BACKUP VIDEO Quick summary: Make sure your meshes have a UVW Unwrap modifier in the stack. Place your model(s) at 0,0,0 coordinates. If you have several meshes, you can edit their pivot point to keep them in place. Don't make it too big nor impractically small. Too big and it will deform. For .MD3, keep the model's textures in the "models" folder structure, and also export your model here. If your texture doesn't show up, clear the material editor and re-assign and apply the textures again, before exporting. For .ASE, place your textures anywhere, and your .ASE anywhere, and open it in notepad. Replace the values of MATERIAL_NAME and MAP_NAME with the path of the texture, for each material ("textures/mapname/material"; or "models/map_objects/mapname/material") Edit the value of BITMAP - remove the full path and rather go with "..\textures\mapname\material" or "..\models\map_objects\etc\material". Test your map with sv_pure 0, so you don't have to pk3 it up!
-
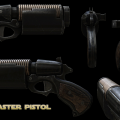
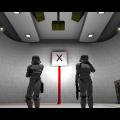
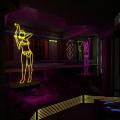
Hey, haven't posted here in a while! This is how Gun & Buckler looks at the moment: https://www.youtube.com/watch?v=6Z68WaGKqQI If you wanna be ready when we go closed beta, you can join our discord =]
-
-
-
-
-
-
-
-
-
-
-
-