-
Posts
760 -
Joined
-
Last visited
Content Type
News Articles
Tutorials
Forums
Downloads
Everything posted by Rooxon
-
-

How to stop the model in the preview from rotating?
Rooxon replied to the_raven's topic in Modding Assistance
Yeah to add to that, most of JKA's files inside the assets that hold commands for the game engine can be opened in Notepad++ (which is notepad, but better). There's also the Jedi Academy SDK which has some software, that *could* make your life easier and additional tools like the NPCtool, for easier NPC file creations and such. -
Hello Djinn! Glad to have you around.
-
@@Droidy365 Contact me on discord, I will help you set you up and we can start working on it.
-
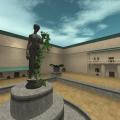
@@Droidy365 Yes, there was some kind of "bounding box" you gotta make in GTK Radiant for the reflection - I remember angelmodder explaining the whole process to me, but I forgot. If you have discord, I might try to search for that discussion but I cannot promise you anything - but it isn't hard to do iirc. EDIT: I can't seem to be able to find it since it was probably in a group chat that got deleted and replaced with a channel instead. But I asked AshuraDX if he can figure the routine out. So hang back and hopefully, we can help. Since the mechanics are pre-built into JKA but never used, it should be the most promising and easiest way to make such reflections.
-
Download AngelModder's latest Jedi Home. It's extra files have got a very nice shader effect, which can be yes a bit tough on the comp and can cause a crash, but it works just as well. It's literary a mirror shader working perfectly and is even implemented into base JKA but was never used anywhere. https://jkhub.org/files/file/3308-jedis-home-3-temple-edition-demo/
-
I'm "so-so" on metal gear games but then again I only played Revengeance and 5 Phantom pain - the last of which is... well, to put it bluntly, one of the more boring games I've tried out. Revengeance, tho, hell... I cut everything into a million pieces - before, again, getting bored of the rest and being disappointed on how short the game seemed to be (started and finished in one afternoon).
-
Moving on, I had the chance of remastering the Sith Sword and Scepter - Still WIP but this is a first-look into it. More to come soon! Sith Sword and Scepter (Game lowpoly remastered) by Rooxon on Sketchfab EDIT: Not sure how it is on your end, but the embed seems to be broken (and it's copied over from sketchfab as always - not sure what the cause is). Direct link to Sketchfab: LINK
-
There is a tutorial for pretty much everything here on JKHub, and JKA is one of the easiest games to learn to mod. You won't even need help - but if you do, feel free to ask questions here on the forums or on our discord server!
-
yeah. Slovenian mod creator, says so in my signature.
-
-
Maybe Rooxon will or encourage you to try it yourself. You can ask me for any help you wish. The models are simple enough, I can show you a few nice tricks to make it really quickly.
-
-
Nope, they're not DT, check it out on Sketchfab. They're optimized as it can be. Arbiter 320 verts Retaliator 518 verts Consul 876 verts I've been taught to become super clever about cylindric sides choices and I've optimized every single vert on the model before UVW mapping it - everything is welded together, only the really needed verts are there. Not taking requests at the moment, sorry. Nothing I can show you for now as I have to work and finish other stuff, but it's in the making. Again, I am not around much and I'm sorry if you guys are expecting stuff from me like before, where I was releasing sometimes several mods per week. I just can't do it anymore, I need some time to relax playing a game or two - I couldn't work all day every day, then go to the computer and model.
-
@Rooxon does not take requests anymore, Rooxon has a full-time "job", owns a bakery that runs pretty much 24/7, day and night shifts. Rooxon models only for the projects he's in, currently (actually i don't even find the time for that anymore).... but then again, it's about time i post another file soon. I was a big-time fan of SAO back in the day when it was still running. But i am sorry, i probably will not do these swords (at least not at the moment). But given how simple they are, it should not be tough even for a newcomer to create - if you decide to give it a try yourself, you can hit me up for help and tips. But i would appreciate you watching a few tutorials beforehand so i don't have to explain every detail step-by-step.
-
Really top-notch models, allthough as a Substance Painter user i still can't shake the "plastic" look i gather from the model's textures which quixel suite produces. I hope that i will one day see a model from you by using substance painter for texturing - imo by far superior to quixel. #constructivecriticism 5 stars all the way for each and every one of your products nevertheless, not to be missunderstood. At such a level of talent it's really down to the details - so software you use and work with. Most people will not understand what i am talking about - but you certainly will Scerendo. Models can only be this good - it's textures where a product as good as this shines. To add another suggestion, Substance Painter has a far superior baker as xNormal as well. Really, just try it out and be amazed. I never learned substance painter, my mods are purely self-taught routines. You seem to have been tought by others - put that knowledge to use with the currently best software availible. You'll become an even bigger god to the community than you already are + you'd reduce texturing to *only* substance painter and nothing else. In case you are interested, hit me up and i will set you up, either on discord or PM here on jkhub.org
-

Rapier Lightsaber (REQUEST COMPLETED)
Rooxon replied to Siegfried's topic in Mod Requests & Suggestions
no of course it can be done, pretty much anything you can imagine can be done. the main problem you guys have is finding someone with time/willingness to do it. or, like i said, give it a try yourself - if you need any help (if using 3ds max and substance painter/photoshop), feel free to ask me. -
-

Rapier Lightsaber (REQUEST COMPLETED)
Rooxon replied to Siegfried's topic in Mod Requests & Suggestions
wierd as in... the rotation is off, for example. if i position it for single wielding, it will look okay if singled, but when you dual wield 2 of them at once, one is gonna be facing about 25° to the left instead of being nice and straight, the other one a bit more, maybe 35-45°, not much you can do about that as it's the skeleton's fault. Fixing that would mean we'd need to fix any and every playermodel in existence - it is a little interesting noone has done those position fixes so far if you think about it, but then again not for the very reason i just mentioned. noone would go and fix everyone's work (and you cannot do anything saber-wise, except two versions and name them left hand/right hand). I am aware i inspire a lot of people and i'm happy for that. I hope more people would give modding a proper tryout, it's not rocket science... okay it's not a 10 piece lego house either but it's nothing too complicated if you're careful when learning for the first time. -

Rapier Lightsaber (REQUEST COMPLETED)
Rooxon replied to Siegfried's topic in Mod Requests & Suggestions
Let's see. I'm not taking up requests anymore, because way too many people nag me after to do stuff for them - not that i got the time or motivation even. But if i was to do this saber, i'd be a bit skeptical because of the shape and JKA's tag rotations - it could look wierd if i position it for single wielding - okay for double wielding and vice versa. I got way too much stuff waiting on me to be done, so if anything, i'd rather show someone and teach them how to do it. Almost noone besides me does saber mods at all anyway (or at least it seems like it to me). Even tho that after reskinning something, it's pretty much the second easiest thing to do in regards to custom textures/models. -
-
This tutorial will teach you how to integrate any hilt of your choice into the SP menus and correctly modify the string files. For low to mid experienced modders, you may use any hilt you want to follow the tutorial. For non-experienced modders, I've included a custom hilt made by me, just download it: https://jkhub.org/files/file/1894-%7B%3F%7D/ Programs we are going to need: - Notepad and https://jkhub.org/files/file/89-pakscape/ Additionally, I've attached the final .pk3 file here, just so you can take a look at mine in case your own doesn't work and see what faults you've done! We are going to do some preparations: First, create a new folder directory on your desktop and name it "base". It's not really important but it's always good to keep the files organized and know where exactly they need to be when you pack it up into a pk3 file. Then open up the zz_RevanSab.pk3 from the downloaded mod I attached up above and copy all three folders into the "base" folder we previously created. Once you've done so, additionally, create two more folders and name them "strings" and "ui" respectively. Open up the "strings" folder and create one more directory, name it "English". Now we just need to copy some more files from the original assets files of the game: Namely, open up assets1.pk3, go into the "ui" folder and copy over the saber.menu file. Then open up assets0.pk3, open the "strings" folder, open the "English" folder and copy over the menus.str file. HINT: Right click on each of the two files you copied from the assets and un-check the "Read Only" checkbox! If you don't, you won't be able to save the modifications to the file! That's it for the preparations! I hope it wasn't that hard. Now there's just a little bit of editing left, I'll divide the process down into a few parts to make it understandable a bit more. 1. First, the game needs to know which saber we want to integrate into the menus - Take a look into your ui folder we created and open up the saber.menu file in Notepad, which we copied over from the assets earlier. - hit ctrl + f. This will (or schould) open up the search box and search for "single_hilt1", you schould see something like this: cvar "ui_saber" //FIXME: read these from sabers.cfg + *.sab? cvarStrList { @MENUS_SINGLE_HILT1 "single_1" @MENUS_SINGLE_HILT2 "single_2" @MENUS_SINGLE_HILT3 "single_3" @MENUS_SINGLE_HILT4 "single_4" @MENUS_SINGLE_HILT5 "single_5" @MENUS_SINGLE_HILT6 "single_6" @MENUS_SINGLE_HILT7 "single_7" @MENUS_SINGLE_HILT8 "single_8" @MENUS_SINGLE_HILT9 "single_9" } As you can see, here's the 9 single hilts already in-game. Copy-paste the last line and change the number 9 in both cases to 10, the modified lines schould look like this: http://shrani.si/f/2J/sy/5JkCdrA/scrtut11.jpg Save and close. 2. .SAB File editing Well, we've decided to go with the style of the already integrated sabers, so we need to modify the .sab file a bit. Go into ext_data/sabers and rename "revan.sab" to "single_10.sab" in Notepad. Do a full copy-paste of everything inside the .sab file! See the line where "revan" stands? change it to "single_10". See the line where "Revan's Lightsaber" stands? change it to @MENUS_SINGLE_HILT10 The final look of the file: http://shrani.si/f/b/C0/1j3FSGP1/scrtut12.jpg Save and close. 3. Final editing step: Letting the game know what name you want to appear in the menus So, open up strings/english/menus.STR in notepad. Hit ctrl + F and search for "SINGLE_HILT1" You schould find lines that look like these: REFERENCE SINGLE_HILT1 NOTES "saber hilt name\n" LANG_ENGLISH "Arbiter" REFERENCE SINGLE_HILT2 NOTES "saber hilt name" LANG_ENGLISH "Retaliator" REFERENCE SINGLE_HILT3 NOTES "saber hilt name" LANG_ENGLISH "Consul" So scroll down to SINGLE_HILT9, copy all three lines and paste them just bellow LANG_ENGLISH "Firebrand" Rename the SINGLE_HILT9 to SINGLE_HILT10 and change the name "Firebrand" to "Revan", you schould have something that looks kinda like this: http://shrani.si/f/3h/10M/4aqU5grj/scrtut13.jpg One last time, save and close! 4. Packing up and having fun! Open up the zz_RevanSab.pk3 you downloaded. We will pack the modified files together with my created files, so the saber will work like it schould. Easy enough, with packscape just import the strings and ui folders and you schould have something that looks like this: http://shrani.si/f/3f/Iv/4a6gpNJe/scrtut14.jpg In any case, I like to check the imported files anyway if they really are the modified ones. After that, just save the .pk3, copy it to your base folder and try it out! That's it for the process, have fun integrating your own hilts of choice into the menus! IMPORTANT NOTES: - For staff hilts, instead of searching for SINGLE_HILT1 you search for STAFF_HILT1 on all occasions in this tutorial. - YOU DO NOT NEED TO FOLLOW THE SAME STYLE I USED! For example, you could also make your saber integrated with using a line like @MENUS_REVANSABER, but keep in mind that you also need to apply that to each line where @MENUS_SINGLE_10 would stand. But I reccomend doing so, just to keep things really working, non-confusing and organized as it schould be. - If you've got trouble getting it to work, I bet it's a fault in either one of the file/folder names or you did mistakes in the line writing. Please be sure to look at my screenshots to see how the correct way looks like! - There are no real restrictions to what names you can use, just be sure to use english characters to avoid getting wierd ones showing up instead of them in-game! - Keep in mind that files must not overlap with other mods! So if another mod uses the name single_10, you schould avoid using that name. Try it with something like single_010 or single_10_ in that case. Also, only one SP Menu support mod will work at a time, unless you modify and combine the sabers.menu and menus.str files yourself! That's all folks! May the Force be with you! zz_RevanSab_SPIntegration.pk3
-
Did you already model your first weapon? Okay great and I take it you have also tried it in-game, right? Well then I'm sure you noticed some other original sabers or other mods having some kinds of reflection, to show you what I mean, take a look at these two printscreens bellow. Example picture 1: Rooxon's WeaponsHD Stinger a.k.a. Reborn saber 3.0 (included in the Misc sabers pack) The top picture shows the model via ModView or rather, the way the actual textured model looks. The bottom pic shows with shaders applied. Do you want to be able to add such effects to your weapons? Than this tutorial is meant for YOU! I'm going to cover two ways you can write shader files, though in this basic tutorial only the first one. And this as I call it, is "by hand" using Notepad, the other is with using ShaderEd2 which quickly and correctly writes your shaders, but to be honest, once you get the grip for it, it's way faster doing it by hand. Also ShaderEd2 is only good to check on errors on such easy shader effects that I'm going to teach you this time. Table of contents: (1.) Getting Ready... (2.) Explanation of shaders and the first step: Thinking (3.) Specular map shader (3.1.) Additional texture making: specular map (3.2.) Your first shader file! Specular map shader file template (4.) Glow map (4.1.) Additional texture making: glow map (4.2.) Glow map shader file template (5.) Enviromental map (5.1.) To draw or to get it? (5.2.) Enviromental map shader file template (6.) Map combination and important facts! (1.) Getting Ready... NOTE: READ THE TUTORIAL CAREFULLY! It's quite detailed, I explain a lot of things, show some possible errors, what causes them and how to correct them! Here are the tools and assets we are going to need: - Notepad - Desired model without shaders - Photo-editing program (I'm using Photoshop CC, GIMP is a good alternative or nowadays even online image editing programs have all the needed tools) - (OPTIONALLY) JKA SDK, which contains ShaderEd2 NOTE: Mostly we will be doing filters on the textures, so a program with utilities like light levels, saturation and color vibrance are a must! NOTE 2: I'm not going to cover basic editing tools like resizing a picture in photoshop or what all possible filters do, I say TRY THEM OUT! That's how I learned to use Photoshop and for the info, pretty quickly. For this tutorial, I will use my old Stinger model 2.0, which I also quickly trimmed of unnecessary files and it contains just the model and it's textures. You can find the download link of the finished pk3 file at the bottom! If you're going to use this saber to learn from this tutorial, just make a "shaders" file directory in the PK3 file where the models directory is located! That's where we have to put our shader files in when we finish! (2.) Explanation of shaders and the first step: Thinking Shaders are basically text files, which give desired textures the desired effects, to make them look more realistic, but also to get some special effects like glow, transparency, twosided texture drawing, animations, chrome effects... This is done in a rather simple way, you just define which texture you want the effects added and later type the correct desired strings. There's also additional texture making needed, though not drawing, mostly you can do great specualr maps with some good thought-out filters. (depends on what shader you want to do) Actually the possibilities are really WIDE. I'll divide them into two tutorials, with this one explaining the basic ones and later a more advanced shader tutorial which will be a video tutorial and teach you animating textures (like fire), cartoon-like shading, a detailed blendfunction explanation and so on. Now before I say anything else, here comes the most important part of shader making. THINK! And give it a good thought, as now you have to decide what effects you want to add. The way I think right now: "Let's say I want my saber to have a different reflection when light shines on it (like the one shown in the example above). Also, this plain texture would look great chromatic a bit. Oh and how cool is that, how about the top part of the saber hilt would glow, or the lines, or both? Gotta try it out." So in short, this tutorial will teach you how to write correct shader files and how to do the corresponding texture files in photoshop at the same time. (3.) Specular map shader (3.1) Additional texture making: specular map Well now that I know what effects I'm going to add. I also need to make the corresponding texture files. Base texture: Specular map: This map shows when light shines on the model and ONLY on those parts (see the example picture at the top to see what I mean). With that in mind, I would make a map that shows just how those lit-up parts look like. So, I opened up the texture in Photoshop and went to Image/Adjustments/Levels and made the whole picture a bit lighter with the light shades also enhanced a bit. You find the Image tab up in the left corner of the program. Something like this is good enough: Usually I go much more extreeme regarding these settings, with darknes between 10-15 and lights between 215 and 200,sometimes even further. I slide the middle gray button according to the look itself, I don't want it too dark and not too lit up. Additionally, I want to show a bit more intensive colors when light shines on the hilt, so again I go to Image/Adjustments/Vibrance and set the vibrance to +100 and saturation to 10, like this: Well I'm satisfied with this for now, but the texture is a bit plain, empty. But I will fix this with shaders, and I'll do that by pasting over a nice metal texture and setting it';s blending to either Soft Light or Overlay. I do this by copy-pasting the metal texture to the hilt's texture and resize it to fit the borders. After that I set the blending to Soft Light and it's opacity to 70%. This is the texture I googled up (By Wojack) and this is how the texture looks like after applying it the way I proposed: Wojack's Metal textures: And this is our final look of the specular map. Save it as sabern_spec.jpg and that's it. Now we are going to write the shader file for the specular map. (3.2) Your first shader file! Specular map shader file template Yes, and you'll be pretty quick about it too. I think this is the easiest way, I'm going to give you what I've written and explain in detail what it means and what it does. At the bottom I'm going to include other interesting choices you might want to try out. So open up notepad and copy-paste the concept you can use as a template for your own shader files (just change the file paths according to your desired textures): models/weapons2/saber_reborn/sabern { q3map_onlyvertexlighting { map models/weapons2/saber_reborn/sabern rgbGen lightingDiffuse } { map models/weapons2/saber_reborn/sabern_spec blendFunc GL_SRC_ALPHA GL_ONE detail alphaGen lightingSpecular } } Explanation: models/weapons2/saber_reborn/sabern //First off you define the path to the texture the shader schould be applied to. Note that it must be the first thing written in the file or else the shader won't work. { q3map_onlyvertexlighting //This line is something I tried out a long time ago and I think the weapons look nicer this way, it's not needed, but you can leave or delete it. { map models/weapons2/saber_reborn/sabern //With this line you define the path to the base map again. It always needs to be the first one rgbGen lightingDiffuse rgbGen gives the map shading properties. When you use specular maps, ALWAYS set it to lightningDiffuse! } { map models/weapons2/saber_reborn/sabern_spec We define the path to the specular map file, usually give it the same name as the base tex with _spec added at the end. blendFunc GL_SRC_ALPHA GL_ONE This blending function makes the map shade everything but black and other than the base textures's black parts. detail This string draws the map more detailed. alphaGen lightingSpecular Finally, this line is actually responsible for the drawing effect of the map only where light shines on it. } } IMPORTANT NOTE: the bracket placement has to be EXACTLY like mine. I press the Tab button to do these quick spaces in between the start of the row and the bracket. Look at the shader file I also included in this tutorial to see how it schould look when finished! So if you've managed to get all of which I just told you, you've written your first shader file! Now all that's left is to save it as any_name_you_want.shader and copy-paste it into the Shader directory you may have created in my included PK3 file at the start and you can try it out! This is the result: WITH SHADERS WITHOUT SHADERS BUT! If something like this happened to you, you probably forgot to copy the needed jpeg files to your pk3 file or haven't named them right: (4.) Glow map (4.1.) Additional texture making: glow map This is fairly easy, again let's open up the base texture and take a look. What would we want to see glow? Well let's say the upper part of the hilt and the black lines on the hilt. If you can select the parts you want to make glow, do it. I'm going to select something and also make a new layer and draw red lines where the black ones are on the original map. To do this, I will use the Line tool located inside the Shape tool selection (click and hold on the Shape tool). Also, I make a new layer by pressing Lctrl + Lshift + n on the keyboard. After this, hold ctrl and click on the picture of the layer with the lines to select all of them. After that use the Rectangle selection tool to add-select any other areas of the texture you want to glow (in the upper left corner, click the second button with the overlaping rectangles and filled whole). Once you've done so, you will have this: Make sure your background layer is selected! Now pres ctrl+j and a new layer schould appear, Merge the two layers we've made, but only them, not to the background. Now once again select the background and fill it totally black. From this point on the shader would already work, but it's better if we make the lights and colors as intensive as can be. Play around with either Image/Adjustments/Levels or Brightness&Contrast or Vibrance. My result is this: If you want, you can use this one, just download the pk3 files down bellow, it's inlcuded together with the enviroment and specular map inside the hilts directory! And that's it for the Glow map work in Photoshop! Well, I resized the glowmap down to 256x512, but honestly, it could be even less as no detail is actually needed for the glow ingame, it all looks blurry either way. Something similiar is the case with enviromental maps also. Well, off to the shader file writing. (4.2) Glow map shader file template Again, I will give you a concept which you can use, or rather, which you will remember down to every last symbol after 20-30 shader files written. It's the easiest way for you to learn, actually. I'm one of those learn-by-doing-it guys. Spoiler models/weapons2/saber_reborn/sabern { q3map_onlyvertexlighting { map models/weapons2/saber_reborn/sabern rgbGen lightningDiffuse } { map models/weapons2/saber_reborn/sabern_g blendFunc GL_ONE GL_ONE glow detail } } Explanation: models/weapons2/saber_reborn/sabern Again it's the path which declares the texture that you want to apply the shader to. { q3map_onlyvertexlighting Again, you may leave this part or delete it. { map models/weapons2/saber_reborn/sabern This part inside these two brackets that I colored red ALWAYS needs to be first in any shader! I call it base texture declaration rgbGen lightningDiffuse } { map models/weapons2/saber_reborn/sabern_g We declare the path to the glow map which would be the texture, but it's also the name for the part colored blue inbetween both brackets. blendFunc GL_ONE GL_ONE This blending draws anything but black. But there's another effect, the darker the colors on the map are, all the more transparent the map is drawn ingame. glow It's the line that makes the parts on the glow map actually shine. detail Again, this line also isn't obligatory, but if you add it to at least ONE map, then you DO have to add it to EACH map after the first one, which is the base texture declaration! } } Well if we combine both the specmap and the glowmap, we first write the base texture declaration (the one with rgbGen lightningDiffuse), then the speculation map and then the glow map. Mind how I added "detail" to only the last two maps? That's what I warned you about up above. models/weapons2/saber_reborn/sabern { q3map_onlyvertexlighting { map models/weapons2/saber_reborn/sabern rgbGen lightingDiffuse } { map models/weapons2/saber_reborn/sabern_spec blendFunc GL_SRC_ALPHA GL_ONE detail alphaGen lightingSpecular } { map models/weapons2/saber_reborn/sabern_g blendFunc GL_ONE GL_ONE glow detail } } (5.) Enviromental map (5.1) To draw or to get it? Yes, the enviromental map is best a screenshot of a level without the hud or even real enviroment pictures are fine, downsized to 256x256 or 512x512 if you really want detail for some reason. Or for chromatic saber, I would make a small new file, 256x256 size. With the standard colors black and white chosen, I would go to Filters/Render/Clouds, after that Filter/Filter Galery (located almost at the top inside the filters tab) and add a chrome filter, which you can find on the Filter Galery window inside the sketch tab on the right. For simple metals, I'd make different shades of black, white, gray and everything inbetween them, but keeping straight lines. Or maybe a gradient blending with 50 shades of gray. Hah I'll just post my finished enviroment maps I use mostly, you're free to download and use them any way you like. (5.2) Enviromental map shader file template Well by now we already know the procedure, here's the template: models/weapons2/saber_reborn/sabern { q3map_onlyvertexlighting { map models/weapons2/saber_reborn/sabern rgbGen lightingDiffuse } { map models/weapons2/saber_reborn/env blendFunc GL_DST_COLOR GL_SRC_COLOR detail tcGen environment } } The important things you schould mind in this template are only the blendFunc and tcGen lines. GL_DST_COLOR GL_SRC_COLOR enables this special transparent look, which covers the whole texture, but leaves out the darkest and the lightest parts. tcGen enviroment commands the map to move around on the saber according to your movements. This enables the illusion of a reflection. (6.) Map combination and IMPORTANT FACTS! Well, if I wanted to combine all those kinds of maps that I've taught you today, the shader file would look like this: models/weapons2/saber_reborn/sabern { q3map_onlyvertexlighting { map models/weapons2/saber_reborn/sabern rgbGen lightingDiffuse } { map models/weapons2/saber_reborn/sabern_spec blendFunc GL_SRC_ALPHA GL_ONE detail alphaGen lightingSpecular } { map models/weapons2/saber_reborn/sabern_g blendFunc GL_ONE GL_ONE glow detail } { map models/weapons2/saber_reborn/env blendFunc GL_DST_COLOR GL_SRC_COLOR detail tcGen environment } } Look ingame: And that's how I've made my old saber a whole lot better! Always mind that the maps are drawn ingame in the same order as you write them. With that said, it's better if you keep the specular map always the second one and the glow map the last one (if you have them both, else you don't need to mind the other, you can have a shader with only a glow map and a specular map, it'll look OK if that's what you want). Okay sheesh, a lot of writting and working behind the computer is now behind me. Now there's a couple more things you need to always be aware of: - the names of your shader files can be ANYTHING YOU WANT, as long as you don't forget the .shader ending and put it inside the "shaders" map in the root of your pk3 file. - mind the correct order for the shader maps! - if you put detail in at least one map after the base one, you have to put it inside each one, like I did! - if you want to make a part of the model transparent, you have to model the inside and the "covering glass" of some kind also, give it a texture with white borders, a bit of gaussian blur and a few straight diagonal lines to make the effect of glass. Then use the glow template without the "glow" line in it and the model will be transparent. For any further questions, feel free to message me or ask down bellow! That's all, I hope my tutorial will help you learn something new, I also wish you luck modding and bid you farewell! TUT_how_your_finished_shader_file_schould_look_like.pk3 TUT_Stinger20.pk3
-
i know i see now after downloading that the model is nowhere near the original TFU one. Still not too big of a fan, as it still seems like a port only simplified, textures included. I enjoy custom, hand-made hard work, not some easy-to-do-stuff-anyone-can-do. A couple of looks at the UV mapping should prove if it started out as the original model or not. Not that i care enough to actually check tho, but i might, as i know only a handful of people on JKHub doing from-scratch quality work.
- 5 comments
-
- Non Star Wars Related
- JKHub Exclusive
- (and 7 more)
-
- 5 comments
-
- Non Star Wars Related
- JKHub Exclusive
- (and 7 more)


