
Rooxon
-
Posts
760 -
Joined
-
Last visited
Content Type
News Articles
Tutorials
Forums
Downloads
Everything posted by Rooxon
-
 Somehow this does look heavily ported, with small edits. I dunno, might be just me seeing this.
 -
 Hands down, incredible map. Bot support and more details after a blu-ray release are definiely a must have - but even without it, the effort alone is outstanding. Nothing less than 5 stars doesn't do this mod justice.
 -
 Kinda decent job but it could be much better. 3 stars from me for motivation, possibly an update. Do not open if you haven't seen EP8 yet!
 -
 You may use my "assets" as you see fit, as long as you credit me for the original work (even if you modify it in any way).
 -
 I gave this a 5 star rating. It's got that special something, that "retro mods" feeling from the old days and there's clearly some effort in it, even though it's not overly detailed especially texture-wise. The models are simple as well but it delivers what you wished to deliver very nicely.
 -
 Throw him the soundwave image Circ
 -
Yeah, only people who follow me on Sketchfab know what i'm momentarily doing. Everyone else is in the dark it seems. But honestly, i'm working as much as i can find the time for modeling. The plan is to deliver the packs around Christmas or actually on christmas.
-
Haven't updated this topic in quite a while, i actually forgot about it cuz it just became another request thread. but i wanna let you know the revamp of the packs is in the works:
- 37 replies
-
- 12
-

-

The Incredible Binnysan/HACKUR has passed away.
Rooxon replied to Cyb3rst0rm's topic in Jedi Knight General Discussions
No matter what kind of a person one is, suicide is just wrong and hurts too many people, leaves holes in their lifes and numerous questions. But it was his choice and we have to respect his death and, like many already do, wish all the best to his family and friends to pull through. May he rest in peace now. -
 You can't, at least not in a quick practical way.
 -
Congratulations Langerd! Deserved victory.
-
This is what i mean by "they're not good" and "i'll do something better".
-
Take your time, no need to rush it during the duration of the contest. If i were you, i'd make this map the size of a vanilla FFA map with all those insanely nice effects!
-
I can make anything, but i kinda stopped taking on requests, as i've had a saber requests thread and taken the whole community on in the past. For now it's temporarily closed as i'm working on several big projects, truly not just one and i don't even find a shard of time compared to before so i cannot say for sure when that will change, but i do welcome ideas from people and what they want to see done. If it's only 1 thing, i could almost assure you that i'll deliver it. But people coming to me asking for renewing whole parts of games, that's not really my cake atm. I like a challenge, don't be mistaken - i just don't have the time.
-
 lol RIP JKhub - and i thought i stayed alive, then i turned around on the left side from the house... A seriously insanely nice work Langerd.
- 24 comments
-
- 2
-
-
- halloween
- contest entry
- (and 1 more)
-
i was literary flipping a coin between pretty much all of the files... had i decided to go with the coin flip, Artemis's Corn Maze would have gotten my vote, but then i thought you know what? I'll give my vote to a fellow weapon creation - Langred's Flashlight. He, too, uttilized a clever trick to get the job done. So yeah, honestly... i cannot possibly pick what i like best. All mods this year are top-notch!
-
You didn't tell me that specifically welp i'll fix it once it gets un-featured and maybe i can think of anything else in the mean time, like additional design changes to them or more texture variations.
-
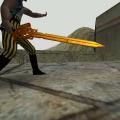
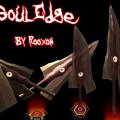 That is a bit tough. It would probably require heavy scripting or even code changes, to tie this effect to this single weapon. Also, i wish to see new renderer advancements soon, to tie in several other maps to make this wep appear much more beautiful ingame - all i could work with now is the diffuse and spec map. Given the vanilla rendering options, you can see the results on the screenshot - not exactly good looking. I could have done a better job, that is true if anyone thinks that but i was kinda time pressed given the circumstances that i've had free time only yesterday and today for it. Nevertheless, i'm happy that the "looking eye" trick works, a small illusion where the eye seems to always look at you. AshuraDX did that a while ago on a wall painting and i've realized that we've done the very same think in primary school, arts class with cut egg-carton (you cut away parts for two eggs, cut out the eyes on a painting or drawing, glued them to the back and drew a black spot in the middle). Then if you moved the painting in several directions, this is the "illusion" that happened. I am probably gonna update this mod at some point, but for now, i'm fighting with this in the contest.
 -
meh a very very simple but attractive design i like it myself, the way it turned out. Even tho if you take a look at the original lowpoly (extra credits section), you'll notice i've come up with pretty much the whole hilt, except it's general cylindrical shape.
-
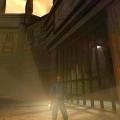 Made me think of that movie Night in the Museum, was a nice one to rewatch Neat effects, i just wish there were more possibilities for JKA, to make the flashlight 100% realistic and have some kind of pin-point directional lightning.
 -
158 downloads
"The Eye is always watching you...literary. Check it out." DESCRIPTION: Halloween 2017 Contest Entry The living Demon blade Soul Edge - It's alive, it's ever watchful of you, it changes shape in regard to it's wielder and drains his/her life force just as well as from it's victims. Take out your opponents quickly or it just might be YOU who ends up broken and dead on the ground! MUAHAHAHA, *cough* *cough* okay, i think you get it. (The blade doesn't actually sap your HP so don't worry, be happy. But it is always looking at you or in your vague direction.) If you're playing on MP, it first needs to be uploaded to the server of your choice, otherwise people will see it as kyle's lightsaber and it will also function as such. Later, simply choose it from the menu and you're good to go. If you're playing on SP, first open your console with ~ or ¨ (button left of 1, under ESC) and enable cheats with: helpusobi 1 then type: saber souledge INSTALLATION INSTRUCTIONS: Copy the r_souledge.pk3 over to your base folder, the default path is "C:/Program Files/Lucas Arts/Star Wars Jedi Knight Jedi Academy/Game data/Base". BUGS: None that I noticed but if you did, leave a message in the comment section! -
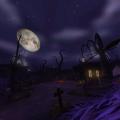
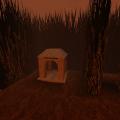 I very much like the idea for this map, a corn labyrinth 5 stars!
 -
I wasn't thinking of doing anything this year, cuz of lack of a good idea. I changed my mind. ^^
-
790 downloads
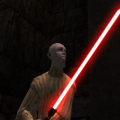
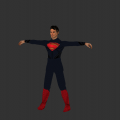
X1 & X2 Lightsaber Lowpoly by Rooxon on Sketchfab INSTALLATION INSTRUCTIONS: Copy the r_x1sab.pk3 over to your base folder, the default path is "C:/Program Files/Lucas Arts/Star Wars Jedi Knight Jedi Academy/Game data/Base" DESCRIPTION: Request from Lord of Hate. And no, i do not accept public requests all the time. Q: Who or what are X1 and X2? A: It's not refering to Megaman. X1 and X2 were both meant to be in the cancelled Battlefront 3 Game, born twins whereas later one turned sith, one jedi. They both wielded the same ligthsaber with the difference that X1 used a Blue lightsaber crystal and X2 a red one. Q: How do i play with this lightsaber? A1: If you're playing on MP, it first needs to be uploaded to the server of your choice, otherwise people will see it as kyle's lightsaber and it will also function as such. Later, simply choose it from the menu and you're good to go. A2: If you're playing on SP, first open your console with ~ or ¨ (button left of 1, under ESC) and enable cheats with: helpusobi 1 then type: saber x1 saber x2 Both are the same saber with vanilla stats, to be MP friendly. However, X1 uses a blue color and X2 uses a red one for their respective blades. BUGS: None that I noticed, but if you did, leave a message in the comment section! Special thanks to AshuraDX for the astounding Weapon Turntable playermodel that i use for showcasing custom weapon creations! https://jkhub.org/files/file/2823-%7B%3F%7D/ -
Help, my JKA's decided to make a fool out of me!
Rooxon replied to Rooxon's topic in Jedi Knight Tech Support
i'm keeping my GOG version safe on USB drives, and believe me they were in a CD case all this time. It's also true that CDs and DVDs have a short life in comparison to other digital storages... something simply must have gotten damaged, somehow. That and issues with a modern OS were my only ideas, but i kinda ruled the OS issue out with GOG working perfectly.