Client-Side
7 files
-

JK2MV
By JKHub
JK2MV (Multi Version) is a modification for Jedi Knight II: Jedi Outcast. It supports all three game versions and comes with various features and optimizations.
Main Features:
Supports 1.02, 1.03 & 1.04 in a single executable Supports most mods made for JK2 (maps, skins, (code)mods etc.) Fast ingame HTTP-Downloads with a dialogue asking you for permission before downloading files to your computer Multiplatform: Windows, Linux, MacOSX Multiarchitecture: 32 and 64 bit support on all platforms Fixes for major bugs found in basejk and many mods Dynamic glow: Better looking lightsabers with the dynamic glow feature from JKA EAX/OpenAL sound fixed Support for modern screen resolutions Fixes for all known security bugs Minimizer: Press the Windows key in fullscreen mode to minimize. Press Alt+Enter to quickly switch fullscreen mode Improved gamma correction High resolution fonts AVI demo recording MVAPI allowing mods to implement features impossible with original JK2 engine Tons of other fixes and improvements in the engine, see the changelog for detailed information Opensource (GPLv2) JK2MV.org
1,634 downloads
(0 reviews)0 comments
Updated
-

OpenJO for Jedi Outcast
By JKHub
OpenJO is the Jedi Knight 2: Jedi Outcast version of OpenJK. This is for single player only. For multiplayer, please see JK2MV.
OpenJK is an effort by the JACoders group to maintain and improve the game engines on which the Jedi Academy (JA) and Jedi Outcast (JO) games run on, while maintaining full backwards compatibility with the existing games. This project does not attempt to rebalance or otherwise modify core gameplay.
Our aims are to:
Improve the stability of the engine by fixing bugs and improving performance. Provide a clean base from which new JO and JA code modifications can be made. Make available this engine to more operating systems. To date, we have releases on Windows, Linux and macOS. If you need help, the JKHub sub-forum is a better place for support queries, discussions, and feature requests.
License
OpenJK/OpenJO is licensed under GPLv2 as free software. You are free to use, modify and redistribute OpenJK following the terms in LICENSE.txt.
Installation
To install OpenJO, you will first need Jedi Outcast installed. If you don't already own the game you can buy it from online stores such as Steam or GOG.
Follow this guide for installing on all 3 desktop platforms. The guide is for OpenJK and Jedi Academy but the steps are the same for OpenJO and JK2.
For Developers
Building OpenJK
Compilation guide Debugging guide Contributing to OpenJK
Fork the project on GitHub Create a new branch and make your changes Send a pull request to upstream (JACoders/OpenJK) Using OpenJK as a base for a new mod
Fork the project on GitHub Change the GAMEVERSION define in codemp/game/g_local.h from "OpenJK" to your project name If you make a nice change, please consider back-porting to upstream via pull request as described above. This is so everyone benefits without having to reinvent the wheel for every project. Maintainers (in alphabetical order)
Ensiform Razish Xycaleth Significant contributors (in alphabetical order)
eezstreet exidl ImperatorPrime mrwonko redsaurus Scooper Sil smcv4,330 downloads
- open source
- mac
- (and 1 more)
-
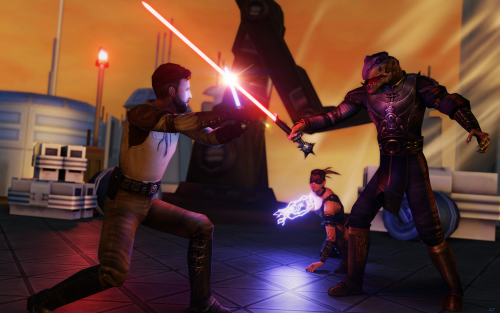
JK2 joMME
By ent
joMME is an engine modification of Jedi Knight 2: Jedi Outcast for moviemaking. It's a
port of q3mme with most of its features and some new ones.
Features:
- supporting versions: 1.02, 1.04
- demo playback control (pause, rewind)
- free camera mode
- chase camera mode
- time speed animation
- capturing motion blur
- capturing output in stereo 3D
- different output types: jpg, tga, png, avi
- playing music on background to synchronize it with editing
- saving depth of field mask
- overriding players information: name, saber colours, hilts, team, model
- dynamic glow effect from Jedi Academy
- weather effects: sun and realistic rain
- realistic first person view with visible body (trueview)
- recording audio to wav
- replacing world textures with your own
- replacing skybox with one solid colour (chroma key)
- capturing in any resolution
- off-screen capturing
- capturing a list of demos
Author: ent
Version: 1.4.2
Date: 27.06.2014
Filesize: 6.01 MB
Installation: either extract the archive to "GameData" folder or extract
anywhere, then create folder "base" next to folder "mme", put in there
("base") assets0.pk3, assets1.pk3, assets2.pk3, assets5.pk3 from "base"
from your original game path. Then run start_joMME.cmd file and enjoy the
mod.
Copyrights: ©2014 ent
758 downloads
-
Jedi Outcast SP Linux Binaries
By Syko
With these binaries you can easily natively play the single-player portion of Jedi Knight II: Jedi Outcast on Linux. No bullshit, just put your assets files in the base folder and run. A widescreen tweak was also added to the source code. You don't have to compile anything.
Note: Currently, this only works for Ubuntu based distros (Ubuntu, Linux Mint, Lubuntu, etc), and does not work with Fedora or OpenSUSE for example.
Installation
NOTE 2: YOU STILL HAVE TO OWN AN ORIGINAL COPY OF JEDI OUTCAST TO USE THIS.
To get the binaries to work, simply copy assets0.pk3, assets1.pk3, assets2.pk3 and assets5.pk3 from your Jedi Outcast game disk (or Steam version) to the base directory, and start the jk2sp executable.
If things aren't working for some reason install the needed dependencies with this command:
sudo apt-get install libopenal1 ia32-libs
Credits
I did not make this port. All credit goes to xLAva (Jochen Leopold) who did all of the porting work. I have permission from him to upload the binaries to JKHub. Because of the GPL2 license of the original source code, I am also required to put a link to the source code on this readme. Original Github link:
https://github.com/xLAva/JediOutcastLinux
659 downloads
- JK2
- Open Source
- (and 1 more)
-

< NT XII > Public Clientside for JK2 1.02
By NTxC
< NT > XII Client
created by NTxC (reality~)
This clientside works best with servers that have the < NT > XII Server Mod installed, but should also work with servers without it.
Installation:
Navigate to your jk2/GameData/ directory (jk2 is where you installed the game). Copy the ntxii folder from this package to the GameData directory so that in the end the path looks like this: jk2/GameData/ntxii/
Inside that folder you should have the ntxii.pk3 file, which is the actual clientside containing all the data needed to use it.
That's it. You can now go to a server and play with the newly installed clientside or you can always load it manually by entering the Main Menu and going to Setup -> Mods -> pick "ntxii" from the list -> Load Mod.
CUSTOM HUD:
After first-time use on a server, a customhud.cfg file will be generated in the ntxii directory. Review it. You can use it in combination with nt_customHUD 1 to customize your HUD to a great extent, as you are now presented with the ability to move the HUD elements on your screen.
WARNING: customhud.cfg isn't updated by the game, so you have to manually update and save it!
CAN'T FIND DEMOS/SCREENSHOTS/CONFIGS?
Watch out for the evil tactic of Windows which sometimes results in your game-generated data like demos, screenshots landing NOT in your jk2/GameData/ntxii/ folder as they normally should, but in: C:\Users\yourusername\AppData\Local\VirtualStore\. That's where you will find the JK2-generated user data. A solution to counter this Windows behavior is to always run JK2MP.EXE with a right-click -> Run as administrator. You can also disable UAC (User Account Control).
GAMMA BUG:
if you can't set r_gamma to your likes, and/or you get a "SetDeviceGammaRamp failed." error, then right-click JK2MP.EXE, select Properties, change to the "Compatibility" tab and select Windows XP SP3 compatibility. Press OK and the gamma bug will then be fixed.
Clientside features:
- Crash fixes
- Built-in JK2 minimizer (default: CTRL+Z and CTRL+SHIFT+Z, use cvars/settings menu to customize)
- New gametypes (Double Domination, Hold the Point)
- Random Model feature
- Ignore feature
- Integration with NT's Fix functions, such as admin commands
- Ultra-fast HTTP pk3-downloading system
- Ingame serverlist (made by Nerevar)
- Optional mouse movement smoothing
- Enabled console and key input during demo playback
- Support for JK2 DeFraG
- Accel-Meter which will help you strafe properly
- Visual support for Client Zero serverside bugfix
- Removal of the cg_fov 97 limit
- Instant import of the old NT XI config file
- Demos: you can now change the RECORDING caption into a little *REC caption or disable it completely
- 52 new color codes for you to use freely! (use /colorguide)
- custom HUD
The clientside supports Windows XP SP2+, Windows 2000, Windows Vista, Windows 7 and Windows 8.
Questions? Bugs?
Contact:
xfire: ntxc
msn/e-mail: nontoxic_1@hotmail.com
Copyright © NTxC 2011-2014
Visit the home page:
http://jk2nt.cba.pl/ (now defunct)
http://www.ntxc.pl/
THIS MODIFICATION IS NOT MADE, DISTRIBUTED, OR SUPPORTED BY ACTIVISION,
RAVEN, OR LUCASARTS ENTERTAINMENT COMPANY LLC. ELEMENTS TM & LUCASARTS
ENTERTAINMENT COMPANY LLC AND/OR ITS LICENSORS.
Accel-Meter code provided by Dzikie Weze
420 downloads
-
PhatMOD
By JKHub
Original Author: cHoSeN oNe
Description:
This is a combination of Dest & Tchouky's JediMod 1.2 and ROP & Eternal's Jetpack Mod demo all compiled in Visual Studio.NET...
- Also added 2 new saber hilts to |:|ReMaRk|:| saber hilt pack.
- Updated tckmodel.cfg also enclosed.
Main Features:
-Type 'bind <key> jetpack' in the console to bind a key to the
jetpack. Use directional keys, jump (climb) and duck (dive) to fly
NOTE: You must first enable Jetpack in the command console if you want to use it. Simply type:
\"set mod_jetpack 1\" in the command console will enable this. To disable, just type \"set mod_jetpack 0\"
This portion of the mod is intended to be used in conjunction with the Mandalorian models w/ jetpacks.(Boba and Jango Fett). The jetpack can be activated with any model, but it won't
look right!
-Known issue: No jetpack flight sound when saber activated.
This is not a problem for our mod, and therefore we do not plan to 'fix' this issue
Enjoy
RenegadeofPhunk(ROP)
New stuff in JediMOD1.2:
-Amazing new hilt pack made by |:|ReMaRk|:| specially for
JediMod v1.2 with 45 new hilts. (be sure to read saber_readme.txt)
-22 new emotes! For a total of 31 emotes!
-Multiple Taunt Sounds! (you can hear yoda go weeeeehehehewhoohehe)
-New move for orange style if your using only one saber
-mod_cheatprotection variable that makes it so players can't change
models if they are close to other players.
-bots can now use hilts.
-no more file size limit on tckmodel.cfg
-This is a full version so you don't need JediMod 1.0 or JediMod 1.1
installed.
Other stuff in JediMod:
-Can wield two sabers at once.
-Hilt models can be selected like player models.
-Two added stances with new special moves for five stances total.
-You can search for JediMod games by hitting the all/Jedi Knight II
game toggle button
-skill mode, toggled with mod_skillMode, causes damage to be area
specific. So if you get hit in the head it does 2x damage while
getting hit in the legs does 0.9x damage.
Installation:
Unzip into the GAMEDATA folder. All of the files inside of the zip should end up in the folder gamedata/phatMOD/
Execution: select the phatMOD v1.0 in the mod setup screen.
Or use the command line argument +set fs_game phatMod
ex. \"C:\\LucasArts\\Star Wars JK II Jedi Outcast\\GameData\\jk2mp.exe\"
+set fs_game phatMOD
Comments:
Remember that you can only play this mod if the server has it and
is running it.
- This mod is opensource, feel free to improve upon it.
- Have Fun !
-Jedimod Thanks to: |:|ReMaRk|:| for the wonderful hilt pack and other help with the mod,
Tchouky for the great model scaling code,
keo718 for the updated tckmodel.cfg list,
Ask(thats a name) for his grappleing hook code,
NickR for helping me with some of the bugs in JediMod,
everyone else in jk2coding for being there so I could ask
them questions, Raven for making a cool game and for the
ghoul2 api, and everyone who downloaded the mod.
149 downloads
(0 reviews)0 comments
Updated
-
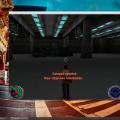
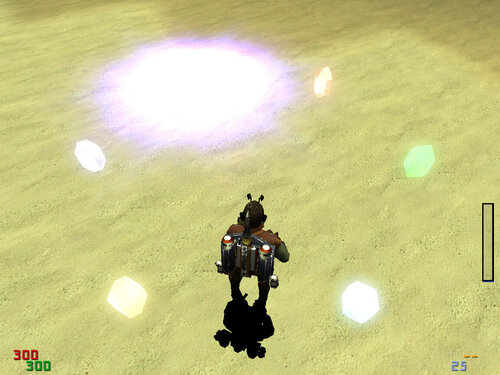
Nerevar's Cam Mod (for JK2 v1.02)
By Kaiser
Nerevar's Cam Mod (1.0) for Jedi Knight v1.02
Even if you don't want to make an ultra cool movie with pro camera rails, you should check it out, cause it makes it much easier (less investigated time to search the kills, fast-forward feature or freeview and spectator mode) to watch your demos
Besides that the mod includes:
- dismemberment
- rain effect
- sun effect
- option for saber trail extension
and some more
Also the demo & Disconnect crash is fixed (CTF demo crash fixed too) and jk2mp.exe will quit orderly
INSTALLATION:
Copy the complete "Cammod" folder into your GameData folder
Then load it by starting jk2 normally -> setup -> mods -> loadmod cammod
(DON'T RENAME THE FOLDER TO SOMETHING ELSE)
Start the game and set in console vm_ui 0 and vm_cgame 0 (the mod won't work otherwise)
Installationhelper:
If you haven't done it correctly, the console will give you a message that a .dll is missing
BUTTONS (ingame):
W,A,S,D,C,SPACE - movement
shift - speed down
mouse2 - speed up
mouse1 - spectate the players (cycling like in spectator mode, press any movement key to return into freeview mode)
Q - opens the camera menu ingame
Z - a step back, if you accidently deleted the wrong waypoint, or don't like the one you just created, press Z end the last state is reloaded (there's just one step)
Del - deletes a selected waypoint for the rail camera
ADDING WAYPOINTS/EFFECTS/COMMANDS:
Important note: To start the rails which you've created, you have to do cam_drawpath 0 (= off)
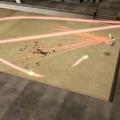
Waypoints (showcase:
):-there are 2 kinds of waypoints: initials and chains
initials will start a "new camerapath" while chains will connect to the last waypoint
-To add an initial fill in all editfields (starttime,endtime,startorigin,startangles,endorigin,endangles)
-To add a chain fill in only the end-editfields and leave the rest blank (endtime,endorigin,endangles)
-modes: linear/smooth/very smooth
Other notes:
editfields can be set to the current time by pressing the triangle next to it
editfields can be set to an event by pressing the cross next to it and choosing an event from the eventcatcher
origin & angles editfields can be set to the current origin & viewangles by pressing the triangle next to it
++++++++++++++++++++++++++++++++++++++++++++++++++++++
More detailed Infos
++++++++++++++++++++++++++++++++++++++++++++++++++++++
Features:
- then there is a time editfield and a commandline editfield, add it and the written command will be automatically executed when the set time is passed
You can add effects:
-times & origins & angles like waypoints
-File is the .efx started when the set time is passed at the set origin
-the list below shows the effects in your folders (base & cammod)
-click on it to choose it
-double click on it to show the effect ingame
OTHER COMMANDS (most of them are included in the menu):
toggletimescale - toggle the timescale value between the value 0 and the current value (so you can easily pause and unpause the demo by pressing just one button) bind it!
startCamerapathNow - the loaded camerapath file will start immediately relative to the started time, ignoring timescale (so you can use the path with timescale 0, f.e.) if you do this, the times for the waypoints don't have to be exact, just the distance between the timepoints is used, timescale has NO influence, the realtime is used
CVARS:
cam_sabertrail - you can change the length(time) of the sabertrail, 40 is default
These you can set also in the menu (prefered):
-cam_preloadfiles - the cammod will preload all files which are needed lateron before the demo starts so there shouldn't be any user/join/connect/skin/model/change-lags
cam_mousespeed - for freeview
cam_speed - for freeview
cam_smooth - for freeview
cam_collision - freeview has collision
cam_dismember - enable/disable dismemberment on kills
cam_corpsedismember - enable/disable dismemberment on corpses
cam_rain - set rain and its intensity (0-1000)
cam_sun - enable/disable sun flare effect
cam_shownames - show the names of all players
cam_freeview - well, freeview
cam_lookat - lock the cameraview to the set entity (entitynumber 0-1024)(0-31 are players, look into the entitylist)
cam_drawpath - draws the waypoints & effects, if this is activated neither camerapathmovement nor cameraeffects nor cameracommands will start (like in editmode)
Menu:
-The mod shows demos of base,cammod and all nt folders in a list, by pressing the buttons above the list you can show/hide those folders
-doubleclick or play button starts the demo
-If you press DELETE the chosen demo will be removed (FOR EVER!!!)
-You can still type into your console "/demo" if there are multiple demos with the same name the list will show those so you can choose which one you really want (also ingame!!!)
Menu stuff:
Add Item:
-You can add a waypoint, a command or an effect here (explanation below)
Timeline:
-You see all the current waypoints/effects/commands
-by clicking on them they will be marked, by doubleclicking on them the view will be set so you can see them
-you can press DELETE to delete an item
-the progressbar below shows the current position in the demo (time)
Entitylist:
-You can see all entities and there entitynumbers
-You can filter which ones you want to see
-doubleclick to spectate the chosen entity
Demo:
-title is the demoname
-Timepoint is the position to fast-forward to by clicking on the fast-forward button
-clicking the triangle will set the timepoint cvar to the current time
-clicking the cross will open the eventcatcher which shows all kills(times are marked red) & chatmessages which happened or will happen in the demo, click accept to set the selected time to fast-forward value (timepoint)
-below you can set the camerapath file which you can load/save by clicking the buttons
-the list under that shows the camerapath files in your cammod/camerapaths folder (click to set)
Setup
-you can edit all cammod settings
Tips & Tricks:
- If you forgot adding a waypoint, it is no problem. You can just insert a waypoint f.e. between two others, by using a time which is between those
- As you can fly smoothly around, you can record your frags ofc with just flying by manually
- Editfields: endangles (making the cameras having an angle sideways) is a rly nice effect when using the rail system
Feel free to ask anything!
General questions plz to http://jk2ffa.freeforums.org/cam-mod-t348.html or simply here at jkhub.org
Coding and other special questions plz to inerevari@live.de
Bugs:
-The campath might disappear after the 10th cam point. I think you can continue however but your campath will be not visible anymore (some maximum is reached or so)
-As the rail system has no fixpoint it might turn wildly around so chose your waypoints wisely (or use cam_lookat 0-31 for clients or 32-x for items/entities):
to avoid that wild turnings the camera should not make turns over 180° as it might turn the other way around, same with endangles (but just try it out yourself)
NEW TUTORIAL:
220 downloads
(3 reviews)0 comments
Updated
.thumb.jpg.5dcb19c4514c273ccb909b62bb79a3e3.jpg)


-

-
For an extensive list of mods we recommend for Jedi Academy for new or old players.
-
Latest Activity
-
2
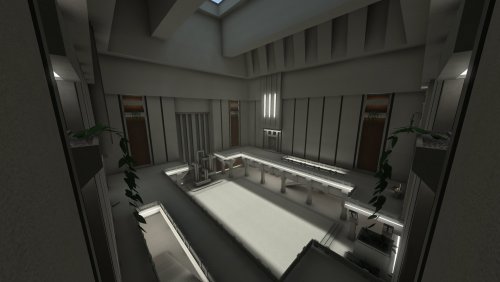
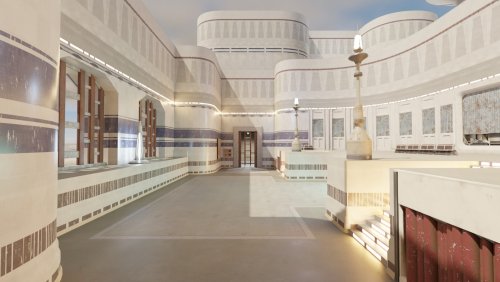
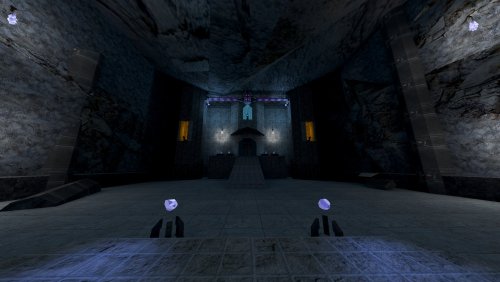
FFA1 to FFA3 Clientside Reskin
After trying this map, after I don’t even know how many years—I had no other choice but to actually sign up on this site just so I could leave a review about how awesome this skin is. For the first time, I actually managed to get to the top because, well, I could actually see something! And best of all, after years of running in sand, I finally get to experience Tatooine with no sand. And I hate sand. It’s coarse, rough, irritating—and it gets everywhere. I have no idea who this map maker is, but clearly she knows her craft. This review was completely unbiased and 100% honest. with no jokes, well done arty!- 1
-

-
2
FFA1 to FFA3 Clientside Reskin
So, there I was on Vjun.... tired of how hard it was to look or see anything. My life spiraling into chaos because of this. Wife yelling at me... kids are sad..... Then browsing JKHub... I see this.... this MASTER piece... I downloaded it. Next thing ya know... I'm nicer to my kids... The wife called me handsome.... I lost 10 lbs! Now I now longer spam the vote button for the next map any more... I even stopped abusing admin commands.... all thanks to this. Outstanding job!- 2
-
-
2
FFA1 to FFA3 Clientside Reskin
I love this Artemis, I can't stand with default ffa1 that is so dark, this is definitely much need!- 1
-
-
2
FFA1 to FFA3 Clientside Reskin
This is genuinely the only way to enjoy an experience on Vjun. Download this. You will not regret it. Things this map does: -Makes the floor consistently textured so it immediately feels like there is more space. -Adds additional lighting from the shaders that brightens the otherwise dark map. -Tatooine. -Makes me happy.- 2
-
-
2
FFA1 to FFA3 Clientside Reskin
After playing for so many years, this is the biggest mindfuck I've ever seen, but in a good way. Amazing!- 1
-
-
2
FFA1 to FFA3 Clientside Reskin

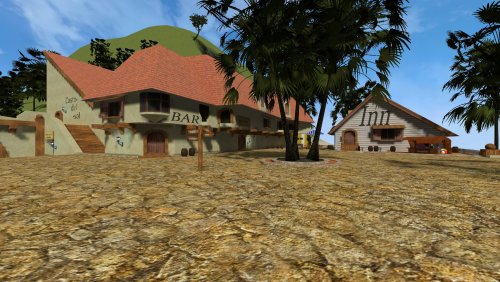
11 downloads
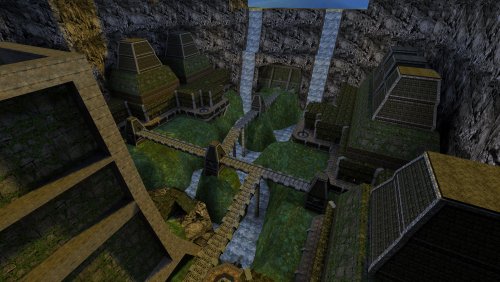
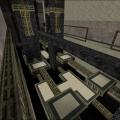
This is a reskin of the base FFA1 map to make it look similar to FFA3. I started on this two years ago solely because I couldn't see well on the original map due to its dark textures, and it's gotten shared around by the community over the past year or so, so I thought I'd give it a home here. Please note, this is client-side only. Servers do not need this file in order for you to use it. That said, servers that use sv_pure 1 will cause this mod to not work (you'll just see the original map) unless you are using EternalJK, TaystJK, or another client that has pure bypass. Since this has already been shared around, please make sure to remove any WIP versions if you already had it installed! -
-
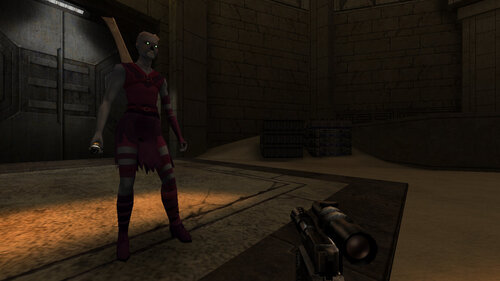
8
Helmetless Stormtrooper (Female)
Can you tell me more specific steps on how to install this mod? I don't know why I can't install it.
-
-
Download Statistics
-
Files3,666
-
Comments14,319
-
Reviews17,538
-