Omicron
-
Posts
1,195 -
Joined
Content Type
News Articles
Tutorials
Forums
Downloads
Everything posted by Omicron
-
Skinning Tutorial #5 - RGB on Transparent Textures This probably would have been more useful four years ago... But better late than never. Prerequisites: Basics of skinning 01: Getting a skin ingame Basics of skinning 03: Shaders Basics of skinning 04: RGB What we want: A texture with transparent parts (such as a hole in a cape) and areas which have RGB customisation. "Traditional" RGB: Apply RGB to entire texture with rgbGen lightingDiffuseEntity, then render the texture on top with transparency applied by blendFunc blend*. This allows the coloured components to show through. *This is shorthand for blendFunc GL_SRC_ALPHA GL_ONE_MINUS_SRC_ALPHA. The problem: If you need part of a texture to be transparent (ripped cape, see-through clothing, etc) then how do you selectively apply RGB to the areas you want to change colour? You somehow have to distinguish between which areas in the alpha channel should remain transparent, and which should be rendered and coloured. This will be less of a "how-to" and more like a guide. There are a couple of ways to achieve this. Using a mask: Pros: Works for all cases, simple. Cons: Requires at least two textures; bigger file size. The idea behind this is to split a texture into two: One with the parts we want to change colour, the other not. These will be referred to as "tint" and "mask". Tint image: In your image editing software, make a selection around the areas you want to have RGB customisation. Invert selection and delete/make fully transparent. Save as a new image. Mask image: Same as before, but instead delete the areas you want to have RGB (i.e. the selection you made). Shader: <path to texture> { { map <path to tint> blendFunc blend rgbGen lightingDiffuseEntity } { map <path to mask> blendFunc blend rgbGen lightingDiffuse } } In game: I recommend doing it this way. However, I have also written how to accomplish this using alphaFunc instead. Using alphaFunc: Pros: One texture required. Cons: Right faff to do, doesn't cover all use cases. I briefly touched on alphaFunc in an earlier tutorial. It has three possible paramaters: GT0, LT128 and GE128 (greater than, 0, less than 128 and greater or equal to 128). 0 and 128 are referring to the value in the alpha channel: 0 is transparent, 255 is opaque, everything else inbetween. So with that said, this method will only work if your texture has "hard", fully transparent areas; won't work on anything with a slight opacity. If your finished texture satisifies this constraint, then open it in your image editing software and make a layer mask from the alpha channel. The areas you want to be transparent should be black (#000000 ) in the mask. Make a selection of the parts you want to have RGB and colour them #7F7F7F (or any shade of grey > 0 and < 128 in brightness). Apply layer mask and save. Shader: <path to texture> { { map <path to texture> blendFunc GL_ONE GL_ZERO alphaFunc GT0 rgbGen lightingDiffuseEntity } { map <path to texture> blendFunc GL_ONE GL_ZERO alphaFunc GE128 rgbGen lightingDiffuse } } In game: The only reason I can see this second method being used is if you require a different blendFunc for your texture, such as forcing a specific RGB value and want to mitigate the lighting issue. Final note: This is somewhat of a niche problem so take your pick depending on your needs.
-
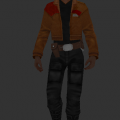
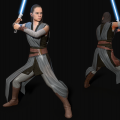
Skinning Tutorial #4 - RGB: change colours n stuff Every skin is better with RGB. Be sure to check out the basics of shaders tutorial before jumping into this. What this will cover: RGB basics Making an RGB texture Making an RGB shader Using the char_color_ codes What is RGB? "RGB" stands for "red, green, and blue"; the three primary colours which make up white light. Mixing various quantities of each will produce any colour in the visible spectrum. In Jedi Academy, skins can have customisable RGB features by using the char_color_red, char_color_green and char_color_blue console commands. The base Jaden models are examples of this. The most common way to achieve this is with a single texture containing transparent areas. These areas are what change colour, once the appropiate shader is made. Making your RGB texture: Ruxith made a tutorial for photoshop users here, if you use Gimp then the process will be very similar. Open up your desired texture in your image editing software. Doesn't matter what, but it MUST support alpha channels (basically not MS paint). Select the area you want to have RGB, make it greyscale and lighten it up if need be: My selection is scrappy cause I cba making a decent job, make sure you do! Add a layer mask, and in your selection fill it with black so it should look like this: Apply layer mask, export your texture as a png. Undoing the process to a texture: To undo this process on a texture, add layer mask > Transfer layer's alpha channel > delete the mask and you'll have a 'normal' texture. Making your RGB shader: It has two stages to it. The first is to load the texture and apply RGB to this layer. The second is loading the same texture on top (without RGB) and using the transparency shader (see previous tutorial) so the RGB elements from the lower layer are visible. If you remove the first stage, your skin will have gaping holes in game, due to the transparency shader (nothing is being drawn underneath). If you remove the second stage, your whole texture will be changing colour! The shader will look something like this: models/players/artsExample/rebel_pilot_torso { { map models/players/artsExample/rebel_pilot_torso blendFunc GL_ONE GL_ZERO rgbGen lightingDiffuseEntity } { map models/players/artsExample/rebel_pilot_torso blendFunc GL_SRC_ALPHA GL_ONE_MINUS_SRC_ALPHA rgbGen lightingDiffuse } } What is causing the RGB then? The answer is the rgbGen in the first stage, lightingDiffuseEntity. lightingDiffuse is the standard for any texture, add Entity to the end and it will now change colour! The second stage is a basic transparency shader to draw the texture on top of the texture with RGB applied. It's the same texture, but its having different things applied to it each time and then drawing it on top. Here is the RGB shader combined with the final shader from the previous tutorial: models/players/artsExample/rebel_pilot_torso { { map models/players/artsExample/rebel_pilot_torso blendFunc GL_ONE GL_ZERO rgbGen lightingDiffuseEntity } { map models/players/artsExample/rebel_pilot_torso blendFunc GL_SRC_ALPHA GL_ONE_MINUS_SRC_ALPHA rgbGen lightingDiffuse } { map models/players/artsExample/rebel_pilot_torso_spec blendFunc GL_SRC_ALPHA GL_ONE alphaGen lightingSpecular } { map models/players/artsExample/rebel_pilot_torso_glow blendFunc GL_ONE GL_ONE glow } } And ingame it looks like this: ... Which brings us onto: Using char_color_ codes: Main thing to remember is you can use any value between 0 and 255 inclusive. 0 = none, 255 = full. You can work out combinations for yourself or look online for "RGB colour mixers". Couple examples of the skin game: Bonus: Black To get black, make all your values greater than 255. Intuitively, setting them all to 0 should be black but for whatever reason in JKA, that makes the player white. Forced RGB In your shader, you can force a texture to use a specific RGB value. This is useful if you want to have many colour variants but don't want to include additional textures. Forced RGB Didn't cover this in the original post but it doesn't really warrent its own thread. In your shader, you can force a texture to use a specific RGB value. This is useful if you want to have many colour variants but don't want to include additional textures. How-to: In the stage where you apply the RGB, change rgbGen lightingDiffuseEntity to rgbGen const ( <R> <G> <B> ). The RGB values are decimals between 0 and 1. Colour Conversion: To convert your RGB values (0 - 255) into decimals in the range 0 to 1, divide each by 255. For example, if I wanted to force the colour , made up from RGB values 79 184 115, then I would do: 79/255 = 0.30980392156 185/255 = 0.72156862745 115/255 = 0.45098039215 and in my shader I would have rgbGen const ( 0.30980392156 0.72156862745 0.45098039215 ). Common conversions you're likely to use: 255 = 1 128 = 0.5 64 = 0.25 32 = 0.125 0 = 0 Shader changed to force the colour , or 150 20 255: models/players/artsExample/rebel_pilot_torso { { map models/players/artsExample/rebel_pilot_torso blendFunc GL_ONE GL_ZERO rgbGen const ( 0.58823529411 0.07843137254 1 ) } { . . . } However, the forced RGB texture will no longer react to light and remain at full brightness: Solution: After the RGB stage and before the "normal" texture stage, insert { map <path to texture> blendFunc GL_DST_COLOR GL_SRC_COLOR rgbGen lightingDiffuse } So the full shader now looks like: models/players/artsExample/rebel_pilot_torso { { map models/players/artsExample/rebel_pilot_torso blendFunc GL_ONE GL_ZERO rgbGen const ( 0.58823529411 0.07843137254 1 ) } { map models/players/artsExample/rebel_pilot_torso blendFunc GL_DST_COLOR GL_SRC_COLOR rgbGen lightingDiffuse } { map models/players/artsExample/rebel_pilot_torso blendFunc GL_SRC_ALPHA GL_ONE_MINUS_SRC_ALPHA rgbGen lightingDiffuse } { map models/players/artsExample/rebel_pilot_torso_spec blendFunc GL_SRC_ALPHA GL_ONE alphaGen lightingSpecular } { map models/players/artsExample/rebel_pilot_torso_glow blendFunc GL_ONE GL_ONE glow } } In game: Credits: Ruxith, for his tutorial on finding and creating RGB textures.
-
Skinning Tutorial #3 - Shaders Throwing shade (╯°□°)╯︵ ┻━┻ Prerequisites: Basics of skinning 01: Getting a skin ingame What this will cover: What a shader is Basic structure and making one Spec shader Glow shader Transparent Textures Putting it all together Closing notes What is a shader? Put simply, it is a set of instructions that tell game what to do with your texture. How it behaves, any effects it has, etc. By using shaders you can make skins far more interesting by applying various effects to give it the desired look. How do I make a shader? Shaders can be made with text editors or ShaderEd from the SDK. For this tutorial we'll be using notepad as that is generally all you'll need once you get the hang of it. So, first off you'll want to have a skin (or at least a texture) made so it's ready to get the shader. In your base folder where you've been working on your skin, make a folder called "shaders" (without quotation marks). In this folder make a new .txt file. The name doesn't matter (as long as it doesn't clash with any of the base shaders) but typically you'd choose the name of the skin. What's important is changing the file extension from .txt to .shader, otherwise it won't work. Open your shader in notepad and work can properly begin! (You can assign the extension .shader to be opened by notepad, Google how if you're unsure.) The typical format of a shader (from top to bottom) is as follows: File path of texture Opening brace { Opening brace { map <File path of texture> blendFunc FUNCTION rgbGen FUNCTION Closing brace } Closing brace } Now, you'll be asking yourself "wth have I just read?" It is best shown with an example following the exact format as above: models/players/artsExample/rebel_pilot_torso { { map models/players/artsExample/rebel_pilot_torso blendFunc GL_ONE GL_ZERO rgbGen lightingDiffuse } } Now I'll explain in turn what each line means and what is happening: models/players/artsExample/rebel_pilot_torso This is the texture we want to apply the shader to. The game needs to know where it is. File extension (.jpg, .tga, .png, etc) isn't needed. { Tells the game that anything after the brace is a shader for the texture just referenced. { Tells the game this is the start of a "stage". Each stage within your shader is telling the game what to do with your texture. For instance, one stage could tell the game to make parts of a texture transparent, the next tells the game to add glow on top. Each different "effect" is divided into separate stages. map models/players/artsExample/rebel_pilot_torso This is telling the game I want to map (use) this texture for the first "effect". I've split the next line up a bit. blendFunc Short for blend function. This tells the game how the texture should be mixed; how the pixels on it should behave with what is 'behind' it. A shader usually has multiple stages, in each stage an image is mapped, so you get 'layers' of images stacked on top of each other. BlendFunc tells the game how that particular texture should be mixed with the others below. GL_ONE GL_ZERO The simplest of blendFunc's. Tells the game to render the texture as-is. More on other blendFunc's later. Again, I've split up the next line. rgbGen This is stuff to do with colour (hence RGB). You can use rgbGen if you want to make a texture pulsate/fade/animated or have customisable RGB (char_color_ commands). lightingDiffuse Tells the game to make it react normal in light. This is what you'll be using mostly. } End of the stage. } End of the shader. Some small notes on the above: You may find people omit a blendFunc or rgbGen from their shaders. This will result in the default behavior of GL_ONE GL_ZERO and lightingDiffuse respectively. blendFunc and rgbGen are two examples of "stage specific keywords" i.e. can only be used within a stage. More on this later. The shader shown above won't make the skin appear any differently in game as it uses the default behaviour for any texture (default blendFunc and rgbGen values). Time to change that! Spec shader: Probably the most common shader used is specular (or spec) i.e. shine. Everything in real life will shine: It's light reflecting off a surface. A spec shader will make a texture react to lighting more vigorously than a texture without. To be more precise, the game will map a separate texture for its shine (called a spec map) which will be shown to various degrees of opacity depending on the lighting conditions the model is in. So, here is how to make one (continuing from previous example)! models/players/artsExample/rebel_pilot_torso { { map models/players/artsExample/rebel_pilot_torso blendFunc GL_ONE GL_ZERO rgbGen lightingDiffuse } { map models/players/artsExample/rebel_pilot_torso_spec blendFunc GL_SRC_ALPHA GL_ONE alphaGen lightingSpecular } } You'll notice that this shader has two stages, this is important. The game needs to first of all map the original texture, otherwise the game will be mapping the specular texture onto... Nothing. It follows the same format as before but this time the texture being mapped is our spec (named etc_spec). Secondly, there is a different blendFunc being used, GL_SRC_ALPHA GL_ONE, there is no rgbGen and there is an alphaGen, lightingSpecular. I'm not going to explain what the blendFunc and alphaGen are doing here, you can do further background reading in the Shader Manual (link at bottom) if you really want. This is just showing what a spec shader will look like. I'll now explain briefly how to make a specular map texture, but it is down to personal preference and what the base texture is (e.g. metal will typically be very shiny, but something like matte black paint will have far less of a shine to it). The main thing to remember is darker parts of the spec map = less visable in game (if the spec map was completely black, they'd be no shine at all) and white = more shine! You shouldn't generally have large parts of a texture completely black, keep a bit of detail visible. How to make a basic spec map: Open your texture in a graphics program. Increase levels/contrast. Either tone down the saturation or make it completely greyscale. Shouldn't be more saturated than before. Example: Diffuse: Specular: As you can see, I didn't want the jumpsuit to have much shine but I wanted the padding to have more. Lets see how it looks in game! Comparison below in another part of the map, with and without the spec shader respectfully: So you have now learned to make a basic spec shader, as simple as it may be it makes a HUGE difference to the skin. Glow shader: Make your skin shine brighter than my future. How to make a glow shader: models/players/artsExample/rebel_pilot_torso { { map models/players/artsExample/rebel_pilot_torso blendFunc GL_ONE GL_ZERO rgbGen lightingDiffuse } { map models/players/artsExample/rebel_pilot_torso_glow blendFunc GL_ONE GL_ONE glow } } GL_ONE GL_ONE makes darker pixels more transparent. If the texture was a simple white => black gradient going from left => right, then in game it would be completely opaque (and show up as white) on the far left and gradually fades to complete transparency on the right. With this in mind, you'll want your glow map to be completely black except the areas you want to glow. These bits should be extremely vibrant so they stand out in game. I've stuck with the same skin as before and I'll be making the clan logo glow. Below is the glow map I have made for it: And here is how it looks in game (no spec shader): Neat huh? It's worth noting that due to a lack of gpu on my computer (:<) you don't see the full glow effect, just a bright looking texture (but it does work, trust me!) Transparency shader: Yes, a shader is required for a texture to be transparent in game. A few things you'll need to know first about transparency: Also called alpha (or an alpha channel). If your texture has no alpha channel then it cannot be transparent. You can Google how to add alpha channels and make images transparent. Once you have alpha on your image and an area is transparent, you've pretty much done the hard work, but the .shader is equally important. If you load your texture in game and it doesn't have the correct shader, it'll be as if you have no alpha channel and anything you have made transparent will be shown. An example of this transparency issue is the rebel pilot I've been using throughout. You'll notice the base rebel pilot has a semi transparent visor while mine doesn't. This is due to the base pilot having a conventional transparency shader, which looks something like this: models/players/artsExample/googles { { map models/players/artsExample/googles blendFunc GL_SRC_ALPHA GL_ONE_MINUS_SRC_ALPHA depthWrite rgbGen lightingDiffuse } } You can also use blendFunc blend (exactly the same). Don't forget depthWrite, otherwise strange artefcats can occur. That's it! The above method is for conventional transparency but you can also use alphaFunc, like so: models/players/artsExample/googles { { map models/players/artsExample/googles blendFunc GL_ONE GL_ZERO rgbGen lightingDiffuse alphaFunc GE128 } } alphaFunc can use the following values; GT0, LT128, GE128 (Greater than 0, Less than 128, Greater than or equal to 128). These apply to the value of the pixel in the alpha channel. A fully black pixel (denoting full transparency) has value 0, while white (fully opaque) is 255. Shades of grey (so partially transparent) are any values in between. alphaFunc cannot be used if your texture requires varying levels of transparency - either has to be visible or not. Because of this, I recommend sticking with the blendFunc GL_SRC_ALPHA GL_ONE_MINUS_SRC_ALPHA. blendFunc GL_SRC_ALPHA GL_ONE_MINUS_SRC_ALPHA: alphaFunc GT0: alphaFunc LT128: alphaFunc GE128: As you can see, results are quite mixed. Stick with the blendFunc method as it's rare that you'll have to use alphaFunc. Now putting it all together! Thoughout this adventure, Mr. artsExample has gone a long way. We've given him a shiny spec, a glowing logo and fixed his googles so he is no longer blind. Putting all the shaders together now is dead easy! You still use the one .shader file, don't need a separate one for each shader your skin uses. models/players/artsExample/googles { { map models/players/artsExample/googles blendFunc GL_SRC_ALPHA GL_ONE_MINUS_SRC_ALPHA depthWrite rgbGen lightingDiffuse } } models/players/artsExample/rebel_pilot_torso { { map models/players/artsExample/rebel_pilot_torso blendFunc GL_ONE GL_ZERO rgbGen lightingDiffuse } { map models/players/artsExample/rebel_pilot_torso_spec blendFunc GL_SRC_ALPHA GL_ONE alphaGen lightingSpecular } { map models/players/artsExample/rebel_pilot_torso_glow blendFunc GL_ONE GL_ONE glow } } And here he is in game: But there's a LITTLE bit more... Remember how I mentioned stage specific keywords? As the name implies, they are specific to stages. You can also get general shader keywords. These apply to the whole shader for that texture as opposed to an individual stage. The only one you'll probably use is cull disable, but there are others which you can experiment with, such as deformVertexes. Read the manual if you're interested in what these do and how to make them. cull disable (can also use cull twosided) makes a texture appear on both sides of its surface. Some textures (most commonly skirts) will only show the texture on one side - when you look through the other side you see right through it as if nothing was there. cull disable fixes this. General shader keywords go between the first and second opening braces of the shader, like so: models/players/artsExample/rebel_pilot_torso { cull disable { map models/players/artsExample/rebel_pilot_torso blendFunc GL_ONE GL_ZERO rgbGen lightingDiffuse } { map models/players/etc... (This texture doesn't need it, it's just there to domonstrate where it goes in the shader.) And that's it! This has covered the basics of making shaders and some common examples of them. Get creating! Some final tips to remember: The majority of the time when making a shader you'll copypasta it from another skin you know has it, even if it's spec or glow. I usually do this if I can't be bothered writing from scratch as it saves a ton of typing. Experiment, experiment, experiment... Mess around with blendFunc's, see what happens if you swap x and y stages around, etc. This is how you will learn and understand what does what and get better at making you're own shaders! Shaders is all about problem solving and logical thinking: You'll ONLY get better with practice. If you roll a turd in glitter... You've still got a turd. Q3A Shader Manual: www.heppler.com/shader tl;dr: Learn yourself by looking at the shaders of other skins. It's what I did.
-
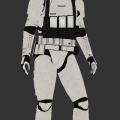
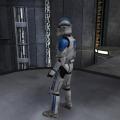
Skinning Tutorial #2 - Species Menu Support Independent head, torso and leg customisation. Prerequisites: Basics of skinning 01: Getting a skin ingame What this will cover: Why you may want this What you need Required .skin files Icons Colours Why you may want this: If your skin has many variations, you may consider adding species menu support. It allows you to mix and match all the different parts you've made to allow a greater variety, without cluttering the character menu. Couple great examples utilising this are Spanki's Sith Customisation and MUG's Base Customisation. I added it to Duster-Man's skin so he can choose from 117649 (49³) variations. What you need: Your skin must have multiple textures for the various parts you want to be customisable (e.g. two head variants). You'll also need to make icons for each part, but more on that later. Required .skin files: A normal skin is uses one .skin file to render in game. Skins in the species menu use three: One for the head, torso and legs. To make the head .skin file, open your model_default.skin and find all the lines which point to the head part of model, including the caps. Copy them into a new text document and save it as head_a1.skin. Here is how it would look for the reborn model: torso_cap_head_off,models/players/stormtrooper/caps.tga torso_cap_hips_off,models/players/stormtrooper/caps.tga torso_cap_l_arm_off,models/players/stormtrooper/caps.tga torso_cap_r_arm_off,models/players/stormtrooper/caps.tga head,models/players/reborn/forc_hood.tga head_cap_torso_off,models/players/stormtrooper/caps.tga head_eyes_mouth,models/players/imperial/mouth_eyes.tga head_face,models/players/reborn/forc_face.tga torso_cowelbase,models/players/reborn/forc_hood.tga Same again for the torso and leg parts, call them torso_a1.skin and lower_a1.skin respectively. Now that the head, torso and legs have their own .skin files, you can use these as a template for your remaining variations. Be sure to use a different number/letter for each new .skin file. (E.g. head_a1, head_a2, head_b1, etc). To keep things organised, I recommend matching the naming of head/torso/leg variations to the .skin name. For example, having all the default textures as _a1, blue as _b1, red as _c1, etc. Any sub variations can be denoted by changing the number. Icons: Once your .skin files are made, you need to make icons for the menu. Not much needs to be said here, other than the naming convention has to match with the .skin file. head_a1.skin goes with icon_head_a1.jpg, torso_b3.skin goes with icon_torso_b3.jpg, etc. Colours: The menu requires at least one colour variation (even if your skin doesn't have customisable RGB). To do this, make a new .txt document called playerchoice.txt. Add the following into it: *white { setcvar ui_char_color_red 255 setcvar ui_char_color_green 255 setcvar ui_char_color_blue 255 } Add more tint options: If your skin has customisable RGB then you can add more variations to your playerchoice.txt. *white { setcvar ui_char_color_red 255 setcvar ui_char_color_green 255 setcvar ui_char_color_blue 255 } gfx/menus/players/skin_example/tintchoice_turquoise { setcvar ui_char_color_red 0 setcvar ui_char_color_green 255 setcvar ui_char_color_blue 54 } The line before the { braces } can either be a *white or point directly to an image. If you want to add RGB elements to your skin, I have a tutorial on this too. Menu name: Once you have done that, you can pak up your pk3, put it ingame. If everything has been done properly, you should see your skin in the species menu with all the customisable parts: You will notice it has no name in the menu. To fix this, extract strings/English/MENUS.str from assets0. If you're playing the game in a different language, then use your relevant folder instead. You should see some developer comments at the top followed by: VERSION "1" CONFIG "W:\bin\stringed.cfg" FILENOTES "" Insert the following three lines after the above and before REFERENCE JEDI_HF: REFERENCE MODEL_NAME NOTES "For character menu" LANG_ENGLISH "Skin name" Change MODEL_NAME to the name of your skin's folder in models/players (e.g. reborn, imperial_worker, etc). Change "Skin Name" to what you you want the name to appear as in the menu. Keep the quotations. Add your modified MENUS.str file to your pk3 (following the same folder structure in assets0), and that's you done!
-

-
-
-
-
-
-
-
-
-

-

-
-
-
-
-
-

-
-
-
-