-
Posts
5,207 -
Joined
-
Last visited
Profile Information
-
Pronouns
Male
-
Location
Vero Beach, FL
-
Interests
Bass, programming.
-
Modding Interests
Coder
Scripter
General Modding -
Operating System
Windows
Contact Methods
-
Steam
eezstreet
Recent Profile Visitors
47,966 profile views
eezstreet's Achievements
-
iamthesenate liked a post in a topic: Learn How to Code
-
DarthValeria liked a post in a topic: AI Workshop
-
albertduchaj liked a post in a topic: Sub mod of JK2:E or merged?
-
Smoo liked a file: Fixed Jawa Sounds
-
Smoo liked a file: Fixed VChat
-
theNEMESiS liked a post in a topic: Run out of transform space for ghoul2 Models. Adjust MiniHeapSize in SV_Spawn Server
-
RancorSNP liked a post in a topic: Master list of NPC oddities
-
bigphil2695 liked a tutorial: shaderlist.txt and its purpose
-
NumberWan liked a post in a topic: Custom Sounds in JO
-
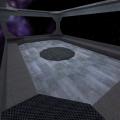
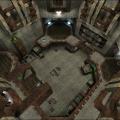
This tutorial will show you how to take a panoramic screenshot using a hidden feature of Singleplayer. Required Tools/Stuff A map that runs on singleplayer (any base map works really, but some custom ones might have issues) Photoshop or a program that can merge panoramic screenshots (I use Photoshop in this tutorial) If you're using QEffects (Pro or otherwise), you should set RenderFrame to 1 in your config, and turn off Motion Blur. Steps: Go ingame and find a suitable spot to take pictures from. Do not worry about removing the HUD, crosshairs, etc, since the game does that for you automatically. Enter in the console: /pano 1. The game will now dump the panoramic screenshots into your screenshots folder, using a naming scheme like "XpanoYY.jpg", with the X being the number of panoramas that you've done, and YY being the individual screenshot number. Close the game. If you have a tool other than Photoshop, find a tutorial to merge those screenshots together. Otherwise, continue with the tutorial. In Photoshop, open each screenshot, in order. For instance, 1pano01.jpg, 1pano02.jpg, etc. Go to File > Automate > Photomerge Choose Auto, Set "Use" to "Files", and hit the Browse button. Select all of the screenshots, again in order. Hit OK. Photoshop will then merge the photos together. This will take some time, and it may freeze photoshop entirely. Once you've got it done, you may need to do some cleaning up to make sure that it looks okay. Enjoy! Sharing it online I've found another alternative for doing this, it's on the site: http://www.dermandar.com Select 360 degree view. Select pictures from your screenshots folder (using steps above) Enjoy! Should take a minute or two, but I can confirm that this works well! Example Output
-
A common misconception amongst modders is that shaderlist.txt is used to tell which shaders are read out of /shaders/. This is not the case. Instead, shaderlist.txt is used for map compiling (q3map2) to determine which shaders to read off of for compiling. If you want to compile a map that uses custom shaders, you will need to add them to the shaderlist.txt file in order for the compiler to be able to use them. If you don't add them, most shaders simply wont work. To add a shader: find the name of the relevant shader file (generally located in the /shaders folder of the pk3 belonging to the map the shader is from) open base/shaders/shaderlist.txt add a new line with the name of the shader file you wish to add. (eg, if the shader file is called naboohills.shader add a line to the file sayingnaboohills Save the file and you are done
-
-
-
- 3 comments
-
- jkhub exclusive
- non star wars related
-
(and 1 more)
Tagged with:
-
- 13 comments
-
- JKHub Exclusive
- Star Wars Related
-
(and 4 more)
Tagged with:
-
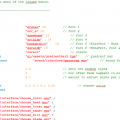
Fixed the screenshots being broken links, and replaced them with ones that conceal some of my personal info and point out the information better. I've also updated the "Most Common Errors" section as it wasn't up to my standards.


