Jump to content

MUG

Members
  • Posts

    902
  • Joined

  • Last visited

Everything posted by MUG

  1. MUG gives us his explanation on how to create your own skin of any kind! This guide will teach you how to make a custom skin and get it into the game. I will assume you know how to open a pk3 for this tutorial. 1. Getting all the files you will need and setting up a workspace A skin consists of several different elements which we need to include. If you want to use a custom model you should find everything you need in its pk3. If you want to use a base model, you will find what you need in base\assets1.pk3 As an example for this tutorial I will use "Rodian" from base. Create a new folder wherever you like (on the desktop, in my documents or whatever) and name it something like "workspace". Doesnt matter what you call it. Inside "workspace" make a folder called "base" Inside of that make a folder called "models" and inside that make a folder called "players" Now we can grab the model and texture files Go into assets1.pk3 (or the pk3 for the custom model if you are using one) and navigate to models\players. Then find the folder for the model you want (in my case "rodian") and copy it into the models\players folder we made earlier. We also need to copy over the folder called "_humanoid" from models\players in assets1. We wont include this in the finished pk3, it just allows us to use modview to look at how the skin will look when we are making it. If you are working on a jk2 model, you will need the jk2 humanoid folder which can be found in the game's assets or download it here. These are the most important files, I will cover how to add shaders, custom sounds, npc support and bot support etc further down. Our workspace should be looking like this: and we should have a load of files inside the modelname (rodain) folder: I will quickly outline what all of these types of files are. I'll give you more details on each further down. Texture files - (usually .jpg or .tga) These are the actual images that are wrapped around a model and are the main thing we are here to change. Icon files - (usually .jpg or .tga) These are the menu images for each different skin the model has. .skin files - These tell the game which textures to wrap around which part of the model. There is one for each team skin, the default skin (no team) and any extra varients added (usually for sp npcs) model.glm - This is the actual model which we wont be editing. We don't need to include it if we are using a base model, but we need it while we are working on it for modview to work. sounds.cfg - This tells the game which sound set to give the model. 2. Modview In order to look at the skin, we can use a program called modview. To load a model in modview: Start up modview hit open and navigate to the folder we created (workspace\base\models\players\rodian) open model.glm A couple of error messages will pop up telling you that modview couldn't find any shaders and a stormtrooper caps texture. Hit OK on those and you should be presented with this: If that didnt work check that you copied the _humanoid folder correctly and that all your folders are laid out propperly (base\models\players\WhateverModelYouAreEditing) You may also need to use the JK2 _humanoid folder instead if it's a jk2 model. You can get that here. You can click and drag about to rotate the model and right-click and drag to zoom. You can also use this button: to fit the camera to the model. The button to the right of this refreshes textures (if we have saved changes to any images since we opened modview it will update them) On the left there are a load of things of interest. The options under "skins available" allow us to switch to the different team skins and variants set up by the .skin files in our model's folder by double clicking them. "Sequences" lets us take a look at the model doing any of the game's player animations (these come from the _humanoid folder). You can use the play/stop/forward/back etc buttons on the tool bar too. 3. Editing The Textures This is probably the main thing you wanted to do. First thing you need to do is work out which textures you want to edit. Are you just making a new version of the default skin? Which parts do you need to change? It should be fairly evident which textures are what if you look at them. If you aren't sure which textures you need to edit, take a look in the relevant .skin file (ie model_default.skin to see what textures are used in the default no-team skin option) It will list all of the textures used. To edit the textures you need some kind of graphics editor. I use The GIMP which is free, most people prefer Photoshop. I'm not going to teach you how to get good at editing the images, there are tons of tutorials for that all over the net but I will walk you through the process: Open the texture you want to edit in your chosen graphics package Edit it however you like To see your changes, save the image then press this button in modview: https://jkhub.org/images/bR3s0.jpg Repeat for any other textures you want to edit. 4. Overwrite or Model Copy or .skin or what At the moment, our skin is set up to replace the default Rodian textures. This would mean that every rodian you see, be it another player, yourself or an NPC, will have your altered textures. If that is what you were aiming for then you are done! You don't need to worry about shaders, bot files etc, the game will just load the default ones from assets. All you need to do is remove the _humanoid folder and any files in the rodian folder that you didnt change and then throw the "models" folder into a pk3. If you are using a custom model, you will need to include all of the files you didn't change too, so all you need to delete is _humanoid There are several other options at this point, that allow you to not replace the default skin but create an edited copy of the model with a different skin which wont replace it. The simplest way is Making A New .Skin Option: This lets us just create an extra skin option for the existing model (much like the team skins) The base game doesnt display these on the profile menu (many mods such as japlus do) but they can always be accessed via the console with /model modelname/skinname (eg /model rodian/blue or /model rodian/mugsedit) The upside of doing things this way is that if someone doesn't have your skin installed, they will see you as the default skin for the model instead of kyle. The downside, is you have to use the base sounds and team skins. Alternatively there is Making A Renamed Copy of The Model which is the most common way that people make skins. This lets you change everything about the model (sounds, team skins, bot files, etc) The downside is that there are way more things you need to set up, the file size is bigger and you will look like kyle to anyone without the skin installed. Finally there is Making A Customisation Species which allows users to choose/mix up various head/torso/legs options for the model. You aren't limited to using head/torso/legs, if you like you can have something like bag colour selection on a wookie instead of leg options or things of that nature. This is the most complex and time consuming option to set up (especially if you want lots of parts to choose from) but is by far the most complete method. Players without the mod will see the model/default skin for the model if you are adding customisation options to a base model. If it's a custom model other players will see kyle. 4.1 Making A New .Skin Option Rename all of the textures you have changed (eg i'm changing "head.jpg" to "head_mugsedit.jpg" etc) Make a copy of "model_default.skin" and rename it to model_whatever (eg "model_mugsedit") Open the copy in notepad or notepad++ or whatever you like to use to edit text files. Replace every instance of the old name for a texture you have renamed with your new name (eg i need to replace every "head" with "head_mugsedit") ctrl+h is your friend here. See 5. for more info on .skin files. Save the file An easy way to test if this has worked is to load up the model in modview and select your skin on the left. If any parts look wrong or are missing (or indeed if your option isn't listed), check if you messed up that part of the .skin. Now you need to make an icon for the new .skin. (See 7. below) You will also need to make a shader if any of the textures you altered use one. See the Shaders section below. All you need to do now is remove _humanoid, any unaltered textures, all the original icons and .skin files. Basically delete everything that isn't renamed by you or made by you. Finally, copy all the contents of your "base" folder into a pk3. 4.2 Making A Renamed Copy of The Model For this method you do not need to rename any of the textures Rename the model's folder (eg rodian) to a name of your choice (eg mugsrodian) Open model_default.skin in notepad or any other plain text editor. Press ctrl+h to bring up the replace menu Replace all /OriginalModelFolderName/ with /NewModelFolderName/ (eg replace all /rodian/ with /mugsrodian/) include the "/" as sometimes you might replace something you shouldn't. Remove _humanoid and paste everything in the "base" folder into a pk3 You will need to make copies of any shaders relating to the model (see 7. below) as well as bot file npcs etc. 4.3 Making a Custom Species This lets you set up a character creation menu where you can select A torso, a head and a lower part from a list. This is pretty involved to do, so I would recommend reading the rest of the tutorial (especially sections 4.1 and 5) before you attempt it. You can still make a default skin, team skins and alternate skin options (as in 4.1) which can be selected from the menu as normal in addition to the character being on the custom menu. I would also suggest having a pk3 for a custom species model to look at as you read this. (here's one I made earlier. Take note that all the actual textures are base, so not included in the pk3) The way this works, is we create a .skin file for each "part" that the player can choose. Each part will need its own icon, so that it can be selected from the menu. The naming convention is that all head parts are named head_a1.skin head_a2.skin etc, torsos: torso_a1.skin and leg parts are lower_a1.skin. The matching icons should be icon_head_a1.jpg etc. The head .skin files should each only include the lines from the model_default that relate to the head, the torso .skins should only include the lines from the torso and the lower parts only including the lines for the legs. For example, if adding Species support to the Jedi (as in the link above) the lines should be divided like so: model_default hipsa,models/players/jedi/legs.tga hipsa_torso,models/players/jedi/torso.tga l_lega,models/players/jedi/boots_hips.tga l_lega_cap_hips_off,models/players/stormtrooper/caps.tga r_lega,models/players/jedi/boots_hips.tga r_lega_cap_hips_off,models/players/stormtrooper/caps.tga hipsa_cap_r_leg_off,models/players/stormtrooper/caps.tga hipsa_cap_l_leg_off,models/players/stormtrooper/caps.tga hips_cap_torso_off,models/players/stormtrooper/caps.tga torso,models/players/stormtrooper/caps.tga torsoa,models/players/jedi/torso.tga torsoa_l_shoulder,models/players/jedi/torso.tga torsoa_r_shoulder,models/players/jedi/torso.tga r_arma,models/players/jedi/torso.tga r_handa,models/players/jedi/basic_hand.tga r_handa_wrist,models/players/jedi/torso.tga r_handa_cap_r_arm_off,models/players/stormtrooper/caps.tga r_arma_cap_r_hand_off,models/players/stormtrooper/caps.tga r_arma_cap_torso_off,models/players/stormtrooper/caps.tga l_arma,models/players/jedi/torso.tga l_handa,models/players/jedi/basic_hand.tga l_handa_wrist,models/players/jedi/torso.tga l_handa_cap_l_arm_off,models/players/stormtrooper/caps.tga l_arma_cap_l_hand_off,models/players/stormtrooper/caps.tga l_arma_cap_torso_off,models/players/stormtrooper/caps.tga torsoa_cap_l_arm_off,models/players/stormtrooper/caps.tga torsoa_cap_r_arm_off,models/players/stormtrooper/caps.tga head,models/players/jedi/torso.tga heada,models/players/jedi/head_01.tga heada_face,models/players/jedi/face_01.tga heada_eyes_mouth,models/players/jedi/mouth_eyes.tga headb,*off headb_face,*off headb_eyes_mouth,*off head_cap_torso_off,models/players/stormtrooper/caps.tga torso_cap_head_off,models/players/stormtrooper/caps.tga torso_cap_hips_off,models/players/stormtrooper/caps.tga head_a1 head,models/players/jedi/torso.tga heada,models/players/jedi/head_01.tga heada_face,models/players/jedi/face_01.tga heada_eyes_mouth,models/players/jedi/mouth_eyes.tga headb,*off headb_face,*off headb_eyes_mouth,*off head_cap_torso_off,models/players/stormtrooper/caps.tga torso_a1 hipsa_torso,models/players/reborn/forc_torso.tga torso,models/players/stormtrooper/caps.tga torsoa,models/players/reborn/forc_torso.tga torsoa_l_shoulder,models/players/reborn/forc_torso.tga torsoa_r_shoulder,models/players/reborn/forc_torso.tga r_arma,models/players/reborn/forc_torso.tga r_handa,models/players/reborn/forc_hand.tga r_handa_wrist,models/players/reborn/forc_torso.tga r_handa_cap_r_arm_off,models/players/stormtrooper/caps.tga r_arma_cap_r_hand_off,models/players/stormtrooper/caps.tga r_arma_cap_torso_off,models/players/stormtrooper/caps.tga l_arma,models/players/reborn/forc_torso.tga l_handa,models/players/reborn/forc_hand.tga l_handa_wrist,models/players/reborn/forc_torso.tga l_handa_cap_l_arm_off,models/players/stormtrooper/caps.tga l_arma_cap_l_hand_off,models/players/stormtrooper/caps.tga l_arma_cap_torso_off,models/players/stormtrooper/caps.tga torsoa_cap_l_arm_off,models/players/stormtrooper/caps.tga torsoa_cap_r_arm_off,models/players/stormtrooper/caps.tga torso_cap_head_off,models/players/stormtrooper/caps.tga torso_cap_hips_off,models/players/stormtrooper/caps.tga lower_a1 hipsa,models/players/reborn/forc_legs.tga l_lega,models/players/reborn/forc_boots_hips.tga l_lega_cap_hips_off,models/players/stormtrooper/caps.tga r_lega,models/players/reborn/forc_boots_hips.tga r_lega_cap_hips_off,models/players/stormtrooper/caps.tga hipsa_cap_r_leg_off,models/players/stormtrooper/caps.tga hipsa_cap_l_leg_off,models/players/stormtrooper/caps.tga hips_cap_torso_off,models/players/stormtrooper/caps.tga Once you have decided how you wish to separate the parts, it's just a case of copying the .skin file, renaming it and editing it with the new texture paths for the alternate part options, then making the icons for each. Finally, all that is left to do is include a "playerchoice.txt" file. This allows you to set up colour options for the character, in combination with shaders. I never use this option as I always favoured adding more texture options instead. In order for the Species menu to work, you will need to include a defaulted version of playerchoice.txt however, even when not using the feature. Simply save a notepad file with these contents to the model folder: playerchoice.txt *white { setcvar ui_char_color_red 255 setcvar ui_char_color_green 255 setcvar ui_char_color_blue 255 } It is also vital to include a model_default.skin as not including it can cause crashes for some players when a player uses invalid part names. If you don't want model_default to be selectable from the menu, simply don't include the icon for it. And finally, remember to remove the humanoid folder before distributing your mod. 5. .Skin Files These tell the game which textures to wrap around which part of the character model. There is usually one for each of the team colours (model_red.skin and model_blue.skin) and one for the default skin (model_default.skin). Sometimes models have a few extra ones which are meant to be hidden (model_whatever.skin) but are usable via /model modelname/skinname. Some models also add hidden skins to the profile menu. .Skin files are also used for each selectable part in a Customisation Species (see 4.3 for details) A .skin file is just a list of each part of the model and the name of the texture to wrap around it. Presented like this: part_name,location/of/texture.tga (eg hips,models/players/rodian/l_leg.tga) Base .skins seem to always have .tga at the end of a line even if the texture isn't a tga, I'm pretty sure that it just makes no difference at all what extension you put at the end, so basically don't worry if it says tga and you used a jpg, it will still work. If you want to completely hide part of the model, instead of typing a texture name put: *off (eg head_tophat,*off) You will see models/players/stormtrooper/caps.tga several times on nearly ever model. This is the texture that is used for basically every "cap" in the game. A cap is, in layman's terms, the stump when limbs are dismembered. 6. Making Icons The easiest way is to copy "icon_default" and rename it to match your .skin file (eg "icon_mugsedit"). If you want to make your own icon, there are a few ways of doing it, you can either use a screenshot (click here for lots of useful commands for screenshots) or you can use these replica base icon backgrounds made by SiLink and a shot from modview to make an icon to match the base ones. 7. Shaders A shader is basically something the lets you apply various visual effects and a few other properties to textures. Often, a .skin file points to a shader instead of a texture. A single .shader file can contain multiple shaders. They can be opened in notepad and look like this: The highlighted part is one shader, named c3po_leg if we were to put models/players/protocol/c3po_leg in a .skin file, that would point to this. This particular shader takes a texture of the same name "models/players/protocol/c3po_leg" and applies a environment map to it (gfx/effects/chr_inv) and then also applies a specular map (models/players/protocol/c3po_leg_s), this basically makes it shiny. I wont go into how you can design shaders of your own here, I will just teach you how to fix up a shader to work for your modified skin. (ie if we had made a new version of the texture models/players/protocol/c3po_leg and wanted to give it the same shiny maps as the original one) Setting up the shaders for a reskin of a base model can be awkward as they hide nearly all of the character shaders in one file. Unsurprisingly, shaders can be found in the "shaders" folder. How to adjust a shader to work for renamed textures (if you have made new textures for a .skin file/Customisation Species) or for a renamed model: First we need to find the original shader we need to change. If we are using a custom model, there is probably just a .shader file in the shaders folder of it's pk3. Just copy paste it and give the copy a new name. If there are multiple .shader files, you probably need to copy and paste them all with new names. If we are using a base model this is a bit more awkward: open up base/assets1.pk3 go into /shaders and open players.shader This file lists a load of shaders from all the playermodels in the game. We need to track down all the relevant shader files for our model, and paste them into a new .shader file. go to your workspace and make a base/shaders folder if you don't already have one save a blank txt file as a .shader file (eg mugsrodian.shader) The name doesn't matter but keep it relevant so you know what it is. in players.shader hit ctrl+f and search for the original name of the model you are editing (eg players/rodian) This should bring you to the name line for a shader. If you don't find anything your model probably doesn't have any shaders so you can skip this entire section. If you do find a shader, copy the whole thing across to the blank .shader file we made Click find next and copy any other shaders you find. Here is how my mugsrodian.shader looked for the rodian models/players/rodian/fins { culltwosided { map models/players/rodian/fins blendFunc GL_SRC_ALPHA GL_ONE_MINUS_SRC_ALPHA rgbGen lightingDiffuse } } models/players/rodian/tint_torso { { map models/players/rodian/tint_torso rgbGen lightingDiffuseEntity } { map models/players/rodian/tint_torso blendFunc GL_SRC_ALPHA GL_ONE_MINUS_SRC_ALPHA detail rgbGen lightingDiffuse } } models/players/rodian/tint_l_leg { { map models/players/rodian/tint_l_leg rgbGen lightingDiffuseEntity } { map models/players/rodian/tint_l_leg blendFunc GL_SRC_ALPHA GL_ONE_MINUS_SRC_ALPHA detail rgbGen lightingDiffuse } } models/players/rodian/tint_boots_belt_vest { { map models/players/rodian/tint_boots_belt_vest rgbGen lightingDiffuseEntity } { map models/players/rodian/tint_boots_belt_vest blendFunc GL_SRC_ALPHA GL_ONE_MINUS_SRC_ALPHA rgbGen lightingDiffuse } } models/players/rodian/tint_l_boot { { map models/players/rodian/tint_l_boot rgbGen lightingDiffuseEntity } { map models/players/rodian/tint_l_boot blendFunc GL_SRC_ALPHA GL_ONE_MINUS_SRC_ALPHA detail rgbGen lightingDiffuse } } Now, we need to edit all of this (or the shader file(s) you copied if this is a custom model) to work for our skin. If you copied the entire model and renamed the folder this is easy: ctrl+h and replace all of the original model folder with your new name (eg replace models/players/rodian with models/players/mugsrodian) and save. Done. If you have copied and renamed textures this is a bit more trickey: Find any textures that you changed (either manually or with crtlf+f) and change them to their new name, in both the shader name and the shader code: Eg if I altered the rodian/fins texture and made a new rodian/mugsfinstexture, I need to change models/players/rodian/fins { culltwosided { map models/players/rodian/fins blendFunc GL_SRC_ALPHA GL_ONE_MINUS_SRC_ALPHA rgbGen lightingDiffuse } } to models/players/rodian/mugsfins { culltwosided { map models/players/rodian/mugsfins blendFunc GL_SRC_ALPHA GL_ONE_MINUS_SRC_ALPHA rgbGen lightingDiffuse } } If one of the shaders doesn't have any changed textures in it you can just delete that entire shader. You don't need it. If you want to know more about shaders I'm sure that someone intelligent will make a full tutorial about their deeper workings and I will link it here. 8. Sounds Choosing what sound bank your character uses is dead easy. In base/assets0.pk3 in the folder sound/chars there are a huge list of folders for different characters, you can look inside them and play the sounds to hear what they are like. Pick one of those folders. (alternatively you can use sounds from a custom model if you copy their sound folder into your workspace) To set it: Open the sounds.cfg file in your model's folder in workspace (if there isn't one there, create a new one in notepad) In the first line type the name of the sound folder you want on the second line type "m" or "f" for the character's gender (used in kill messages etc) eg: rodian1 m If you like, you can create your own sounds for your model either by recording your own or by getting some sounds from somewhere. All the sounds need to be in mono and need to be either .wav or .mp3. A free sound editor/recorder is . Then it is just a case of looking at all the sounds used in one of the default sound folders and creating your own folder laid out in the same way with new sound files named the same. If you don't include a sound, the default one will be used (the same sounds you hear when you don't have another player's skin)
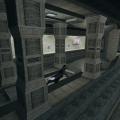
  2. Here is the end result we are aiming for: It lets us connect the top of a cylinder to other flat brushes, allowing us to make a round hole in a floor or similar. It doesnt matter if you are using a cylinder, or an inverted cylinder, this should work for both. Method: First off, because radiant doesnt know how to cap a cylinder, we need to make a bevel. Make a brush around the lower right corner of your cylinder: Now, go into the "Curve" menu, and select bevel: now cap it like so: Delete the bevel and the top part of the endcap: now move the bottom part up to the top and copy/paste/rotate it around: Add brushes if you need it to be wider:
×
×
  • Create New...