Omicron
-
Posts
1,195 -
Joined
Everything posted by Omicron
-
-
-
Skinning Tutorial #1 - The Basics Getting your first skin in game - from start to finish. What this will cover: Required software Some basics Setting up your working directory Making your skin Making your .pk3 Closing remarks Links Required software: Additional links will be at the end. You need: Graphics program Simple text editor like notepad ModView Pakscape (optional, makes navigating PK3 files easier) ... and patience. Some basics: .pk3 Files: Jedi Academy reads game data like maps, models, skins, etc from .pk3 files in the base and mod folders (e.g. japlus). These are just renamed .zip files - to open one you can change the file extension from .pk3 to .zip, or assign your file archiver to recognise the extension. Likewise, to create a .pk3, make a .zip and rename the extension. Easy! ModView: A utility to view your skin without having to load up JKA each time. It requires a very strict folder hierarchy in order to work, along with some additional files. Your working directory: Somewhere on your computer, make a folder where you can work on your skin. Remember how I mentioned ModView requires a strict folder directory? This is where it goes. Make a folder called "base". Inside that, "models" and in that, "players". ..\My Skin\base\models\players Next, go to your JKA base folder, located at: Windows: C:\Program Files (x86)\LucasArts\Star Wars Jedi Knight Jedi Academy\GameData\base Steam: <steam folder>/steamapps/common/Jedi Academy/GameData/base And open assets1.pk3, you should see something like this: Navigate to models/players and copy the _humanoid folder into the "players" folder you created earlier, along with the folder of the character you want to reskin. For this tutorial, I'll be reskinning rebel_pilot. Now, go to the model's folder you just copied over, and open model.glm with Modview, you should see this: If you get this error, then just press OK. For this error, select No, unless you don't mind it popping up every time you refresh the textures. Some basic navigation tips in Modview: Holding down left-click and moving your mouse rotates the model. Holding down right-click and moving your mouse forwards or backgrounds will zoom in and out of the model. Holding down alt + left-click and moving your mouse will shift where the model is on the scene. Now open the model_default.skin with notepad, and you should see something like this: hips,models/players/rebel_pilot/rebel_pilot_legs.tga hips_torso,models/players/rebel_pilot/rebel_pilot_torso.tga torso,models/players/rebel_pilot/rebel_pilot_torso.tga torso_l_shoulder,models/players/rebel_pilot/rebel_pilot_torso.tga torso_r_shoulder,models/players/rebel_pilot/rebel_pilot_torso.tga torso_cap_head_off,models/players/stormtrooper/caps.tga torso_cap_hips_off,models/players/stormtrooper/caps.tga torso_cap_l_arm_off,models/players/stormtrooper/caps.tga torso_cap_r_arm_off,models/players/stormtrooper/caps.tga head,models/players/rebel_pilot/rebel_pilot_head.tga head_teeth,models/players/rebel_pilot/teeth.tga head_face,models/players/rebel_pilot/face.tga head_helmet,models/players/rebel_pilot/helmet_chinstrap.tga head_goggles,models/players/rebel_pilot/googles.tga r_arm,models/players/rebel_pilot/rebel_pilot_torso.tga r_arm_cap_r_hand_off,models/players/stormtrooper/caps.tga r_arm_cap_torso_off,models/players/stormtrooper/caps.tga r_hand,models/players/rebel_pilot/rebel_pilot_hand.tga r_hand_inner_glove,models/players/rebel_pilot/rebel_pilot_hand.tga l_arm,models/players/rebel_pilot/rebel_pilot_torso.tga l_arm_cap_l_hand_off,models/players/stormtrooper/caps.tga l_arm_cap_torso_off,models/players/stormtrooper/caps.tga l_hand,models/players/rebel_pilot/rebel_pilot_hand.tga l_hand_inner_glove,models/players/rebel_pilot/rebel_pilot_hand.tga torso_frontpack,models/players/rebel_pilot/rebel_pilot_head.tga hips_cap_l_leg_off,models/players/stormtrooper/caps.tga hips_cap_torso_off,models/players/stormtrooper/caps.tga hips_cap_r_leg_off,models/players/stormtrooper/caps.tga l_leg,models/players/rebel_pilot/rebel_pilot_boots.tga l_leg_cap_hips_off,models/players/stormtrooper/caps.tga l_leg_boot_pipe8,models/players/rebel_pilot/rebel_pilot_legguard.jpg l_leg_boot_pipe7,models/players/rebel_pilot/rebel_pilot_legguard.jpg l_leg_boot_pipe6,models/players/rebel_pilot/rebel_pilot_legguard.jpg l_leg_boot_pipe5,models/players/rebel_pilot/rebel_pilot_legguard.jpg l_leg_boot_pipe4,models/players/rebel_pilot/rebel_pilot_legguard.jpg l_leg_boot_pipe3,models/players/trandoshan/foot.tga l_leg_boot_pipe2,models/players/rebel_pilot/rebel_pilot_legguard.jpg l_leg_boot_pipe1,models/players/rebel_pilot/rebel_pilot_legguard.jpg r_leg,models/players/rebel_pilot/rebel_pilot_boot_right.tga r_leg_cap_hips_off,models/players/stormtrooper/caps.tga This is showing you which textures go on which parts of the model. If you want to edit the torso, find the lines which reference the torso, and look at what texture(s) they point to. (This isn't strictly necessary, as you can usually look at the textures and work out where they are on the model.) Here we find it's pointing to rebel_pilot_torso.tga. The image itself isn't a .tga, but that's the extension commonly used in .skin files. Now for the fun part, doing the skinning! Making your skin: Open up the rebel_pilot_torso texture with the image editing software of your choice, and you should see this. For a first skin, you'll most likely want to do something simple, like adding a few colours, changing the hue, adding a logo, etc. Once you have edited the texture, you'll need to save it. If it's a jpg, you need to make sure progressive is turned off. So, you have made your texture and it has replaced the rebel_pilot_torso texture. Now to make ModView recognise the change. Go to the ModView teskbar and press the circled button marked as TEX: If it works, then your textures will have refreshed and you should see your edited texture on it! Now to make this its own separate species to the rebel_pilot. Close ModView, and open up model_default.skin again, you'll notice that all the directories say: models/players/rebel_pilot/ but a few say: models/players/stormtrooper/ Leave the stormtrooper lines alone, they point to the burn marks you see when your character gets chopped in half, decapitated, etc. Change "rebel_pilot" to whatever you want your skin's name to be. Do the same for model_red.skin and model_blue.skin, as they are team skins. Once you have done that, rename the rebel_pilot folder to the name you called your skin in the .skin files. Icons: Now for the icons, so it doesn't show up empty in the main menu. I highly recommend these JKA icon backgrounds by Ruxith. If you go for your own icon style, the dimensions have to be to the power of two on the x and y axes, most people go for 128x128 or 256x256 px. (The base icons are 128x128.) The icon name has to match up with the .skin file name: model_default.skin goes with icon_default.jpg, model_red.skin goes with icon_red.jpg, etc. Making your .pk3: Once you are happy with your skin, it's time to get it in game. Delete the _humanoid folder you copied over, then create a .zip archive of your models folder and its contents. Change the extension to pk3. Now put your pk3 in your game's base folder, boot up JKA, and if everything has been done correctly, it should be in your menu and work in game! If you have reached this far, then congratulations, you have successfully put your own custom skin into JKA! Closing remarks: All textures in the game (model textures, icons, gfx images, etc) have to be to the power of two on the x and y axes. (2, 4, 8, 16, ..., 1024, 2048, etc) Never modify the assets*.pk3's directly and put your own skins in them; make your own .pk3's. Software links: Paint.NET (free) GIMP (free) Photoshop ModView Pakscape
-
What Is The Most Fun You've Had In The Jk Games?
Omicron replied to Jango40's topic in Jedi Knight General Discussions
Fooling around on JKGalaxies a number of years ago with Rami, eez, Pande, Resuru... Good times. Definitely my fondest memory of JKA. -
Rob Halford's christmas album is
-
love christmas
-
u suk
-
stark is vgREAT MUI
-
base jka is only jk
-
ports suck make mods urself
-
Chrome "save as" dialog missing places bar
Omicron replied to Omicron's topic in General Tech Support
Fixed it. It was the ExplorerFrame.dll's which were causing the issue (used to change the back/forward button). Reverting back to the default ones fixed it. -
Chrome "save as" dialog missing places bar
Omicron replied to Omicron's topic in General Tech Support
Yeah, but reverting back to default still has the issue. It could be that when I was installing theme(s) I altered something I shouldn't, but I can't think what. -
Chrome "save as" dialog missing places bar
Omicron replied to Omicron's topic in General Tech Support
Found the same issue in notepadd++ but oddly saving seems fine. it seems that it's one type of dialog box having this issue globally. Something wrong with my explorer? -
Same issue with my laptop. Had this problem for a few weeks now at least, not sure how or when it started. haven't found anything online (so far) that helps. Not sure if this is a problem exclusive to Chrome as I don't have this issue when saving in other programs.
-
No. Kotf can fuck off.
-
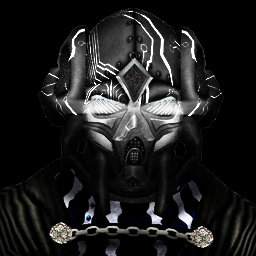
 That shader for the face... Wow. Fantastic work, great model and textures!
 -
He's stopped doing requests. Hilt does look pretty cool, but it probably wouldn't be noticed in game as it'd look too similar to luke's.
-
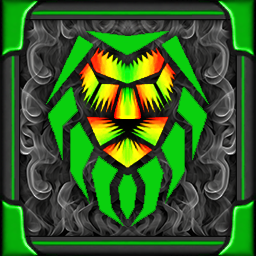
 Nothing wrong with people having their own take on it . Fairly sound reskin mate, nice work
- 4 comments
-
- 1
-

-
- Star Wars Related
- Male
- (and 2 more)
-
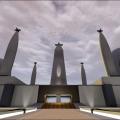
 Sweet. If I were to nitpick, it'd be that the spawn points added at the stage would be better if the player faced towards the centre of the map rather than outside. Apart from, great.
 -
Looks pretty. I like.
-
\m/
-
What's wrong with the robes? Haps' Anakin and Obi wan robes are probably the best there is.