
Tempust85
-
Posts
4,085 -
Joined
-
Last visited
Content Type
News Articles
Tutorials
Forums
Downloads
Everything posted by Tempust85
-
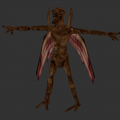
Getting a GLM to FBX: Noesis reads the GLA associated with the GLM from the same directory as the GLM. Be sure to place your GLA in the same directory as your GLM or you won't get any bone data/animation exported. If it's just a weapon GLM, then just import. - Open Noesis (4.0996 at least is required) - Load the GLM model you wish to convert to FBX - Export the GLM model to FBX As far as I'm aware, Noesis will export the legacy FBX version (2006 version?) which is importable by all versions of FBX plugins. Getting an GLM from FBX to game (Player Model): Noesis reads GLAs from the same directory as the export directory. Be sure to place the _humanoid GLA you wish to have your model work with in the same directory as your export directory or you won't get the proper bone ordering. To get texture names stored in the GLM, name your material in your 3D package like this: models/<yourmodelpath>/<yourtexture>.jpg - Create your model following the JKA model construction guidelines as normal, and weigh the model using minilogoguy18's ModTool rig or the included max file if you're using 3ds Max (8+). - Export your model to FBX - Open Noesis (4.0996 at least is required) - Load your FBX model - Export your FBX model to GLM with the following command in advanced options: JKA GLA: -scale 0.64 -g2exforceskeleton 53 -g2extagtrivertshift 4 -g2exorderbonesfromgla _humanoid.gla JK2 GLA: -scale 0.64 -g2exforceskeleton 72 -g2extagtrivertshift 4 -g2exorderbonesfromgla _humanoid.gla You may need to play around with the number for -g2extagtrivertshift to get your desired result. Getting an GLM from FBX to game (Weapon Model): To get texture names stored in the GLM, name your material in your 3D package like this: models/<yourmodelpath>/<yourtexture>.jpg - Create your model, and split it up so each object doesn't go over 1,000 verts - Create your tags with the name starting with * ( example *blade1 or *weapon ) - Export your model to FBX - Open Noesis (4.0996 at least is required) - Load your FBX model in Noesis - Export your FBX model to GLM with the following command in advanced options: -g2exanimname *default -g2exfakehierarchy -g2exforceskeleton 1 -g2exmodelname models/weapons2/<yourweapondirectory>/<yourweaponname>_w.glm If your tags are angled wierd in modview, use the "-g2extagtrivertshift" command like so: -g2exanimname *default -g2exfakehierarchy -g2exforceskeleton 1 -g2exmodelname models/weapons2/<yourweapondirectory>/<yourweaponname>_w.glm -g2extagtrivertshift 4 You may need to play around with the number for -g2extagtrivertshift to get your desired result. Notes: I've included a max (Max 8+ required to open) file that has the all the bones & tags you need. Everything is put into layers: Base Bones - Base bones that are shared between JKA & JK2 skeletons JK2-Specific Bones - Bones specific for JK2 model rigging. Unhide this layer if your model is for JK2, and hide "JKA-Specific Bones" layer. JKA-Specific Bones - Bones specific for JKA model rigging. Unhide this layer if your model is for JKA, and hide "JK2-Specific Bones" layer. Size Reference Mesh - Reference mesh used for proportions when creating your model. Isn't weighed. Tags - All the game tags. the "bolt_l_hand" is weighed to the "lhand" bone by default so if your model is for JKA, please re-weigh this tag to the "lhang_tag_bone". Rich has also provided a zip which contains batch files that allow you to include LODs: Noesis_JediAcademy.zip max8_JKA_JK2_skeleton.zip
-
Getting an MD3 to FBX: - Open Noesis (4.0996 at least is required) - Load the MD3 model into Noesis - Export the MD3 model to FBX As far as I'm aware, Noesis will export the legacy FBX version (2006 version?) which is importable by all versions of FBX plugins. Getting an MD3 from FBX to game: To get texture names stored in the MD3, name your material in your 3D package like this: models/<yourmodelpath>/<yourtexture>.jpg - Create your model, and split it up so each object doesn't go over 1,000 verts - Add any bone objects you want as tags and name them "tag_<name>" - Export the model + bone objects to FBX, any version should be ok - Open Noesis (4.0996 at least is required) - Load your FBX model into Noesis - Export your FBX model to MD3 with the following command in advanced options: -md3tbone <BoneName> <TagName> without the < > of course. Notes: Tags are created from bone objects in Max, not sure about other software. Rich said any skeletal joints. If you're wanting to create world weapon models (held in the player model's hand), then please check out my GLM tutorial.
-
About MTR Shaders An .MTR shader is a copy of the standard .SHADER. You only can use an .MTR shader IF there is a .SHADER shader of the same name already present, due to how it's loaded by the OpenGL 3 "rend2" renderer. This is to allow one shader (.SHADER) for the OpenGL 1 "vanilla" renderer, and a different shader (.MTR) for the OpenGL 3 "rend2" renderer. If you're only creating assets for OpenGL 3 "rend2" (which DF2 Mod only uses), then just use the .SHADER extension. Sun Shader Example ///////////////////////////////////////////////////////////////////////////////////////////////////////////////////// // // q3gl2_sun <red> <green> <blue> <intensity> <degrees> <elevation> <deviance> <shadow map scale> <ambient light scale> // // // red green blue : Color is described by three normalized RGB values. Color will be normalized to a 0.0 to // 1.0 range, so it doesn't matter what range you use. // // intensity : The brightness of the generated light. A value of 100 is a fairly bright sun. The intensity // of the light falls off with angle but not distance. // // degrees : The angle relative to the directions of the map file. A setting of 0 degrees equals east. // 90 is north, 180 is west and 270 is south. In the original version of Q3Map, non-axial values had a // tendency to produce jagged shadows. With Q3Map2, this problem is avoided with new options like lightmap // filtering, raytracing and penumbra effects. // // elevation : The distance, measured in degrees from the horizon (z value of zero in the map file). // An elevation of 0 is sunrise/sunset. An elevation of 90 is noon. // // deviance : The number of degrees for the half-shadow. General values up to 2 or 3 are acceptable. The real // sun has a solid angle of about half a degree. // // shadow map scale: range = 0.0-1.0. 0.0 = not visible, 1.0 = black shadows. // // ambient light scale: range = 0.0-1.0. // ///////////////////////////////////////////////////////////////////////////////////////////////////////////////////// // // q3gl2_tonemap <toneMapMin> <toneMapAvg> <toneMapMax <autoExposureMin> <autoExposureMax> // // // toneMapMin: Default = -8.0. Determines minimum lighting. // // toneMapAvg: Default = -2.0. Determines average lighting. // // toneMapMax: Default = 0.0. Determines maximum lighting. // // autoExposureMin: Default = -2.0. Determines minimum auto exposure. // // autoExposureMax: Default = 2.0. Determines maximum auto exposure. // ///////////////////////////////////////////////////////////////////////////////////////////////////////////////////// textures/skies/df2_katarn { qer_editorimage textures/skies/sky surfaceparm sky surfaceparm nomarks surfaceparm noimpact surfaceparm nolightmap q3gl2_sun 1.00 0.89 0.81 500 250 75 3 0.5 0.3 q3gl2_tonemap -8.0 -2.0 0.0 0.0 0.75 q3map_nolightmap skyParms textures/skies/sulon 512 - } . . Liquid Shader Example (GL2 exclusive, not supported in rend2) ///////////////////////////////////////////////////////////////////////////////////////////////////////////////////// // // liquid <color rgb > <fog color rgb> <height> <choppy> <speed> <frequency> <depth> // // // color: Set the waves color. // // fog color: Set the fog color. Use this to adjust the base color of the water. // // height: Set how intense the water's parallax effect is. // // choppy: Set how choppy the water is. // // speed: Set the speed of the water effects. // // frequency: Set the frequency of the water effects. // // depth: Range = 0.0 - 1.0. Set the fog density inside the water. 0.0 is not dense, 1.0 is dense. // ///////////////////////////////////////////////////////////////////////////////////////////////////////////////////// textures/DF2_water/water { qer_editorimage textures/system/water qer_trans 0.8 // transparency in Radiant surfaceparm nonsolid // surface is non solid surfaceparm nonopaque // surface is transparent surfaceparm trans // surface is transparent 2 surfaceparm water // water characteristics surfaceparm nomarks // water characteristics q3map_material Water // water characteristics 2 //liquid <color rgb> <fog color rgb> <height> <choppy> <speed> <frequency> <depth> liquid .80 .90 .60 .10 .19 .22 0.9 1.5 60 6.56 .3 } . . Texture Workflows There are two workflows for you to choose from: 1) Gloss - Uses diffuse map, + normal map + specular (RGB = specular, A = gloss) 2) Roughness - Uses albedo map + normal map + RMO (R = roughness, G = metalness, B = ambient occlusion) Use one workflow per stage - you cannot combine them in the same stage. You can for example, use the Gloss Workflow for shader stage 1 and use the Roughness Workflow for shader stage 2 just fine though. Workflow Roughness Size restrictions: RMO & Albedo textures must be the same size. See example below. Yes - Albedo = 1024x1024, Normal = 1024x1024, RMO = 1024x1024 No - Albedo = 1024x1024, Normal = 1024x1024, RMO = 512x512 Normal Map Setting: You can add a setting below your "normalMap" or "normalHeightMap" line to flip either the red or green channels of the normal map. You can also use this to increase the intensity of your normal map. Default setting is "normalScale 1 1". Examples: normalScale 1 -1 - this will invert the green channel, while leaving the red channel alone. normalScale 2 1 - this will increase the red channel's intensity, while leaving the green channel alone. normalScale -2 1 - this will invert the red channel and increase its intensity, while leaving the green channel alone. Glass Shader Example This shader will give you a transparent image, with cubemap reflections. This shader expects the use of TGA. You must use a "lightmap" in your shader, otherwise your glass will not display properly. Using the "roughness" workflow, the albedo texture's alpha channel contains the opacity: textures/DF2_glass/glass1 { qer_trans 0.5 { map textures/DF2_glass/glass1 blendFunc GL_ONE_MINUS_SRC_ALPHA GL_SRC_ALPHA normalMap textures/DF2_glass/glass1_N normalScale 1 -1 rmoMap textures/DF2_glass/glass1_RMO } { map $lightmap blendFunc GL_DST_COLOR GL_ZERO } } . Using the "gloss" workflow, the diffuse texture's alpha channel contains the opacity: textures/DF2_glass/glass1 { qer_trans 0.5 { map textures/DF2_glass/glass1 blendFunc GL_ONE_MINUS_SRC_ALPHA GL_SRC_ALPHA normalMap textures/DF2_glass/glass1_N normalScale 1 -1 specularMap textures/DF2_glass/glass1_SPEC } { map $lightmap blendFunc GL_DST_COLOR GL_ZERO } } . . Level & Model Texture Shader Examples: Normal (no height) Shader: Workflow Gloss: Diffuse, Normal, Specular, Lightmap. textures/DF2_cargo/wall_6 { { map textures/DF2_cargo/wall_6 normalMap textures/DF2_cargo/wall_6_n specularMap textures/DF2_cargo/wall_6_spec } { map $lightmap blendFunc GL_DST_COLOR GL_ZERO } } . Workflow Roughness: Albedo, Normal, RMO, Lightmap. textures/DF2_cargo/wall_6 { { map textures/DF2_cargo/wall_6 normalMap textures/DF2_cargo/wall_6_n rmoMap textures/DF2_cargo/wall_6_RMO } { map $lightmap blendFunc GL_DST_COLOR GL_ZERO } } . . Normal + Height Shader: Workflow Gloss: Diffuse, Normal + Height, Specular, Lightmap. textures/DF2_cargo/wall_6 { { map textures/DF2_cargo/wall_6 normalHeightMap textures/DF2_cargo/wall_6_nh specularMap textures/DF2_cargo/wall_6_spec } { map $lightmap blendFunc GL_DST_COLOR GL_ZERO } } . Workflow Roughness: Albedo, Normal + Height, RMO, Lightmap. textures/DF2_cargo/wall_6 { { map textures/DF2_cargo/wall_6 normalHeightMap textures/DF2_cargo/wall_6_nh rmoMap textures/DF2_cargo/wall_6_RMO } { map $lightmap blendFunc GL_DST_COLOR GL_ZERO } } . . Model Shader: Workflow Gloss: Diffuse, Normal, Specular. models/players/kyle/torso { { map models/players/kyle/torso rgbGen lightingdiffuse normalMap models/players/kyle/torso_n specularMap models/players/kyle/torso_spec } } . Workflow Roughness: Albedo, Normal, RMO. models/players/kyle/torso { { map models/players/kyle/torso rgbGen lightingdiffuse normalMap models/players/kyle/torso_n rmoMap models/players/kyle/torso_RMO } }
-
Keep a check on the DF2 mod section of the JKHub JKCommunity discord.
-

3ds Max Quake III MD3 Exporter Multi-Version Pack
Tempust85 reviewed Archangel35757's file in Utilities
-
-
-
-
-
-
-
-
-
-
-
-
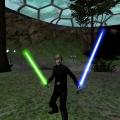
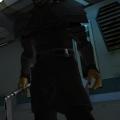
RAIDEN'S HIGH FREQUENCY BLADE (METAL GEAR RISING)
Tempust85 reviewed AshuraDX's file in Lightsabers & Melee
-
-
-
-
-

-