
 1st Place Winner Reepray with Rishi Station 2,
  2nd Place Winner chloe with Oasis Mesa, and
  3rd Place Winner Artemis with TFFA Brutal! Amazing submissions by everyone!


2019 DISCLAIMER: This tutorial was not written in 2018, but in 2014. This should be considered outdated material (and probably contains shady artistic and technical advice). I recommend looking into how to do this with Blender nowadays.
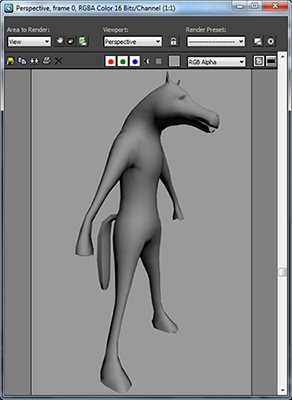
Welcome, welcome. In this tutorial, I will teach you some things to keep in mind when modeling for Jedi Knight, and how to get your model working in game using 3DS Max. I'm going to let you follow along as I create the character Horseton Legged and make him work in-game, which should give you some input on both human concerns and animal concerns in modeling land. I must admit I haven't been to all the corners of modeling land, and certainly not the sewers. Some of the most daunting tasks of rigging your character is automated and easy-made by some tools, and the theory behind that will not be covered in this tutorial, but can be found in others... just to save you the trouble – and myself, as I don't know what I'd do without them. We'll get there. This tutorial will be divided into different spoilers, sections with different aspects of the process depending on what you need to do. You will see that some parts are absolutely necessary to get it in game, but that there are also optional parts which might not be relevant for you. This way, you can focus on one thing at a time or select what you need. Spoilers also serve as a tool to keep your mind and milt intact, so that the tutorial won't feel like it's 20 meters long. Now, to begin.
What you will definitely need for this tutorial:
- A 3DS Max version with an available XSI exporter (2010 plugins work on 2011).
- JK2 Editing Tools v1.0
- JK2 Editing Tools v2.0
- Psyk0Sith's hierarchy auto-linker.
- Psyk0Sith's prepared JA skeleton (even if you're modeling for JK2)
- Patience to try things more than one time.
What you can have for this tutorial:
- Other modeling softwares for the modeling itself.
- Photoshop and/or reference images.
- Zbrush (very handy for texturing seamlessly, and making normal maps for your character)
- Other tutorials, such as Tim Appleby's, or others on the subject. However, some things have changed since the early 2000's, and if I'm doing this right, you should be able to make it through the tutorial you're currently reading.
About these tools:
The JK2/JA editing tools
The JK2/JA editing tools contain various files handy for modding the game in many, many different... ways. Install the v1.0 before the v2.0. Install it into your game's GameData folder, where there now will be created some folders, among them the folder Tools. This folder contains some important tools that will be used later, when your model becomes a baby. For my part, I hope it will become a horse man.
The modeling program
Plug-ins are being worked on for 3DS Max for exporting XSI. I've been using 3DS Max 2011 and the list of available exporters is likely to expand after the time of writing. Whether you're using 3ds max, Maya, Zbrush or Gmax (or any other common 3D software) for modeling doesn't really matter, as long as you can make it look the way you want and with a reasonable poly count. 3DS max and Gmax is much the same, but Gmax is much slimmer, and you will nonetheless be forced to use 3DS max for the formal ceremony at the end, anyway (in the scope of this tutorial. You can use other programs). Even though this tutorial covers some modeling, roughly, it assumes you know how to control the spaceship. Of course, not everyone's familiar with parallel parking in space, so I will do my best to make the tutorial manageable, for people who's still learning the program – like myself!
The JA Skeleton
Download this 3DS Max project file, and put it somewhere you can find it the next time you want to make a model as well. It's a skeleton tampered with by Psyk0Sith, ready to hatch. This means modeling suddenly becomes a whole lot more not overwhelming and life threatening, because he has taken the hit for us. It's Kyle's skeleton, and the tags are already weighted to the skeleton. Tags are a sort of reference points for the game, for example a tag to specify where the saber will be held. Unfortunately, you can't change this, and you must not change anything at all in the skeleton, because it's like changing the laws of physics, or changing the past so that you never got born. Just make sure to always undo any changes you might do to the skeleton.
The Hierarchy Autolinker
Same as the JA skeleton, download it and place it where you will find it again. This handy tool will be indeed handy when we've finished the model, segmented it and renamed the segmented parts. It's a script that links the hierarchy for you, if you've named the parts correctly. Less work, less knowledge and less tutorial.
1. Setting up the work path
I never liked making folders directly on the C drive, but it's quite harmless. We need to make a folder on the C drive, called base. Next, proceed to make the folders models/players/YourModelNameHere.
In my case, it looks like C:\base\models\players\Horseton_Legged.
Next, you need to make the folder C:\base\models\players\_humanoid. You need to find a file called _humanoid.gla and place it in there. This is the animation file that will be used for your model (obligatory if modeling for MP. See other tutorials for making your own .gla). To find this file, go to your game's base folder, open assets0.pk3 with an archive editor such as 7-Zip or WinRar, and find the models/players/_humanoid folder. Here are two files, the file you need, and a file called animation.cfg, which you don't need. Copy the _humanoid.gla and place it inside C:\base\models\players\_humanoid.
Since you've installed the JK2/JA Editing tools, there should be a Tools folder in your GameData folder. Inside that folder, copy the files Assimilate.exe and carcass.exe and paste them into C:\base\models\players\_humanoid, together with the _humanoid.gla file.
Assimilate.exe is the program that will make the compiler carcass.exe comprehensible. So carcass.exe will only be used by Assimilate, not by us, the way you use your remote control to make robots bring you a clean pair of socks!
So, we must make Assimilate.exe use carcass.exe as the compiler. Open Assimilate.exe, go to Edit > Preferences and change the «Compiler:» line to C:\base\models\players\_humanoid\carcass.exe. Or just browse to it. Alright, that's it for setting up the work path! You will come back to these folders near the end when you've finished your model. Now it's time to start plotting for your model...
2. Planning the model
I'm going to cover some ground on modeling with reference pictures. This will only be relevant if you're building your model from scratch, perhaps from your own imagination. After all, I'm showing the process in which I make Horseton work in-game. Before you start modeling, it's common to use two reference pictures as guides. One showing the front, and one showing one of the sides (let's stick with the left side). What I'm going to do, is to draw my own reference picture, because I don't have any reference pictures of Horseton, because I've made him up. If you already have reference pictures of what you're going to model, there's still an important thing to take into consideration first. If you don't intend to use reference pictures, the skeleton will serve as a reference anyway. Now, the people who are going to use reference pictures, follow along!
Reference pictures
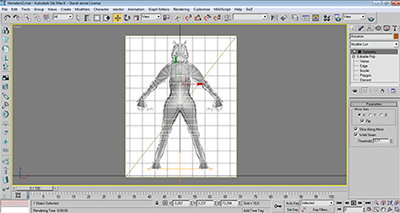
Now, either you draw your own reference pictures, or you already have some. Either way, there are still things that must, or should be done, for both of these options. It must be made to fit the JA skeleton in proportions. We should take screenshots of the front and left viewport of the skeleton, and fit the reference around the skeleton. That way, when you make the model, you'll be sure the arms and legs eventually come out where they should be and not out of some alien mutant limb because you got the proportions wrong.
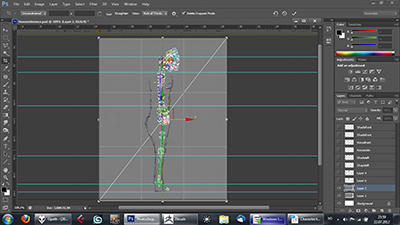
So, load up 3DS Max, and open JK3 Skeleton.max. It might give you the message «Obsolete data format found – Please resave file.» It's just being jealous, but it has a point. Save your file as a new .max file, whatever you'd like to call it. I decided to call it Horseton1.max. This is because we're going to save many times, and it's nice to save to new .max files (Horseton2, Horseton3 etc) after every major step. That way you can go back to an earlier save if you have to redo a specific major step. For now, avoid moving around in the viewports, as we're going to do a dirty trick to line up the reference.
Now, the first thing to do when you've saved your file, is to change the bottom right viewport that says «Camera01» to «Perspective». Now, we're going to take screenshots of the front viewport and the left viewport. But first we're going to make planes that our reference will be attached to. Planes are flat one sided surfaces. So...
Step 1: Select the Front viewport (top right), and scroll one step out, or until you can see the entire skeleton. But keep track of how many scrolls you do.
Step 2: Select Plane (assuming you're still in the Create menu), and create a plane that covers the entire skeleton, with enough space on the sides to cover the shape of your model. Size doesn't matter, but it should room your entire reference. You can resize and move this plane immediately after creating it (otherwise, in the Modify panel). Change Length- and Width segs to 1. When you've got the size right, click Alt + W to go fullscreen in that viewport.
Step 3: Take a screenshot (PrtSc or Fn + PrtSc on some computers).
Step 4: Paste it into a new Photoshop file.
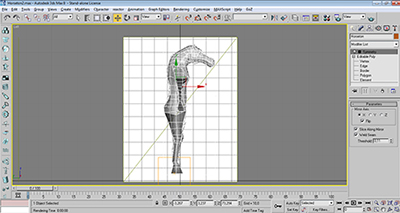
Step 5: Back in Max, select the top viewport, select the plane, and hold SHIFT and use the rotate tool to rotate it 90 degrees (use angle snaps or type it in manually). When you release the mouse button, make a copy of the plane and click OK.
Step 6: Repeat the process you did for screenshooting the front viewport, just with the left one. Make sure you make the same amount of scrolls outwards as you did with the front viewport, to make the sizes the same. Also, selecting the plane before taking the screenshot makes it white and more visible. Paste it into the same Photoshop file.
You now have two layers, each containing a same-sized picture of a same-sized plane, which will give us a same-sized reference for the front and left viewport. If they're not completely lined up, just change the layer opacity so that you can see both, and use the Move tool and make them line up as close as you can.
Now, if you already have the reference you want to use, the next step would be to paste it over, and probably use the [CTRL T – right click – Warp] tool to make it fit around, and thus look really weird, but it might be what you need for reference. Use the layer opacity to see if your reference lines up both on front and left, after you've pasted your front and left reference. Also use the ruler tool, to see if the different parts match up in your reference. It can be tricky, but unless you have some reference made to match up front and left, tricky is what it is. It's just reference anyway, you won't be doomed, because you can change the model as you like. But it's a nice thing to have to get the overall shape right and natural, or to even get tiny details looking natural. When you're done with this, look for the «NEXT STEP» below the boring draw-it-yourself nonsense.
If you're about to draw your own reference, there's a few more things we could do before starting that. The rulers in Photoshop can be found by default as a frame around your project. Just click CTRL + R if it's not there. Now we can set some key points, that definitely need to match up, before we start drawing. Just drag out rulers to for example the top of the head, eyes, nose, chin, neck and so on. It should be the same on both your front and side reference now, and that will make it easier to draw the two references together.
Here's what my rulers look like:
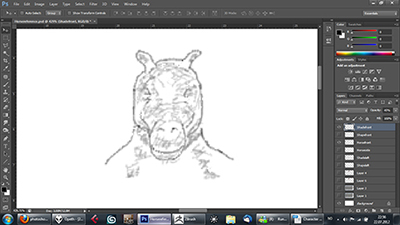
Now it's time for me to draw my reference. I will begin with the side. Also when you start getting a good side reference, you will have more ruler points to set out, to match up details you've placed in the side reference, to the front reference.
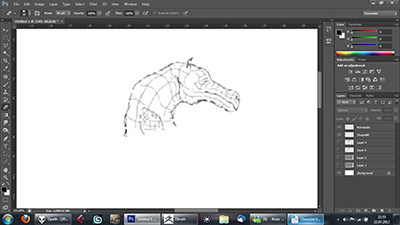
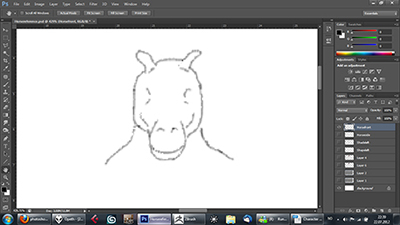
I begin with drawing an outline of the face. Then if you want, however not necessary, you can aid yourself with drawing some overall «shape feel», which can make it easier to get more accurate shapes in the modeling process (second image).
Also, if you wish, you could supply with some rough shading, to further define the shape. Don't make it too dominant though, as the outline shapes from the left and front view will be the most important anyway.
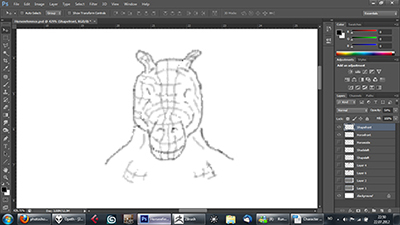
Here's the finished left outline, and some extra shape defining.
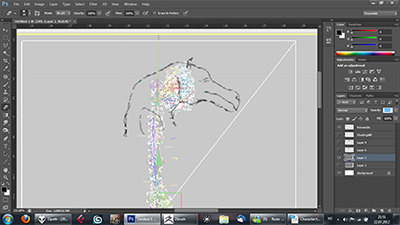
Now I will do the front reference. It's important now to match up with the side. Before drawing on top of where you have rulers, make sure snapping is turned off (or else your brush will snap to the ruler, and ruin your lines). You can do this by clicking View > Snap and uncheck it. For the head's outline I have something like this:
Don't worry too much about getting the left and right sides identical. Like I will explain later in the tutorial, you will make the foundations of the model by only modeling one half of the model, and using a symmetry modifier to mirror it over to the other side. So as long as one of the sides (preferrably the left one for me) is alright, it's alright. Similarly, I'll add some more shape definition.
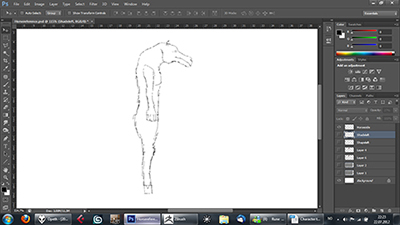
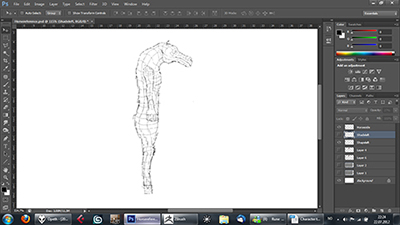
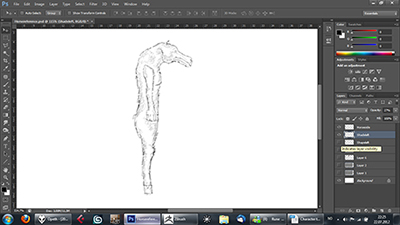
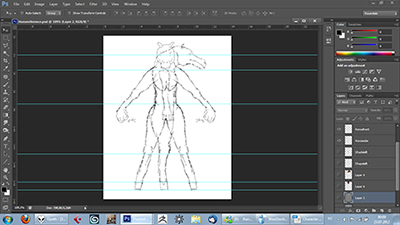
Outlined front. Mirrored one side over to the other, matched up quite well with the side, and skeleton. Now remains only the shape defining if you want (picture 2). It may look a bit compressed, but it was what I could do with the restriction of the skeleton. That's it for the reference drawing!
NEXT STEP:
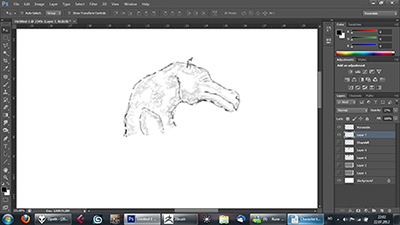
Now, whether you've pasted reference or if you've drawn reference yourself, the next step is to crop the picture to the size of the planes. If you've drawn your own reference, you might have several versions to pick between, like I do (outlined, shaded, wired etc), and if you save them all, it shouldn't be much work to quickly switch back and forth in 3DS Max, or any other modeling program you're using.
Make the layers with the skeleton reference visible so that you can clearly see the edges of that plane we made in 3DS Max. Hopefully the plane edges are so closely matched up in the left and front reference that it doesn't matter too much when you crop only one of them. Anyway, select either the front or the side skeleton reference, and draw a crop around the edges of the plane. Before you crop, make sure both the front and the side (drawn or pasted) reference fits into the crop field (haha!) and lines up. After you've made the crop, you're free to hide the skeleton layers, and bring up the layers you want to see in your 3DS Max reference. (TIP: Holding shift and moving with the Move tool in Photoshop, moves things in straight angles.)
Here's Horseton cropped exactly to the size of the planes we set up in 3DS Max, with both layers visible. However, when saving your reference, just save JPG images of the layers you want visible, and like I've done, you can choose whether to save with outlines, or with shades or just save all of the versions.
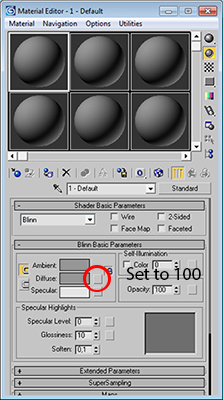
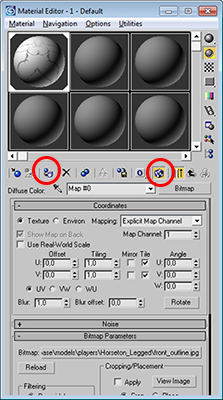
The last thing to do now, is to set up the reference in 3DS Max. Open your project with the planes we set up earlier. In the front viewport, select the front plane and click M (Material Editor). It should bring up a window like the one you see in this picture. In the Blinn Basic Parameters section, set Self-Illumination and then click the blank button to the right of the gray field where it says «Diffuse» (picture 1). Select Bitmap from the next menu, and browse to your front reference and select it. After you've done that, you're back to the window here, and you must select «Assign material to selection» and «Show map in viewport» (picture 2)
When you've done this, the reference should show up on your plane, stretched to fit. Even though it's stretched to fit, it won't really be stretched since we've cropped our images to the size of the plane.
Repeat the process for the left viewport plane, with the left reference picture. Before you do it though, select a new material (one of those balls) in the top of the Material Editor. But the pictures don't show up in the front and left viewport! No problem, just right click on where it says «Front» in the front viewport, and select Smooth + Highlights. Do the same for the left viewport, and I think it should already be default for the perspective viewport.
If you take a look around in the perspective viewport now, you can see that the planes are set up in a cross. Also, it's in the middle of where our model is going to be. So we'll simply move them further away. Select the front plane, and drag it further back in the left viewport, to make space for our model. Drag the left viewport to the right so that it doesn't get infront of our model when watching in the left viewport.
Select both of the planes now, and right click on one of them and click Properties. In the next window, check off «Show Frozen in Gray», and click OK. With the planes still selected, right click again and select Freeze Selection. They will now be frozen, and unselectable, so that they won't interfere with your modeling, and most importantly, they won't accidentally move, something which could have unthinkable consequences! That's it, save, and you're ready to start modeling!
3. Modeling
Finally, after setting up references in the viewports, we're ready to start shaping our model. A very common way to model, is to only model one half, and use a mirror modifier to make everything you do on the left side, also show up on the right side. That's simply how symmetrical we humans and animals tend to be. Of course you can make changes afterwards, on only one of the sides, and so on, but let's first just make this model with symmetry on.
If you don't know how to model, I can't teach you the basics, otherwise this tutorial would be ridiculously long. There are, however, plenty and plenty of good tutorials on it. I recommend you look in to edge loop modeling, for example.
Polycount
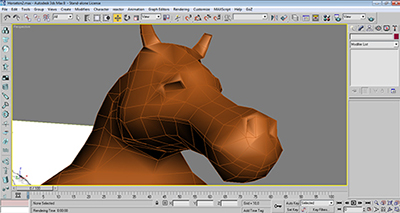
A very important thing to keep in mind, is to keep this a low poly model. No JK2 or JA models are very stuffed with faces really, so you should be conscious about how much geometry you add into your model. We can take a look at Kyle's GLM file.
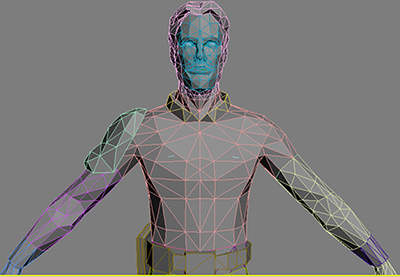
When the character is compiled, quad faces (4 vertex points), get divided into triangles. That means that the polycount you have in quads, will probably be around doubled after compiling. Keeping that in mind, we can see a bit how this model might have been created. It was (seemingly) built mainly with quads, and I'll highlight some of them, to give you an idea of the poly level.
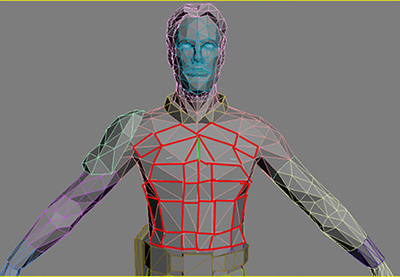
The flat quads, have been split into triangles by the compiler. Or, they've split the quads into triangles themselves before compile and done extra tweaking to the shape. But don't worry about this if this is your first model. Regardless of quads and triangles, you can begin to see the standards for Kyle's model, and that could be a place to set the bar. Kyle's model has something around 2800 faces after compiling. The maximum vertex count per object, for each segment that is, is 500. If you go above that, you'll get a warning: «WARNING: surface can't use shadows». Pressing 7 in 3DS Max gives you the current selection's polycount.
Shaping your model
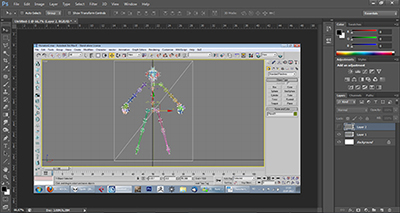
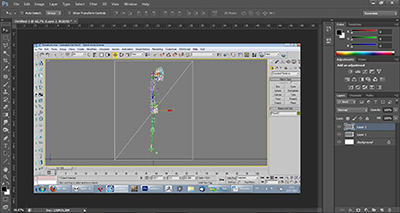
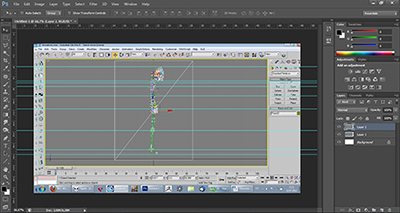
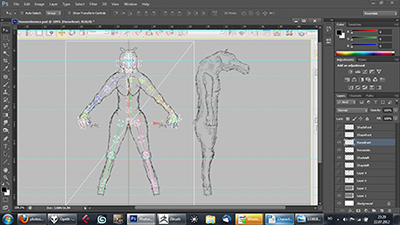
Alright, enough with all the boring instructions, let's try to begin! I'm going to go for edge loop modeling from a cylinder with just 5-6 sides for starters, and I'm beginning with the upper and lower body, and wait a bit before I model the head. Before we begin, it would be the best to hide the skeleton. Pressing CTRL + A at this point should select the entire skeleton and nothing else, assuming you froze the reference planes earlier. If not, you can freeze them now. Once you've selected the entire skeleton, right click and Hide Selection. Now we can use the reference only, and not be bothered by the skeleton. Or if you're a hardcore non-referencer, you'd keep the skeleton visible of course.
Now it's time to use what you already know about modeling and start shaping. Pressing ALT + X makes your model transparent so you can see the reference behind it.
Joints and animation in mind
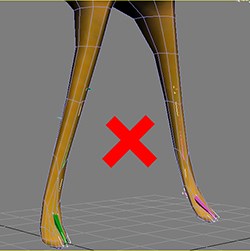
When creating characters that are going to animate, you should think about where the character is going to bend and deform. You should have a low poly model, but the character probably needs more geometry around the joints. This is, for example, the knees. When you crouch in game, there needs to be some extra geometry that can fold along with the sharp angle. A mistake I did with my first model, was thinking «this whole leg looks good, with just a few segments». But in game, when crouching, there's really just one segment for the thigh, and one for the leg, leaving a hollow tube visible where the knee bends. Same goes for the elbows, shoulders and hips. Add some more cuts to support the deformation that will happen when your model animates.
Here's how joints should not look (picture 1). The knee is simply one single cut.
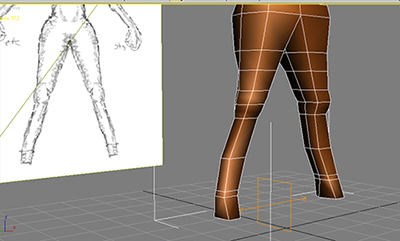
I've decided to go for three loops defining the knee (picture 2). Hopefully that will give enough resolution to bend convincingly. Keep in mind the quads will be split into triangles, thus giving more faces. Also you can look at Kyle's GLM file to see how they did it. Something to also keep in mind though, is that characters such as Kyle and other NPCs from the singleplayer campaign has a lot more animation (for single player) than the animations that are in multiplayer. No multiplayer character really turns their head a lot to the sides or has facial expressions, for example (unless you have a modification). So if you're making a character strictly for multiplayer, you probably don't need to prepare it that much for animations it really won't do.
Progressing...
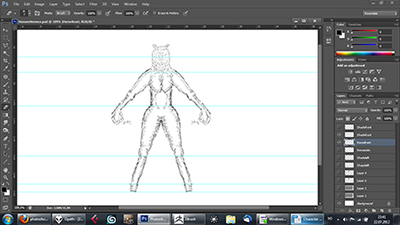
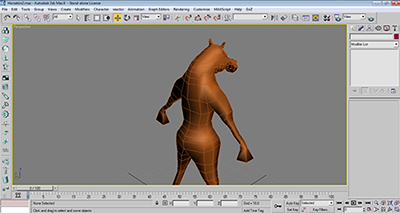
Still modeling in one piece, I've got the most important parts down. The overall shape of the body, the shape of the hands and feet are beginning to be the way I want it. I had to go a bit away from the reference at those parts, because I realized ways it could be better, and more horse-like. I have tried to maintain a reasonably good topology to prepare the character for animations and facial expressions (my character will also eventually be an important single player NPC character). Although, I might do more refining as I progress in this area, taking the eyes into consideration.
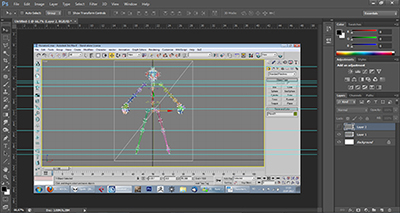
Sometimes you can unhide the skeleton and check if the mesh properly covers the bones, and adjust accordingly. You'll notice a lot of tentacles sticking out from the head bones. Don't worry about covering these in geometry, they're used for other things.
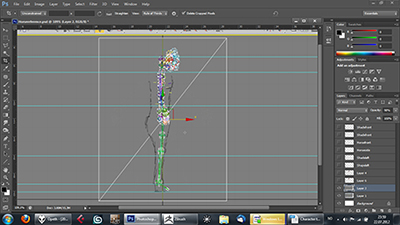
The finger bones are a bit mysterious. They stick out in all kinds of directions. I tried modeling the fingers exactly to the skeleton once, and it just ended up sticking out in the same awkward directions in-game, so apparently the fingers don't animate independently. It may take some experimentation to get the position just right, to make it hold the saber convincingly, or even the weighting of the hand. The same goes for the feet. There is no bone that will keep it in place like it shows. Let Kyle show the way.
I'm going to split the mouth opening right under the lip, and model the inside of the mouth, since this character will talk. Also, I found that the arms needed more geometry to appear less boxy, and smooth nicer.
4. Finishing off and UV mapping
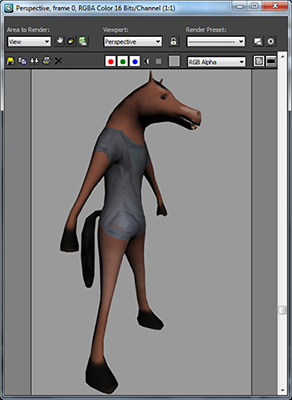
This is what I ended up with.
UV mapping is the process of laying out the texture coordinates for your model – defining how much space in the image files the different parts of your model will have, thus how much detail they can have, and how it's going to look in the texture skin files. What I did was using Zbrush both for generating the density and seaming of the different areas of the model, and I also used it for painting my whole model, thus avoiding visible seams at the UV seams. I recommend looking up tutorials on UV mapping and texturing, as this is a bit too big of a topic to cover here. If you look at the base models such as Kyle, they never really avoided the seams. There's a visual seam right in his face! Some solutions otherwise could be to cover the seams in other geometry, such as having a belt, pads and other accessories.
After you've done the UV layout, you can render out templates and draw over them in Photoshop, or you can use other software for texturing it such as Zbrush.
Keep in mind that texture maps must be sized using a power of 2 – that is: 64, 128, 256, 512, 1024 etc. They don't have to be square, but make sure you don't violate these dimensions!
5. Weighting the model
Weighting the model is the process of binding the model you just made to the skeleton. You define how much influence a bone has on a set of vertices on your model. I recommend looking up tutorials on this, and being prepared to experiment quite a bit here. Before you start weighting, just for safety reasons, you should reset the XForm. Do this by navigating to the Utilities panel and reset the Xform from there. Then collapse it to the editable poly in the modifier panel (but keep the UVW Unwrap modifier).
Weighting is done by using the Skin modifier. I won't cover every detail here. OK, I won't cover almost any details here, but let's get started. Where it says “Bones:”, click Add and add the following bones to the list.
Spoiler
cranium
cervical
rclavical
lclavical
thoracic
upper_lumbar
lower_lumbar
pelvis
rhumerus
rhumerusX
rradius
rradiusX
lhumerus
lhumerusX
lradius
lradiusX
rfemurYZ
rfemurX
rtibia
rtalus
lfemurYZ
lfemurX
ltibia
ltalus
One last thing before we start – go to the Advanced Parameters tab, and change Bone Affect Limit to 4, instead of 20. This will make sure every vertex can't be affected by more than 4 bones, which is a limit in the compiler.
The weighting can be done in a number of ways. You can resize the envelopes that belong to every bone, and it can be a good starting point. However it's not necessarily so accurate. For instance in my case, I have a tail I need to include in the pelvis bone, without getting too much the thighs and legs. Also the nose is quite long, and I don't want to include the chest in the head bone.
You can also paint weights, but be sure to follow tutorials first. I've had some issues with it. And finally, you can have per-vertex control over the weight to each bone, by checking “Select: vertices” and editing the Abs. Effect, ranging from 0 – 1. Every vertex needs a weight, just like every vacuum cleaner needs... vacuum. Or else errors will ensue.
One thing that will make this significantly easier, is to make a small animation, just to make the joints bend. If you do this, make sure you DON'T change the first frame of the animation, as that would put the force off balance in eternity. As long as the first frame remains unchanged, you can animate it however you like, but keep this as simple as possible, in order not to mess up something. Animation is done with the “auto key” button, but look it up. Now you'll be able to see more clearly what's going on when you weight the model.
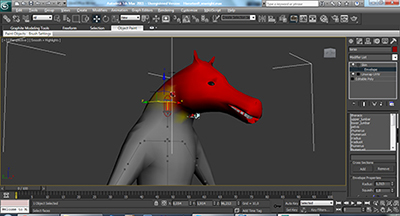
My model also had eyes and teeth, in a separate segment. What I did was weighting it fully to the cranium bone, which was the closest bone.
6. Segmenting your model into parts and naming them
The reason why we weighted the model before segmenting it, was to make sure that every limb shared the same skin modifier, so it will move and deform uniformly in-game.
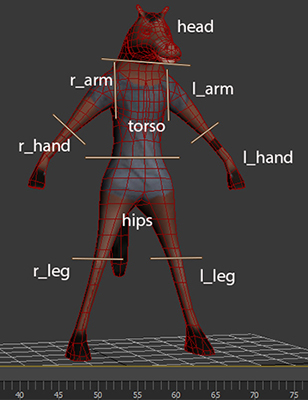
The model now needs to be segmented into 9 basic segments. If you have more body parts, such as a human-eating milt transplant, feel free to segment it as well, and just be sure to link it to its parent in the end.
The 9 segments are:
head
torso
hips
r_arm
r_hand
l_arm
l_hand
r_leg
l_leg
There are two ways you can do it. The easiest visual way is to select the polys you want to detach, and Detach as [name of segment]. That way you'll know what you've already segmented and can't select it again. After detaching all the parts, they will have lost their modifiers. But the last limb remaining will have the skin modifier that is needed. Copy it and paste it back into the modifier of all the other limbs, and give them their UVW Unwrap modifer back as well. This works because only the bones that are used will be... used.
If you don't want to lose the modifiers, you can duplicate the whole-piece model, by holding shift and dragging it off to the side where you can see it, and select the polygons you want to detach. Then instead of using the Detach function, do CTRL + i to invert the selection, and delete that. Then rename it, and deselect it, and it will snap back into place, keeping its modifiers. The hitch is that you'll have to remember where you made the segments, so you don't overlap when doing this to the other bodyparts! In the end when you have all the bodyparts, just delete the whole-piece model which they came from. But save first.
7. Linking the hierarchy and giving birth to your model
You're almost done. Thanks to Psyk0sith's autolinker, the next part will be quite joyous.
First of all, make sure the skeleton is unhid, and press H. You will be presented with a list from which you can choose whatever you want. Anything! Well, locate a tag named “bolt_l_hand” and select it. Look in its skin modifier. If this tag is weighted to “lhang_tag_bone”, remove that tag from the bone list, and add “lhand” instead.
Now, if you've made extra segments other than the ones listed, link it to the body part it belongs the most to. You can use the “connect” tool and drag a connection from the child, to the parent, where the child would be the segment in question.
And now, it's time to locate the autolinker you downloaded, which is a script that links all the different parts in the max file together, granted you've named the model parts correctly. For a more technical view on what's happening or how you could do it yourself, refer to other tutorials such as Tim Appleby's tutorial, I believe.
Drop it right into the 3DS Max window where your model is, and it will start doing a whole lot of lightning fast arrangements, calling all the right people, and signing the right contracts. Soon, it will tell you it's “Done!” and you might just be done in 3DS Max, if you're lucky.
Don't close it.
But this is exciting.
8. Exporting the .xsi and compiling your .glm
Granted you have a .xsi exporter, go File > Export > and select .xsi from the list. Navigate to the _humanoid folder you set up in the beginning, and save it there as “root.xsi”. Don't export animation, just to be sure. If everything went fine, go to the same folder and open up Assimilate which we set up properly earlier. File > Add files. Now, you should have the _humanoid.gla file in the same folder as you have the root.xsi file. Select the _humanoid.gla file. It knows what to do with the .xsi file, but we won't be touching it ourselves. A folder now appears in Assimilate. Double click on it, and a properties panel will open. Check the boxes “Smooth all surfaces” and “Remove duplicate verts from mesh during compile”. Then click OK, and click the “B” symbol, short for Build. It will ask you to save a .car file, which you can go ahead and name “model.car” and save. This is not the file you'll need, but it will write a .glm file after this.
A console will open and in just a few moments, you've either run into errors, or it will look pretty and ask you to press a button, followed by “Everything seemed to go OK!”, in which case you have good reasons to shout loud noises in your household and generally exert positive energy without any judgment. Once you're done celebrating, we need to set this up in a way that the game can read!
9. Making the .skin files
In your game's base folder (GameData/base), set up the folder path for your model. Base/models/players/ModelName. Now go to the _humanoid folder on your C drive again, and copy the model.glm file and put it in the file path you just set up in your base folder. Also, put the textures you've made for your model in here. At this point, what you can do is to take the .skin files from one model, and modify them to fit yours. Kyle's .skin file is found in assets0.pk3 in models/players/kyle. Copy the default and red and blue ones into your own folder, and open up the default skin file. These files are very easy to understand. First, they state the name of the body part, then they point to the path of its texture.
Remove lines that belong to body parts you don't have in your model, such as belts, shoulder pads and so on, and add lines for bodyparts you have. Modify the path so it points to the corresponding texture you will be using. Using the replace function in notepad can come very much in handy here.
If you made caps, you can either point to the stormtrooper caps, which is the most common, or you can make your own. Unfortunately, I haven't covered the topic of caps in this tutorial, but I might add it in the future. If not, there's always information about it in other tutorials. If you don't have caps in your model, remove these lines.
Repeat the process (copy and paste) for the blue and red .skin files, pointing to the blue and red team colors instead. If you have icons for your model, name them icon_default, icon_blue and icon_red. If you don't have them yet, you can still try your model in game.
Now, the final thing we will cover before testing this in game, will be the sound files and the gender. Also from Kyle's folder, you can copy a file called sounds.cfg. This is just a little text document pointing to the path where you can find the sound files for this model, and a letter, “m” or “f” to define whether it's male or female. If you're unsure, just lift your model up and look under its belly, just like with cats.
You can set up your own sounds in a folder called chars/YourModel. To make them work in-game, they must be named properly. The easiest thing is to copy all the sounds from assets1.pk3 – sound/chars/kyle/misc, and replacing those sounds with your own. Make sure they're .mp3 format, mono, 44100 sample rate, and 192 kbps bitrate.
10. Testing the model
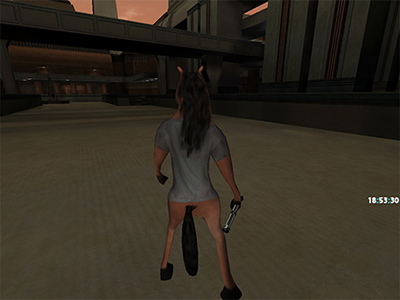
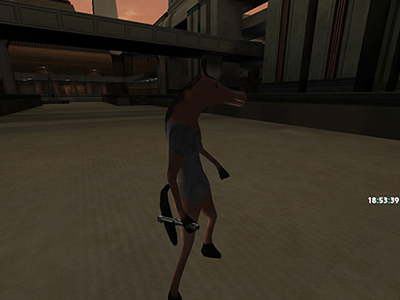
Now, before packing this model in a .pk3, it would be nice to know if it works as it should. If you don't have icon pictures yet, keep in mind the name of the model. As if it wouldn't be embarassing to forget the name of your own child! Load up your game, and before you enter a map, type sv_pure 0 into the console. This allows the game to use files that aren't packed in a .pk3 yet. Now enter a map, and see if your model works! Type model [ModelName]. Now is the time to see if the texture is working fine, but most importantly if it animates correctly and generally looks the way it should. If yes, congratulations! You can now make screenshots for your icon pictures!
If it does not animate correctly, or if textures are missing or if it looks like a monster from the sewers of Bespin before they even got sewers – when you didn't try to create that particular monster... well, check out the troubleshooting section below.
11. Making a .pk3
Whether you're using Pakscape or an archiving software, doesn't really matter. I use WinRar. Make a new pk3 (you can make a .zip file and rename it to ModelName.pk3 to make it a pk3). You already have the folders you need setup within your base folder. The folders are:
models/players/ModelName/[content]
sound/chars/ModelName/[content] (unless you're using another player's sounds, in which case you don't need to redistribute it)
You can add other things such as bot and npc support, shaders and more but there are other tutorials for that.
That's it! I hope this is a method that works well for you, and that you found the tutorial comprehensive and detailed enough.
Troubleshooting
You: The textures are missing!
Horseton: Usually that means you've either used the wrong size of your texture maps, which need to be by a power of 2 (512, 1024 etc), or you've assigned the bodyparts and textures incorrectly in the .skin file. If you have a shader that is not correctly setup, it could also cause missing textures.
You: It looks like a mutant, and the body parts are all over the place!
Horseton: That would be a weighting problem. Did you reset the XForm before weighting the model? Did you weight it in one piece? Did you leave the skeleton untouched?
You: The compiler gives errors stating that the following body parts are out of reach from a surface.
Horseton: It has to do with the linking of the hierarchy. Make sure you name all your body parts correctly, and link any extra body parts you might have to the closest natural parent. Then re-run the autolinker and export again.
Horseton: Wnyyhyhyyyh!
You: No, stop speaking like that, I can't understand you.
Horseton: [No answer]
The information used in this tutorial has been collected from several places, and joined together in this one.
A big thanks to Psyk0sith for a lot of this information!


Recommended Comments
There are no comments to display.
Create an account or sign in to comment
You need to be a member in order to leave a comment
Create an account
Sign up for a new account in our community. It's easy!
Register a new accountSign in
Already have an account? Sign in here.
Sign In Now