
JKHub
-
Posts
616 -
Joined
-
Last visited
Content Type
News Articles
Tutorials
Forums
Downloads
Everything posted by JKHub
-
2,756 downloads
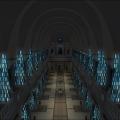
Title : Jedi Temple Type : FFA/TFFA File Name : jeditemple_ta File Size : 23.919 Mb Author(s) Map: =tom= Layout:=tom=/ACiDUS Textures:=tom=/ACiDuS Date of Release : 20/06/2007 Email Address : mariocheret@hotmail.com Homepage : http://mbgs.tk Description : This is our vision of the Jedi Temple. This map was originaly made for The MovieBattles II mod(http://www.moviebattles.com/) Note: This is an FFA version based on the Movie Battles II map from Build 18. No youngling NPC's available, but plenty of weapon spawns. Special thanks to: - =Some0ne= for the statue in the Blue Hall (never released separatly specially made for this map) - Pahricida for the head model in the Jedi Archives (never released separatly specially made for this map) - Mars Marshall "NeoMarz1" for the GunshipVM Additional Credits to: The MovieBattles Team and Community. ================================================== ============== * Play Information * JK version required : Jedi Academy version 1.01 Bot-Support : NO New Textures : YES New Music : YES New Shader : YES * Construction * Editor(s) used : GTKRadiant 1.4, Fireworks Known Bugs : none so far Tech. Details Total Brushes: 18579 Total Entities: 4124 Net Brush Count: 10144 Install-Instructions : Extract Jedi Temple to your GameData/Base/ directory Deinstall-Instructions : Delete Jedi Temple from your GameData/Base/ directory Have fun with it! ================================================================ * I admit that * (as required by the LEC Licence Agreement about Addon Levels) 1. My Level works only with the retail version of the Software, and does not work with any demo or OEM versions of the Software. 2. My Level does not modify any COM, EXE, DLL or other executable files. 3. My Level does not contain any illegal, scandalous, illicit, defamatory, libelous, or objectionable material (as may be determined by LEC in its sole discretion), or any material that infringes any trademarks, copyrights, protected works, publicity, proprietary, or other rights of any third party or of LEC. 4. My Level does not include any LEC sound effects or music files or portions thereof. 5. My Level identifies in every description file, on- line description, read-me, and in comments in the New Level code: (a) the name, address, and e-mail address of the level's creators, and (b) the following disclaimer: "THIS LEVEL IS NOT MADE, DISTRIBUTED, OR SUPPORTED BY LUCASARTS ENTERTAINMENT COMPANY. ELEMENTS TM & © LUCASARTS ENTERTAINMENT COMPANY." 6. My Level may not be sold, bartered, or distributed with any other product for which any charge is made (other than incidental charges for time spent on-line), but rather must be distributed free of charge. 7. By distributing or permitting the distribution of any New Levels, all creators or owners of any trademark, copyright, or other right, title or interest therein grant to LEC an irrevocable, perpetual, royalty-free, sub- licensable right to distribute the New Level by any means (whether now known or hereafter invented), and to create and distribute by any means (whether now known or here- after invented) derivative works thereof, and to charge for the distribution of such New Level or such derivative work, with no obligation to account to any creators or owners of the New Level in any manner. * Copyright / Permissions * WARNING. YOU MAY *NOT* USE ANY OF MY TEXTURES. IF YOU WISH DO TO SO PLEASE EMAIL ME FIRST. THANK YOU. Other editors may NOT use this map as base for other maps, using reverse decompile methods. You MAY distribute this level, provided you include this file, with no modifications. You may distribute this file in any electronic format (BBS, Diskette, CD, etc) as long as you include this file intact, with NO charge (other than incidental charges for time spent on-line). Uploaded by Tompa9- 14 comments
- 14 reviews
-
- 3
-

-
- Botroute Support
- Roleplaying
- (and 1 more)
-
263 downloads
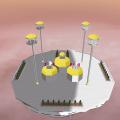
Submitted By: Veilor Created By: DaDosDude This map was NOT created by me, but by DaDosDude 13 years ago for a Dragon Ball mod we both were a part of, The Power Within. It failed but I kept most of the files throughout the years and I sent DaDosDude a mail asking for permission to upload it here and he said go ahead. Proof of the mail exchange here. This map is in a beta state but still playable without any visible bugs, all original map files are gone, so nothing more can be done on it. Enjoy! -------------------- Jedi Knight III -------------------- -------------------- Info: -------------------- Title: Kami's Lookout File Name: kamislookoutBETA.pk3 File Size: 757KB Date Released: 14 March 2005 Type: Map Custom music: Yes Bot Support: No -------------------- Author: -------------------- Edited By: DaDosDude Email: dadosdude@gmail.com -------------------- Note: -------------------- This is a map based on the series Dragonball Z. It is the time chamber and kami's lookout fused in 1 map. Made for the mod The power within. that mod is currently under construction. -------------------- Installation -------------------- just extract/copy the kamislookoutBETA.pk3 to you Base folder(usually c:\Program Files\Lucasarts\Star Wars Jedi Knight Jedi Academy\GameData\Base\) and start your game! -------------------- Disclaimer: -------------------- THIS MODIFICATION IS NOT MADE, DISTRIBUTED, OR SUPPORTED BY ACTIVISION, RAVEN, OR LUCASARTS ENTERTAINMENT COMPANY LLC. ELEMENTS TM & © LUCASARTS ENTERTAINMENT COMPANY LLC AND/OR ITS LICENSORS. -
280 downloads
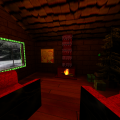
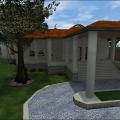
Uploaded by Cagelight This is not my map, this is the daytime version of Winter's Gift (https://jkhub.org/files/file/2178-winters-gift/) that I got ages ago from pcgamemods. I don't have the original readme but I'm almost positive this was made by the original Winter's Gift author(s). I noticed it wasn't uploaded anywhere else so I'm uploading it here. This map requires the original Winter's Gift to be installed to work correctly. ------------------- Winter's Gift Day Authors: *VaS*Buffy and Jenova*Rebirth*(*VaS*Jenova) Contacts: vasbuffy@gmail.com and jenova19848@hotmail.com Release Date: 12-19-2005 Custom Textures : Yes Custom Models : Yes New music : Yes Bot Support : Yes Build Time : About 2 months on and off Description: A special Christmas and New Year's map for the Winter season for you and your friends too enjoy. Features: - Village - Snowball Arena - Hockey Field - Ski Lifts - Tauntaun Stable - Market - Maze - Carnival - Mansion - Playground - 2 Songs to pick from - Caroler Stage - The North Pole - And much much more for you too explore... Tips: You can download a Snowball mod to turn your Thermals into Snowballs to make the Snowball fights more Realistic. Secrets: Well Secrets wouldn't be secrets if we would tell you where they are now would they? However there is one secret we can help you on your way with as there are secret presents hidden all around the map in the colours: Red, Green, Yellow and Orange. We have added a special Check list to the Zip file to help you find them, Please read it as there is some helpful information in there. Good Luck! ************************************************* Programs used: Adobe Photoshop, Winrar, Wordpad, Gtk Radiant, Easygen ************************************************* * Copyright / Permissions * IMPORTANT! This map and it's contents may not be modified without *VaS*Buffy or Jenova*Rebirth*'s written agreement. This map and it's contents may not be used for porn or nudity purposes. If this mod is used in any file like maps,movies,skins or others mods, Please inform *VaS*Buffy or Jenova*Rebirth*. If this mod is used We wish too receive credit for our hard work. ************************************************* INSTALLATION: Extract the wintersgift_bf_jr.zip in your star Wars Jedi Knight Jedi Academy/Gamedata/Base folder. Removal: - Remove wintersgift_bf_jr.pk3 from your base folder ************************************************* Special Thanks: - Onobi Foondu - Grimreaper - Hapslash - Worsonn - Darth G - Szico VII - Lemog - All *VaS*Members and Friends - All who we forgot to mention -
Version V1.0
913 downloads
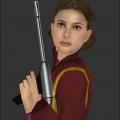
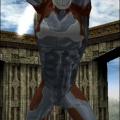
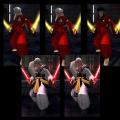
Uploaded by Tompa9 ****************************************** JEDI KNIGHT III : JEDI ACADEMY MODIFICATION ****************************************** Title : Queen Amidala + Handmaiden 1 and 2 Author : Liberty Ashford E-Mail : food_raider01@hotmail.com File Name : Queen Amidala.pk3, Handmaiden.pk3, Handmaiden2.pk3 File Size : 2, 499 KB, 1, 409 KB and 1, 428 KB Date Released : 18/08-06 Team Colours : Yes New Sounds : Yes Model & Textures - HapFord Team (Hapslash and Liberty Ashford) Mesh Optimization, Weighting & Conversion - Infinity Blade Description: ---------------------------------------------------------------------- This is a model of Queen Amidala, and her handmaidens. This is Queen Amidala, dressed up in her handmaidens battle outfits, while her decoy, Sabé, pretends to be Queen Amidala. The handmaidens are basically just a reskin of Queen Amidala, except with either dark brown hair, or light blonde hair, and different faces. These models come with team colours. The team colours only change the sleeves colours, from default, to blue or red. Anyway, I would also like to announce that myself and hapslash will be making a Queen Amidala model pack in the very near future. Infact, we've started. Anyways, I made this model before we joined alliances, but anyways, enjoy the model my good friends =D. Bugs: ---------------------------------------------------------------------- Only bugs I could find were the legs clipping through the lower half of the cloak, when doing certain animations. Also, the collor sometimes clips through the neck when running, or walking, or doing whatever certain animations. Comments: ---------------------------------------------------------------------- Thanks to Hapslash, who is now my new modelling partner. And a VERY special thanks to Infinity Blade for making my model come true. I really want people to know how much Infinity Blade has done for me, and what a wonderful and generious friend he is. THANKS IBBY FOR GRACING ME AS THE BEST WEIGHTER EVER!!! Installation: ---------------------------------------------------------------------- Simply extract Queen Amidala, handmaiden.pk3 and handmaiden2.pk3 into /star wars: jedi knight jedi academy/GameData/base file. Un-Installation ---------------------------------------------------------------------- just extract/delete the Queen Amidala, and/or handmaiden.pk3 and/or handmaiden2.pk3 file out of your /star wars: jedi knight jedi academy/GameDate/base file. ====================================================================== THIS MODIFICATION IS NOT MADE, DISTRIBUTED, OR SUPPORTED BY ACTIVISION, RAVEN, OR LUCASARTS ENTERTAINMENT COMPANY LLC. ELEMENTS TM & © LUCASARTS ENTERTAINMENT COMPANY LLC AND/OR ITS LICENSORS. -
Version (JK2)
300 downloads
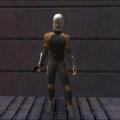
File created by ksk_h2o Original README: ***************************JEDI KNIGHT II MODEL***************************Title : GRAY FOXAuthorModel by : ksk_h2oSkins By : ksk_h2o, [SM]Maximus, FoJ_JM_MiyamotoE-Mail : ksk_h2o@hotmail.comWebsite : --File Name : grayfox.pk3File Size : 3.2 MB Date Released : Feb 18 2003Description : Multiplayer ModelComments : Well, as the name says it, its Gray Fox, as the Cyborg Ninja from Metal Gear Solid.***=======****The caps TGA and caps shader in the pack is from the cheshire vader model by cheshire cat and Matt "arco" Fergusson, and Michael Frost "sithlord-ii'Many thanks to sithlord for also helping me out with the shader for the caps and general tips.***=======****Much Thanks to [SM]Maximus for all the help with skinning, his skins, and his support thgroughout the project. Many Thanks to FoJ_JM_Miyamoto for his great work on skinning the characters Elan, Tycho and Deimos. There are quite a few skins and not all have their own icons. Most models come with an open facemask version as well as the closed facemask version.Here's a list of what you need to type to get all the models:DEFAULT SKIN:model grayfox/default model grayfox/dopen <-open faceplate default modelTEAM SKINS:model grayfox/blue <- BLUE TEAM Modelmodel grayfox/bopen <- BLUE TEAM Model with open faceplatemodel grayfox/red <- RED TEAM Modelmodel grayfox/ropen <- RED TEAM Model with open faceplate(of course the open faceplate models will not work in team games)[SM]MAXIMUS' Personal Skin:model grayfox/max <- Original skin created by [SM]Maximus this was later updated This skin may/can be replaced with the latter version depending on what the creator wantsmodel grayfox/mxopen <- Maximus' original Sin with open faceplateSKINS FROM FoJ_JM_Miyamoto:model grayfox/default_elan <- Elan with the closed faceplatemodel grayfox/elan-o <- Elan with open faceplatemodel grayfox/default_tycho <- Tycho with the closed faceplatemodel grayfox/tycho-o <- Tycho with open faceplatemodel grayfox/default_deimos <- Deimos with the closed faceplatemodel grayfox/deimos-o <- Deimos with open faceplateThere are a number of shaders at work on the model while the shine covers the entire body, the others are mainly on the head/face. THe face shaders might be too discreet to notice at a long distance.A better way of getting in touch with ksk for comments, etc; (due to large quantities of spam) is by logging into the premier forums for JKII and sending "ksk h2o" a pm...Have Fun,kskTHIS MODIFICATION IS NOT MADE, DISTRIBUTED, OR SUPPORTED BY ACTIVISION, RAVEN, OR LUCASARTS ENTERTAINMENT COMPANY LLC. ELEMENTS TM & © LUCASARTS ENTERTAINMENT COMPANY LLC AND/OR ITS LICENSORS. Uploaded by: Toast -

Version JKA Version
429 downloads
Readme: Author (Of this SoundFix): Xen/MeWmIXNOTE: I did not make this Model..all I did was make it so the sounds would work in JA.Also, I am 80% done with The Twin Snakes version of Gray Fox, I just need my skinning done. Included will be the sounds, Bloody Gray Fox, Spider-Fox (Unlockable Costume Change for him) and hopefully I can finally finish my Beam Rifle model for his arm.Credits: Well of course ksk_h20 for the model, and SM]Maximus, FoJ_JM_Miyamoto for the skins. This is probably the best model for JO and it should be appreciated by being used by people in JA. I use it alot..so that should motivate you enough to use it. ^.^ Original ksk_h2o model readme: ***************************JEDI KNIGHT II MODEL***************************Title : GRAY FOXAuthorModel by : ksk_h2oSkins By : ksk_h2o, [SM]Maximus, FoJ_JM_MiyamotoE-Mail : ksk_h2o@hotmail.comWebsite : --File Name : grayfox.pk3File Size : 3.2 MB Date Released : Feb 18 2003Description : Multiplayer ModelComments : Well, as the name says it, its Gray Fox, as the Cyborg Ninja from Metal Gear Solid.***=======****The caps TGA and caps shader in the pack is from the cheshire vader model by cheshire cat and Matt "arco" Fergusson, and Michael Frost "sithlord-ii'Many thanks to sithlord for also helping me out with the shader for the caps and general tips.***=======****Much Thanks to [SM]Maximus for all the help with skinning, his skins, and his support thgroughout the project. Many Thanks to FoJ_JM_Miyamoto for his great work on skinning the characters Elan, Tycho and Deimos. There are quite a few skins and not all have their own icons. Most models come with an open facemask version as well as the closed facemask version.Here's a list of what you need to type to get all the models:DEFAULT SKIN:model grayfox/default model grayfox/dopen <-open faceplate default modelTEAM SKINS:model grayfox/blue <- BLUE TEAM Modelmodel grayfox/bopen <- BLUE TEAM Model with open faceplatemodel grayfox/red <- RED TEAM Modelmodel grayfox/ropen <- RED TEAM Model with open faceplate(of course the open faceplate models will not work in team games)[SM]MAXIMUS' Personal Skin:model grayfox/max <- Original skin created by [SM]Maximus this was later updated This skin may/can be replaced with the latter version depending on what the creator wantsmodel grayfox/mxopen <- Maximus' original Sin with open faceplateSKINS FROM FoJ_JM_Miyamoto:model grayfox/default_elan <- Elan with the closed faceplatemodel grayfox/elan-o <- Elan with open faceplatemodel grayfox/default_tycho <- Tycho with the closed faceplatemodel grayfox/tycho-o <- Tycho with open faceplatemodel grayfox/default_deimos <- Deimos with the closed faceplatemodel grayfox/deimos-o <- Deimos with open faceplateThere are a number of shaders at work on the model while the shine covers the entire body, the others are mainly on the head/face. THe face shaders might be too discreet to notice at a long distance.A better way of getting in touch with ksk for comments, etc; (due to large quantities of spam) is by logging into the premier forums for JKII and sending "ksk h2o" a pm...Have Fun,kskTHIS MODIFICATION IS NOT MADE, DISTRIBUTED, OR SUPPORTED BY ACTIVISION, RAVEN, OR LUCASARTS ENTERTAINMENT COMPANY LLC. ELEMENTS TM & © LUCASARTS ENTERTAINMENT COMPANY LLC AND/OR ITS LICENSORS. Uploaded by: Toast -
169 downloads
Readme: ***************************JEDI KNIGHT III MODEL***************************Title : Gray Fox V1Author: GrayFox814Model by : Darth KittySkins By : Darth Kitty, GrayFox814E-Mail : darth_kitty@hotmail.com(Darth Kitty...obviously) quatre_gsandrock@yahoo.com(GrayFox814)Website : www.shoopshq.com(GrayFox814)File Name : ninjafox.pk3Description : Multiplayer Model, SIngle Player ModelComments : Well this model was made by Darth Kitty and released with his Solid Skake Pack as a hidden character. As such, it had no sounds so i added some . I also fixed up a few of the skins and added a few of my own, such as the bloody one that is missing an arm and the blue team skin. I also made it selectable in single player mode, but it is not fully customisable, each icon represents one full skin. Hopefully i will be able to add full sp support some time soon. I am also working on a pseudo Mr X (Olga in the Ninja suit from MGS2) for all the gals that wanna use this model both in MP and SP. I will also be ading new icons (the icon with the Real gray fox in the background and the model in the foreground is the new one) so that it is easier to figure out which model is which.Also, there are npcs packed in there and you need the Hattori Honzo sword for them or else he will have just a plain saber.Here are the npcs P by their name means they are player friendly and E means enemy:Gray_Fox_Melee (Melee Fox but doesn't do much)PGray_Fox (Regular Gray Fox)PGray_Fox_mgdmg (a damaged Gray Fox that is missing an arm and has a bloody eye)PRaiden(ya gotta have the Dante reskin of Raiden)PGray_Fox_mask (i think this is the one with the mask closed)PGray_FoxE (Regular fox)ERaidenE (Regular Raiden)ETheBride (The Bride from kill bill ((get the model at the lucasfiles.com))PAll credit for the model and most of the skins goes to Darth Kitty.May you all enjoy this awsome model by Darth Kitty and the awsome SP support by me! (well mabey it is not AWSOME but it is still cool.)THIS MODIFICATION IS NOT MADE, DISTRIBUTED, OR SUPPORTED BY ACTIVISION, RAVEN, OR LUCASARTS ENTERTAINMENT COMPANY LLC. ELEMENTS TM & © LUCASARTS ENTERTAINMENT COMPANY LLC AND/OR ITS LICENSORS. Uploaded by: Toast -
529 downloads
Author: |GG|Carl Readme Description: ---------------------------- This is my very first map, and I have no mapping experiences from before, so if you happen to be an evil reviewer from map-review or something, go easy on me! The map is like an asteroid with lot's of different themes on it (Formula 1, Indiana Jones, real life etc.). NOTE: Yeah, I read that stuff about "maintaining a consistent style throughout the map" but whatever, I like being a little different It's kinda huge, and there are a few ships on it (I know, "JA is not a flying game", but don't fly if you don't like it...) It supports FFA, TFFA (and JKR). In the beginning it was supposed to be a clan map, but now when I'm done I've realised there are only 3 "clany" areas (which are all pretty well hidden) and one or two clan banners. And I think I might have hit the world record in "secret area count", but I'm not sure... Filesize: 13.7 mb Additional Credits to: George Lucas and Raven Thanks to: RichDiesal for an excellent mapping tutorial (http://richdiesal.jedioutcastmaps.com/tutorials/) GothicX for helping me with LOTS of different things. WadeV1589 for ansering some of my stipid questions. lassev for helping me with the scripting. QkennyQ for the very cool Van Halen guitar md3 +some other md3 models. My clan mates in |GG| for lots of great ideas (Especially |GG|Boss, he's the one who made all the wacko stuff up!) +Some other dudes at lucasforums... Other: My best time on the racetrack is 1 min 10 secs, try to beat that! And btw, SOMEONE PLEASE MAKE A MOD WHICH MAKES THE SWOOPS GO FASTER! BOT-support: Yes New sounds: Yes New textures: Yes Story: A long long time ago, on an asteroid far far away the evil Darth Ugnaught sat in his throne room and thought. He wanted to prove the dark side was stronger than the light. He saw only one solution. He invited his Jedi brother, Master Ugnaught. Master Ugnaught accepted the invitation, because he wanted to prove the light side was most powerful. They dueled. And dueled. And dueled. But no one seemed to win! After 6 days and 6 nights the brothers fell asleep. When they woke up they both where furious! Someone simply had to win! They built a new duel room. But no one won there either. They built more duel rooms, but no one won. After some months the asteroid was full of duel rooms and stuff. Darth Ugnaught said to his brother: We must find some way to see who’s the greatest! Master Ugnaught agreed. Suddenly a great idea popped up in their minds; they should race about it! If you want the rest of the story you've gotta play the map! * Construction * Editor used: GTK radiant, Photoshop 7.0, Nero wave editor, Pakscape, Notepad Known Bugs: The map is huge and kinda detailed, which might lead to a crazy little thing called lag... * Installation * Unzip the pk3 file to your "gamedata\base" directory (for example: C:\Program files\Lucas Arts\Jedi Academy\Gamedata\base) * Copyright / Permissions * YOU MAY USE MY TEXTURES, SHADERS AND STUFF, BUT YOU MUST CREDIT ME IN THE README! Uploaded by Onysfx -
So called "emotional attachments" are a way for the multiplayer bots/characters to relate to each other and take sides with their loved ones and friends in FFA game mode, too, instead of attacking everything in sight like a mindless zombie. The problem is there has been great confusion as to how this all works. Due to a few key custom-made player models having this implemented with an error (and people habitually copying the faulty files), the result has been that many of today's newly released player models have non-working relationships implemented. So let's look into how it works a little bit. Open up your JKB (bot personality) file. In it you'll find a section like the following: EmotionalAttachments { Padme Amidala 3 General Kenobi 3 Yoda 2 Plo Koon 2 } Notice that the bracket header says "EmotionalAttachments", not "EmotionalAttachment"! This single spelling error causes the entire relationships setup to fail, so pay attention to it in your JKB file. Make sure the header is plural. Inside the brackets we have two values, separated by a tab on each line. The first contains the user readable "name" of the character's BOT file (found in the "scripts" folder). This value can contain spaces, and it doesn't need to be wrapped in quotation marks in the JKB file like it is in the BOT file, but it must match what is in the user readable "name" setting of the other character's BOT file for it to work. The second value is a number from 1-3, representing the strength of the character's attachment to the other characters. The higher the stronger the attachment. Obviously 3 stands for loved ones and friends, 2 for acquaintances, and 1 for members of the same faction. You can probably tell by this that the example I've used above is from Anakin's personality file. Due to the default game's limitation, we can only have up to four character emotional attachments, so make them count. The four closest allies to your character should take place here, and to be practical, make sure that player models for those characters actually exist in the modding community. If you got all these details right, and match the bots' personality files, your allied character bots won't attack each other -- unless they hurt each other and interpret that as betrayal from the other character. Set it right and have fun watching your bots relate movie-like in FFA.
-
Model Dismemberment (Realistic Lightsaber Combat)
JKHub posted a tutorial in Console Commands & Cvars
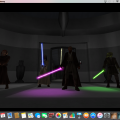
This tutorial attempts to explain in detail the console commands used to enable a realistic lightsaber combat simulation in your Jedi Academy game. Launch the game. In the main menu hold Shift on your keyboard and press the tilde key (~) to bring up the game console. Single-player game: Type the following into the console: helpusobi 1 Press the Enter key on your keyboard to apply the new setting. This command allows us to make advanced changes to the game. Then, type the following command and press Enter: seta g_sabermorerealistic 2 This command raises the damage level of a lightsaber to the point where it can cut apart an opponent as seen in the original Star Wars movie when Old Ben draws Luke's lightsaber in the bar scene. Next, type the following: seta g_dismemberment 3 This command sets model dismemberment to the highest level. This means that any part of a person can be sliced clean off if a lightsaber kills them, be it their hands, feet, arms, legs, head, or torso (as seen in the final Darth Maul scene in The Phantom Menace). If you find neck and torso slicing not to your liking, you can type 2 instead of 3 for the value in this setting, and that will limit dismemberment to only hands, arms, legs, and feet. Next, we need to set the likelihood for dismemberment to occur. Type the following into the console: seta g_dismemberprobabilities 40 If you'd like for it to happen every single time you kill an enemy in the game, set the value of this setting to 100 instead of 40. The following two settings should only be turned on if you have a computer that has enough strength to run the game smoothly. Type: seta g_corpseRemovalTime 0 This will force the game to keep the bodies of fallen enemies on the ground after they have been killed, and not remove them. (Some body parts will still be removed, unfortunately, but at least something of them remains.) Type: seta broadsword 1 This setting will turn the bodies of fallen characters from solid to limp, so that they appear more like real flesh and blood objects if they fall or if they are moved. And that's it; you're done for single-player game mode. As long as you keep your game saves/configuration, you don't need to type these commands in the console again. Multiplayer game: Type the following into the console: seta g_dismember 100 Press Enter. This command enables the slicing off of body parts due to lightsaber blade damage in the game, but in itself it does not really amount to anything. We need to apply the following next: seta cg_dismember 2 This command sets the value responsible for the dismemberment of characters to allow for the slicing off of hands, feet, arms, legs, head, and torso with a lightsaber. If you prefer it to be only arms and legs, you can swap the value 2 with 1 in the command. Finally, we should enable soft bodies, so that fallen characters do not appear as solid blocks, but as flesh and blood objects: seta broadsword 1 And that completes the picture. Your multiplayer game is set for realistic lightsaber combat. Of course, when playing online these settings will depend on what the server you're playing on is configured to allow by its administrator, so it may not work on every occasion -- but it will work in solo game mode at least. Going back to the default settings: If you wish to revert back to the game's default lightsaber combat settings, bring up the console and make sure that advanced changes are enabled (see first steps above). Simply type "reset" and the name of the setting to be set back to default, like so: reset g_sabermorerealistic The game's engine will reset the value of that setting to its default. Repeat this for all the settings you've changed. Note: You can also type just the name of a setting to see its current value. This allows you to see what is currently in effect in your game. Quick setting/value reference: SP: g_sabermorerealistic //sharpness of lightsaber blade 0 (normal), 1 (higher damage), 2 (cuts parts off when damage is fatal), 3 (even touching the blade kills instantly) g_dismemberment //how much can get sliced off 0 (nothing), 1 (hands, feet), 2 (hands, feet, arms, legs), 3 (hands, feet, arms, legs, head, torso) g_dismemberprobabilities //how likely dismemberment is to happen 0 to 100 (the number being the chance in percentage) g_corpseRemovalTime //dead bodies' disappearance 0 (leave bodies), 1 to 120 (the number seconds after which the bodies will disappear) broadsword //soft bodies (rag-doll physics) 0 (disabled), 1 (enabled), 2 (enabled and skips death animation) MP: g_dismember //disable/enable dismemberment 0 (disabled), 100 (enabled) cg_dismember //how much can get sliced off 0 (nothing), 1 (hands, feet, arms, legs), 2 (hands, feet, arms, legs, head, torso) broadsword //soft bodies (rag-doll physics) 0 (disabled), 1 (enabled), 2 (enabled and skips death animation) Closing notes: Special thanks to Ent and Vulcan, without whose help I would not have gotten around to writing and completing this tutorial. I hope you all find it useful and handy for reference. -
Version 3.17.16
2,030 downloads
Q: What is xNormal? A: xNormal is an application to generate normal / ambient occlusion / displacement maps. It can also project the texture of the highpoly model into the lowpoly mesh ( complete texture transfer, even with different topologies ). It also includes an interactive 3D viewer ( with advanced shaders and realtime soft shadows / glow effect ), some Photoshop filters and importers/exporters for 3dsmax (Max7-2013) and Maya (8.5-2013). It supports high levels of parallelism using multicore/multithreading, distributed/parallel rendering, ray tracing and advanced GPGPU techniques. (NOTE: The latest version 3.19.2 available for download at www.xnormal.net deprecated all x86 plugins for older versions of 3ds Max and Maya that are still heavily used by this modding community-- these x86 plugins are last available in version 3.17.16 and thus my reason for making this tool available here as it is no longer possible to download it or its SDK on the internet. Additionally, v3.19.2 no longer supports the dotXSI file format. So we must use v3.17.16 if we want to bake normal maps using dotXSI files). Q: How much xNormal costs? A: Absolutely nothing. It's free for any use, including commercial one. No price and no fees at all. If you like it, please, help them by sending bugs/feedback, examples of your art or mention xNormal in your project. Q: I can't use other normal mappers because they calculate their own tangent space and they only allow to use a kind of mesh format. Does xNormal include a SDK to make my own importers, exporters and plugins? A: Yes, xNormal includes a complete and easy-to-use C++ SDK to write plug-ins. You can make image or mesh importers/exporters,etc... One of the key features of the xNormal SDK is the ability to customize the tangent basis. Please, take a look at this link to know why it's so important: http://wiki.blender.org/index.php/Dev:Shading/Tangent_Space_Normal_Maps (NOTE: I've also included the 3.17.16 SDK since it is no longer available to download). Tutorials for using XNormal can be found here: http://www.xnormal.net/Tutorials.aspx Finally, if you get an error on program start about missing an OpenRL dll then simply rename the extension on the MapRenderer_OpenRL.dll to .bak in the x86 and x64 plugins folders. It isn't needed and the program can function without it. Or you could try to reinstall the OpenRL runtime if you're using a graphics card that requires it. -
821 downloads
OpenJediProject Enhanced Source Code (2013) This is the last source code of OJP Enhanced released by Razorace on lucasforums.com (2013) before the site goes down. This is not the exatly the source corde of OJP 1.2 (2008) but a later version (2013) which was never officialy released. So if you compile this source, you will get some minor differences with the compiled OJP 1.2. OJP Team : razorace@hotmail.com http://www.moddb.com/mods/open-jedi-project-enhanced Presentation of OJP : Master your weapon. Master the Force. Master yourself. The Open Jedi Project (OJP) is an open source modification for Raven Software's Star Wars Jedi Knight: Jedi Academy. Aiming to develop innovative, fun features to the base game, OJP, led by Razor Ace, brings together dedicated fans to integrate their vision of what a Star Wars game should feel like with those of others. Open Jedi Project consists of two mods: Basic and Enhanced. Whereas Basic serves as an unofficial patch to fix bugs and increase the capacity for other modders to experiment in baseJKA, OJP: Enhanced breaks new ground with major overhauls to the Jedi Knight gameplay. Open Jedi Project Enhanced (OJP: Enhanced) makes major gameplay alterations that not only build upon existing features that make base JKA fun, but also introduces new features that greatly increase immersion into epic Star Wars battles. You can find the original OJP 1.2 here : http://www.moddb.com/mods/open-jedi-project-enhanced/downloads/ojp-enhanced-version-012 Or the same version with some assets fix here : https://jkhub.org/files/file/1972-openjediproject-v12-fixed-by-fja/ and a patch to fix some coop maps : https://jkhub.org/files/file/2341-ojp-coop-maps-fix/ I thank Razorace who allowed me to put this source code on JKHUB. -
235 downloads
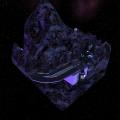
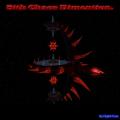
Author; This map was totally made by Desostros,who is a part of Digital Core.DC is a mapping team that consists of myself (Deso) and Stormkiller. Description; "Sith choas dimention." is a medium sized JKA map made for duel AND FFA purposes.Ideal for duels.This map is botrouted. Other info; This PK3 file contains some new textures and new shaders. -
188 downloads
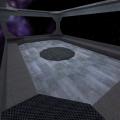
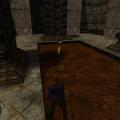
Original Author: McCrusher Uploaded by eezstreet Message From Lando: "Welcome aboard the "Cloud Shark". She's a vintage cruiser I recently won in a game of chance, while I was a "guest" at Reloo's waste facility. Actually it wasn't until after I won her that Reloo threw me in his brig. But with the help of a friend I was able to collect her... My friend never told me how he did it.... or whats become of Reloo. The "Cloud Shark" still uses the old Fitnell-33 antigrav turbines. Well suited for the lower gravity on Bespin. I use her mostly for pleasure tours and hunting, the cruiser has enough lift to carry a netted Rancor or Wind Dragon. Lately with the increased activities of the remnant Sithe I've been holding grudge matches or duels between Jedi upstarts and under-trained Sithe. I've been using the Cloud Shark to transport the competitors to and from the arenas. This is where you come in. I need a ringer for the sabre tournaments that can throw a match, as well as win - when the need arises. I'll give you a fare percentage of the take. Cloud City needs a new holo theatre, this is the only way I can think of to raise some funds quickly. There are three arenas in total - well four if you count the supply store under Kyle Katarn's hanger. One arena the "Fishtank" can double as either a free-for-all or 1vs1 arena. There are health and shields in every arena to top-off after you win a duel. You can also fight in the same arena as someone else if you initiate a "challenge duel" with your opponent. The rules are simple and follow the elf clan Sidhe format: -Fight only in the arenas, if there is a line then wait your turn. -Signal to your opponent with either a slash (Sithe) or bow (Jedi) when your ready to duel. -Fight to the finish, no health, no shields during the match. Unless you're in a Free-For-All then anything goes in that arena. -Fight with honor, unless you are a Sithe, then...just fight. -Hunt, Kick, or Ban those being a nuisance. The rules are list at the helm console of the Cloud Shark incase you for get them. Good luck, I'm counting on you. P.S. Place the CloudShark.pk3 in the base folder, example: (C:\Program Files\LucasArts\Star Wars JK II Jedi Outcast\GameData\base) That should upload the coordinates to the Cloud Shark and the sabre tournaments. Lando C. - out." Author: MrCrusher File Name: CloudShark File Size 1.8 megs Date Released: May, 19 2002 Description: 1vs1 dueling map with three arenas and a Big hover craft. Other maps: For Rune - 1on1Arena, Death and Ressurection, Odin's Arena. Cloud Shark is first map with Radiant. No bot support. This map is for real players who Duel and do not wish to wait in long duel server lines. -
434 downloads
Author: Fir`en Darkhaven A simple spoof off of Wal-Mart. It's got many of the same features as a Wal-Mart, and perhaps a bit more. As of this point, I decided to ditch several ideas that I had had to move on to a different map project. I know FPS is a little shaky in some parts (possibly more so outside, since it's a lot larger) but it's the best I could do in a massive area. It's my first map that I've made (so I know it's probably lacking) but I hope you guys enjoy! New Music: YES New Models: YES New Textures: YES Bot Support: NO -
Version v2
1,065 downloads
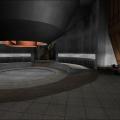
Author: SMoKE_89 Date: 12-10-2007 Version: v2 Knights of the Old Republic Series: =================================== The KotOR Series is a series of maps in production by SMoKE Designs and Kessno Productions. They are all based off of certain locations in the games 'Star Wars Knights of the Old Republic', and 'Star Wars Knights of the Old Republic II: The Sith Lords'. Website: http://smokedesigns.thejefffiles.com/kotorseries Forum: http://www.thejawaclan.com/smokedesigns/viewforum.php?f=6 Dantooine: Jedi Enclave: ======================== This installment in the KotOR Series is called Dantooine: Jedi Enclave. The Jedi Enclave on Dantooine is a hidden refuge for the Jedi, where they can train new generations of Jedi, and be of help to the locals at the same time. The fleet of Darth Malak bombed the Enclave into a big pile of rocks in his search for the Jedi Bastila Shan. Website: http://smokedesigns.thejefffiles.com/kotorseries/dantooineEnclave Forum: http://www.thejawaclan.com/smokedesigns/viewtopic.php?t=12 Installation/Uninstallation: ============================ To install, you must extract the KotOR_Dantooine_Jedi_Enclave.pk3 file into the GameData\Base-folder where your Star Wars Jedi Knight: Jedi Academy-game is installed. The default path is: "C:\Program Files\LucasArts\Star Wars Jedi Knight Jedi Academy\GameData\Base" To uninstall, you must remove the KotOR_Dantooine_Jedi_Enclave.pk3 file. Credits: ======== - SMoKE - Kessno - DL Thanks to: ========== - Inyri Forge for her excellent computer console model, and for being a fellow KotOR lover - lassev for some helping out with ICARUS - Darth NormaN for reminding me of Brush Cleanup - lemog for his fantastic free online archive of seamless textures - Kessno for several reasons, like reminding me that the map was in progress - ObiWanKenody for making a teaser trailer of the previous version of this map - The blokes over at SMoKE Designs Official Forums for their great support through hard times Special thanks to: ================== - George Lucas - The people behind Star Wars Knights of the Old Republic - The people behind Star Wars Jedi Knight: Jedi Academy BETA testers: ============= - SMoKE - ObiWanKenody - MaceCrusherMadunusus - (JAWA)LeaderLink - Inyri Forge Links: ====== - SMoKE Designs www.smokedesigns.co.nr - Kessno Productions www.kessnoproductions.thejefffiles.com - Knights of the Old Republic Series www.smokedesigns.thejefffiles.com/kotorseries - Inyri Forge's KotOR Map Objects http://jediknight2.filefront.com/file/KotOR_Map_Objects;77747 - Leveldesign by Darth NormaN www.darthnorman.de.vu - Lemog3d www.lemog.fr - Forge Productions http://inyri.atspace.com - JKA News www.jkanews.com - Mace's Mapping Center http://macesmapping.map-craft.com Author's note: ============== - I know alot of people will ask why I didn't make the Ebon Hawk interior, and the answer is simple, but somewhat hard to explain: When you are inside the Ebon Hawk in KotOR, it's MUCH bigger than it is when you're outside. And so, making those two pieces fit would be practically impossible. This be also the reason why I didn't make the loading ramp leading to the Hawk's interior, in case anyone wanted to know. - I also know alot of people will ask why I didn't make the Dantooine plains while I was at it, and there are several reasons: It would be extremely hard to make it look alright, considering the shape of the "hills" that are out there. If I for some reason should be able to make it, the map would be too big, or, I would have to place "invisible walls" everywhere, to limit the area. And if there are things I really hate in a map, it's "invisible walls". - Additionally, if anyone's going to ask why the skybox is so easy to hit, that would be because the structure of the original map itself did not open up for alot of bunny-jumping. It would just mess up alot, and sometimes allowing the jumping player to see over the walls and into the rooms beyond it, which I do not want to happen - but it is regretable anyway. And so, as those three questions above has been answered here in the read-me, I will not be answering them later on, so don't ask. -
453 downloads
Author: SavageX InuYasha Skin Pack - featuring InuYasha, Sesshomaru, Kagome, Kikyo, Sango, and Miroku. All have team support and bot support. Some models have more than one default skin. These models have been updated for use in Jedi Academy. New models has also been included including Miroku and Sango's causal clothes. Kikyo and Kagome have a new additional default skins (Kikyo has a long hair version and Kagome has a short sleeve outfit) and InuYasha and Sesshomaru have updated skins. Uploaded by KyleKatarn1995 -
295 downloads
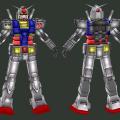
Author: SavageX The RX-78-2 Gundam that was piloted by Amuro Ray from the show "MS Gundam". This is the JO version that features much better textures than the JK version- 3 comments
- 4 reviews
-
- 1
-
-
- JK2
- Custom Sounds
- (and 3 more)
-
Version 1.0
435 downloads
Author: Jake Keating This mod had been uploaded and shared with the written authorization of its author. The story takes place during Roman Era. You are Gluteus Maximus, a thief who is forced to fight as a gladiator. Will you become the best gladiator of the arena, of Roman Empire, and the crowd's favourite man? Or will you finish as lion's fodder, like many people before you? Show the mob what you have got! This mod contains a lot of new models, new textures and informations about the Roman Games culture. Uploaded by: lang_french -
955 downloads
Uploaded by Numfast "Star Wars Lady Jedi" is a mod for "Jedi Outcast" made be "Nazar Design Group" back in 2004. In this mod you play as a Jedi of Old Republic, Mariel Waterfall, who fights against The Empire(this mod came out before "Star Wars Episode III Revenge of the Sith", because of that here you see that Empire was born then Republic was still existing). Mod includes 12 maps. This mod is on russian language. So, if you don't know that language and still want to play, I suggest you to read story here on "JKHub wiki" after you complete walkthrough: https://jkhub.org/wiki/index.php/Lady_Jedi#Plot -Installation-: Put the "LadyJedi" folder in your "GameData" directory of JO and launch it from mod menu in setup(menu will be on english, but gameplay - on russian) Optional: if you want to switch on blood just change extension of "ladyjedi_blood" file from "off" to "pk3" after dot. -Uninstallation-: Delete "LadyJedi" folder from "GameData" directory of JO. -Warning-: Some content of this mod is 16+, please take into consideration before downloading and playing. While playing "Lady Jedi" you can meet glithces that weren't in original release. This may happen because "Lady Jedi" was released as separate game, although it's still mod. I just took assets that this mod requires to work. -Disclaimer-: You can ask me: "Why you have uploaded on JKHub not your mod, without permission and released it not standalone, as the original release was?" Well, some people tried to find this mod for years. I can't get permisiion because the "NDG" and their site are dead for years. And I released "Lady Jedi" as normal mod because the standalone release was made only for one thing: to profit money from fans, without permission from "LucasArts.", which isn't legal. -
580 downloads
"Star Wars Communication Force" is a mod for "Jedi Outcast" made by "Nazar Design Group" back in 2003 (before JA came out). This mod provides you to take control on Mark Pride - a Jedi Student in the Jedi Academy, who is sent on important mission: find out what new kind of weapon against New Republic was invented by Remnant forces. This mod includes 13 new maps, which connected by plot. This mod is on russian language. So, if you don't know that language and still want to play, I suggest you to read story here on "JKHub wiki" after you complete walkthrough: https://jkhub.org/wiki/index.php/Communication_Force#Story -Installation-: Just put "ComForce" directory in your "GameData" directory of JO and launch it from "Mod" menu in setup(menu will be on english, but gameplay - on russian). -Deinstallation-: Delete "ComForce" directory from "GameData" directory of JO. -Warning-: While playing "ComForce" you can meet glitches that weren't in original release. This may happen because mod was released originally as separate game(Yes, "NDG" tried to take some profit from it, which isn't legal) and some original JO assets maybe were modyfied. For example the maps from JO were cut (I've compared unmodified and modified assets of JO, only files that wasn't used in this mod were cut, but there is probability that I forgot to check some of them). So, I just took archives that has new assets for this mod and put them in new directory. Thanks to that you can play this mod only using your copy of JO as it was meant to be sometime. -Disclaimer-: You can ask me: "Why you have uploaded on JKHub not your mod, without permission and released it not standalone, as the original release was?" Well, some people tried to find this mod for years. I can't get permisiion because the "NDG" and their site are dead for years. And I released "ComForce" as normal mod because the standalone release was made only for one thing: to profit money from fans, without permission from "LucasArts.", which isn't legal as I said above. -
Version 3
1,228 downloads
Author: YashTS These were some pretty good round sabers I found on filefront/jk3 files. These don't conflict with the hilts I use so they are ideal for me. Here's the realm that came with the file, it is also included in the zip: [update: new blade shape, sounds, and colors] These recreate the blades seen in ep2. The screens are pretty bad so check it out yourself in the game. Remove any other saber mods (INCLUDING MY OLD ONES IF U HAVE EM). Put selected pk3's in gamedata/base folder (jka or jk2). The colors in the ep2.blades_v3.pk3 are using the originals. So if you want the new colors, add the other pk3's to the gamedata/base folder. Comments : have fun Update in Detail : -Fixed the saber swing (more accurate to the movie). -The shape of the blade redone -Fixed up the sound pack with cleaner sounds(episode 2 sounds). -Fixed up some colors (colors inside the pk3) -
1,192 downloads
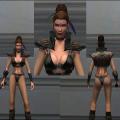
This is a modification for the Lucasarts/Raven Software PC game Star Wars® Jedi Knight®: Jedi Academy. This file was created by Amidala (operator of the Chop Shop Jedi Academy and Jedi Outcast servers). -------------------------------------------------------- Concept The television program "Extreme Makeover" takes average people and gives them thousands of dollars worth of aesthetic (plastic) and surgery, professional hair and makeup styling, and a new wardrobe, to make them as attractive as possible. I decided to give my favorite bad-girl Tavion an "Extreme Makeover" with laser tattoo removal, hair and makeup changes, and some wardrobe "improvements" to make HER as attractive as possible. Each Tavion skin has color-coordinated feathers, eyeshadow, and nail polish. Default Tavion has hazel eyes, Red Tavion has green eyes, and Blue Tavion has blue eyes. --------------------------------------------------------- 11 comments
- 12 reviews
-
- 1
-
-
- Bot Support
- Team Support
- (and 1 more)
-
Version 1.1
379 downloads
An update to the Dark Forces Mod Demo for Jedi Outcast, fixes some bugs with the mod and improves it a bit. Author : Dark Forces MOD Team E-Mail : darth_linux@planetblood.com Website : http://darkforces.jediknightii.net File Name : demo_update.pk3 File Size : 6177kB Date Released : 8/7/03 Description : Additonal files and updates for the Dark Forces MOD Demo Installation : Add this PK3 to your current Dark Forces MOD demo installation, where you have the demo_game.pk3. Requirements : Jedi Knight II must be patched to version 1.4 to work. The files demo_game.pk3, demo_music.pk3 and demo_video.pk3 are also needed. Comments : - Release Notes : - fixed shot effects for the Bryar pistol (including Imperial Officer shot) - added completely new Kyle model - EAX support for the Secret Base demo level - more sparkly helmet for the Imperial Commando - new Blaster and Bryar pistol models and skins - "correct" menu music - some shader fixes - one menu fix -
701 downloads
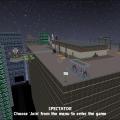
Author: Orbitius This has been an ongoing project for several months now, but sadly its not complete. I decided to release it as it is, unfinished, because im moving on do to bigger and better things. Q3 engine just can't satisfy me anymore. Anyway, some of the things that we were planning on doing with this map were a complete weapons replacement mod; ak47s, uzis, Rpgs, etc... Also, a complete replacement of items and pickups... Also, new vehicles such as the huey on the roof and speed boats... And i was planning on doing a "modified" siege gametype... All this would have been great but i felt it wasn't worth the effort for JA. Sorry... Another game, another time. It is in fact likely that we'll work on a mod like this for another game.. We're not sure what, probably UT04. For those who care, the real reason i'm moving on is that i'm just tired of getting ignored for my NON-Star wars themed stuff.- 10 comments
- 6 reviews
-
- 1
-
-
- Botroute Support
- Non Star Wars Related
- (and 1 more)