

Circa
-
Posts
6,537 -
Joined
Content Type
News Articles
Tutorials
Forums
Downloads
Everything posted by Circa
-
 No idea. Perhaps the all-knowing @@ensiform could tell you.
 -
But did you add it to a new shader file? And did you refresh shaders in radiant? Did you add your new shader file to the shaderlist.txt?
-
What does your skies.shader look like? If you're making a custom skybox, you should be adding it to a new shader file, not editing an existing one from the assets.
-
Right. Just making sure you know that's your main base folder for OpenJK. It reads your vanilla base folder too but anything in the openjk base folder overwrites the vanilla base folder.
-
Your OpenJK folder has to have a base folder, because that's where your openjk.cfg and openjk_sp.cfg are located. It should be in your User/Documents/My Games/ folder, not the folder in your GameData folder. You can put pk3s in there. It's generally best to put the bulk of your pk3s in there, so that your vanilla JKA can still launch if you ever need to use it.
-
I actually remember figuring it out my first playthrough, after seeing all the detonators around the map. But I had been trying to use the alt fire on them and accidentally use primary fire instead. I noticed they followed it, so I proceeded to chuck them left and right as I collected the parts I needed.
-
model2 is md3 only from my experience. But if your model is invisible, how will you know if it's doing what you want? model2 models also need an origin to tell where it needs to go. So maybe you have it correct but it's not where you think it is? @@Ramikad may be able to help regarding scripting. But like I said before, if a server has force powers enabled, pretty sure you can't just enable them via script.
-
Also, and I've explained this a few times already in other threads and statuses, but we are doing a huge amount of work behind the scenes with getting JKHub 2.0 up and running. It's been a lot of work and there's still a lot to do. So a lot of our time that we'd be spending doing file approvals and moderation are mostly being spent working on that. So yes, file approvals are slower than normal lately, and I apologize for that. But hopefully you understand why that is. I'll be sure to be a bit more proactive with it when I can.
-
I've been staff since 2013 and I guarantee any time a file was approved the same day it was submitted was by chance that a staff member had free time that day. We have always made it a point that file approvals get done when they get done. And though we try our best to get them approved quickly, it may not be for a couple days. Need I remind people of the jk3files days when file approvals took literally weeks, sometimes months. I'd say a couple days is an adequate time frame for volunteers to approve files for a 15 year old game.
-
Software Development Kit, yes. Be sure to check out our tutorial section as well.
-
Welcome. To be honest, modding JKA is probably easier. The pk3 file format makes it so convenient. We have the mapping program that the developers used, GTK Radiant, so you can create maps just like they did. Pakscape makes delving into pk3 files super easy. Tools that came in the SDK are huge help for many things as well. Hopefully you enjoy your time!
-
Shadow/shader problem on butt and shoulders
Circa replied to PreFXDesigns's topic in Modding Assistance
It should be showing the model's triangles when using that command. I'm not seeing anything in that video. -
Shadow/shader problem on butt and shoulders
Circa replied to PreFXDesigns's topic in Modding Assistance
Ingame, from the console. /r_showtris 2 -
.warnbox { background: #e3f6e5 url( images/icons/exclamation.png ) no-repeat 9px 10px; border: 1px solid #b4e3b9; color: #475949; } Double post of this thread.
-
Yeah the size definitely probably plays a large role in it. Hosting and downloading games would take a lot of time and resources.
-
Rosh is voiced by Max Goof and Chester McBadbat.
-
How do I replace music in single player?
Circa replied to Darth Ooga Booga's topic in General Modding Discussions
Already did it years ago, friend. Here's a link: Prequel Music Replacement -
Just look at an existing sky shader and copy what it does. Replace the mapped texture with your own. You'll want to just list the texture as whatever your files are but with only the main prefix. So if you have files called jakku_up.jpg, jakku_dn.jpg, etc; then you'll want to make sure it's listed as just jakku in the shader so it uses them as a skybox properly. Like this: textures/skies/jakku { qer_editorimage textures/skies/sky.tga surfaceparm sky surfaceparm noimpact surfaceparm nomarks notc q3map_nolightmap skyParms textures/skies/jakku 512 - }
-
Surprising, then. Maybe it just hasn't been cracked yet by the usual people that crack games. Not sure. I'm sure it's harder to crack modern games compared to a few years ago when you could get any game cracked. With the DRM that Origin uses I'm sure they have made it difficult. But not sure, you make an interesting observation. I doubt it has any reason to do with the fact that it's an EA game. I can't find a lot of recent games on TPB just from a quick search myself. The first EA Battlefront isn't on there either. Perhaps nobody that is able to crack has any interest in doing it? Who knows.
-
Everyone here doesn't have all the answers. Maybe nobody can help you that has seen your thread. I understand you're frustrated but don't assume we are withholding help for the sake of being douchebags. Did you disable Steam Cloud entirely or just for JKA itself? It seems like it's still reading the files in the cloud, even though its turned off. Is there a way to delete cloud files manually? (I don't use steam for JKA so I have no idea, just a thought)
-
Post your server.cfg (remove the rcon password) so we can take a look there. Maybe you don't have the master servers set?
-
.warnbox { background: #e3f6e5 url( images/icons/exclamation.png ) no-repeat 9px 10px; border: 1px solid #b4e3b9; color: #475949; } Topic moved to Modding Assistance forum. @@KyleRendar
-
Why are you assuming people haven't pirated those games?
-
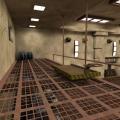 This is definitely one of my favorite maps. Would love to see more realistic maps like this based on more planets.
 -
Welcome!
