-
Posts
609 -
Joined
-
Last visited
Content Type
News Articles
Tutorials
Forums
Downloads
Everything posted by JKHub
-
Version 2.1
60 downloads
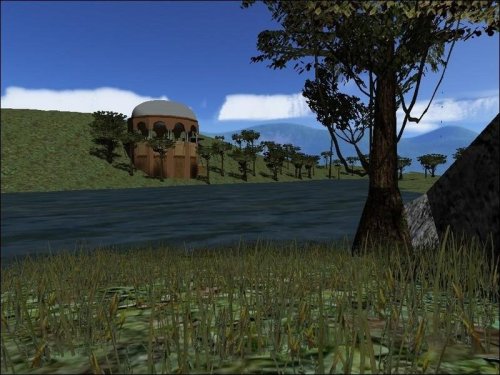
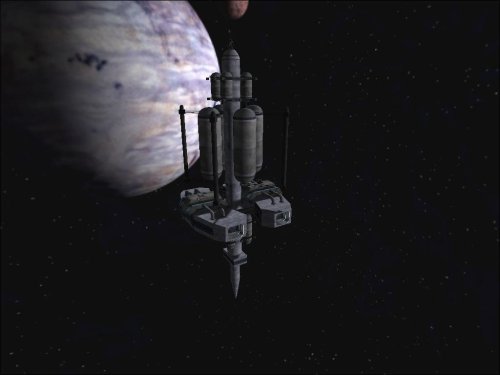
NABOO HILLS version 2.1 by Darth Zappa Sept. 19, 2004 This is a vehicle warfare map on a large open hilly area. It is good for general FFA, team FFA and CTF games, and also supports duel and powerduel games. There is a base with vehicles, weapons and ammo in each far corner of the map. In a CTF or TFFA game, the teams will each start at one of these bases. In FFA mode players will start at the gazebo building next to the lake. use the eopie spawning station nearby to get transportation to the far bases. Scattered throughout the map are stations with health, shields, ammo and other vehicles. Although the map is somewhat symetrical, the layouts of the two bases are quite different. Some people like this sort of thing for CTF games, some hate it. CTF support was shoe-horned in at the last minute and may have some problems; your mileage may vary. Bot-routing support is also included and is of questionable quality; the bots wont drive the vehicles anyhow, so their route will stay around the gazebo area. Naboo base - weapons, powerups, N-1 Starfighter, combat swoops Trade fed base - weapons, powerups, droid fighter* hailfire, droideka, sith speeder Additional vehicle types are available at the powerup stations throughout the map. Each of the orange console switches in the map spawns a vehicle of some sort. Not all vehicles perform well in water; mind the lake. Due to the large number of vehicles in this map, you will find that you can't spawn any new ones on here unless you are running a mod that allows for more vehicles on both the client AND server sides. Don't try it, you'll just crash. If you are missing textures on the ground, then remove the pre-release jedicouncilgc and forest sanctuary maps from your base folder, as well as any other maps that have been converted from JK2 to JKA. There is a problem with the way some folks are converting their older maps that causes a texture conflict. The only solution is to remove the offending maps from the your base folder. Vehicle models by Duncan_10158, Monsoontide, tFighterpilot and Neomars1; some are further customized. (See below for full details.) Skybox by Whiteshdw, courtesy of Shadriss's dotf map. Installation ------------ Before installing any of the naboohills21 files, first remove *ALL* other vehicle pk3s and vehicle-related map pk3s from your base folder, including older versions of these vehicles. Also remove any older versions of this map. Once you've done that, put everything in the 'put_all_this_in_base' folder into your base folder.If you dont have any other vehicles or maps with built-in custom vehicles (like KOTOR flight) in there, then everything should be fine. After that, you can take out individual vehicle pk3 files if you want to remove certain custom vehicles (they wont spawn from the buttons then.) All the vehicles must be on the server for all the switches to function properly. The 'read me' files for all the original vehicles are included in a separate folder. Files Included - filename (npc vehicle) info -------------- naboohills21.pk3 (naboohills21) map file hailfire_droid06.pk3 (hailfire_droid) trade fed rolling rocket launcher maulspeeder.pk3 (maulspeeder) sith bomber speeder bike, customized ojp_eopie_saddle.pk3 (eopie) the butt-ugly but loveable riding horse-anteater-thing OJP_droideka_06.pk3 (droideka) the trade fed rolling destroyer droid gunshipVM.pk3 (gunshipx) republic clone gunship N2.pk3 (n2) naboo N-1 starfighter, customized sb-bikes.pk3 (swoop_bike1, swoop_bike3, swoop_bike5) heavy duty customized combat/racing swoops bdc-cloudcar.pk3 (bdc-cloudcar) customized bespin cloud car, currently acting as a stand-in for a trade fed fighter this map uses a compatible vehicle set with BDC Racing Club v1.2. If you are running this map, you can run tha one too without changing any vehicles around. Misc. Notes ----------- - Changes from 2.0 version - optional black reskin for the N2 included in separate folder - new Trade Fed Lander base design, more accurate to the ship in the movie - fixed CTF spawn points - models now clipped correctly, you cant shoot through them anymore - more trees - N1 naboo fighter now has a proper bounding box, and is easier to hit - some vehicles now have custom radar icons, where i was allowed (cough) to add them - new dueling area with good fps under the starting gazebo - deeper lake is now more dangerous to fly in, watch those rocks - fixed weapons on sith speeder and combat swoop bikes - some other minor very minor tweaks - Changes From 1.2 version - skybox from dotf (thanks shadriss) - added droideka, gunship, more swoops, eopie; removed atst, rancor, tauntauns - map area now twice as big (perhaps too big now), new trade fed. base position - CTF support and bot-routing (sort of) - larger area of view (fps suffers a bit) - replaced tauntauns with faster eopies - re-arranged powerup stations - other minor tweaks and such - Stuff That Needs Fixin' - better lookin terrain and detailing in general - siege? perhaps. - Wish List (stuff i would like to add to this map, but doesn't exist yet) - Trade federation AAT battle tank (sadly this was abandoned by duncan. if it gets finished, i'll use it) - Trade federation fighter plane thingies (the cloudcar is currently filling in for this until it is ready.) - Lasers on the gunship (i've given up hope for this. thanks, you know who you are.) - gungan ridable kaatu (under construction, or so they say) - In a perfect world, i would like this map to have episode 1 and/or naboo-specific vehicles only. - For lots of great movie character skins and other vehicle models go to www.jedimoves.com - darth maul, obi-wan, qui-gon, battledroid, gungan, mace windu skins and much more - Also make sure to check out the Open Jedi Project, at http://ojp.jediknight.net Credits ------- map designed and constructed by Darth Zappa (darthzappa@blackdeathclan.net) hailfire droid, sith speeder and droideka, and N-1 vehicle models by Duncan_10158 (http://io.meskinaw.net/) and Monsoontide (http://home.earthlink.net/~monsoontide) republic gunship vehicle model by NeoMarz1 (http://www.geocities.com/neomarz1@sbcglobal.net) N1 vehicle customized by Nexus of OmNi clan (nexplanet.tk) Sith speeder customized by Nexus of OmNi clan (nexplanet.tk) with further tweaks by me Bespin Cloud Car converted to JA vehicle model by tFighterPilot, and further customized by me swoop bike (swoop_bike1,swoop_bike3,swoop_bike5) vehicle files modified by myself and McCleod of DX clan (www.dxgaming.net/jka) eopie, droideka vehicle models from the open jedi project (http://ojp.jediknight.net) skybox texture by WhiteShdw (kal_el23@hotmail.com) courtesy of Shadriss from his Duel of The Fates map for JKA. Copyright info -------------- This map and related files were not made or supported by Raven or LucasArts or any of those sorts of professionals. This is amateur hour all the way, baby. All Star Wars related intellectual property rights are reserved by their proper owners, as noted here with these fine copyright notices. © 2003 LucasArts Entertainment Company LLC. © 2003 Lucasfilm Ltd. & TM or Æ as indicated. All rights reserved. Used under authorization. LucasArts and the LucasArts logo are trademarks of Lucasfilm Ltd. © Raven Software LTD 2003, Activision- 2 comments
- 3 reviews
-
- botroute support
- roleplaying
-
(and 3 more)
Tagged with:
-
Version v1.2
23 downloads
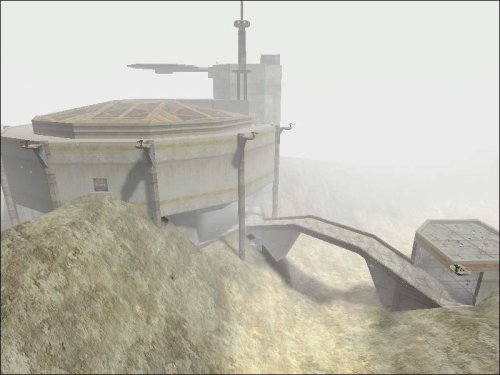
BDC Racing Club v1.2 a FFA and Racing Map for Jedi Academy by Darth Zappa (zappa@blackdeathclan.net) Aug 25, 2004 BDC Clan Website: www.blackdeathclan.net READ THE INSTALLATION INSTRUCTIONS BELOW! YOU'RE GONNA HAVE PROBLEMS IF YOU DON'T! 1.2 Update: ----------- removed lap counter and probe droids to lower the entity count. this should make the map MUCH more stable. Also, many of the posters have been replaced with low-res versions to help with loading times. (sigh. oh well.) They dont look as nice now unless you have your texture quality set to 'very high'. There have been some other minor fixes and adjustments made as well. Description: ------------ This map started out as a simple 'slap together' dirt race track for some basic swoop racing. That was last October; since then, it got completely out of hand, and mutated into the behemoth you see here. This is a 'clan map' of course, but I like to think it is something different from the usual 'hall of boxes' that so many clan maps are. BDC Clan-related decorations have been kept to a minimum (mostly all in one hallway, but there's alot in there) so as to appeal to a wide audience. Some of the vehicle files here are updates to the ones included with NabooHills 2.0. You should replace the older versions with these new ones on both your server and in your base folder. Naboo Hills 2.1 will include the same updated vehicles as this, as well as an updated N1 fighter. INSTALLATION INSTRUCTIONS: *** READ THIS!!! *** ------------------------- Before installing any of these files, first remove *ALL* other vehicle pk3s and vehicle-related map .pk3 filss from your base folder. This includes vehicles from previous versions of this map, and naboohills. the ojp_vehicles_002.pk3 in particular is now redundant. Also, remove any older versions of this map. Once you've done that, put everything in the 'put_all_this_in_base' folder into your base folder. If you dont have any other vehicles or maps with built-in custom vehicles (like KOTOR flight) in there, then everything should be fine. After that, you can take out individual vehicle pk3 files if you want to remove certain custom vehicles (they wont spawn from the buttons then.) To Run This Map with NabooHills 2.0 ----------------------------------- If you want this map and naboohills 2.0 on your server at the same time, you must remove the ojp_vehicles_002.pk3 from your server and replace it with ojp_eopie_saddle.pk3. this will disable the stap speeder on naboohills 2.0 (it has been removed from 2.1) The only other additional vehicle on NabooHills that isn't on this map is the customized N1 Naboo Fighter, but there is room to have it in your base folder with this map installed too. Once you get this map working properly, you can add the N1 starfighter (n2.pk3, not included here) back to your base folder to play naboo hills 2.0 and leave it in if you like. files included: filename (npc vehicle name) info --------------- bdc-racing.pk3 (bdc-racing) map file hailfire_droid06.pk3 (hailfire_droid) trade fed rolling rocket launcher maulspeeder.pk3 (maulspeeder) *UPDATED* sith bomber speeder bike, customized *UPDATED* ojp_eopie_saddle.pk3 (eopie) butt-ugly riding beast-thing *REPLACES OJP_VEHICLES_002* OJP_droideka_06.pk3 (droideka) the trade fed rolling destroyer droid gunshipVM.pk3 (gunshipx) republic clone gunship bdc-cloudcar.pk3 (bdc-cloudcar) customized combat cloud car with turbo and heavy guns sb-bikes.pk3 (swoop_bike1, swoop_bike3, swoop_bike5) *UPDATED* heavy duty customized combat/racing swoops *UPDATED* The 'read me' files for all the original vehicles are included in a separate folder. Misc. Notes ------------ * this map uses most of the available vehicle slots; cheat/admin spawning of vehicles and NPC's is not recommended. You're gonna crash your server if you mess around too much on here. * the sniper rifle scope is of limited use in the dense fog, as are the binoculars. * only one race with lap counting can be run using the start switches in the control room. this is due to an absolutely asinine restriction of the target_counter entity. (it deletes itself when finished counting! Why???) if you want to run multiple 'counted' races, you need to restart the map each time. I realize this is ridiculous, but its the best I could do for now. As an alternative, you can use the 'no lap count' buttons in the racing command center to 'fake a starting line' and have the players count themselves. * the track lap counting works, but only barely. Improvements in that system will come at a later date when I get my brain wrapped around scripting. (Nothing is scripted in this map at the moment, it is all entities and triggers.) Right now, the first person around a lap is messaged that they are the leader for that lap, or the winner for the final lap. * The lap-counted race takes 10 laps to complete. * Players who aren't racing should stay off the track during a lap-counted race; it is possible (but unlikely) for a non-racer to accidentally trip one of the 'checkpoint' triggers, which will botch things up. * hit 'use' at the bars on the map to get a bacta drink. if there is a bartender, he can hit 'use' to give a big bacta drink to 'customers'. the 'taco stand' features other novelties. * the droid spawning at the merc base should be kept to a minimum, or you will eventually crash your server, as with all npc spawning on any map. * there are fighter auto-turn zones in the sky at the edges of the map, however this map isnt really big enough (!) to give enough room to do a complete u-turn in time. if you approach the edge of the sky from an angle (instead of 'head on') you'll turn fine. if you fly full-speed into the sides or top of the map, you're still gonna crash. * The lighting is not wonderful. It was sorta too late to scrap it all and start over, once i realized what third-rate cheese I was making. Much of the lighting was done 'on the go' in order to get this map out at all. Future updates will improve on this. * BDC High Council member 'The Eye' had no idea that I was gonna do that to his office. I hope he doesn't mind. Credits: -------- hailfire droid, sith speeder and droideka models by Duncan_10158 (http://io.meskinaw.net/) and Monsoontide (http://home.earthlink.net/~monsoontide) sith speeder customized by Nexus Bespin cloud car model converted to vehicle class by tFighterPilot (http://www.gamingforums.com), new vehicle definition file by me (darth zappa) republic gunship vehicle model by NeoMarz1 (http://www.geocities.com/neomarz1@sbcglobal.net) eopie model courtesy of the Open Jedi Project (http://ojp.jediknight.net) some of the extra map models are from www.map-center.com the BDC logo sign was designed by Xemoka-sama special thanks to Nexus for helping out with the custom .veh files and various other bits and doodads, such as the word "furrito". {DX}McCleod also did quite a bit of work on tweaking the racing swoops. Many of the clan member's posters were made by the players themselves, the rest I did in a big hurry. The Star Wars pictures and posters were all scavenged from various fan sites. I tried to pick interesting ones. I cribbed the legal disclaimer (below) from one of sith j cull's map read-me files, since it's short and to the point. Legal Flotsam: -------------- THIS LEVEL IS NOT MADE, DISTRIBUTED, OR SUPPORTED BY LUCASARTS ENTERTAINMENT COMPANY LLC. ELEMENTS TM & � LUCASARTS ENTERTAINMENT COMPANY LLC AND/OR ITS LICENSORS.- 1 review
-
- botroute support
- desert
-
(and 1 more)
Tagged with:
-
22 downloads
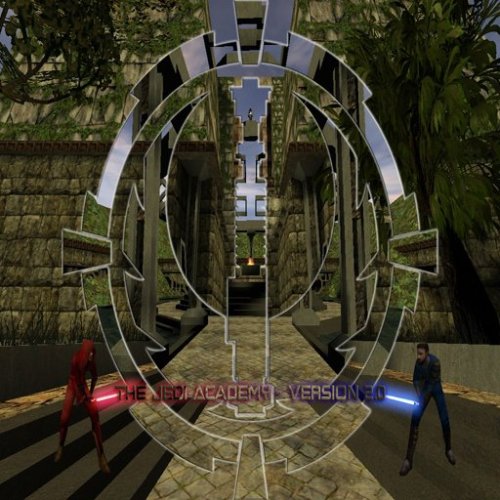
New version V3 available here: https://jkhub.org/files/file/138-the-academy/ --- Title : The Jedi Academy Official Map Version : 2.0 Author : Virtue E-Mail : virtue@thejediacademy.net OR rain_down_af@hotmail.com Website : http://www.thejediacademy.net File Name : the_academy_v2.pk3 File Size : 23 MB before zipping Date Released : December 16th, 2004 Description : Official Map for the Jedi Academy (http://www.thejediacademy.net). Heavily modified update of my last map - 'the_academy', many areas are either new or have been totally redesigned. This map was built specifically for training and socialising. The Jedi Academy has numerous training facilities each used for training in different areas of skill. There are three Jedi Duelling rooms which can be used for engaged duelling or Full Force battles, each have an observation deck with health and shield pickups. A 'Pit' room where people can duel/ffa on small ledges which are scattered around - be careful though, if you fall off, you don't come back. A gunning battleground, which is a large, open area with a few obstacles, littered with weapons and ammo for all your 'blow up every dude on the Server' pleasures. There is a Bar, a Ceremonial Hall, a Combo training facility, two NPC spawning areas and an administrator's area whereby you can lock down certain areas of the map and change the map music. One section of the Map has been dedicated to a dear friend of ours at the JA, Vladarion - This great man was tragically taken away from us as a result of a car accident on Boxing day, 2003. - Rest in Peace, my Brother. Find out more about Vladarion here: - http://www.thejediacademy.net/articles_detail_page.php?f_id=5 Since v1, there have been alot of addresses where FPS is concerned. With this version, FPS should remain solid and high in all areas. The buttons that are labelled I, II and III in the control room will control the locks for the privacy booths in the bar. Install : Unzip the *.pk3 file into your GAMEDATA/BASE folder #################### #Additional Credits# #################### DJ Sith: For Editing the Bar Music and making it compatible with the game and map. Thanks DJ. Odan-Wei: For making many of the custom textures that you will see in the Map. Darth_Mobility: For making all of the sign textres in the Administrator area and making the splash/loading screen image. Jaiko D'Kana: For providing the sounds to our Lightsaber Hilts. Mirael D'Kana: For editing the Ceremonial music to be compatible with the game and the map. And for being the undisputed queen of the Universe. Sared: For skinning the new NPCs. --- Standard Saber NPC Voice : Huxley Dual Saber NPC Voice : Jacen Aratan Staff Saber NPC Voice : Mirael D'Kana- 1 review
-
- clanmap
- botroute support
-
(and 3 more)
Tagged with:
-
41 downloads
NetRadiant-custom (also seen as NRC) is a fork of NetRadiant which itself is a fork of GTKRadiant, the map making utility made to create maps in games like Jedi Academy, Jedi Outcast, Quake 3, etc. (GtkRadiant 1.4→massive rewrite→1.5→NetRadiant→this) This is generally considered the best tool to make maps in the modern era, with it being more stable on modern hardware and operating systems and containing tons of quality of life features and additions. If you are familiar with GTKRadiant, it is similar enough to learn quickly though some default keybinds may be different than you are used to. Created and maintained by GARUX Supported games Main focus is on Quake, Quake3 and Quake Live. Though other normally supported games should work too. Releases include configs for the following games: Alien Arena, Darkplaces, Doom 3, Doombringer, Wolfenstein: Enemy Territory, Heretic II, Half-Life, Jedi Knight Jedi Academy, Jedi Knight II: Jedi Outcast, Kingpin, Neverball, Nexuiz, Open Arena, Project::OSiRiON, Prey, Quake II, Q3Rally, Quake 4, Quetoo, Smokin' Guns, Soldier of Fortune II - Double Helix, Star Trek Voyager : Elite Force, Tremulous, Turtle Arena, UFO:Alien Invasion, Unreal Arena, Unvanquished, Urban Terror, Warfork, Warsow, Return To Castle Wolfenstein, World of Padman, Xonotic, ZEQ2 Lite. Features Development is focused on smoothing and tweaking editing process. Random feature highlights WASD camera binds Fully supported editing in 3D view (brush and entity creation, all manipulating tools) Uniform merge algorithm, merging selected brushes, components and clipper points Free and robust vertex editing, also providing abilities to remove and insert vertices UV Tool (edits texture alignment of selected face or patch) Autocaulk Model browser Brush faces extrusion Left mouse button click tunnel selector, paint selector Numerous mouse shortcuts (see help->General->Mouse Shortcuts) Focus camera on selected (Tab) Snapped modes of manipulators Draggable renderable transform origin for manipulators Quick vertices drag / brush faces shear shortcut Simple shader editor Texture painting by drag Seamless brush face<->face, patch<->face texture paste Customizable keyboard shortcuts Customizable GUI themes, fonts MeshTex plugin Patch thicken All patch prefabs are created aligned to active projection Filters toolbar with extra functions on right mouse button click Viewports zoom in to mouse pointer 'all Supported formats' default option in open dialogs Opening *.map, sent via cmd line (can assign *.map files in OS to be opened with radiant) Texture browser: show alpha transparency option Texture browser: search in directories and tags trees Texture browser: search in currently shown textures CSG Tool (aka shell modifier) Working region compilations (build a map with region enabled = compile regioned part only) QE tool in a component mode: perform drag w/o hitting any handle too Map info dialog: + Total patches, Ingame entities, Group entities, Ingame group entities counts Connected entities selector/walker Build->customize: list available build variables 50x faster light radius rendering Light power is adjustable by mouse drag Anisotropic textures filtering Optional MSAA in viewports New very fast entity names rendering system Support 'stupid quake bug' Arbitrary texture projections for brushes and curves Fully working texture lock, supporting any affine transformation Texture locking during vertex and edge manipulations Brush resize (QE tool): reduce selected faces amount to most wanted ones Support brush formats, as toggleable preference: Axial projection, Brush primitives, Valve 220 Autodetect brush type on map opening Automatic AP, BP and Valve220 brush types conversion on map Import and Paste New bbox styled manipulator, allowing any affine transform (move, rotate, scale, skew) rendering of Q3 shader based skyboxes Incredible number of fixes and options Q3Map2: q3map_remapshader remaps anything fine, on all stages Automatic map packager (complete Q3 support) Report full / full pk3 path on file syntax errors Allowed simultaneous samples+filter use, makes sense -brightness 0..alot, def 1: mimics q3map_lightmapBrightness globally -contrast -255..255, def 0: lighting contrast -saturation light option -bouncecolorratio 0..1 (ratio of colorizing light sample by texture) -nolm - no lightmaps -novertex works, (0..1) sets globally -vertexscale New area lights backsplash algorithm (utilizing area lights instead of point ones) -backsplash (float)scale (float)distance: adjust area lights globally (real area lights have no backsplash) New slightly less careful, but much faster lightmaps packing algorithm (allocating... process) -extlmhacksize zero effort external lightmaps for Q3 Valve220 mapformat autodetection and support Consistent brush content deduction with mixed face parameters Model shaders paths deduction Fixed model autoclip, added 20 new clipping modes Support negative misc_model scale Assimp model loading library (40+ formats) -json bsp export/import -mergebsp injects one bsp to another No shaderlist.txt mode: load all shaders see changelog-custom.txt for more -
26 downloads
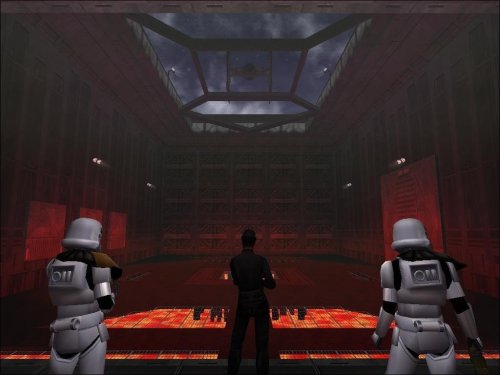
AUTHOR: JediMurderer/MeatsOfEvil DATE RELEASED: 19 October 2009 CREDITS: I would like to thank a number of people who made this possible, starting of course with Lucasarts and Ravensoft for making such a moddable game. In addition the good people of the jk3files forums deserve my thanks for various tips and suggestions. The tutorials of mappers RichDiesal, Szico and Bubba were also instrumental in teaching me what I know. Thanks to SpPwn for suggesting an alternate lava shader, and AshuraDX for providing said upgrade. All textures in the lava folder and the shaders are property of AshuraDX. I also want to thank in particular NAB622, for putting up with my noobish-ness on the jk3files forums, pushing me in the right direction when I had almost lost hope on getting my map to work properly and even providing me ideas for future modifications. NAB622, you have saved this map. Lastly, I want to thank all the people who tested my map before it's release: My Brother My Mom cloudflint PANIC98 SpPwN martinfaulkes NAB622 General Jaxun AshuraDX Anyone who did not post their name on the forums but tested it anyway INSTALLATION INSTRUCTIONS: Place malevolence.pk3 in your base folder. The base folder is located in the gamedata folder, which is in the folder you installed the game in. DESCRIPTION: Malevolence is a duel/powerduel map designed (in my opinion) to make these modes more interesting. The duels that I have observed tend to be rather dull, as the two duelists swing at each other, dodge out of the way, and repeat. What if the battleground itself was also hazardous? Even better, what if the environment was actively trying to kill you while you fought? This is where Malevolence comes in. An Imperial officer and his bodyguards watch as you and other prisoners fight to the death while avoiding the obstacles of the arena itself. Dare to fight on this map to find out what dangers await. Your only warning of the impending doom will be the double siren that sounds before your death. Enjoy! BUGS: I have seen bots defy death on one or two occasions where a normal player would be reduced to rubble...since I have no idea how they do it I have no hope of fixing it. Also despite my best attempts at bot-routing, the AI will still act pants-on-head stupid at times and we will just have to live with that. Also, the alarm and the taunts from the Imperials interrupt each other. COMMENTS: Everything the map throws at you CAN BE AVOIDED. Pay attention to what is happening and you will see a way to escape. Also do not go near the observation box unless you want to be insulted by your executioner. Lastly, this is my first map ever! Yay! PERMISSIONS: Ask me before using any of my assets. Also, the lava textures and shaders belong to AshuraDX so I cannot authorize anyone to use them.- 1 review
-
- roleplaying
- co-op
-
(and 1 more)
Tagged with:
-
Version V2
116 downloads
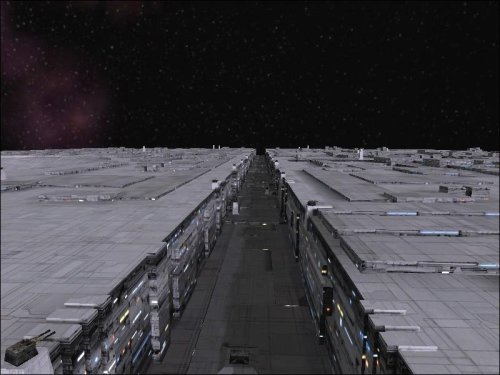
Author: Darth Zappa Original Release Date: 12-07-2004 The deathstar trench. Pretty self explanatory i guess. This is a team ffa dogfightin' map, with turrets on the surface. There is an exhaust port that goes kaplooie and awards 25 points to the first rebel that shoots it, but the entire map does not explode or anything like that. beware flying over the large deathstar gun dish - the gun is ARMED! if you fly into its shot path, it will fire. you will go kaplooie. This map will NOT WORK WELL in FFA MODE. I STRONGLY RECOMMEND TFFA GAMES on HERE. to change to TFFA, set your server's g_gametype to 6. This map is huge. In fact, it's as big as it can possibly be. If you had trouble running star destroyer siege, then don't bother with this. There is no 'inside' to the deathstar, other than the tie-fighter hangars. I have no plans to add the interior to this map. I may add siege in the future; for now it's TFFA. There are two versions of the map included: deathstar_trench_v1 - has just basic x-wing and tie-fighter vehicles. this version is good for folks who dont want to add any custom vehicles to their servers. deathstar_trench_v2 - has several custom vehicles added to the map - tie-advanced - darth vader's tie fighter - tie-defender - a deluxe tie fighter from the EU novels and games - tie-interceptor - the improved tie fighter from ROTJ - y-wing - the rebel heavy fighter - a-wing - small heavily armed fighter from ROTJ - b-wing - the large heavy fighter from ROTJ - millenium falcon (yt-1300) - heavy armed freighter, which is only enabled if the rebels make it to the far end of the trench ** IMPORTANT ** READ THIS ABOUT VEHICLE LIMITS ** This map uses many custom vehicles, and you might hit the limit allowed by JA. I STRONGLY RECOMMEND RUNNING A MOD such as 'ASTEROIDS MOD' or 'JAPLUS v2.2' which enables the server and client to have extra vehicles installed in your base folder. If you do not use a mod like this, you need to clean out your base folder of any other vehicles that you are not using on this map to run it. If you are running a Mod that allows for extra vehicles, you can also install your vehicles in that mod's folder. For example, if you are running japlus, then you can put extra vehicles in the gamedata/japlus folder and they will only be available when you are on a server running that mod. This is a good method to keeping your base folder tidy and conflict-free. ** INSTALLATION ** put the deathstar_trench.pk3 into your base folder. If you are going to run the v2 version of the map with extra vehicles, put the vehicle .pk3 files into either your base folder, or (recommended) your mod folder, such as gamedata/japlus or gamedata/asteroids (whatever one you are using.) vehicles installed into a mod folder are only available during games that are running that mod. Credits: -------- map design and construction by darthzappa custom vehicle models credits: b-wing vehicle by Hatrus and Manquesa tie defender vehicle by Hatrus a-wing vehicle by Astromash and Manquesa y-wing vehicle by Manquesa and Andy 867 tie interceptor vehicle by 7IM and Michael 'Chang Khan' Gummelt tie advanced X1 vehicle by Raven Software, NeoMarz1 and Manquesa yt-1300 vehicle by Raven Software and Manquesa all original vehicle read-me files are included in a separate folder. Several of these vehicles are from the Asteroids Mod pack, to ensure compatibility with that mod. Portions of this map were copy/pasted from Raven's star destroyer siege map, but i changed them around quite a bit. -
Version final
88 downloads
Author(s): KOTORMRJay & War_Shark Original Release Date: 03-02-2007 Two simple bases connected by a wormhole FSF is set up with a few different features. This map has turrets that have a variable, the server/host must state the ones he has in use ( AI or player controlled ). All players must conform to the host turret choice. To control the Player turret you must hold the "BACK" direction to unlock full rotation. There are NPC's in map as well as many secrets and bonuses to find ( like a NPC based saber challenge ). FSF also has a user variable. Each player can pick the ships they want to use for the "bonus ships" for Rebs. there is the B-WING_REB and the Y-Wing_reb for Imp. there is the VADER-TIE_IMP and the SLAVE-1_IMP. These are mainly examples as long as the basic VEH and NPC files remain mostly the same and the ship you choose to create has the appropriate amount of tags almost any ship can be created as a "bonus ship". Every player can have their choice of bonus ship for example... Server has the b_wing and the vader_tie in his base folder, player 1 has the y_wing and the slave_1 in his base folder they can both play. When the players meet in space the server will see player 1 flying a b_wing and himself in a vader tie. Player 1 will see the server flying a slave_1 and himself in a Y_wing. Basically you will see the ship in your base folder. Extract info and basic tutorial of how to switch out ships. extracted data extract to base folder: BASE: FSF.PK3 TURRET_PLAYER.PK3 VADER-TIE_IMP.PK3 B-WING_REB.PK3 FOLDER(bonus_ships_imp) VADER-TIE_IMP.PK3 SLAVE-1_IMP.PK3 FOLDER(bonus_ships_reb) B-WING_REB.PK3 Y-Wing_reb.PK3 FOLDER(Turret_variants) TURRET_EXTREME_MODE_A-I.PK3 TURRET_PLAYER.PK3 Let say the server is running AI turrets... BASE: FSF.PK3 (TURRET_PLAYER.PK3) delete me VADER-TIE_IMP.PK3 B-WING_REB.PK3 FOLDER(bonus_ships_imp) VADER-TIE_IMP.PK3 SLAVE-1_IMP.PK3 FOLDER(bonus_ships_reb) B-WING_REB.PK3 Y-Wing_reb.PK3 FOLDER(Turret_variants) (TURRET_EXTREME_MODE_A-I.PK3) copy me TURRET_PLAYER.PK3 Now simply paste the copied pk3 into base folder... BASE: FSF.PK3 (TURRET_EXTREME_MODE_A-I.PK3) paste me here VADER-TIE_IMP.PK3 B-WING_REB.PK3 FOLDER(bonus_ships_imp) VADER-TIE_IMP.PK3 SLAVE-1_IMP.PK3 FOLDER(bonus_ships_reb) B-WING_REB.PK3 Y-Wing_reb.PK3 FOLDER(Turret_variants) TURRET_EXTREME_MODE_A-I.PK3 TURRET_PLAYER.PK3 Lets say you want to switch to the Y-wing... BASE: FSF.PK3 TURRET_PLAYER.PK3 VADER-TIE_IMP.PK3 (B-WING_REB.PK3) delete me FOLDER(bonus_ships_imp) VADER-TIE_IMP.PK3 SLAVE-1_IMP.PK3 FOLDER(bonus_ships_reb) B-WING_REB.PK3 (Y-Wing_reb.PK3) copy me FOLDER(Turret_variants) TURRET_EXTREME_MODE_A-I.PK3 TURRET_PLAYER.PK3 Now simply paste the copied pk3 into base folder... BASE: FSF.PK3 TURRET_PLAYER.PK3 VADER-TIE_IMP.PK3 (Y-Wing_reb.PK3) paste me here FOLDER(bonus_ships_imp) VADER-TIE_IMP.PK3 SLAVE-1_IMP.PK3 FOLDER(bonus_ships_reb) B-WING_REB.PK3 Y-Wing_reb.PK3 FOLDER(Turret_variants) TURRET_EXTREME_MODE_A-I.PK3 TURRET_PLAYER.PK3 You can NOT have the b_wing and y_wing or vader_tie and slave_1 in the base at the same time, only one bonus ship for a side (reb or Imp) and you MUST always make sure you have the same turret set up as the host but once again your bonus ship is your choice. The map is FFA TFFA and CTF. The map does come with a basic bot support Bots do not fly Good luck and have fun. -
167 downloads
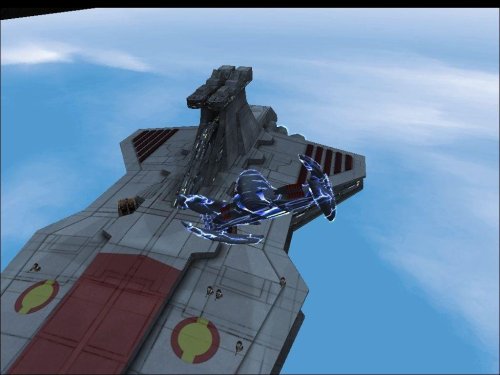
Author: XOFT CORP Original release date: 12-24-2012 Version: 1.0 STORY By the second year of the Clone Wars, the Outer Rim world of Quell, the principal planet of the Quell system had become a contested site between the Galactic Republic and the opposing Confederacy of Independent Systems. However, Quell's state of contention soon escalated when capital ship forces from both sides of the ongoing war met in the highest levels of the planet's atmosphere to engage in battle. The Sky Battle of Quell took place in the second year of the Clone Wars in the skies over the contested world of Quell when Jedi General Aayla Secura and her Republic fleet were ambushed by a Confederate Navy flotilla. Meeting in Quell's upper atmosphere, each faction launched starfighter squadrons that engaged their enemies in combat. Although both sides took losses, it was Secura's forces that suffered greater casualties when two of her three Star Destroyers fell to the Confederate frigates' heavy turbolaser fire. As the Separatist tactical droid commander, TF-1726, dispatched B2-RP battle droids to board Secura's crippled command ship, the Liberty, Jedi General Anakin Skywalker arrived with reinforcements aboard his own flagship, the Resolute. Launching in LAAT/i gunships, Skywalker boarded the Liberty with his Padawan, Ahsoka Tano, and troops of the 501st Legion led by Clone Captain CT-7567 to evacuate the cruiser before it could be destroyed. INSTALLATION Place all pk3 files included into C:/Program Files/LucasArts/Star Wars Jedi Knight Jedi Academy/GameData/base Notes: This pack was tested succesfully in the following Jedi Academy modifications: - JediMoves JA+ Mod v2.3 Full Distrib - ForceMod III Movie Battles Edition CREDITS ________________ Special Edition ---------------- -Phase I Conception: : Lui-Gon-Jinn Venator outer Modeling : o.o-LAOSS.FFA.MEX and Lui-Gon-Jinn Sky : JOE++ Compilation : o.o-LAOSS.FFA.MEX and Lui-Gon-Jinn -Phase II Attack Cruiser v2 Remodeling : Lui-Gon-Jinn Map Object Modeling : Lui-Gon-Jinn Texture & Shader Design : Lui-Gon-Jinn Coding : Lui-Gon-Jinn Munificent Ship Modeling : Lui-Gon-Jinn Compilation : Lui-Gon-Jinn -Phase III Beta Testers : Lui-Gon-Jinn Compilation & Packaging : Lui-Gon-Jinn ________________ Original Credits ---------------- Title : Attack Cruiser v2 Author : LuB E-mail : lu8@gmx.net Website : www.luza-leveldesign.dl.am File : acv2tjt.pk3 Filesize : 9.47 MB Release date : 11/04/2006 --- Title : Siege/FFA/Observation Deck - Battle over Coruscant Source Files Author : Darth NormaN E-mail : darth-norman@gmx.de MSN : darth-norman@gmx.de ICQ : 262187088 Web : www.normansblog.de Filename : Siege_BoC_Source.zip Filesize : 4.20 MB Release date : 12/2009 --- Title : Movie Battles II Version : Version Zero Author : Movie Battles Team Website : www.moviebattles.com Forums : www.moviebattles.com/forums Release date : 09/14/2008 Disclaimer: ----------- The Venator Star Destroyer Team does not take any credit for the following vehicles. They have been created by the respective authors mentioned below. The vehicles have not been altered except for improve radars in some models. Contents: --------- This pack includes the following vehicles: Title : Republic Gunship Vehicle Imports : Mars Marshall "NeoMarz1" Modeling : Mars Marshall "NeoMarz1" E-Mail : neomarz1@sbcglobal.net Website : http://www.geocities.com/neomarz1@sbcglobal.net/ File Name : gunshipVM.pk3 File Size : 981KB Release date : 11/25/2003 --- Title : V-19 Torrent Clone Starfighter Model by : Zymotico Vehicle by : Hatrus Animation by : Manquesa Skins by : Zymotico File Name : v-19.pk3 File Size : 4.46MB Release date : 06/05/2005 --- Title : V-Wing Starfighter Model by : Minilogoguy18 Vehicle by : Minilogoguy18 Animation by : Minilogoguy18 Skins by : Dark_Cuillere File Name : miniVWing.pk3 File Size : 1.81MB Release date : 10/29/2005 --- Title : ARC-170 Clone Starfighter Model by : Minilogoguy18, Dark_Cuillere Vehicle by : Minilogoguy18, Dark_Cuillere Animation by : Minilogoguy18 Skins by : Dark_Cuillere File Name : mini_arc.pk3 File Size : 6.52MB Release date : 08/18/2005 --- Title : Vulture-class Advanced Droid Starfighter Model by : Hatrus Vehicle by : Hatrus File Name : droidfighter.pk3 File Size : 6.62MB Release date : 06/05/2005 --- Title : Jedi Starfighter Model by : Unknown Vehicle by : Unknown File Name : jsfighter.pk3 File Size : 780KB Release date : Unknown-
- star wars related
- space
-
(and 1 more)
Tagged with:
-
151 downloads
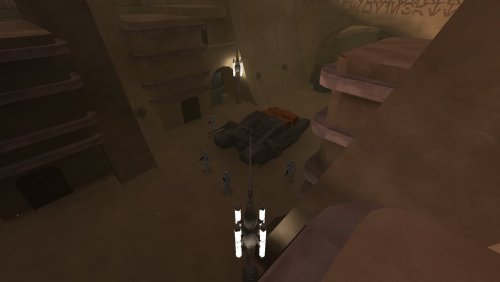
This is a re-upload of a map made by PyroTechnics. As he has since retired from the modding community, don't expect any official updates and support. *********************************** Jedi Knight: Jedi Academy *********************************** TITLE: Jedha City AUTHOR: PyroTechnics FILENAME: mb2_jedha.pk3 FILESIZE: 36.270 kb DATE RELEASED: 11th of November 2020 CREDITS: George Lucas/ Raven, and any people that worked on the game, and stories. -------------------------------------------------------------------------------- INSTALLATION INSTRUCTIONS: Install the pk3 file in your MBII folder... \Jedi Academy\GameData\MBII -------------------------------------------------------------------------------- DESCRIPTION: This is the FFA version of Jedha City. Here is the original readme: Hey guys, I made a map based on Rogue One's Jedha City for the Moviebattles 2 mod. If you want to play this map you need to have the Moviebattles 2 mod installed for JK3. Download Moviebattles 2 The objectives for the rebel team is that they have to hack the imperial occupier tank, The Imperials have to defend it. The rebels have a rooftop advantage, the Imperials a ground advantage. All the textures, models, map and FA are made by me. This music is a custom mix from the movie soundtrack to suit the 5 min rounds. I recommend a fast pc that can handle high fps, and haven't had any feedback from any one conserning performance, but it should be doable for a modern pc. I hope you can play this without any errors, because I'm not planning to support this project any further in the future. It was fun making it, and I hope you enjoy it. See you when I see ya, PyroTechnics. -------------------------------------------------------------------------------- BUGS: *few patches not fitting properly, *some z-ing at the connection points of curved patches, *some fps issues on older pcs. -------------------------------------------------------------------------------- COMMENTS: No hidden areas or death pits this time. -------------------------------------------------------------------------------- Beta Testers: *None -
Version 1.01
182 downloads
Author: unknown (if you are the author or know who the author is, please let staff know) This is a very old model of Spongebob that has circulated among the JKA community for decades but as far as we know, was never publicly released on JK3Files or JKHub. It's possible it was from pcgamemods. The author is unknown, so if you are the author, please reach out to JKHub staff to give you credit. It now has bot, team, and NPC support. There are 2 NPCs, one good and one bad, depending on if you want to fight him or alongside him. /npc spawn spongebob /npc spawn spongebob_bad -===================- -!|!- CREDITS -!|!- -===================- @Circa for NPC support, bot edits, team support and sound fix @disneyaintcanon13 for bot support and upload -========================- -!|!- INSTALLATION -!|!- -========================- Put the pk3 in the base folder of your Jedi Academy GameData directory (Jedi Academy/Gamedata/base) -
Tools you'll need Notepad Pakscape ModView Image editing software, such as GIMP This tutorial is meant to explain how to compile multiplayer skins. This tutorial is not meant to be a tutorial on how to make actual skin textures. Please use more creativity than this tutorial shows when making your own multiplayer skins! The first thing you want to do is have an idea of what kind of skin you want to make. For this tutorial we'll make a recolor, however I strongly recommend against making simple recolors, unless just for practice. For this tutorial we will use the Jedi model. Create the following directory in your hard drive: base/models/players Open assets1.pk3 from your Jedi Academy base folder using Pakscape and extract the Jedi folder and the _humanoid folder (see image below). Open the model.glm in ModView. It should look like this: What we want to do is recolor the shirt. In your own works you'll want to do more than this, but as an example it'll work. In the jedi folder you extracted, open "model_default.skin" with notepad. Inside you'll see the following: hipsa,models/players/jedi/legs.tga hipsa_torso,models/players/jedi/torso.tga l_lega,models/players/jedi/boots_hips.tga l_lega_cap_hips_off,models/players/stormtrooper/caps.tga r_lega,models/players/jedi/boots_hips.tga r_lega_cap_hips_off,models/players/stormtrooper/caps.tga hipsa_cap_r_leg_off,models/players/stormtrooper/caps.tga hipsa_cap_l_leg_off,models/players/stormtrooper/caps.tga hips_cap_torso_off,models/players/stormtrooper/caps.tga torso,models/players/stormtrooper/caps.tga torsoa,models/players/jedi/torso.tga torsoa_l_shoulder,models/players/jedi/torso.tga torsoa_r_shoulder,models/players/jedi/torso.tga r_arma,models/players/jedi/torso.tga r_handa,models/players/jedi/basic_hand.tga r_handa_wrist,models/players/jedi/torso.tga r_handa_cap_r_arm_off,models/players/stormtrooper/caps.tga r_arma_cap_r_hand_off,models/players/stormtrooper/caps.tga r_arma_cap_torso_off,models/players/stormtrooper/caps.tga l_arma,models/players/jedi/torso.tga l_handa,models/players/jedi/basic_hand.tga l_handa_wrist,models/players/jedi/torso.tga l_handa_cap_l_arm_off,models/players/stormtrooper/caps.tga l_arma_cap_l_hand_off,models/players/stormtrooper/caps.tga l_arma_cap_torso_off,models/players/stormtrooper/caps.tga torsoa_cap_l_arm_off,models/players/stormtrooper/caps.tga torsoa_cap_r_arm_off,models/players/stormtrooper/caps.tga head,models/players/jedi/torso.tga heada,models/players/jedi/head_01.tga heada_face,models/players/jedi/face_01.tga heada_eyes_mouth,models/players/jedi/mouth_eyes.tga headb,*off headb_face,*off headb_eyes_mouth,*off head_cap_torso_off,models/players/stormtrooper/caps.tga torso_cap_head_off,models/players/stormtrooper/caps.tga torso_cap_hips_off,models/players/stormtrooper/caps.tga I have bolded the lines of interest. They indicate the torso and both arms, which we want to recolor. As you can see, they point to torso.jpg. Open this jpeg in your graphics program (preferably something that supports layers, like GIMP or photoshop -- do not use MS Paint!) Once you have the jpeg open, make a new layer and, for our purposes, we'll choose a green color. Use paintbucket to fill the layer with green, then set the layer to overlay, then save it. Re-open the jedi model in ModView, or refresh the textures (see image below). Now you don't want to overwrite the jedi model, so now we're going to make this an independent skin. The first thing we need to do is open up model_default.skin again. Now press control + H and you should get a text replace window. For our purposes we're going to name our skin bobs_jedi, so in "Find what:" put jedi, and in "Replace with:" put bobs_jedi. Note that you can't always use the replacer, as sometimes the folder name will also be present in the texture name. Be careful when replacing text in the .skin file. Once your .skin file is finished, rename the entire jedi folder bobs_jedi, then open up the model.glm and make sure your model still has textures. If it doesn't then you've done something wrong. Open PakScape and create the following directory structure: Save the PK3 with a unique name in your base folder. Do not overwrite any assets PK3s or any pre-existing PK3s. To make sure your mod is as compatible as possible, make the name as unique as possible. An easy way to do this would be to put your name or initials in the PK3 name. This also goes for your character's folder. Our folder is named bobs_jedi. However if we simply named it "bob" or "jedi" it would be more likely to conflict with another mod. Think of how many Anakin skins are out there, and how many problems we would have if they all used the same folder name! Write a read-me text file for your mod, take some screenshots, and zip everything up, then share it with your friends!
-
This modding tutorial will explain how to add any skin or model into the single-player species selection menu. It also covers how to correct issues with the Hoth outfits for the two Hoth levels. Originally written by Inyri Forge Tools you'll need Notepad Pakscape Image editing software, such as GIMP Make sure the model/skin you want to be a new playable species (through the character creation menu) is ready and works. Open Pakscape and open "assets0.pk3". Extract "MENUS.str" to any folder. Add a new entry to MENUS.str to reflect the skin you want to use. If the folder of your skin is "bob_skin", your entry will look like this: REFERENCE BOB_SKIN NOTES "For character menu" LANG_ENGLISH "Bob's Skin" Reference is the folder name of your skin, notes you don't need to worry about, and LANG_ENGLISH is the title that will come up on the menu. NOTE: While I'm not completely sure of this, I believe that the menu will only recognize the strings of the first MENUS.str you put in your base folder. In my experience, after subsequent modifications the strings will not appear. The mod, however, will work just fine. Make a new PK3 file (you may call it whatever you want) and make a folder called "strings". Inside that folder, make a folder called "English". Put MENUS.str into this "English" folder. You may choose to put the contents of the skin file into your PK3, or use the original PK3. This is up to you. However, we do need to add something to the skin to make it function, so do the following: make a folder called "models" in the base directory of your PK3. Inside this folder, make a folder called "players". Inside this folder, make a folder with the name of your skin. For our example, that would be "bob_skin". If you choose to make a new copy of your skin inside this mod, copy all contents of the "bob_skin" folder (or whatever you skin is called) into the new folder in the new PK3. Now is where things can get tricky, if you forget a step. Open notepad and make a file with the following content: *white { setcvar ui_char_color_red 255 setcvar ui_char_color_green 255 setcvar ui_char_color_blue 255 } Save this as "playerchoice.txt". That's right, save it as a text file. After saving, place it in the "bob_skin" folder, or whatever name you have chosen. Now is where we get a little involved. This tutorial will already assume you have your variants chosen and ready. What you will need to do is make icons for each head, torso, and lower body segment that you want to use. Name these "icon_head_a1.jpg", "icon_head_a2.jpg", "icon_head_a3.jpg", etc. Same with "icon_lower_a1.jpg" etc. and "icon_torso_a1.jpg" etc. Put them in your skin's folder. Now is the more complicated part. You will need to make skin files for each head, torso, and lower segment for each variant. This can be most complicated. While not difficult, most .skin files are not arranged in a very intuitive manner. We will take this section in steps as well. Assuming you have multiple skins of the same model that you want to use as variants: separate the head, torso, and lower strings of each skin. each head, torso, and lower segment to a new file. Name them the same way you named your icons (ie. head_a1.skin, torso_a1.skin, etc.). Test these out in ModView if you wish, otherwise place these in your skin's folder. In our example, "bob_skin". NOTE: Make sure that all of your skin files are pointing to the correct directory! If you did any folder renaming, you'll need to edit your .skin files to match. Save your PK3 and try it out! Fixing the Hoth Skins Make sure you have already followed the tutorial for getting a single-player skin or model in the custom menu. Copy your torso and lower .skin files, renaming them "lower_e1.skin" and "torso_g1.skin". Please note that these names must be exact. The game is programmed to look for these two skin files for the hoth clothing, and if there's a way to circumvent that I haven't found it yet. I haven't looked, however, because renaming them e1 and g1 isn't that complicated. Open up your skin's PK3 (the one you made in the last tutorial) and add these two .skin files to your skin's folder. Save and play! This should fix the problem of having the models come up mangled during the Hoth levels.
-
This short introductory tutorial will show you the basics on how to setup ModView and how to properly use it for viewing models using the Quake3 engine. Tools you will need Pakscape ModView Any in-game model ModView is a very picky application. It requires a specific file structure to run properly, as well as a bunch of files. I'll guide you through the setup process in another step-by-step method. Make a folder called "base" anywhere on your PC. You may use your Jedi Academy base folder, if you wish. Make a folder, inside "base", called "models". Make a folder, inside "models", called "players". Open Pakscape, and open "assets1.pk3" which is located in your Jedi Academy base folder. In the models/players directory of assets1.pk3, find a folder called "_humanoid". Copy this folder into the players folder you made. Open the PK3 of whatever model you've chosen to look at. For this tutorial, we'll use the luke model. Go into models/players of the assets1.pk3 and copy the "luke" folder into your players folder that you made. Now that we have our computer set up to run ModView, let's look at the model. Go into the luke folder (on your PC, not in Pakscape; you can close Pakscape now, in fact) and click on "model.glm". This is our model file, which ModView will show. When ModView opens, there may be some error messages about shaders or caps. You can ignore those. Look at the model. If you've done everything correctly, you should be able to see it. ModView is ideal for skinning, except for the fact that in-game you will see the model at a much lower resolution, so it won't look quite the same. However, that fact does not mean you should skimp on the details. So now you want to edit Luke. Edit his texture files (targas and jpegs) any way you want. Now you want to see your changes. Make sure your textures are saved, then go back into ModView. There is a small button at the top with an oval on it and the letters "TEX". Click this to update your textures. Voila, those are the ModView basics. Here are some other helpful hints. ModView will show any supported model performing all in-game animations. You can press the play button to view them from start to finish, or use the collapsable tree on the left to view individual animation sequences. This can be helpful for choosing new/alternate animations. The button just left of the "TEX" button is the "best fit to screen" button. In case you lose your model somewhere, you can click that button to bring it back to the center of the viewscreen. Mouse Navigation of Preview Left click: rotate Right click: zoom Alt + Left click: pan
-
This simple but comprehensive tutorial will teach you how to make a very basic sword model from generic shapes. It is ideal for learning to make weapons for video game modding. Originally written by Inyri Forge Tools you will need 3DS Max (or gmax) Image editing software, such as GIMP NOTE: This tutorial was written with 3DS Max in mind. Some parts may not be compatible with GMAX - I can't say for certain because I don't use it and don't know what functions it doesn't have. See the attached key below to find all important buttons/functions listed in this tutorial: This tutorial will cover all aspects of both modelling and skinning a very simple sword - a Roman gladius. This sword will need the following basic shapes: a plane (or box), two spheres, and a cylinder. That's right! You can make a sword out of just these basic shapes. I purposely picked a very simple design to begin with. It's never good to try and learn to do something by starting out with something complicated. The first thing we want to do is find a good reference picture. I've already done this for us by using a quick google search. Searching google is one of the easiest ways to find good reference pictures without having to do much work yourself. For self-concepts or less common models you may have to draw your own references. If this is the case you just want to make sure your reference is as straight as possible (you may even want to open the image with your image editing software and rotate it until it is as straight as you can get it). This will help in the modeling process. So here is our base reference image: As you can see, this image is only from the front. We will have to "guess" what it looks like from the side. It is okay to assume that the hilt portion is either perfectly round or slightly ovular - whether you want your grip to be round or an oval will be up to you - it really doesn't matter. I am guessing both the sphere on the bottom and the guard separating the hilt and blade are also round. This will be important later. The first thing we want to do is open up 3DS Max or GMAX and start out with a fresh scene. Pick a viewport - I usually use the front viewport - and hit ALT + B. This will bring up the viewport background window. What we want to do is add our base image as our viewport background. Find it, wherever you saved it on your hard drive, then under Aspect Ratio select Match Bitmap. Just to the right, make sure both Display Background and Lock Zoom/Pan are selected. Click OK. So now we should see our gladius image on the background of our viewport. If you find the grid distracting, as I usually do, you can turn it off by right clicking the viewport name and selecting Show Grid. This will toggle the grid off. There, now I can see my reference better! At this point I would zoom in to your selected viewport by hitting the Maximize Viewport Toggle button in the very bottom right. You will probably also want to zoom out by using your mouse scroller. So now what? We have our image, but how do we start? First of all, make sure yo'ure in the create tab. I use a plane method to make all my sword blades, so I don't have to worry about two layers of vertices, but you can just as easily use a box and skip the extrude step I will get to later. This tutorial will go over the plane method. Make a plane roughly the size of your blade. Don't worry if it's not perfect. Once you have made your plane, you may want to change the viewport rendering to Smooth + Hilights. Find this in the same place as Show Grid. Now hit escape to deselect the plane tool and select your plane. Hit ALT + X to go into x-ray mode and F4 to show your edges. If you see lots of edges, go into the modify tab and change your length/width segments to one. MODELER'S HINT! It's always easier to add edges than remove them! If in doubt, use less detail than you need. You can always add more later, but removing detail can be a pain! So now your viewport should look something like this: What we want to do now is right click on the plane, go down to Convert To and chose Editable Poly. This will bring up the Editable Poly Roll-out. Select the Edge Tool and select the two long edges. Right click and select Connect. You should now see an edge in roughly the middle of the blade. Using the Move tool, drag it up to where the blade first begins to narrow. At this point, your viewport should look like this: Now we want to select all three of the short edges and hit Connect. This should draw a line right down the middle. Now I will teach you a time-saving technique for use with symmetrical objects. Select the Vertex tool and delete all the vertices to the right of that center line. That will destroy the right half of your plane. Unselect the vertext tool and select your plane. Hit the Mirror button and make sure it it set to X. Then under Clone Selection choose Instance. This will copy the right half of your blade to the left half, so whatever you do to one side will be mirrored on the other. Handy, huh? Now select the left side again, and select the vertex tool. We will now use the Target Weld tool. Select the target weld button and click on the top left vertex. Now click on the top middle vertex, where the point of the sword is. Now our plane looks a little more like it's supposed to! You'll notice the shape isn't quite right, as the gladius narrows a bit at the top. No worries! With the vertex tool, select the top right vertex (not the point of the sword!) and with the move tool move it to the right until it matches the reference image. You may also have to move the bottom left vertex out as well. Now you should know enough about the basic tools to be able to do this, though! Move the outer vertices around until you're happy with the general shape. So now what do we do? All we have is a flat plane. Now comes the fun part. The first thing we want to do is combine the two halves of our sword to avoid headaches later on. Because the right side is an instance, we can't attach them directly. So what do we do? Delete it! Repeat the process of making the instance, but this time chose to copy it as a copy. Now you can choose Attach from your modify panel and click on the other side of the blade. To reduce the vertex count, use the vertext tool, select all vertices, and click Weld. With the default number it should weld all the middle vertices without welding any vertices you don't want to weld. Now that our blade is complete again, use the Polygon tool and select all the faces of your blade. There are only four, so it's not a big hassle. Just hit CTRL + A to select all. Now hit Extrude in your roll-out. Don't see a difference, do you? Now we'll need to go to a different viewport to see what we're doing. Hit Cancel and press the P button on your keyboard. This will send us to the Perspective viewport. Don't worry that your base image is gone - it's still on your other viewport. Zoom out so you can see your whole model and use the Viewport Rotate button to get a good angle on your blade so you can see both the front and side. With all faces still selected, once again hit Extrude. Now we can see what's happening! This will only be one side of your blade, so the default 10 should be okay. We can always increase it later if we need to. Click OK. So our sword now should look like this: Now we're going to use the Target Weld tool again to make the blade sharp - nobody wants to use a dull blade! Weld the vertices of the front to the back, leaving the middle vertices where they are - you have nothing to weld them to anyway! This is easiest to do in perspective mode. Remember, you can turn edges on here too by hitting F4. Here's another trick, to make sure your blade looks sharp. With the Polygon Tool select the faces of one side of the blade - right or left. Scroll down in the rollout until you see Smoothing Groups. Underneath this will be buttons numbered 1 to 32. 1 should be hilighted in yellow. Click it so it is grey, then click the 2 next to it so that the 2 is yellow. This will cause one side of your blade to have a different smoothing group than the other, making it have a hard edge. This will help your blade to look a bit harder. For smoothed blades you'll want to forgo this step. Now to make the back side of our blade we will once again employ the mirroring technique, but this time choose Y as your axis. You can mirror as a copy if you like and attach the front to the back if you're sure you aren't going to make any more changes. If you think you might alter your blade later, copy it as an instance again. You can skip the welding phase here also if you like. This will keep the blade from smoothing around the edges. For swords with higher vertex counts you will want to weld them and apply different smoothing groups to either side, but this sword has so few polies in the blade that it is unnecessary. So now our blade is done! Phew! Let's move on to the hilt. Hit F to go back to your front viewport. Use the Pan tool to get a good view of the hilt area and zoom in if you need to. We will make the hilt before we make the guard. From the Create tab select Cylinder. A section will pop up called Parameters with a bunch of options. Change the Height Segments to 1 and the Sides to 8. Anywhere from 8 to 12 sides should be sufficient for current gaming purposes (the game engine will smooth these faces and you will not see a difference even if you use additional edges). Using more sides than that is simply wasteful. Put your mouse cursor at roughly the middle of the hilt and click, dragging ds until the edge of the cylinder is close to the edge of the hilt in the picture. Drag the mouse a little bit and click again - this determines the height of the cylinder. Since you can't see how long you made it, we'll worry about changing it later. Hit escape to deselect the cylinder tool. Once again hit ALT + X to put this cylinder in x-ray mode. The cylinder isn't facing the right direction, so we'll need to rotate it. If you have 3DSMax you can use the Angle Snap Toggle to make sure you rotate it exactly 90 degrees. If you have GMAX you'll just have to be a little more careful, as I'm told it lacks this function. Click the Rotate tool and rotate the cylinder 90 degrees. That should look more like a hilt! Move the cylinder up or down and use the Scale tool to scale it only up and down (select just the green part and pull it up or down, depending on how you rotated your cylinder). Position the cylinder so it approximately covers the hilt. To compensate for our hilt guard and pommel section we will need to make it a little bit longer on both ends. I forgot to tell you to do this for the blade, so we'll fix that later. Your model should look something like this at this point: You can see our hilt isn't quite the right shape, as we did with the blade, change the cylinder to an editable poly. Using the vertex tool, select all of the bottom vertices and scale them (you can scale in all directions this time by clicking the center of the yellow portion and dragging) until the are about the width of the bottom of the hilt in the picture. Do the same with the top. Now we have this: Much better! Our hilt is done! Wasn't that easy? So now we have to do the pommel and the hilt guard. This'll be a little bit more complicated, but not too bad. For these we will use the sphere tool. The first thing we want to do is fix our blade. It isn't quite long enough right now, so we want to drag the bottom verts down so they're just overlapping the hilt guard in our picture. This will ensure our model doesn't have any holes. Overlapping objects isn't a bad thing. In fact it is often the easiest way to make sure your model doesn't have any gaping holes in it! Now select the Sphere tool from the Create tab. Change its parameters so the Segments are about 10 or 12. Twelve segments will be much easier to work with for our purposes. To get the sphere to match our reference, place the cursor near the middle of the very bottom of our blade, click, and drag. If it doesn't match up with the picture, use the move tool to reposition it. Remember to put it in x-ray mode! To make things easier for ourselves, let's rotate this sphere 90 degrees up so that it has a straight line across the middle, where our hilt guard and blade will meet. It's a good thing we picked 12 sides, because the mid line falls right where we want it to! Scale the sphere to the left and right if you need to, then convert it to an editable poly. Delete all the vertices above the center line. You should have this: Now if you look at this in perspective mode you'll see we have a problem. Deleting those vertices left us with a hole! In Polygon mode, select Create. Now click on each vertex in order around the top of the half-sphere. This will create a large face which will be the top of our hilt guard. Our hilt guard is done! Now for the easy part - the pommel. I could explain a complicated way, which involves attaching it to the hilt, yadda yadda yadda, but doing that is really unnecessary and will only make UV mapping it more difficult, so we're just going to leave it unattached. Once again select the Sphere tool with the same parameters are our hiltguard. Click on the center of our pommel and drag. Scale the sphere up, down, left or right until you get the right shape. Voila! Done! Before we move on, you may want to go into perspective mode and make sure your hiltguard and pommel aren't elongated from front to back. If they are, scale them appropriately. Here is our finished sword model:
-
Please note that we have been granted permission by Rich to link to and/or host these tutorials. Go to RichDiesal's Mapping University (2003) GtkRadiant can be downloaded here. The Rich Diesal Mapping University / RichDiesal's JK2Radiant MapSource was regarded by many across the community as the best set of tutorials for beginners and advanced mappers to learn from. Some time in 2010 when Map-Craft went down, RichDiesal's tutorials went down along with it, but we managed to get our hands on a backup of the bulk of it. Rich never finished it, so a lot of links aren't there. Tags: Rich Diesal mapping, RichDiesal, Rich Diesel, RichDiesel,
-
-
80 downloads
Author: Jagged Cougar (Brandon) of Clan Apathy (Ca) File Name: Grand_Apathy.pk3 File Size: 33.5 MB~ Date Released : Nov 16, 2010 Special Thanks: Clan Apathy for waiting so long for this map. HQTZ, aka Boddo, for his patience teaching me things and testing help. All the "beta" testers over the last year or two. Credits : Boddo and his awesome shaders. <JS> Vouksh of jk2files.com for the Master Sword model of his Link Sword Mod (v3.1) pack. SithMasteR555's SwordMod (v2). Various authors of hi-res n64 texture packs from emutalk.net. Google.com! Description : My first map ever released, and the first official clan map for Ca. I've noticed that even the best looking maps get old quick, so I designed Grand Apathy with longevity and practicality as a focus. The challenges are tough, yet fun and will add alot of life to the map. Comments: I hit the entity-limit with this map. Because of that, I was unable to add some additional triggers and stuff around the map, was unable to completely finish the admin wing, and was definitely unable to make the 3-4 additional rooms/challenges I had planned (GRAND Apathy indeed!). Other than that, the 10-year-old N64 fan in me had a fun time making this map, and it was a wonderful learning experience. I think I have now acquired a good technical know-how in mapping, that's for sure. Technical: 8235 brushes. 1633 entities (1259 light). Compiled with -light -fast -filter -super2 -bounce8. Sorry, no -samples on this one. I actually worked on about 3 different versions of this clan map before scrapping them all and finally ended up piecing together the rooms into this monster. Done over the course of 2 1/2 years taking months long breaks between 3-7 day mapping spurts. Guestimated worktime: 150+ hours. How to Install : Put the Grand_Apathy.pk3 in your GameData\base game folder. Start JK2 and put "/com_hunkmegs 128" in the console then restart the game. Now enjoy the map! Map Information New Textures : yes New Music : yes New Sounds : yes New Models : yes Game Types : ffa, tffa, duel -
Version Beta 16
340 downloads
This program is basically obsolete by today's standards, but it provides a few unique features not found in modern clients like entity positioning which is essential for clever entity mods. The original website this was available on is now down. This upload is to help preserve a key part of JKA's history while also providing the tool to use even 20+ years later. Note: this is not compatible with OpenJK natively. It runs on jamp.exe. Boba Fett's Ultra Utility is a utility with many tools and features designed to enhance the gaming experience and providing new abilities. Note: Ultra Utility, since it runs alongside Jedi Academy, needs a decent system to run properly. So trying to run it on older pc's or laptops may result in performance issues. One of the primary components of Ultra Utility is its kill tracker. This system allows you to keep track of your kills, deaths and much more. There are, of course, other kill trackers around, but none are as advanced as Ultra Utility's KT, as it keeps track of the players that killed you (or that you killed) with their 'KT profile', it tracks weapons used to kill/die, bots and humans are tracked separately, long names are supported, all languages are supported (the kill tracker is fully language independent, as it does not use console messages for the tracking), and even CTF stats are tracked. And of course you can set your own kill messages. Now, not everyone likes kill trackers. Therefore the kill tracker is just a component of Ultra Utility and can therefore be turned off at will. For the people that like special duel music, you can set a special song that should play once you enter a duel. Next there is a media player, powered by FMOD, supporting many file formats (see features). This way you can listen to your favorite music while chopping up people with your lightsaber. To make things more interesting, Ultra Utility provides an equalizer, several sound effects and the ability to change the playback speed to make the music sound better or just for the fun of it (chipmunks ^_^). The media player supports multiple playlists so you can easily group your music and switch playlists on the fly in-game. Ultra Utility uses the classical 'KT' command system, meaning it uses commands prefixed with ! (exclamation mark). Unlike normal KT's, Ultra Utility does not only support commands typed in chat, but also commands typed in the console! Likewise, you can also bind UU commands or put them in scripts (.cfg), as they act like real JA commands. The command responses can be set to appear in the console, in private chat (sent to you) or public chat (not recommended unless you're sure the server admins don't mind) A thorough list of commands can be found in the manual, or you can use !help for command information in-game. One of Ultra Utility's special features, which is one of the things that makes it unique: The in-game menu. This is a menu system that uses the console to display itself (by overriding it). In this menu you got access to predefined messages (so you don't have to waste keys), broadcast messages (ampsay messages, currently only JA+ is supported), emotes, rendering options (the things that do not appear in the options screen ^_^, including a few 'cheat-protected' settings), server info, player info (with homing system), media player info, download manager (to download specific files from the server, if the server allows downloads), a palette editor so you can change the RGBA combinations of the color code (this is client-side only though), player data monitor (so you can see your information such as health/armor, rewards (leftover from JK2, but they work!), inventory, weapons, force powers, position.. etc), and the JA-GPS (live position and movement information about yourself). Starting the menu is done by pressing a hotkey (ctrl-numpad / by default). The menu itself is controlled using keys, every entry has a key linked to it, just press the key to perform a certain action (open a menu, display a message, change a setting, etc). Closing it can be done by pressing the X key (back) in the main menu or by pressing the hotkey again. When the menu is closed, Ultra Utility will recover the console fully. Next in line is the Favorite server list. This feature allows you to keep track of your favorite servers, see who's playing, check the server settings and join it on the fly at any time. Further more it allows you to use rcon on any server in your list (of course, as long as you have the rcon password). Ultra Utility's rcon feature is the one of the only ones with support for 'multi-word passwords'. Ultra Utility's game launcher lets you specify which mod to load on startup, and which server to connect to (if any), so you can be on any server you like with any mod pre-loaded on the fly! Then there is a nice feature for people who run clans: the clan manager. Now don't be fooled by the name, it is simply a place where you can store information about your clan, such as the server and website, ranks, members, clan wars (TFFA's), and more. You can optionally export the clan manager info and share it with clan members (who also have Ultra Utility). Ultra Utility also contains a minimizer (with resolution changing support!) which can be activated either by command (!mini) or by a hotkey. Ultra Utility allows you to set hotkeys for certain tasks, such as the in-game menu and minimizer (as said above), but also for media operations (play/pause, stop, next, previous). This way you don't have to spam the !next and !prev commands to switch songs, but simply press the hotkey instead. Furthermore you can make Ultra Utility remember stuff for you by setting reminders (it basically works like a note block), so you don't need to have pen and paper around if you need to write something down. You can also set 'allies', which will be greeted when they enter the server you're in, and will get alternative kill messages (if specified). For the people that modify maps (either using BSP editing techniques, or lugormod/makermod), Ultra Utility provides many commands to make things easier. Ultra Utility can show entity information (and a lot of it), list entities in the current snapshot (as well as the amount), search for entities using a certain model, effect or sound, or give info of the entity you're aiming at. Furthermore Ultra Utility can be very helpful if you're trying to place brush entities, as it can calculate the origin you need to specify to move a certain bmodel (*xx) to its target location (with rotation optionally) Ultra Utility allows you to change your chat messages, either by changing their color, or by applying a style to them (a prefix and suffix). So you can type in your preferred color (non-green) or add some fancy things to your chat messages. (Note: this only works for public chat messages and only if they're typed using the chatbox itself, /say commands are not styled) Ultra Utility also provides a terminal so you can easily change the settings, check out your media info and view your KT stats on the fly using a UI plug-in (requires a pk3 which can be downloaded from the website) And last but not least (in this summary) is the skinning system. If you like to give Ultra Utility a personal touch, you can change the looks of the main window using the skin creator, or download skins created by others. This and more awaits you in Ultra Utility v3 (Beta 16) Changes and features in Beta 16: Highly advanced kill tracker Long name support Support for every language, including mods (Language independent) Does not rely on the console for its information, and can therefore not be faked Weapon statistics are tracked Kill stats for humans and bots are tracked separately Suicides are tracked Team kills and team deaths are tracked Vehicle kills are tracked Duels are tracked Support for non-standard duel ends (duel separation, a player joins spec/disconnects, etc.) CTF stats are tracked Customizable kill messages, with support for ordinal numbers (xxth) 3 Message modes: Off, Private chat and Public chat Player stats are tracked and can easily be viewed, sorted, etc Can be turned on and off at will Advanced media player Formats supported: WAV, MP2, MP3, OGG, WMA, AAC, ASF, AIFF, MOD, S3M, XM, IT and MIDI Supports the import of M3U, PLS and WLP playlists 10-band equalizer with 18 presets Support for multiple playlists Add directories, with subdirectories included if you want (uses high-speed file scanner) CD-player Internet radio support Zero-Latency Sound Effects: Pitch Shifter, Low pass, High pass, Reverb, Distortion, Echo, Flange and Chorus Ability to change playback rate/frequency Analysis (Oscillators, spectral analysis, volume meters and voice print) In-game menu system Complete menu system featuring the following menus: Messages Broadcast messages (JA+ only at the moment) Emotes (Base/JA+ only at the moment) Team chat selector (JA+ only) Profile selector Rendering options - including: Basic cg_ and r_ settings Void color, white walls, global light, etc Wireframe and normals (fully functional) – available unless the server denies the usage of them (see below) Ability to unlock camera commands (cg_thirdpersonxxxx commands) Ability to unlock weather control (r_we) And more.. Server Information Player Information (+ homing system) When using the homing system, the targeted player is highlighted to make him/her easier to see Media player (+ overlay mode) Palette editor Download manager Player data monitor JA GPS And custom menus which you can create yourself Displayed and operated in the console Operated by the A-Z keys Fully restores the old console state when closed Can be activated using a hotkey or a command Can be turned on and off at will Advanced command system All commands use the classic ! (exclamation mark) prefix Commands are fully registered in-game and can be used in the console, binds, scripts, etc. Commands can be typed in chat (like classic kill trackers) Commands work properly when using chatstyles (see below) Response messages use a color scheme of 4 colors (which can be modified at will) Command responses have 3 message modes: Console, Private chat and Public chat Immune against faked commands (copying someone’s name and typing a command) Favorite server list Get server info easily (settings, players, allowed force-powers/weapons, etc) Send RCON commands easily (password is remembered per server ) RCON supports ‘multi-word’ passes Allows you to join a server on the fly with the right mod pre-loaded Allows you to give server ‘nicknames’ so you can address them in-game using commands (to query or join) You can add servers to the list in-game using commands (either the current server or with a specified IP) Clan manager Write down information about your clan, the website, the server, etc Keep track of members, clan wars (TFFA’s), new promotions, new recruits and more Export the clan manager data and share it with other Ultra Utility users in your clan Protect the clan manager data against editing by setting a password (if you want to share it for example) Duel Music Play your favorite tune while you’re dueling Can be to only play if you were already listening to music (in case you simply don’t want to hear music for the time being) Can be enabled and disabled in duel without mess-ups Allies Create a list of allies (friends) Set up a welcoming message for your allies/friends Set up custom kill/death messages for allies/friends Reminders Useful to store a message you want to remember, think of it as a notepad Console monitor Console content display (fully colored) Ability to send commands to the console Lets you chat while your game is minimized With optional (UU): prefix so people know you’re minimized Ability to log the console to a file Minimizer Lets you minimize Jedi Academy any time you like If the desktop resolution differs from your game resolution, the minimize will automatically correct it (unless you tell it not to) Jedi Academy Launcher Launch Jedi Academy on the fly Preload any mod you like Connect to any server instantly Add your own custom command-line options If you get to the launcher though the favorite server list, the mod and server IP will automatically be set properly Hotkeys Set up hotkeys for: In-game menu on/off Ultra Utility on/off Media commands (play/pause, stop, next song and previous song) Minimizer Terminal Playtime tracker Keep track of the amount of time you’ve been playing Jedi Academy (with Ultra Utility running) Comes with 2 counters, a global and a session counter, so you can track your playtime during a certain period without losing the overall count Chat coloring and chat styles Chat coloring lets you chat in any color you wish (from ^0 to ^7) Chat styles let you add prefixes and suffixes to your chat messages Chat colors and chat styles are only applied on public chat that is spoken though the chat box (Y key by default), not messages said though the console or team/private chat (to prevent issues) Entity information commands Designed for map modders (BSP editing, lugormod and makermod users alike) and anyone else who’s interested in entities List all entities (of a certain type)(within a certain range) Get extended information about a specific entity Locate entities by model, effect or sound Get a full listing of bmodels and their bounds and midpoints Handy bmodel origin calculation commands (just specify the bmodel and the position you want to move it to (and optionally the angle), and Ultra Utility will calculate the origin to specify) Get a listing of all shader remaps currently applied Ability to invoke a trace (check what you’re aiming at) and get trace results (with surface info) and optionally entity info Terminal UI Add-on (requires you to install a pk3 in order to be able to use it) Lets you change Ultra Utility settings on the fly Get a live view of media info Get a listing of all your KT stats (human and bot stats) Open the in-game menu with a single click HUD Add-ons Lets you display information on-screen Media Add-on: Displays the current song, index, playlist, position, playback speed, equalizer settings, etc on screen Kill Tracker Add-on: Displays live KT stats on screen (both human and bot stats) If you aim at a player, his KT profile will be shown (how many times you kill him/her, got killed by him/her, etc.) Entities Add-on: See the amount of entities in the current snapshot real-time Get information of the entity you’re aiming at (if any) Get the aiming point coordinates and surface normals real-time Game integration system Stealth console communication system Messages sent to the console do not appear in the prompt (as it does with other similar programs) No message sent will appear in the command history Chat styling controller Allows the chat coloring and styling (see below) to work without having to send keystrokes to the game Snapshot processor Enables Ultra Utility to get full snapshot and entity information, display entity information and it’s used as the information source for the kill tracker Com_PrintF hook Enables Ultra Utility to get the contents of the console with full color coding, allowing it to display full color coding in the console monitor and recover the console (after using the in-game menu) properly Text overlay system Allows Ultra Utility to display text on screen (currently only used by the HUD Add-ons system Command registration system See ‘Advanced command system’ above Silent mode While this mode is in effect, no messages are shown in public chat (native Ultra Utility messages that is). This also counts for the advertisement line, so if you wish to disable it, enable silent mode. Navigation system / Tracking device Allows you to easily find certain locations using Ultra Utility’s guidance system Can be used to guide you to specified coordinates or to track the location of certain players Restriction system Allows servers to block certain functions which can be abused Works with 3 cvars set server-side (using the sets command) Allows servers to restrict the following: Hide the origin of certain specified models (origin gets shown as ???) Hide the presence of ‘hidden’ players (no entity info available, and the homing device cannot target them) Disable the use of Ultra Utility’s tracking systems (navigation system and homing device) Disallow ‘wall-hax’-like rendering options (wireframe and normals) Force Ultra Utility to use silent mode (even if the user has it disabled) SP Shield replacement Lets you replace the MP shield (green shield bubble) by the SP variant (comparable to force absorb, graphically) Only applies to protection bubbles, not damage JA+ crash fix Ultra Utility automatically patches a "bug" in Jedi Academy that often causes JA+ to crash shortly after joining a server (or after a map change) Get weather forecasts in-game Skinning system Lets you create your own skins for Ultra Utility’s main interface Skins are to be created with the skin creator (included) Skins can change the background image of the skin, the colors of the interface components and the hit zone locations: the drag bar (to drag the window around), minimize button and close button Skins can be password protected to prevent them from being edited in the skin creator (these passes have no effect on Ultra Utility itself) Ultra Utility contains a skin manager with a list of all installed skins (skins must be placed in the /skins directory) with live preview -
71 downloads
Title : No Limits Mod Author : Akira File Name : knsnolimits.pk3 Date Released : 20/02/03 Description : This mod makes all weapons plant and fire extremely quickly. It also removes the limitations of mine planting, you can plant as many as you wish without them blowing up on you. With cheats on and with unlimited ammo you can have a blast. Originally made for screenshots and demo's for the Knights Of Sith website. ________ |Features| ---------------------------------------------------- | v1.0: | | * Every gun shoots extremely quick. | | * No limit on the mines you plant. | | * Mines will only blow by an explosion. | | * Detonation packs don't explode when | | overlapped. | ---------------------------------------------------- ____________ |Installation| ---------------------------------------------------- | Extract knsnolimits.pk3 from the zip file and | | place in /jk2directory/gamedata/. Make sure "Use | | paths" or "Use folder names" is ticked. This will | | ensure that the file is extracted to | | gamedata\Nolimit directory. Alternatively you can | | make a directory in the gamedata folder called | | "Kns Nolimits" or something else and extract the | | file into there. Without paths enabled. | | | | -:-Note: The mod will not appear in the list if | | pk3 file is placed in the wrong directory. Do not | | put it in the Gamedata or Base directory. It must | | be in a seperate folder in the Gamedata directory. | | The foldername doesn't matter but the pk3 files | | path should be jk2directory/gamedata/<Folder name>.| ---------------------------------------------------- _______________ |Running in game| ---------------------------------------------------- | Just start Jedi knight 2 in Multiplayer mode. | | In Main menu goto setup then goto Mods in the | | submenu and select -<[KnS]>- No Limits from the | | list and click apply. Now goto to play in the menu | | and select create server. Configure the server as | | you see fit then start the game. | ---------------------------------------------------- __________ |Known Bugs| ---------------------------------------------------- | * Game crashes when too many mines are | | planted due to too many entities. | | | | * Tripwire dissapears from newly | | planted mines after about 250 are | | planted. Again due to too many | | entities. | ---------------------------------------------------- ______________________________________________________ Enjoy our Mod! -<[KnS]>-Akira -
60 downloads
*********************************** Jedi Knight: Jedi Academy *********************************** TITLE: Cartoon HUD AUTHORS: Last Wish and Darth Cariss E-MAIL: darthcariss(a)hotmail.com and eivind_n_haugen(a)hotmail.com FILENAME: Cartoon Hud.pk3 FILESIZE: 99.0 kb DATE RELEASED: 14 Oct 2006 ================================= CREDITS ================================= LAST WISH : For the Design and graphics. DARTH CARISS : For the HUD ui and rigging it all to work in game. =================================== INSTALL: Just put the pk3 inside your GameData/base Folder DESCRIPTION: This is a fully different hud, It's supposed to be a cartoon hud that is fully different than the orignal JA hud. BUGS: What the .. None! COMMENTS: A new fresh Cartoon Hud THIS MODIFICATION IS NOT MADE, DISTRIBUTED, OR SUPPORTED BY ACTIVISION, RAVEN, OR LUCASARTS ENTERTAINMENT COMPANY LLC. ELEMENTS TM & © LUCASARTS ENTERTAINMENT COMPANY LLC AND/OR ITS LICENSORS. -
4,541 downloads
OpenJO is the Jedi Knight 2: Jedi Outcast version of OpenJK. This is for single player only. For multiplayer, please see JK2MV. OpenJK is an effort by the JACoders group to maintain and improve the game engines on which the Jedi Academy (JA) and Jedi Outcast (JO) games run on, while maintaining full backwards compatibility with the existing games. This project does not attempt to rebalance or otherwise modify core gameplay. Our aims are to: Improve the stability of the engine by fixing bugs and improving performance. Provide a clean base from which new JO and JA code modifications can be made. Make available this engine to more operating systems. To date, we have releases on Windows, Linux and macOS. If you need help, the JKHub sub-forum is a better place for support queries, discussions, and feature requests. License OpenJK/OpenJO is licensed under GPLv2 as free software. You are free to use, modify and redistribute OpenJK following the terms in LICENSE.txt. Installation To install OpenJO, you will first need Jedi Outcast installed. If you don't already own the game you can buy it from online stores such as Steam or GOG. Follow this guide for installing on all 3 desktop platforms. The guide is for OpenJK and Jedi Academy but the steps are the same for OpenJO and JK2. For Developers Building OpenJK Compilation guide Debugging guide Contributing to OpenJK Fork the project on GitHub Create a new branch and make your changes Send a pull request to upstream (JACoders/OpenJK) Using OpenJK as a base for a new mod Fork the project on GitHub Change the GAMEVERSION define in codemp/game/g_local.h from "OpenJK" to your project name If you make a nice change, please consider back-porting to upstream via pull request as described above. This is so everyone benefits without having to reinvent the wheel for every project. Maintainers (in alphabetical order) Ensiform Razish Xycaleth Significant contributors (in alphabetical order) eezstreet exidl ImperatorPrime mrwonko redsaurus Scooper Sil smcv- 4 comments
-
- open source
- mac
-
(and 1 more)
Tagged with:
-
1,509 downloads
ORIGINAL AUTHOR: DARROW LINDER Date Created : February 22, 2006 Overview: --------- Ahhhhh... Finally done. 35 levels, 150000 brushes, 25000 lines of script, 40000 entities and 3000 hours of blood and sweat. EY:4 - The Lost Maps. Let's get this out of the way first. I know the download is big. Sorry. I've made every effort to keep the mod as small as possible. There are 20-30 hours of gameplay here, so it will be worth the download, I hope. If you played my first conversion, Escape: Yavin IV, then hold on to your hats. This is an extension of the first conversion, but includes 25 additional levels, a new story, vehicle levels, space levels, additional duels and puzzles, and customized interface (including a 'Chapters' menu that enables you to play any game level), on-the-fly saber upgrades, and three endings (that's right 'THREE' endings). Your choices during the game decide your fate. Given the length of the game, I have eased up on the difficultly of the game a bit (just a bit). Nuff said. Installation: ------------- BEFORE YOU INSTALL, YOU MUST DO THE FOLLOWING: 1. Remove *all* custom pk3s and mods from your base / GameData folder 2. Remove *all* custom pk3s and mods from your base / GameData folder 3. Remove *ALL* custom pk3s and mods from your base / GameData folder Failure to do so will likely result in the game failing to even start. So please don't ask me why the game won't start if you haven't done this. To install this map, extract the contents of the ZIP file into the 'GameData' folder of your Jedi Academy install directory. Double-click the batch file in the GameData folder and you're on your way. I've been running with the 1.1 patch. If you don't have it, play at your own risk. Story: ------ Basically, the Sith have dominated the galaxy. The good guys (called the Alliance) are threatened. The game will feed you some hints that explain the reason for the Sith control. Of course, you have to come to the rescue to save the universe from total Sith control (oh, unless you choose to become a Sith). The rest of the story pretty much tells itself. Please note that if you choose to jump around the levels using the chapters menu, you will not get the entire story. Just keep that in mind. It is recommended you play through in normal game mode before jumping around. Gameplay: --------- In all, there are 38 levels (12 cinematic levels and 26 playable levels). Unlike the traditional game (JKIII), your saber upgrades occur as you defeat your opponents. Each level also offers your a chance to 'trade' your saber for one encountered up to that point in the game. Like the cool saber disc your opponent has? Defeat him, and take it! It's that simple. Issues: ------- There are two really big issues: 1. level2_saber_shipment always hangs for me when it is *not* loaded as the first level in the game. ** If this occurs, you can use the Chapters menu to start a new game from this point in the game. 2. After some time of playing, the game seems to 'hang' after about 90 seconds from a save point. It does not happen in the same level or in the same place in the level. The problem only occurs after playing and saving for SEVERAL HOURS continuously (essentially the same game). Restarting and loading the saved game does not correct the problem. ** If this occurs, you can use the Chapters menu to start a new game from where you left off. 3. My hard drive crashed and I lost *everything* associated with this game just a couple weeks ago. Fortunately, I had already posted a V4 Beta, so really what you are playing is Beta V4+ here. Everything pretty much works fine, but I lost all of the .map and script files. So... If you use the Chapters menu to start the ending levels of the game (Chapters 8 - 11), you'll need to use the cheats to setup your force powers. ** Bring up the console then type: > helpusobi 1 > setforceall 3 There's other little detailed things, most of which you probably won't even notice, so it's not worth mentioning... Credits: -------- Without these contributors, this game would not be. Beta Testers: ============= Tester #1 ............................ Theos Burgess Tester #2 ............................ Captain Shuttle Tester #3 ............................ Mr11 Tester #4 ............................ Chris Jackson Skins: ====== Aayla Secura ......................... Mars Marshall & Dark_Cuillere Abbaddon ............................. El Cuko Asajj Ventress ....................... Monsoontide and Psyk0Sith BPPloKoon ............................ [BP]Plokoon Bain Elite v2 ........................ -=SOTG=-Bain_Elite Boba Fett ............................ Brian Jones (Bones) Darth Maul 1 ......................... mrdefender Darth Maul 2 ......................... broken_hope & Aaron Smith & Chesire Darth Omega .......................... KAZZZ Darth Savet .......................... Brejo Savet Death ................................ +]Nekroscop[+ Egor ................................. Unknown FemOffee ............................. Mars Marshall General Grievous ..................... Mars Marshall Howler ............................... Light Ninja Knight ............................... Unknown Lamasu ............................... Crying Gods Germany Lizard Reptile ....................... Tps_sithrouge Mace Windu ........................... Aaron Smith Maddog JKA ........................... Maddog Magna Guard .......................... Mars Marshall Mandalorian Sniper ................... Innocent Hawk Neo Reborn ........................... Drakkan Ninja ................................ Tim & Jimesu_Evil & Shady-D & Satanmaster & Playingkarrde Noghri ............................... RO Agent Smith Olts Keldor .......................... OLTS /// Lord Vili **** Pit Droid ............................ Matt-Liell & Scouttrooper RAB-24 ............................... Chairwalker Raptor ............................... Thrawn42689 & Graves & LightNinja Razchrome ............................ Unknown Rodian ............................... Darth Algar Sabergirl ............................ v2 by Sabergirl Samus ................................ Kurtis 'KMan' Smith Shinobira ............................ Crying Gods Germany Sithress ............................. DarthVengeant Soulseeker ........................... Unknown Spawn ................................ Stingray Swoop Racer .......................... Nick Aikenhead (Kahn) Witchblade ........................... {EJA}DarthVengeant{S} Xian ................................. Unknown Yarael Poof .......................... Mars Marshall & PsykOSith & Nomad Yoda ................................. Darth Dizzy & Team Yoda Younglings ........................... Mars Marshall Zabrak Male .......................... Darth Algar Sound Effects: ============== Enhanced Saber Sounds ................ Aryyn Grievous Sounds ...................... Kurt Libengood Voice Acting: ============= Darth Maul ........................... Mr11 Jedi ................................. Darrow Linder Jedi Master Nadoo .................... Mr11 Jedi Master Savet .................... Darrow Linder Jedi Master Secura ................... The Light Side Jedi Master Windu .................... Mr11 Mirala ............................... The Light Side Queen Mothma ......................... The Light Side Rosh Penin ........................... Darrow Linder Sith Lord ............................ Darrow Linder Sithress ............................. The Light Side Saber Models: ============= Crystal Hilt ......................... {THC}ShovelHead CyberNinja ........................... Revan Dark Darth Maul ........................... Unknown Desann Saber ......................... CHoSeN ONe Dual Lightstaff Sabers ............... Red Sith Eclipse Saber ........................ +POO+Sigma Imales ............................... IMALES (Damir Berkovic) Light Disc ........................... Wolrajh/Xantcha Majestic Sai Staff ................... Tiri Punisher ............................. Darth Khan & Lord G-Spot Reborn Saber ......................... CHoSeN ONe Skywalker Saber ...................... CHoSeN ONe Star Wars Classic Sabers ............. Revan Dark TS Custom Sabers ..................... Trauma Sensei X-Saber .............................. Jon Hill Textures: ========= Custom Textures 1 .................... BerneyBoy Custom Textures 2 .................... Shaithis Water and Ripples .................... Sith J Cull (Arevas) Sith Command Ship .................... Sith J Cull (Ep3 Mappack) Weapons: ======== Rocket Effects ....................... Rhinen Concussion Effects ................... Spector Disruptor Effects .................... Spector Vehicles: ========= Duality .............................. Manquesa, RaSiN_HeCk Sith Speeder ......................... Duncan_10158 & Monsoontide Speeder Bike ......................... Duncan_10158 & Monsoontide STAP ................................. Duncan_10158 Interface: ========== Menu Tutorial ........................ Red Sith Startup Screen Images ................ http://www.geocities.com/Area51/Lair HUD .................................. Chewy≤/Uber Noober≤ Maps: ===== duel_valley (modified and extended) .. Raven (all other maps were done by me)- 3 comments
-
- contains cosmetic changes
- star wars related
- (and 5 more)
-
1,432 downloads
ORIGINAL AUTHOR: DARROW LINDER This is a new single player mission for Jedi Academy. It utilizes models, skins, and saber models that I found interested from the jk3files.com over the past year or so. The bits posted by other authors have been stripped down to their bare minimum, to keep the size of this mod down as much as possible. Some highlights: - New and different opponents / challenges in each level of the game - Custom SP maps (13 in all including 2 bonus and 1 cinematic level) - Custom missions with helper NPC's - Custom menus including saber descriptions - Custom saber models - Custom saber abilities - Custom sounds and sound effects - Custom music - Custom visual effects - Custom weapon effects - Custom skins - Custom cinematics (almost an hours worth throughout the game) - Custom HUD - Custom objectives (43 in all) - Secret areas included in nearly all the maps - Powerful sabers and force abilities from the beginning - Several opportunities to upgrade / replace your sabers - Over 20 new opponents with varying levels of difficulty - Approximately 10-14 hours of challenging game play A walkthrough is provided in GameData/escape when you install the mod. This mod is hard -- much more difficult than JA -- but very playable. So if you pick this up, expect something more challenging than what you're used to. Installation: ------------- To install this map, extract the contents of the ZIP file into the 'GameData' folder of your Jedi Academy install directory. Double-click the batch file in the GameData folder and you're on your way. ************************************************ PLEASE USE THE BATCH FILE TO LAUNCH AND RUN JA WITH THIS MOD PLEASE DO NOT USE WITH ANY OTHER JA MODIFICATION ************************************************ To un-install, simply remove the 'escape' folder and the .bat file from your GameData folder in your JA install directory. Story: ------ This starts out pretty much where Jedi Academy left off. It assumes you chose 'the dark side', stole the scepter, and went on your way of domination. Because of your dark ways, what was left of the imperial and rebel forces were destroyed by bands of cultists and other dark jedi. A powerful Sith gathered followers (called loyalists) and made a deal with you. Hand over the scepter, or die. Your life was spared, but the scepter is now in the hands of the Sith. He threw you in prison cell buried in the rugged mountains on the planet moon of Yavin to rot. Your force powers faded as the sith dominated planet after planet. You home is the last to be overthrown. In a deperate attempt to contact you, the queen from your home planet used her telepathic ability to send you a message. Your force powers have faded to the point where you can't receive the distress call. After years of meditation, you realize the error in your ways and wish to seek revenge on the Sith. An accident gives you a chance to escape. And this is where story begins... Gameplay: --------- In all, there are 13 levels (1 is a cinematic level only and two are 'bonus' levels that give you a chance to upgrade sabers). Each of the levels have anywhere from 3-8 objectives that must be fullfilled before proceeding. To estimate the length of the mod, from start to finish is probably somewhere between 10 and 14 hours. This entire mod is one very long mission broken up into 13 maps. The opponents get progressively more difficult (although your force powers and your opportunity for saber upgrades keeps the playing field somewhat fair) throughout the game. One hint: keep a close eye on your cursor for things to push or break -- it is sometimes required to continue on with the level. You may want to turn on force hint in your config (cg_crosshairForceHint) if you can't work things out. Enough said -- you can figure out the rest. GAMEPLAY: Issues: ------- There really aren't too many issues. I found a few bugs with JA itself. The noticable issues include: - JA crashes during simultaneous thermal detonator and saber throw effects - Saber properties sometimes ignored on restart of JA and loading saved game - JA leaks memory (I watched it). These maps are very large, and playing across several of the levels (like most of them) for an extended perior of time will lead to a decreased frame rate. Restarting JA corrects the problem. - Some of the cut scenes and cinematics are a little unstable. Some of the sound cuts out part way through and sometimes the NPC don't go to their specified navgoals. I don't know, maybe my problem, but they work sometimes, sometimes not. - There are a couple of brushes with issues. One causes a HoM effect (tiny little sliver of a brush in a massive area -- but you have to walk over it). A few brushes have some vertex problems, so there are gaps. I didn't bother to go back and fix them -- they are hardly noticeable and don't impact gameplay. There's close to 85000 brushes in this entire game and probably less that 10 with noticable issues. That's about all worth noting. Credits: -------- The following lists the skins, saber models, mods, etc. that were all put together to create this mod: Skins: ====== Abbaddon ............................. El Cuko Asajj Ventress ....................... Monsoontide and Psyk0Sith BPPloKoon ............................ [BP]Plokoon Bain Elite v2 ........................ -=SOTG=-Bain_Elite Boba Fett ............................ Brian Jones (Bones) Darth Maul ........................... mrdefender Death ................................ +]Nekroscop[+ Egor ................................. Unknown Howler ............................... Light Ninja Knight ............................... Unknown Lamasu ............................... Crying Gods Germany Maddog JKA ........................... Maddog Neo Reborn ........................... Drakkan Razchrome ............................ Unknown Sabergirl ............................ v2 by Sabergirl Samus ................................ Kurtis 'KMan' Smith Shinobira ............................ Crying Gods Germany Sithress ............................. DarthVengeant Soulseeker ........................... Unknown Swoop Racer .......................... Nick Aikenhead (Kahn) Witchblade ........................... {EJA}DarthVengeant{S} Xian ................................. Unknown Sound Effects: ============== Enhanced Saber Sounds ................ Aryyn Saber Models: ============= Light Disc ........................... Wolrajh/Xantcha Eclipse Saber ........................ +POO+Sigma Dual Lightstaff Sabers ............... Red Sith X-Saber .............................. Jon Hill Desann Saber ......................... CHoSeN ONe Skywalker Saber ...................... CHoSeN ONe Reborn Saber ......................... CHoSeN ONe Majestic Sai Staff ................... Tiri Punisher ............................. Darth Khan & Lord G-Spot Imales ............................... IMALES (Damir Berkovic) Darth Maul ........................... Unknown Weapons: ======== Rocket Effects ....................... Rhinen Concussion Effects ................... Spector Disruptor Effects .................... Spector Interface: ========== Menu Tutorial ........................ Red Sith Startup Screen Images ................ http://www.geocities.com/Area51/Lair HUD .................................. Chewy²/Uber Noober² Maps: ===== duel_valley (modified and extended) .. Raven t3_rift_sample (excerpts only) ....... Raven t2_rancor_sample (exceprts only) ..... Raven- 1 comment
-
- complete overhaul
- contains weapons
- (and 5 more)
-
46 downloads
This mod was released back in December 2008. Since then, the author hasn't released any updates. Stalax v1.0 ----------- Here's the readme about Stalax, it tells the more important things about the installation and the modification's usage. 1 - Features ------------ The mod's main feature is Lua Scripting, you can do everything you want on your own server. And if you are a mapper, you can improve your maps' interactivity and make new features that you have never seen. There's a new bot system called AceBot, it has been ported into this mod and it's not stable at the moment. It has some good possibilities, the bot can make his waypoints itself by finding some possible holes in the map, and when he finds an enemy, he goes forward to it, not like the original Jedi Academy bots. 2 - To Do --------- A perfect physics engine could come soon, but not quickly. I will do my possible to make sure that he would be perfect, since the Quake III Engine needs a better collision detection and we could make more and more crazy stuff like vehicles, ropes,... maybe endless possibilities. 3 - Running the Demo -------------------- To run the demo, simply launch "Stalax Demo.bat", it will load Jedi Academy under Stalax with the sta_tour map. In this map you will see some scripts I made and commented for you : .. Password Terminal with the console - move near the terminal, make sure that you put your crosshair on it, open your console and type "/input" with your password. The good password is "goodpwd", I think you'll need it in order to go to the next level. .. Chat Password Terminal - more comfortable way, it's the same Password Terminal, but you just have to use it with your USE button, look at it, and say the password in the chat. Like if you want to say it to everyone but the message will be canceled so the players won't see it. .. Teleporter Terminal - a nice teleporter terminal with more choices, use it with your use button, look at it and type the number of your choice in the chat. .. NPC Conversation - now you can talk to NPCs and make them react with the things you tell them. Use Luke with your use button, and tell him to open the door by typing the number of the choice you want to make. .. Item Grabbing - Ha! Something like Portal, not perfect, but as always, the physics engine is still missing :-(. Grab the crate with the USE button, move near the blue button located right the door and drop it with the USE button again. If you remove it, the door will be closed. The mapsource of sta_tour is included into the maps folder. That's it for the demo, I will add more and more examples in newer versions. I hope you like them. 4 - Installing a script ----------------------- I think the method to install a script is really the easiest. Guess how ? Simply put the .lua script into the Stalax/lua/global folder. The server will load it automatically. If it's a script only for a map and if you want the server loads it only if the specific map is loading, then create a folder into "lua", having the map's name. For example, if you want to make a script only for t2_trip, create a folder named "t2_trip" into "lua" (Should look like lua/t2_trip) and place your map's scripts into that folder. If it's for a mp map like mp/ffa3, just do "lua/mp/ffa3" (ffa3 into the mp folder). 5 - Documentation ----------------- I'm sorry if the documentation is not really complete, there's a lot about the Entity and Client commands, and I don't really have the time to finish it properly. But I'm always ready to help you and give you more infos about commands right into the forums. You can find the documentation there : www.stalax.net/doku.php?id=docs [WEBSITE IS NO LONGER ONLINE] And the whole Stalax community there : www.stalax.net/forums/ [WEBSITE IS NO LONGER ONLINE] You will find a lot of scripts, tutorials and solved problems into the forums. I hope you'll enjoy it. Eltran -


