

Corto
-
Posts
341 -
Joined
-
Last visited
Content Type
News Articles
Tutorials
Forums
Downloads
Posts posted by Corto
-
-
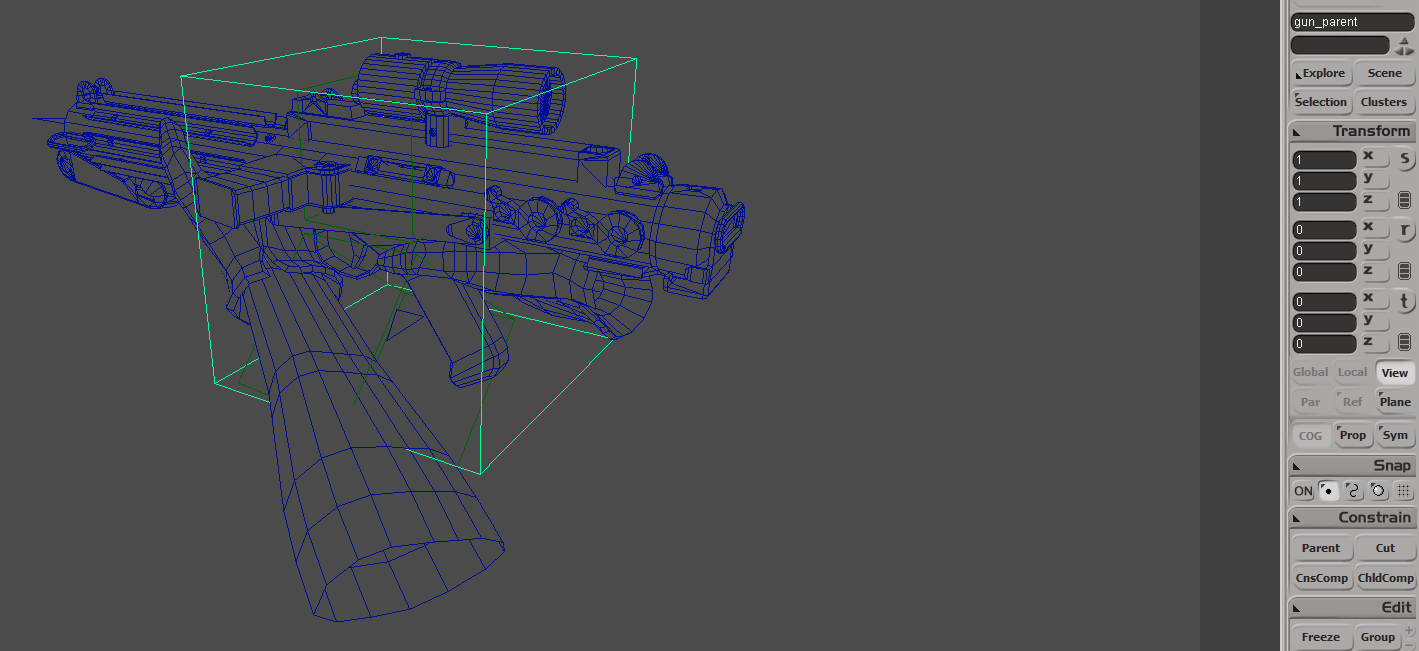
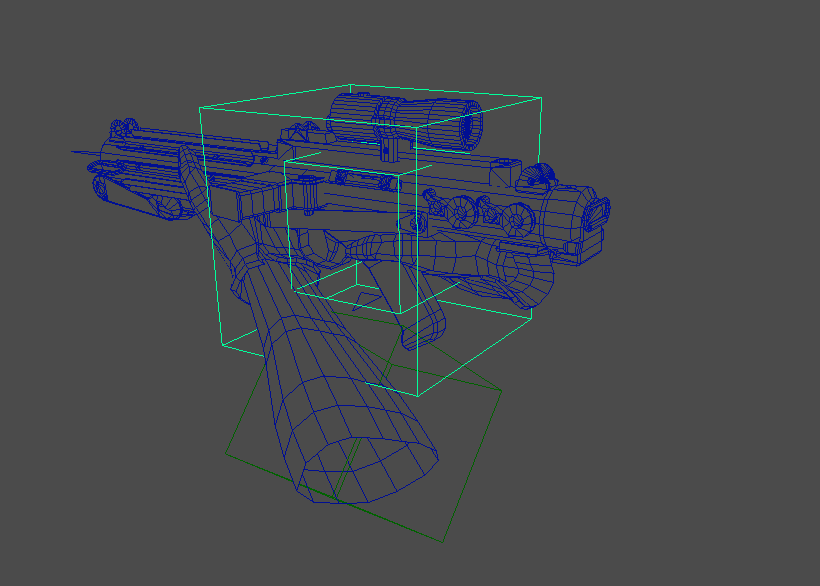
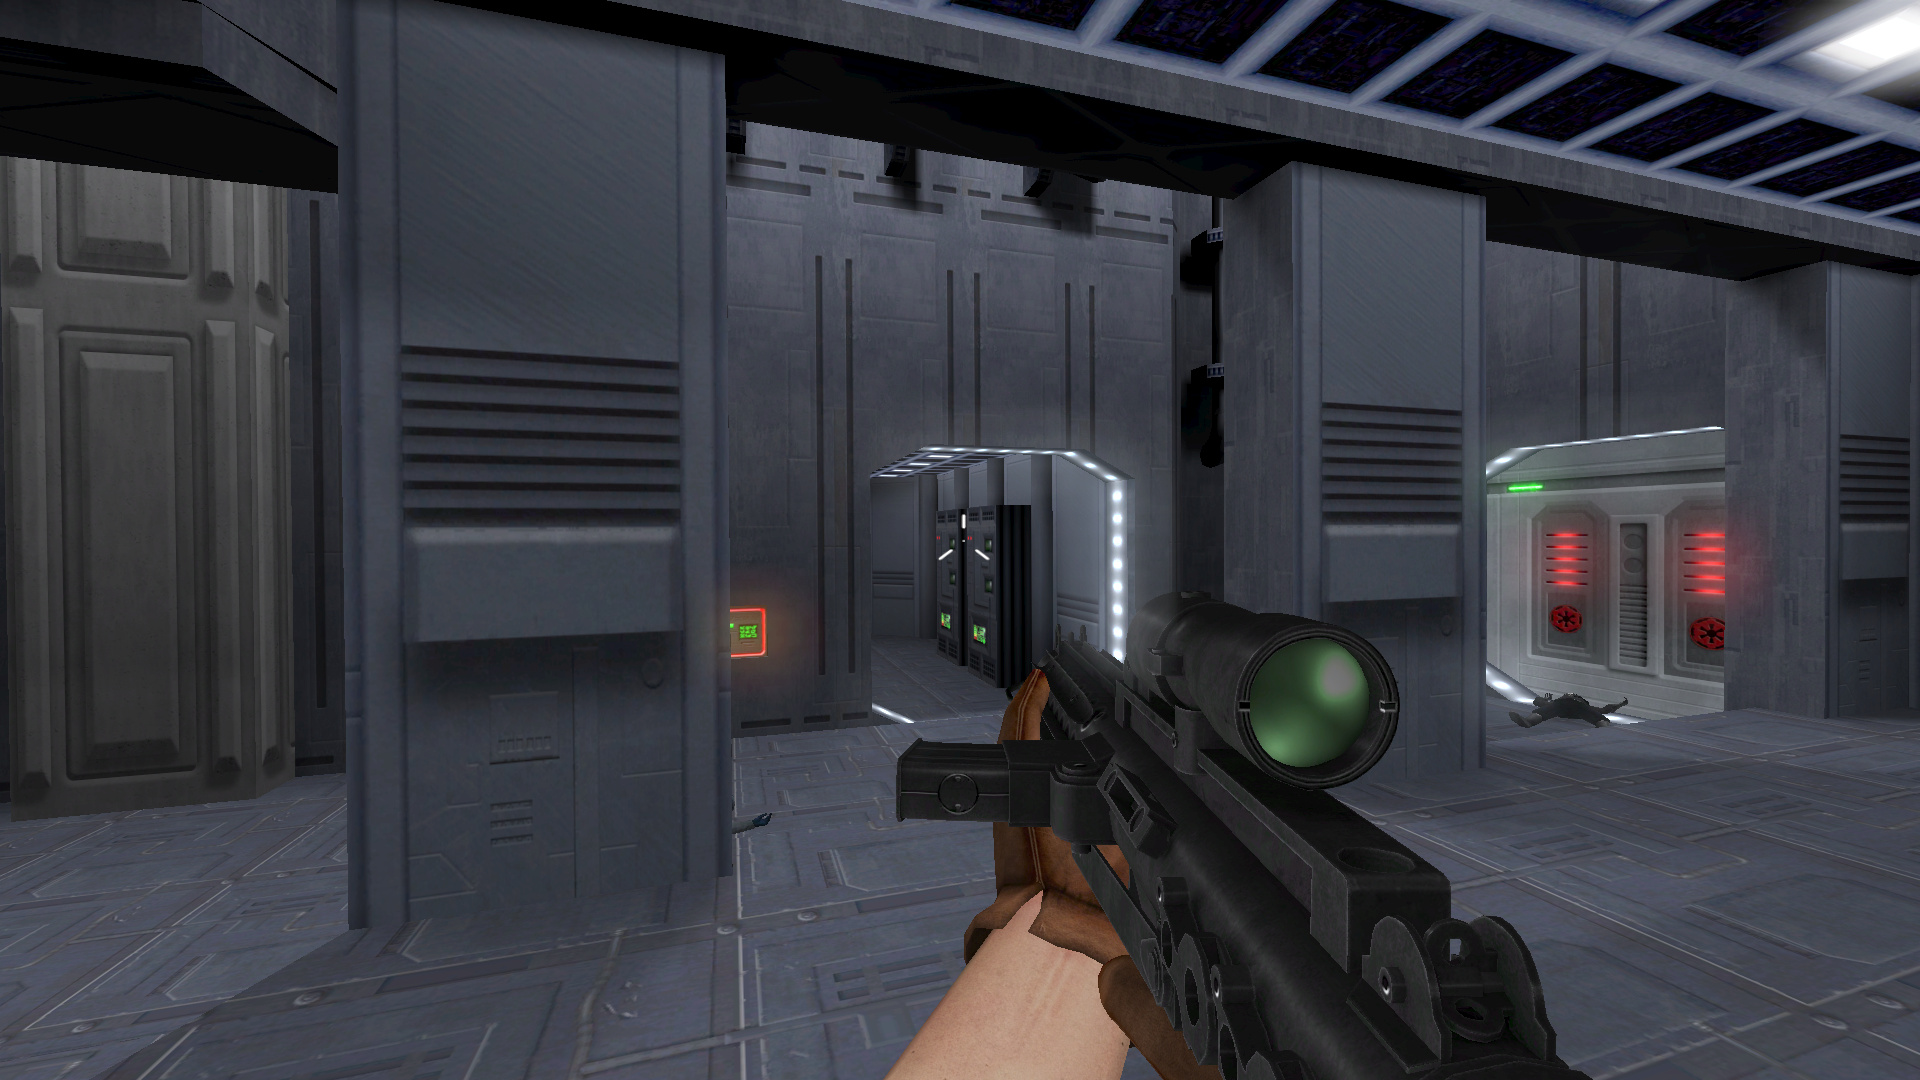
My solution for the odd position and angle required for the first person model to work and then for the world view to have the right scaling is this:
For the neutral position, I created a null object with all the transform data in 0 as you can see on the right hand side panel, and "childed" all my exportables to that null object.

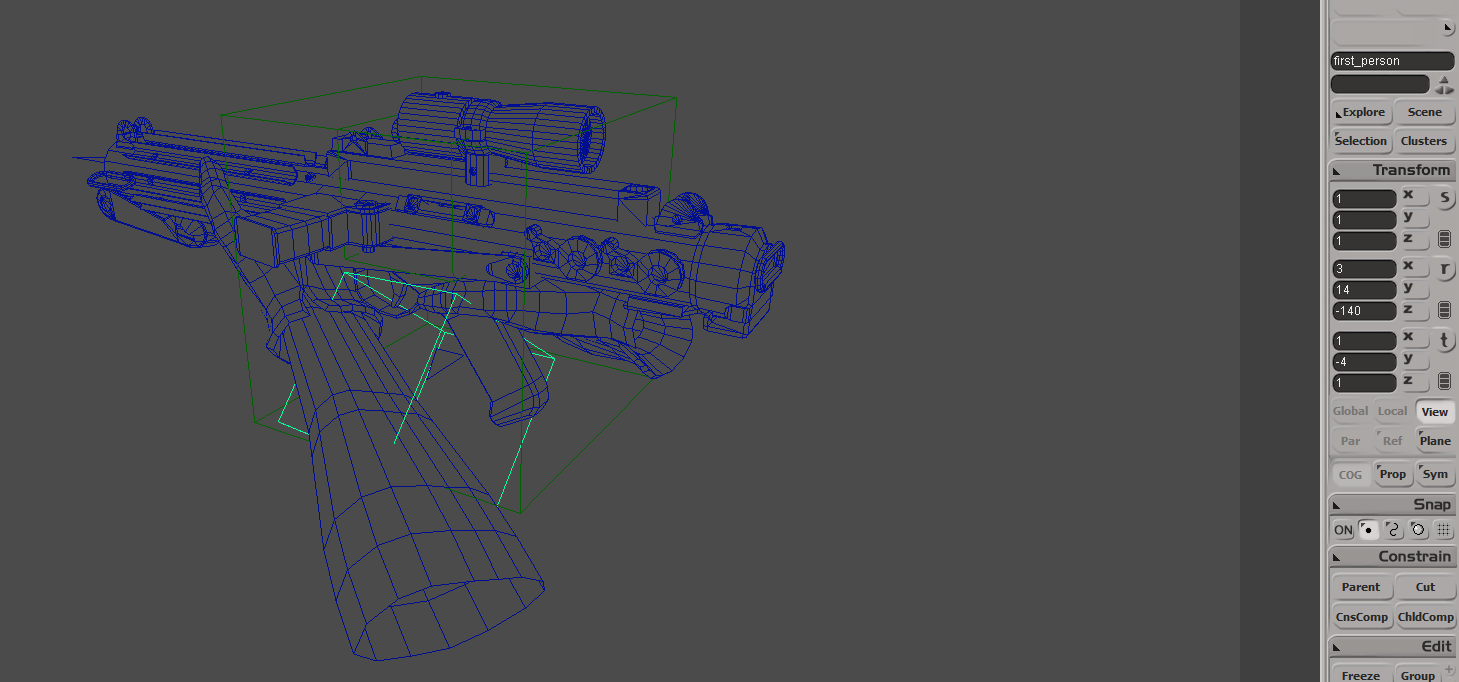
Then, for the first person view, I created another null object, which has all the transformation data for the first person model to look correct in game (highlighted object on the screenshot). It's rotated and translated to get the exact position I want. Whenever I'm going to export the model for the first person view, I select my parent and then match all the transforms of the first person null object.
This is how it looks after my parent object matches the transform data of the first person null object:
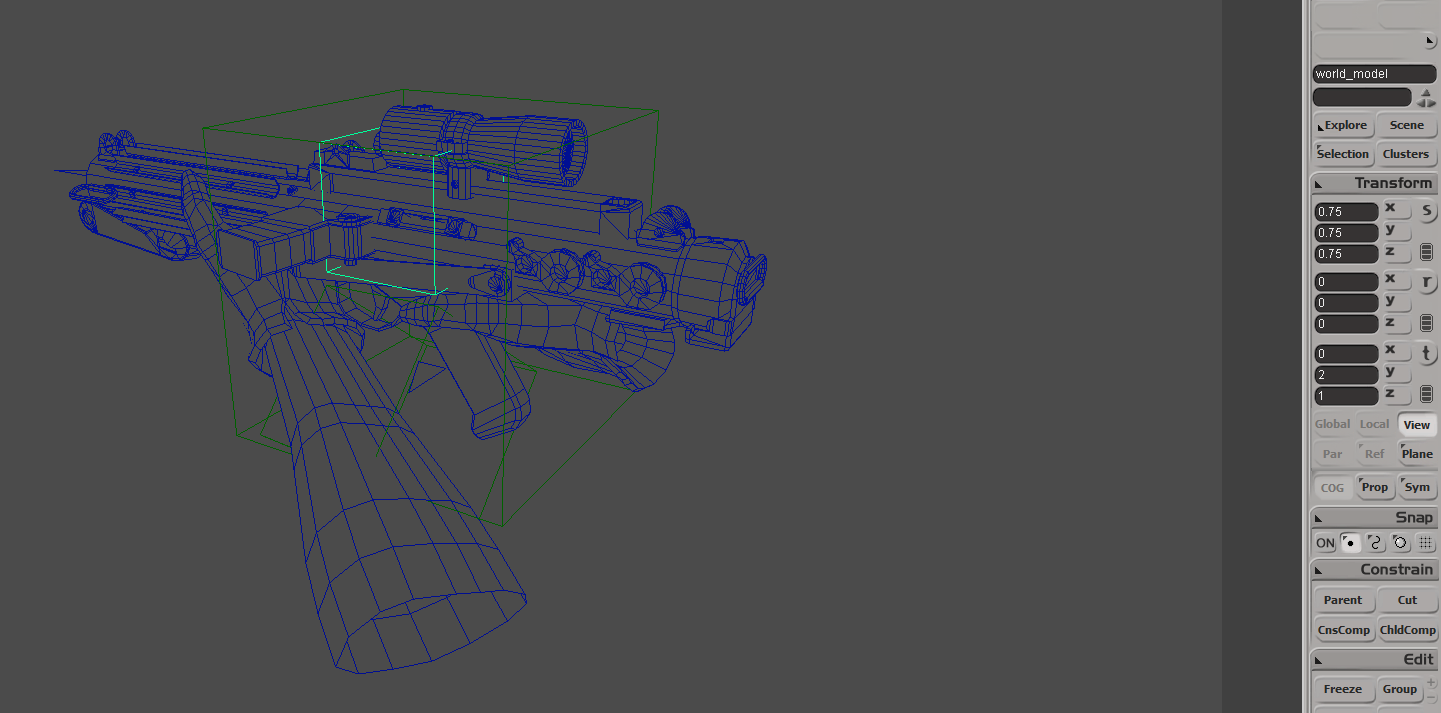
For the world view I use the same method, but as you can see, instead of rotating oddly and moving the object around, it simply moves is up a little and scales it down by a 0.75 factor. Which makes the gun look the correct size and position in the game from a third person perspective. No more oversized guns in world view.
This is how it looks when I matched all transforms of the world view null object:
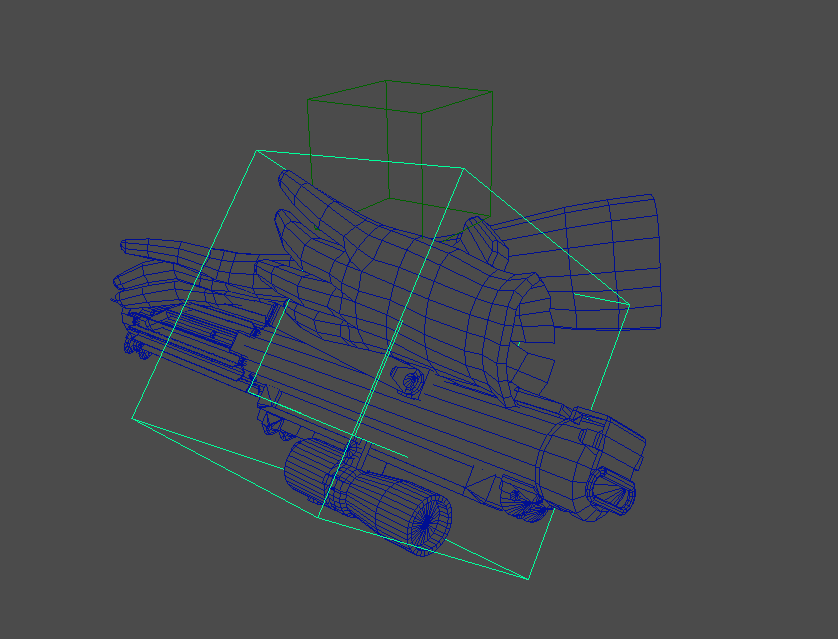
For the world view I only select the gun objects and the tags, so the exporter will ignore the hands.
This is the solution I created using Softimage, but I'm sure the same thing can be done with Maya, 3dsmax or Blender.
JAWSFreelao, Archangel35757, ooeJack and 1 other like this -
So lovely I can't express it.
Then don't. Just use it.
Maksman and JAWSFreelao like this -
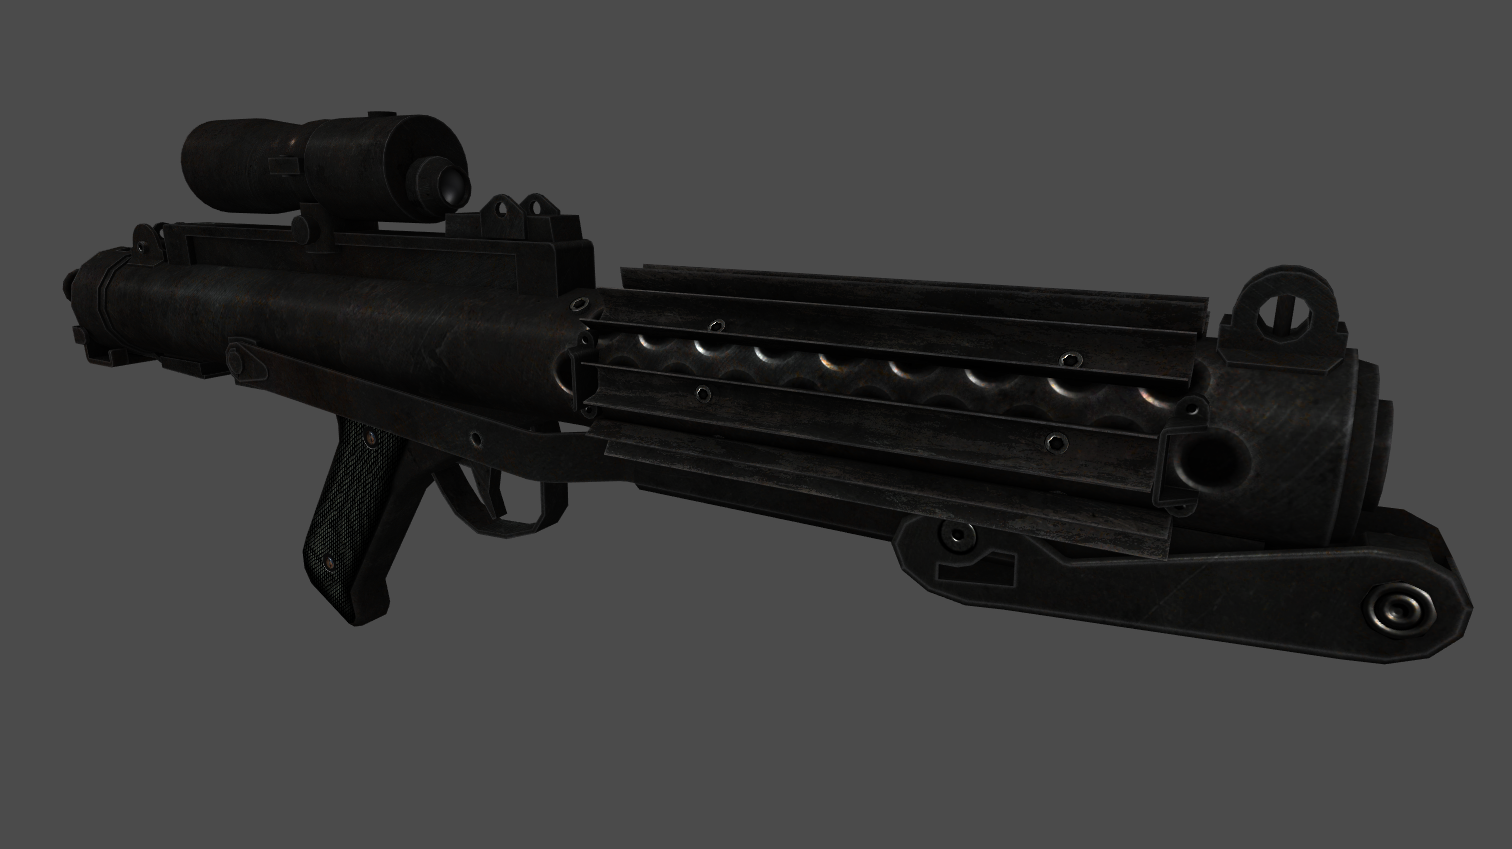
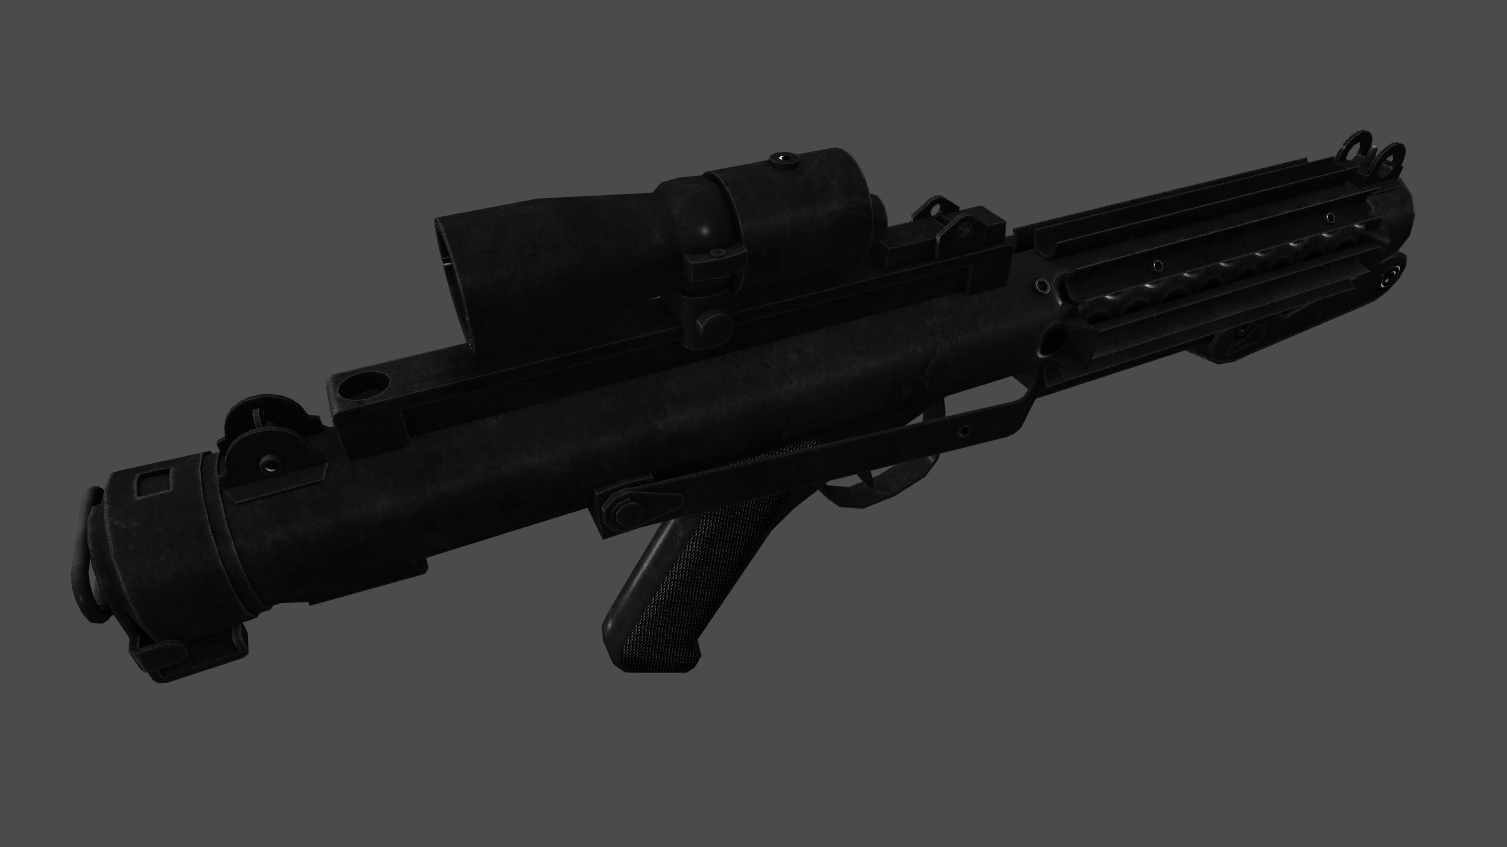
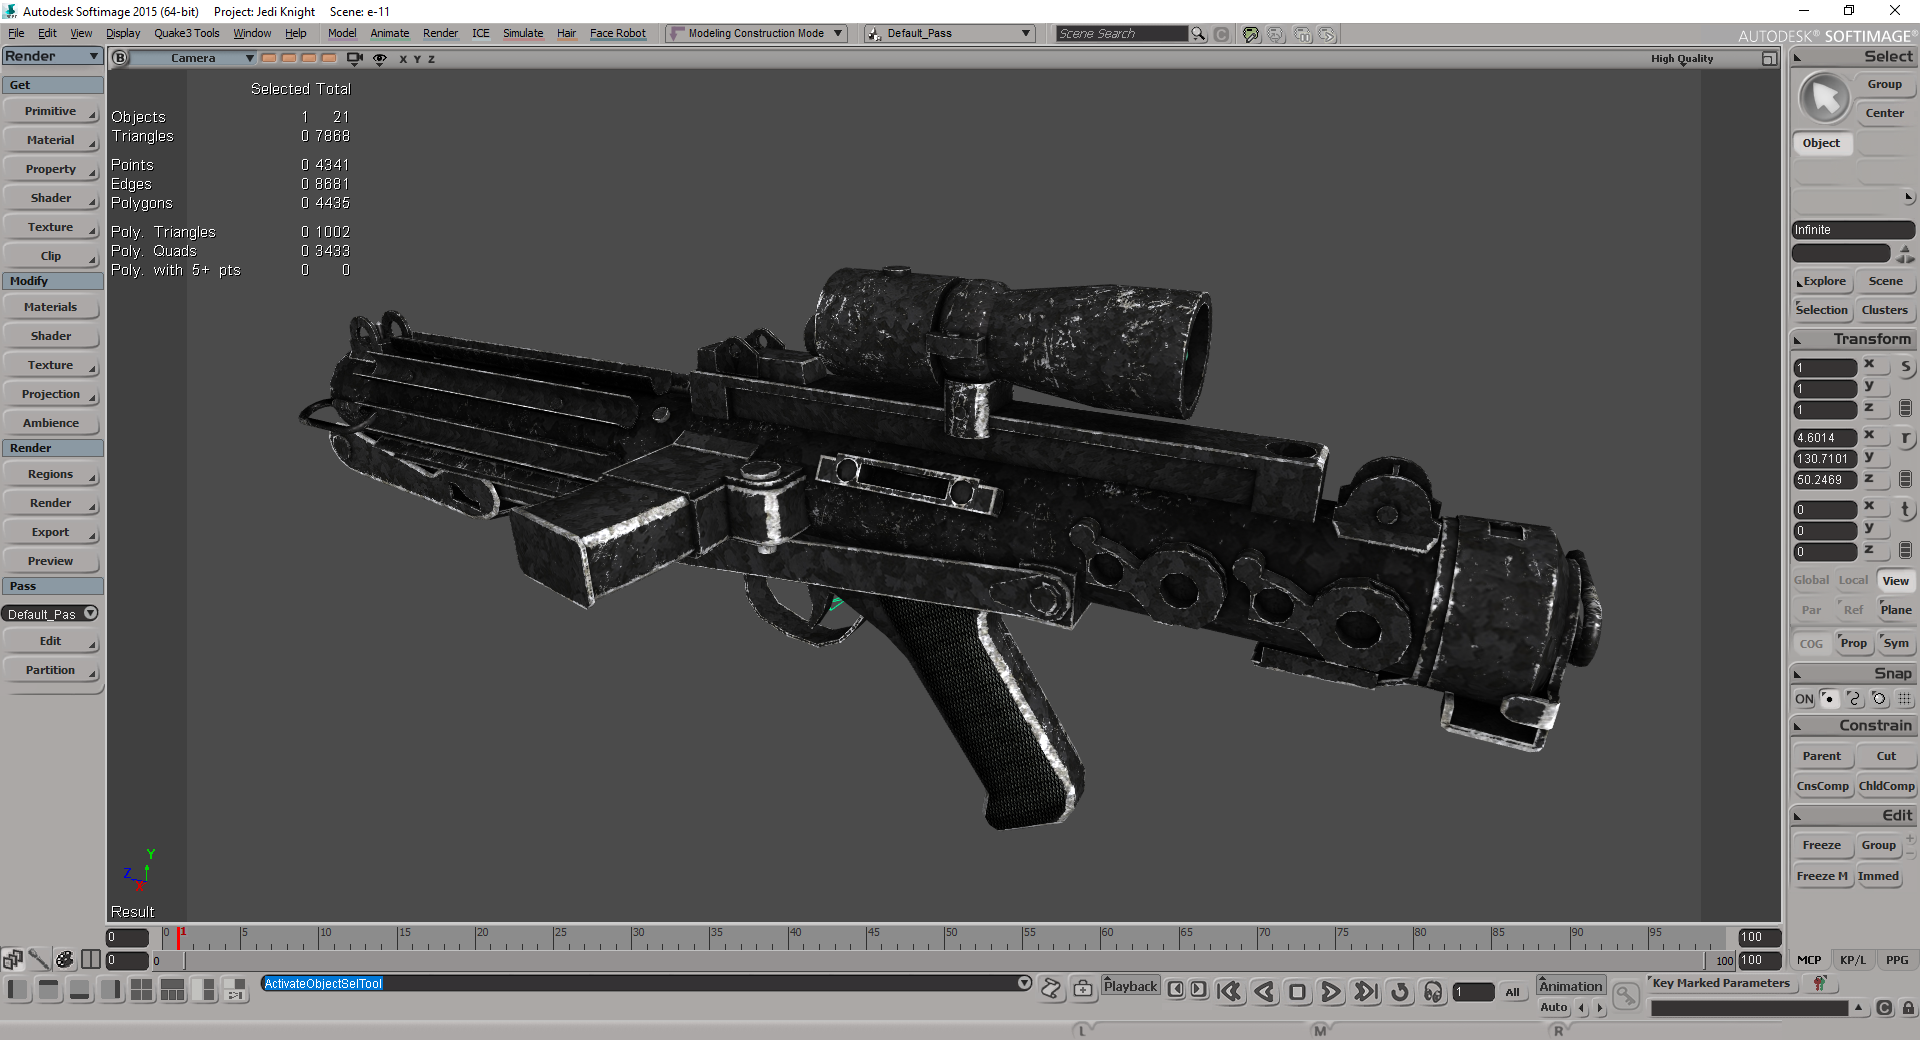
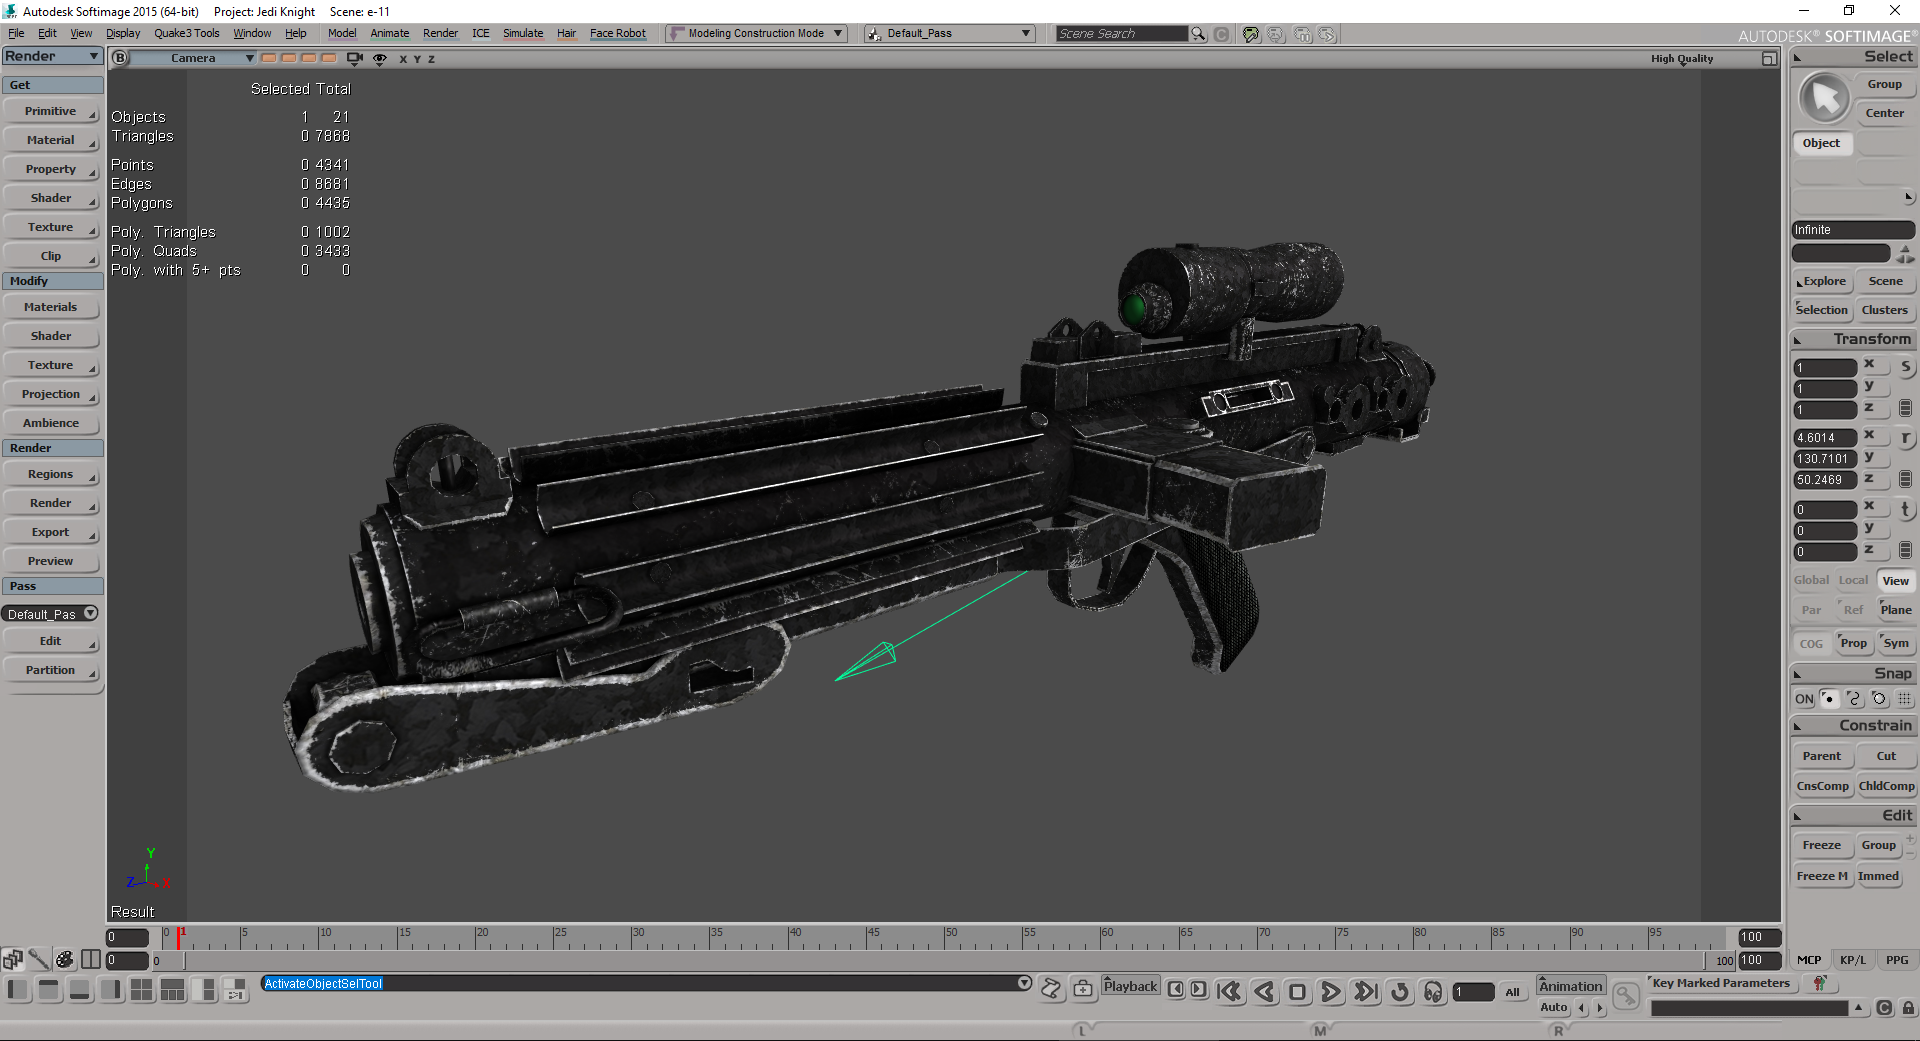
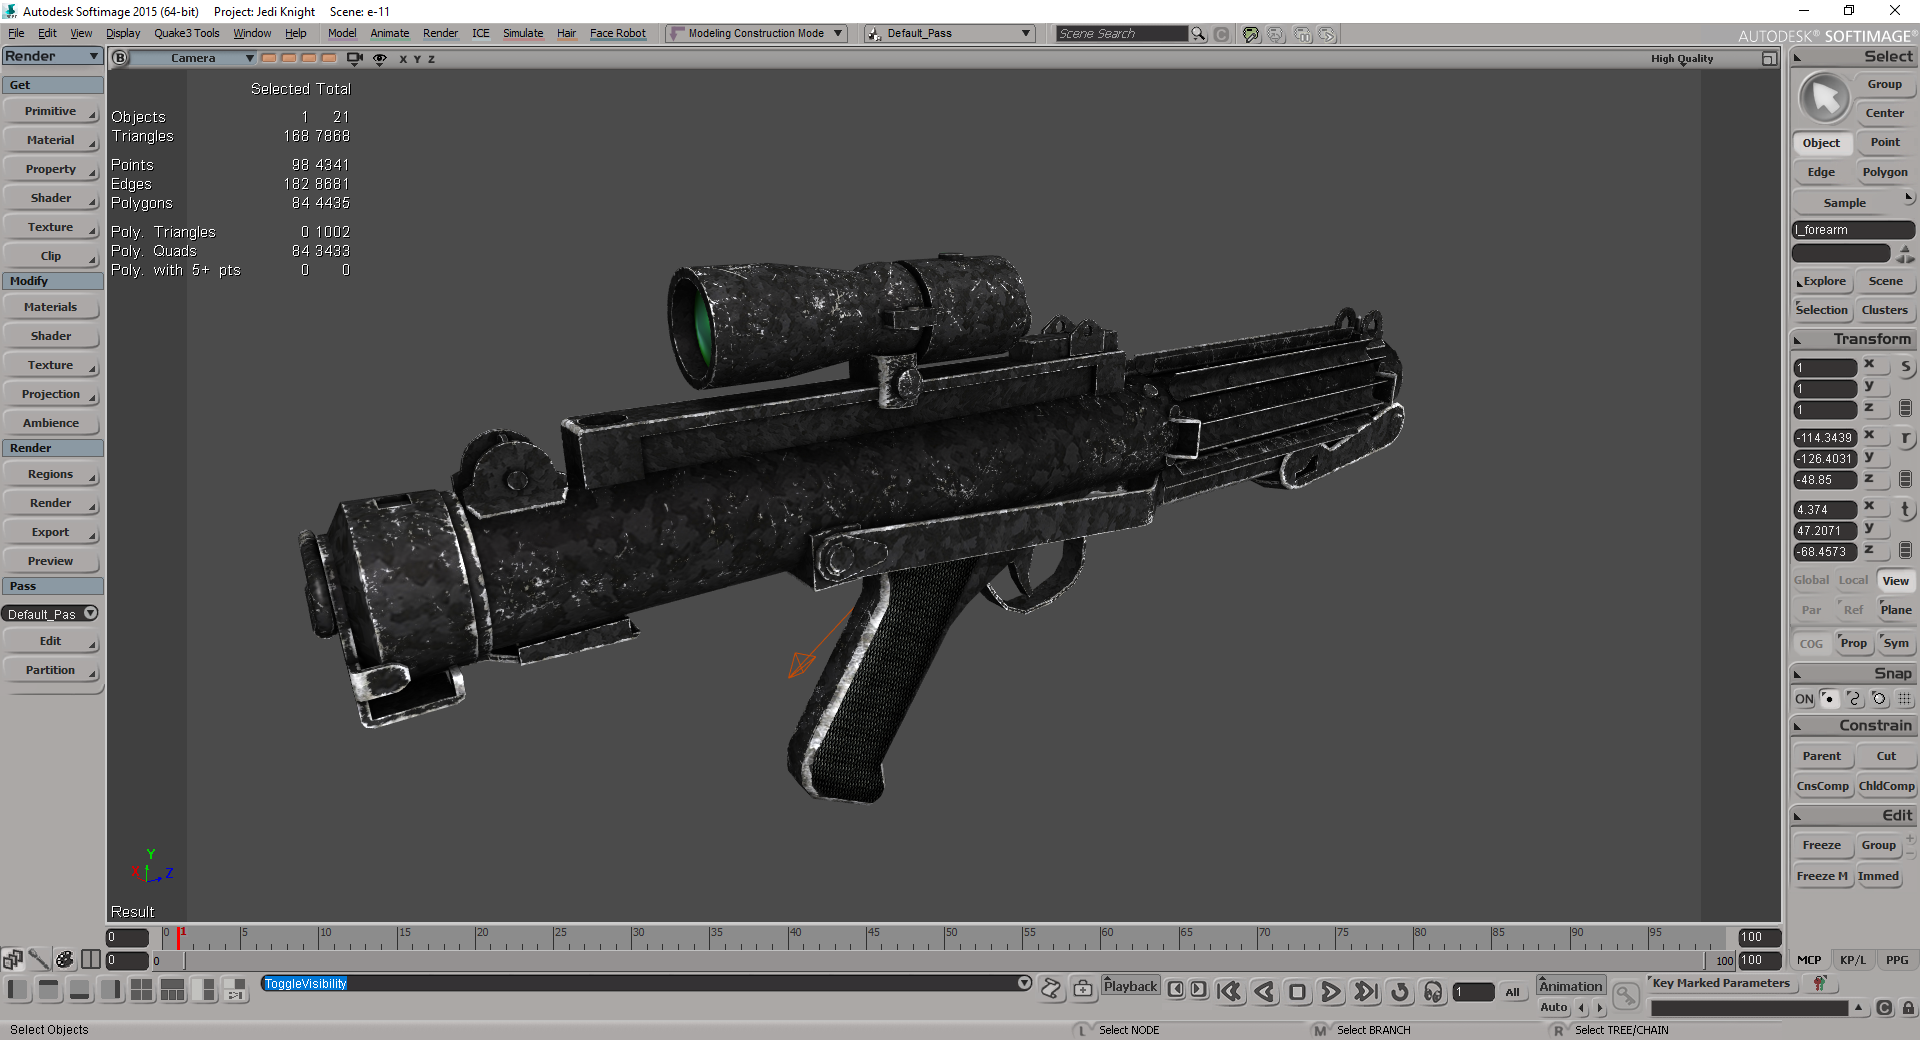
I'm starting to feel like a reached a point where I have to move on to the next model and leave this one to rest for a time. Here's a new progress update. I'm submitting this version for now.
Daniel, JAWSFreelao, Kualan and 5 others like this -
I'm currently learning sculpting with Zbrush. But I can also use sub-d in Softimage itself and create extremely detailed hard surface meshes like you say. I guess I need to adapt to current techniques. For my next gun, I'll start with high poly and do what you propose.
-
Very, very nice. What are you using to generate terrain? As far as I have been looking around, terrain in GTK radiant is a pain in the neck.
-
Nice work! ...the gloves could use more love.
Don't even mention it. Those gloves are just a placeholder and need to go. I really need to get rid of those arms and model the sleeves of Kyle's jacket and turn those gloves into Kyle's merc gloves. That's the problem with raising the bar with something. Everything else needs to follow or they stand out in a bad way.
-
I'm not there yet. There are several details I need to add to the texture and then there's the matter of optimizing the world model (which will require that I make more changes to the texture in order to fake some geometry detail into it). Thanks to everyone, specially to Ashura for pushing me not to slack and have it done properly.
SomaZ likes this -
Ok, I think I'm finally getting there...
Daniel, minilogoguy18, Archangel35757 and 7 others like this -
Quoting John Miles "Modding was my first love...". I started modifying the Vampire Redemption game, using Milkshape and Maya 3.0. It was clumsy at best, but it worked. I was able to modify Christoph Romuald and turn him into The Kurgan from Highlander. Shortly after, Jedi Outcast came out and it changed the game for me. Not many in here may know me from the Lucasforums era, but that's where I started. My first contribution was a Jango Fett model that had everyone asking for more, but instead of doing a lot of models, I dedicated most of my time to figure out how to export new animations and compile a .gla file. At the time, everyone said it was impossible under the circumstances, but I proved them wrong and started a new era with custom animations for the game. Soon after that, Dave Turner contacted me to be part of the Dark Forces mod and the rest is history. Now I feel like it is time to come back to my first love.
Archangel35757, Noodle, TheWhitePhoenix and 2 others like this -
I know the vainilla Jedi Outcast/Academy has a limit of a thousand vertices per surface for .md3 models, I think it´s much higher for .glm models. Which forces me to split .md3 models in several pieces in order to remain inside those limits while pushing the polycount. Now, is that limit higher in OpenJK? What are the current contraints for content creation? Is there a document that consolidates all this data? Thanks!
-
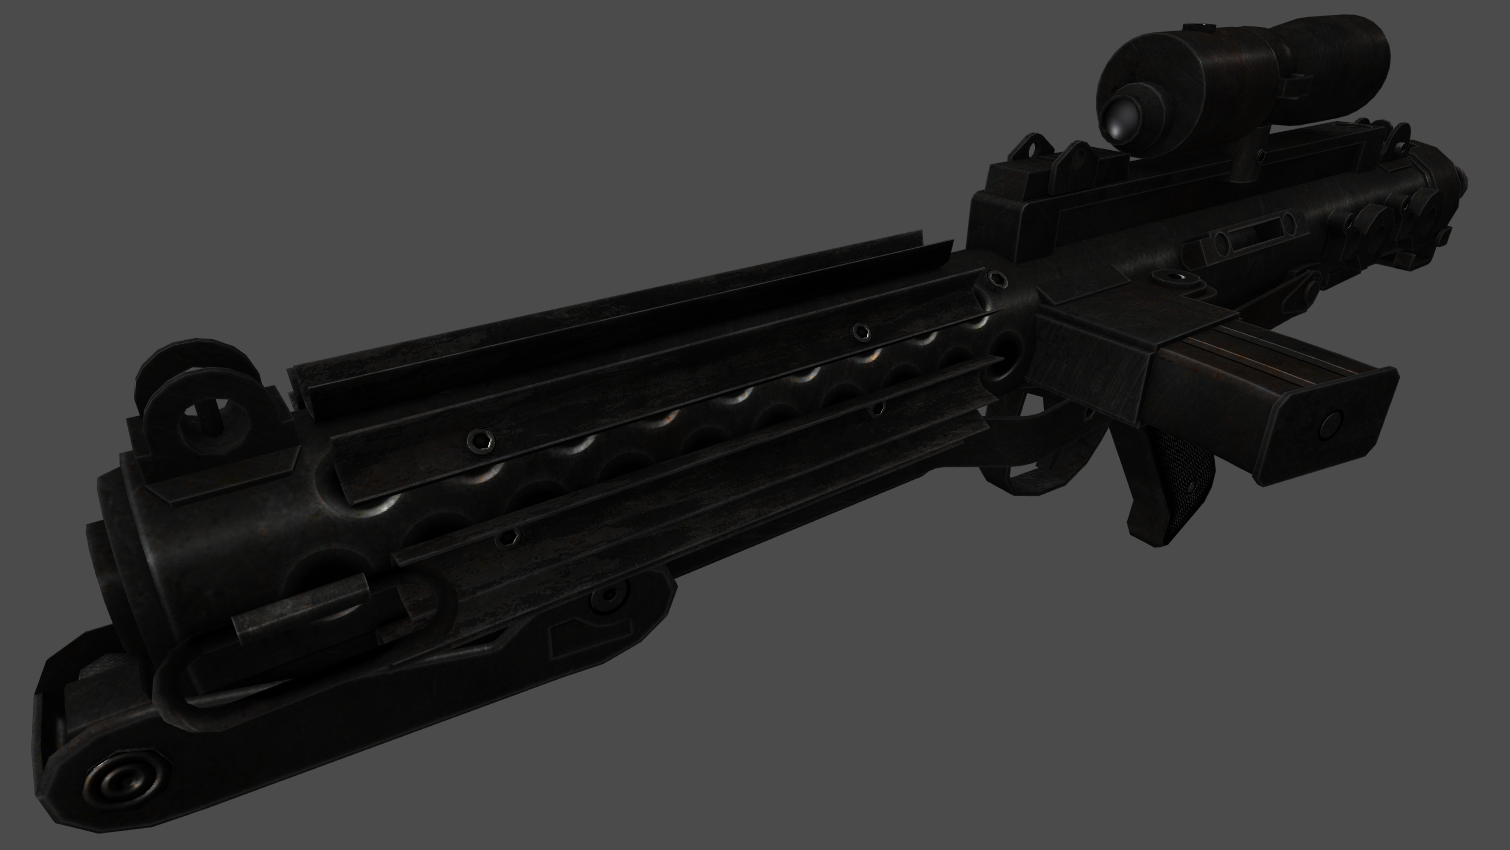
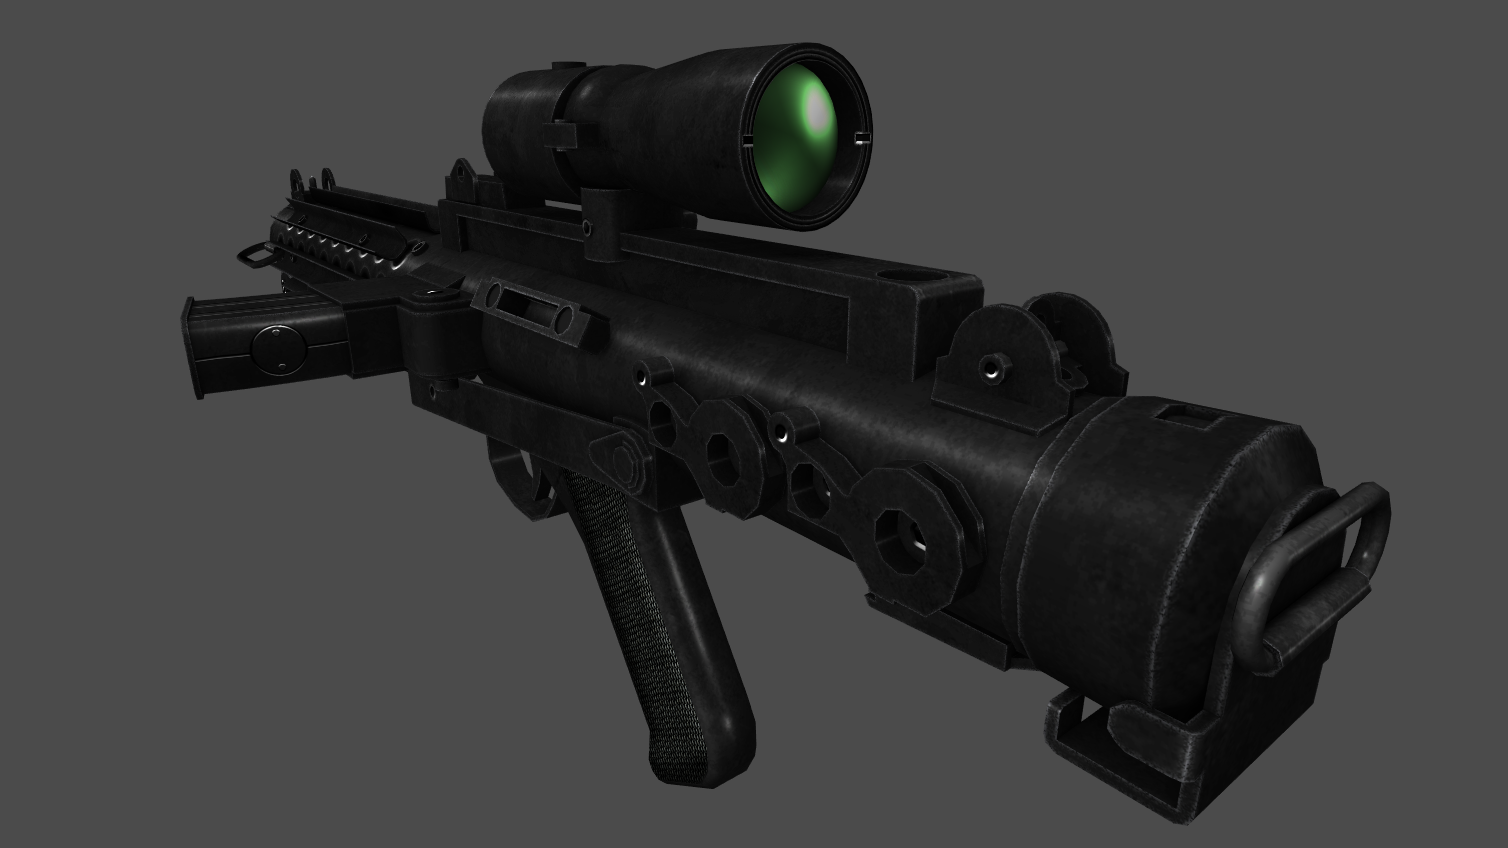
Well done with the gun so far! What strikes me at first glance is the contrast - it's very much just black and white. Perhaps not all wear and tear need to be that visibly fully scratched? Some of it could be more faint, like barely noticeable rust or dust or color variation. Also I think the forms need to be exaggerated more to the diffuse texture with shadows, occlusion and highlights, it's all a bit flat at the moment (too albedoy).
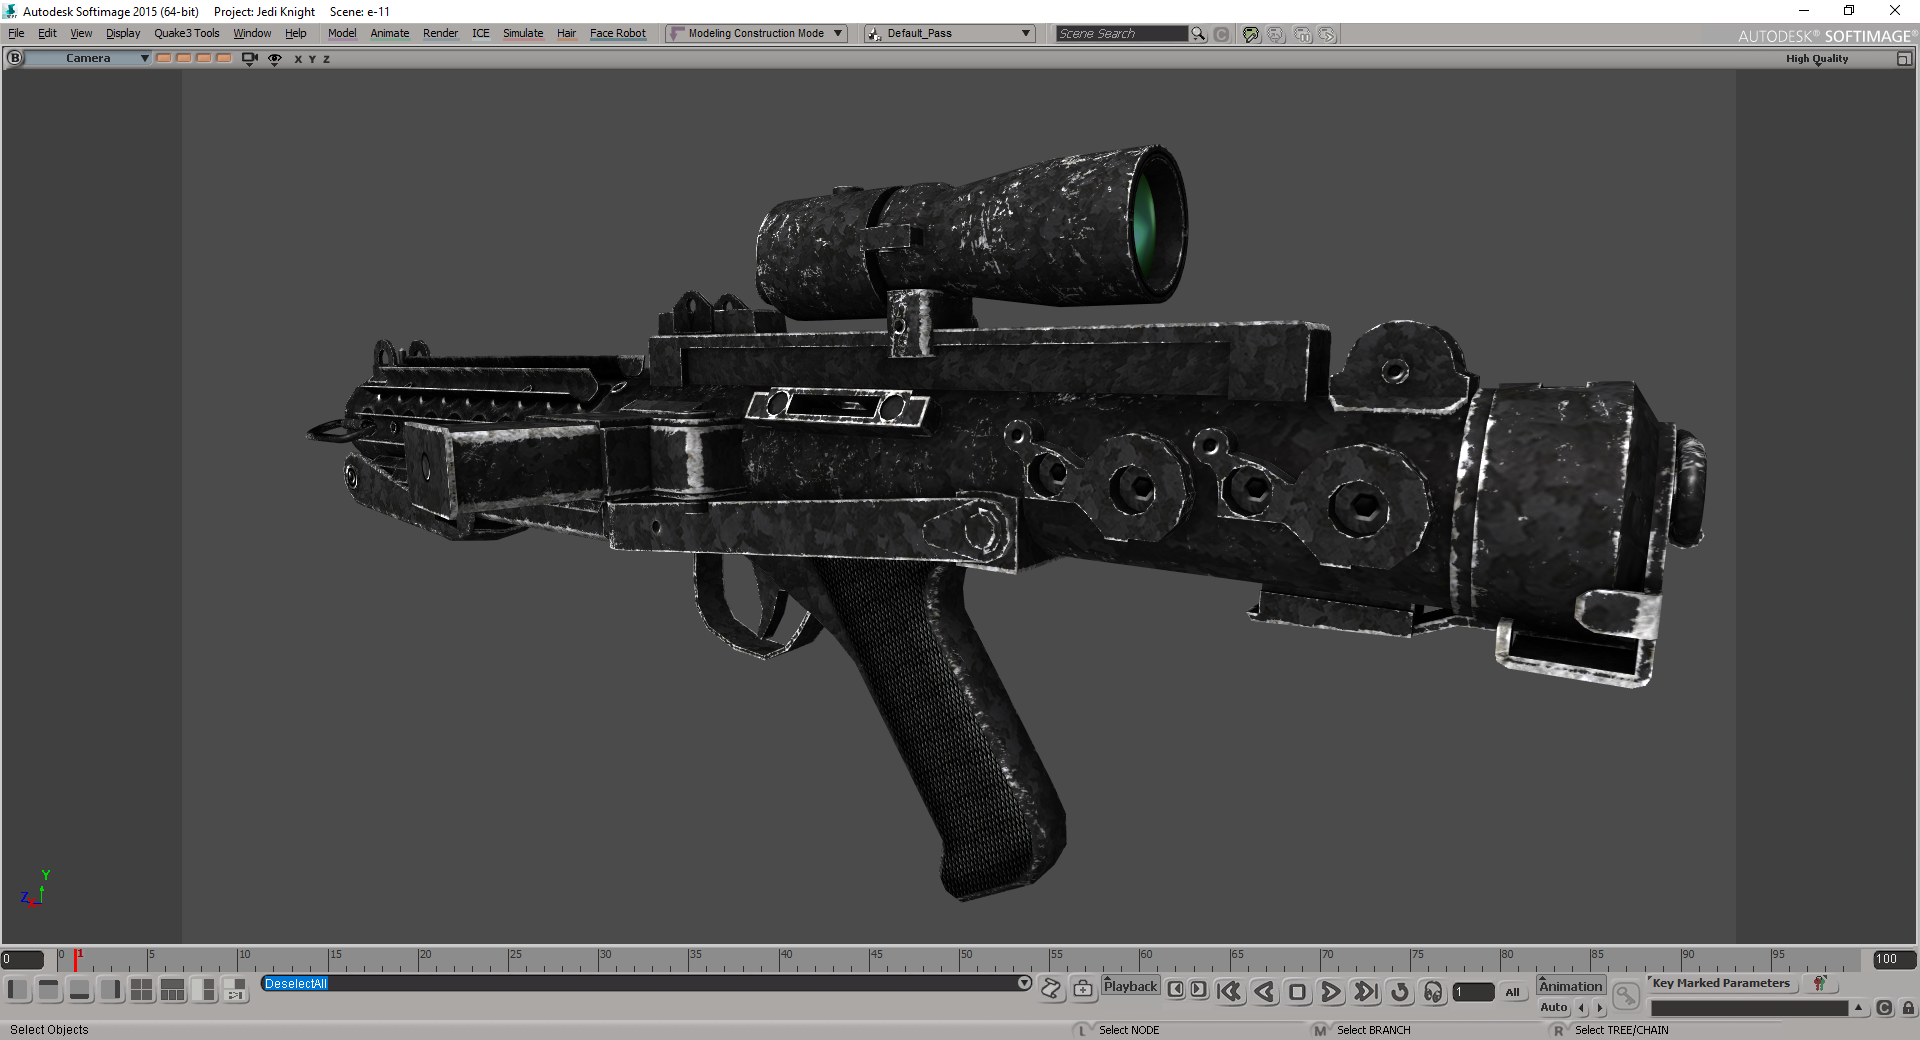
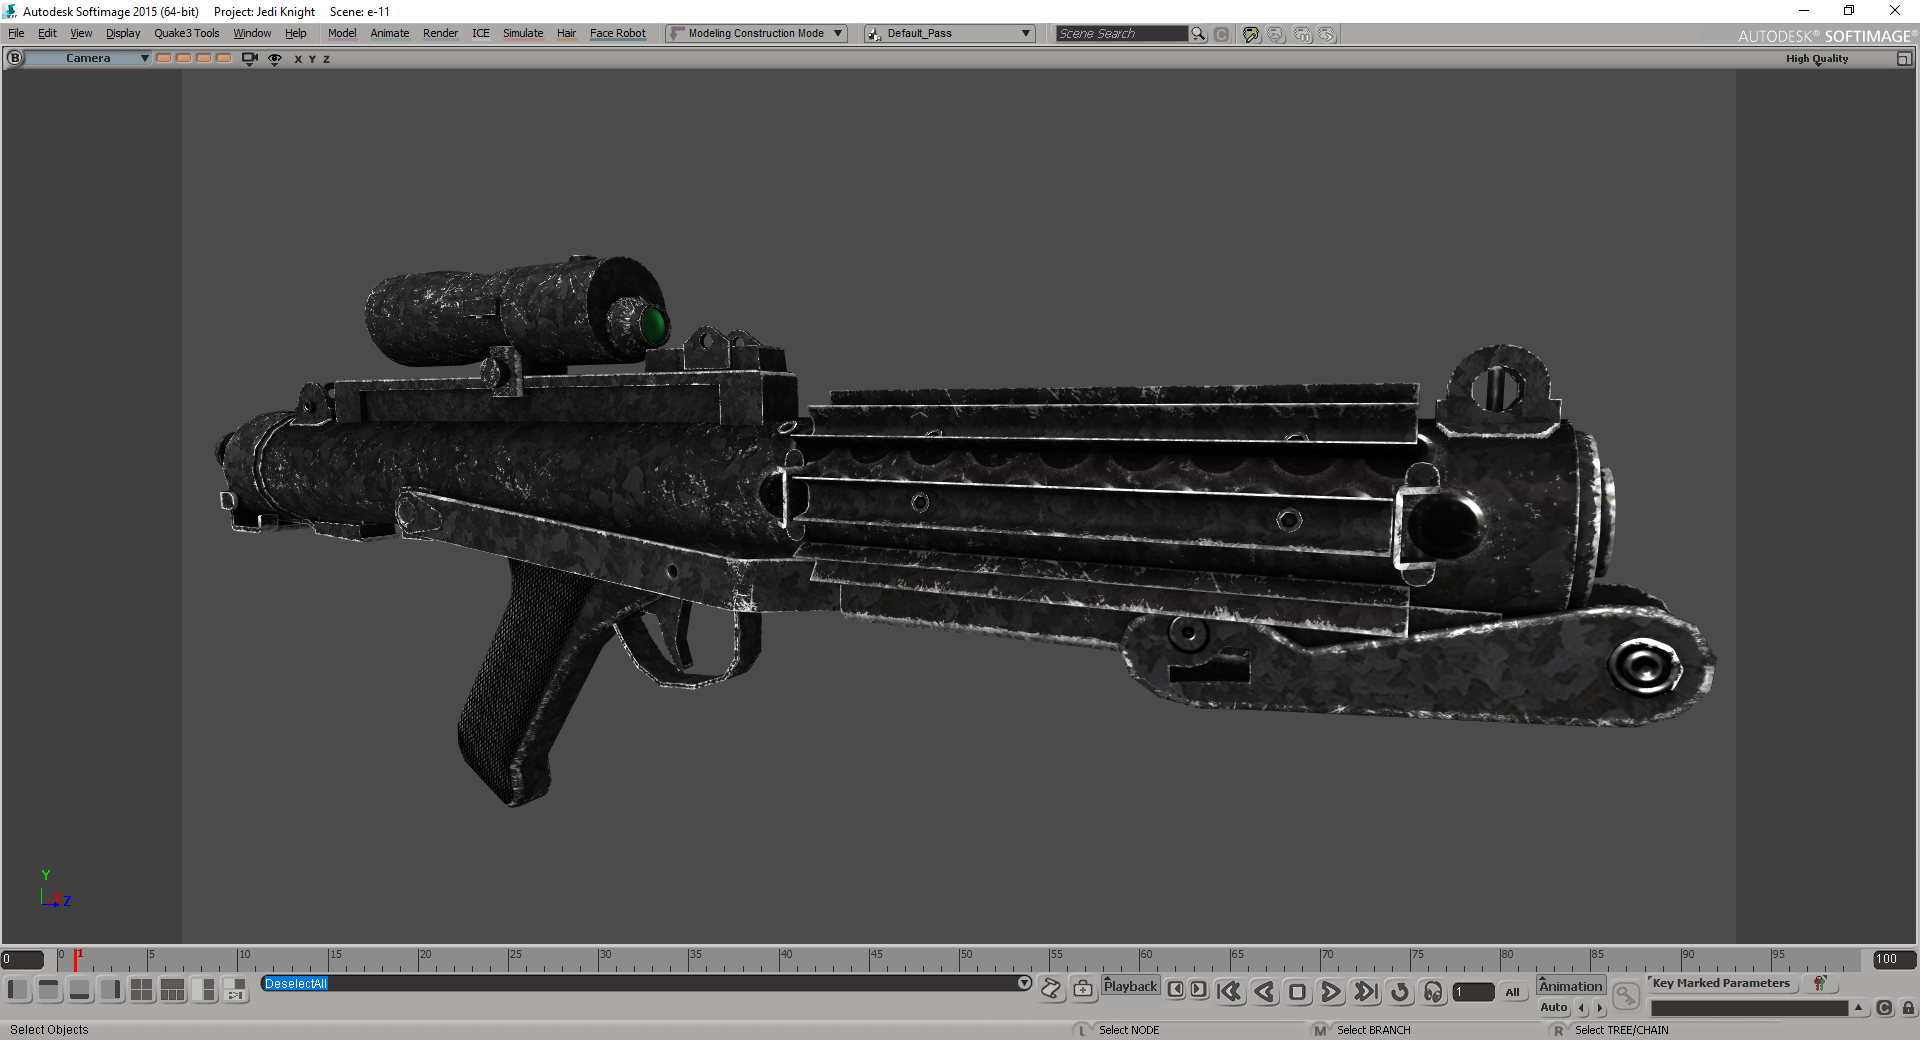
Following Ashura's comments, I have decided to scratch the base layer and do myself the edge wear. I'm going for a much subtle and controlled approach. I'm manually painting lines where I want the wear to be and then controlling the amount using blending effects. It's looking much better so far.
It's all being taken care of.
-
Following Ashura's comments, I have decided to scratch the base layer and do myself the edge wear. I'm going for a much subtle and controlled approach. I'm manually painting lines where I want the wear to be and then controlling the amount using blending effects. It's looking much better so far.
GPChannel likes this -
If by clean you mean pristine, without marks and scratches, then yes I can do it. I would only have to replace one layer.
-
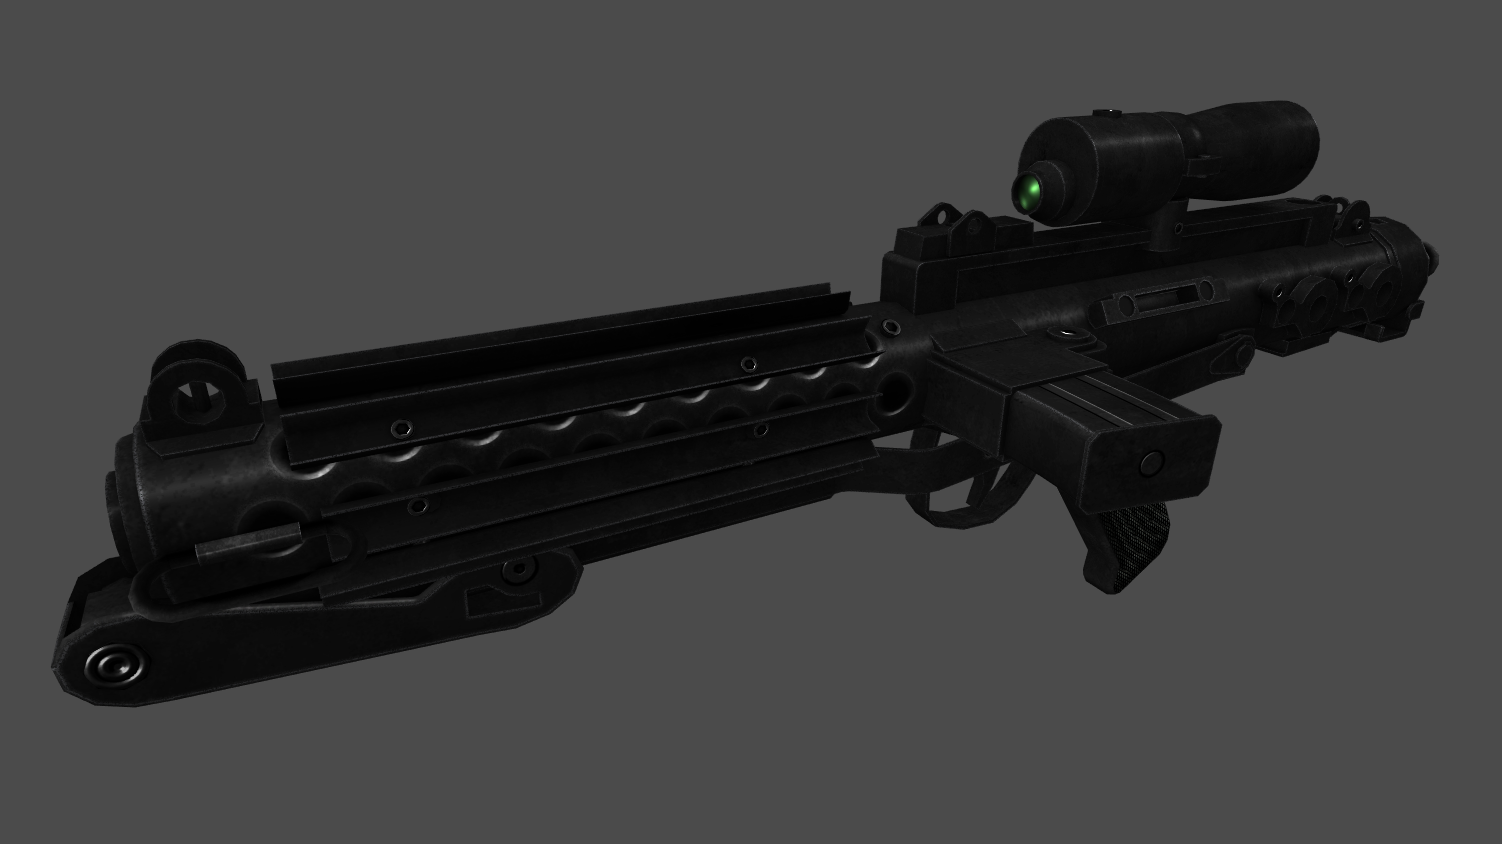
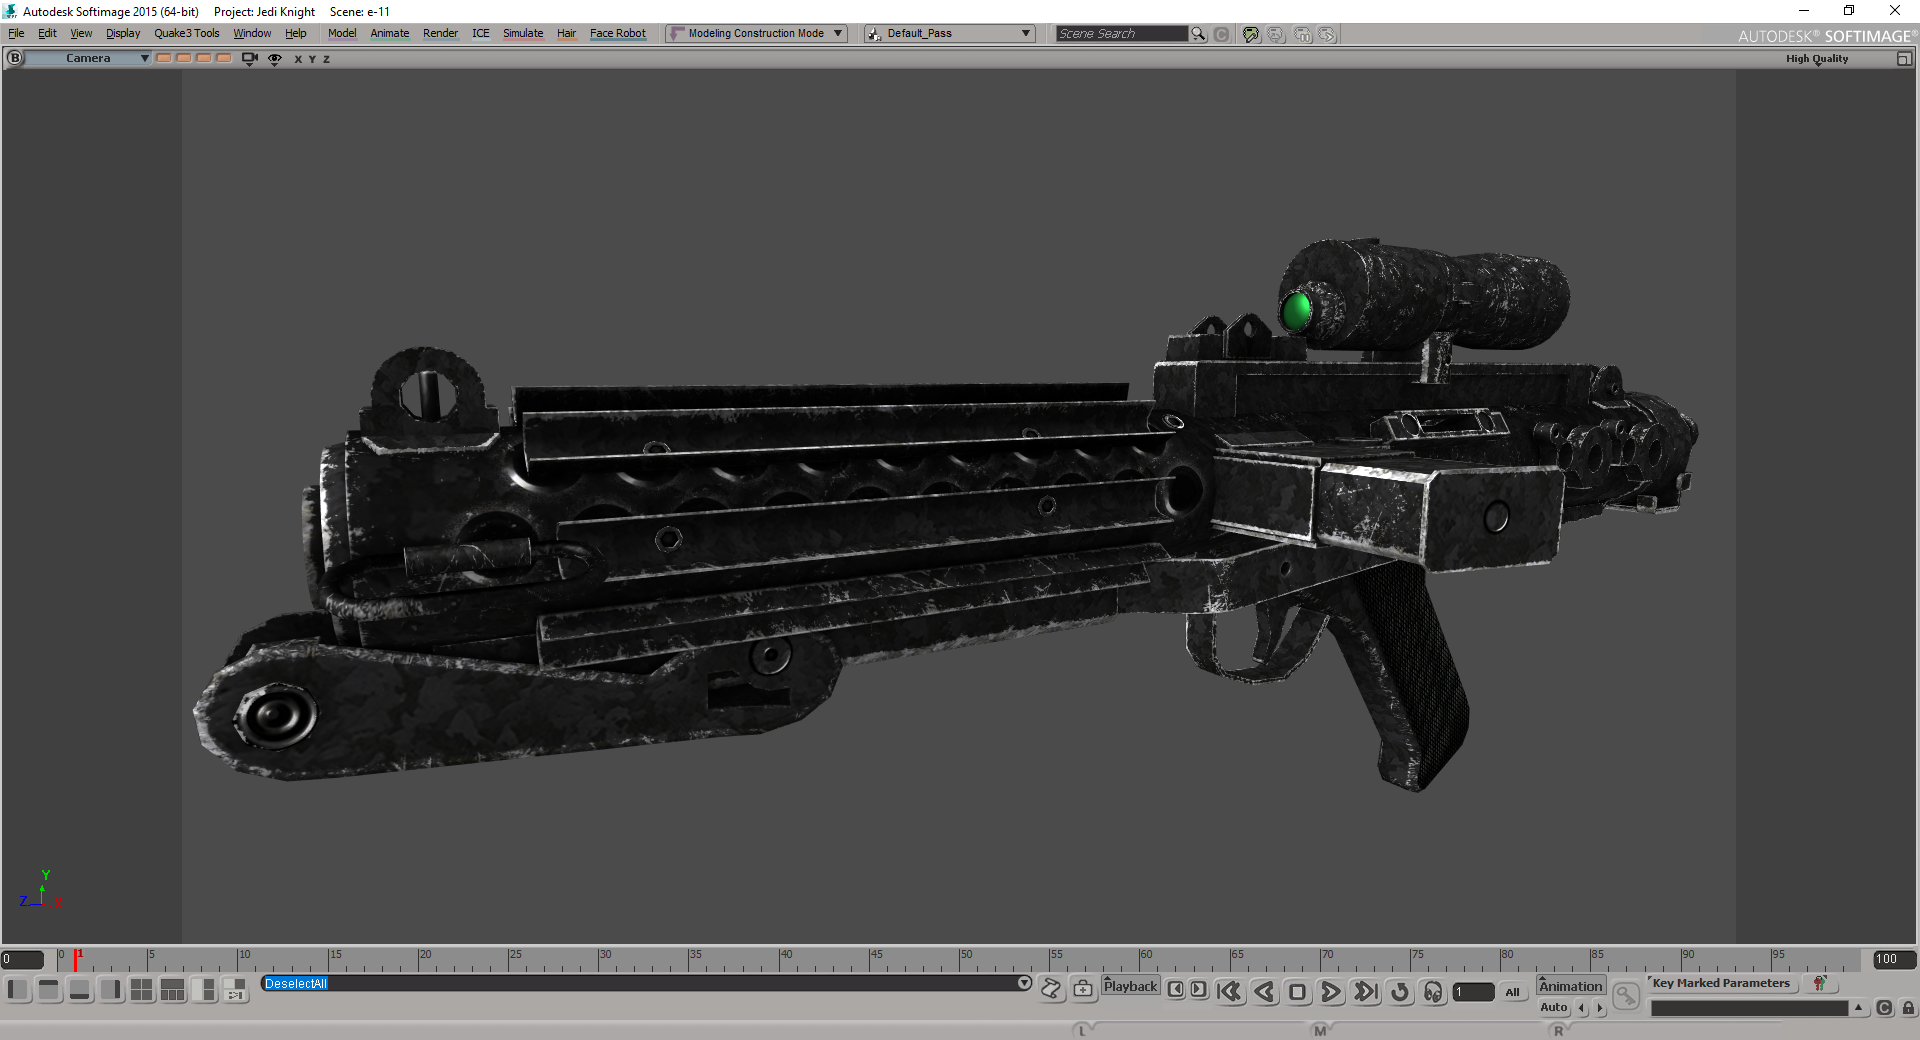
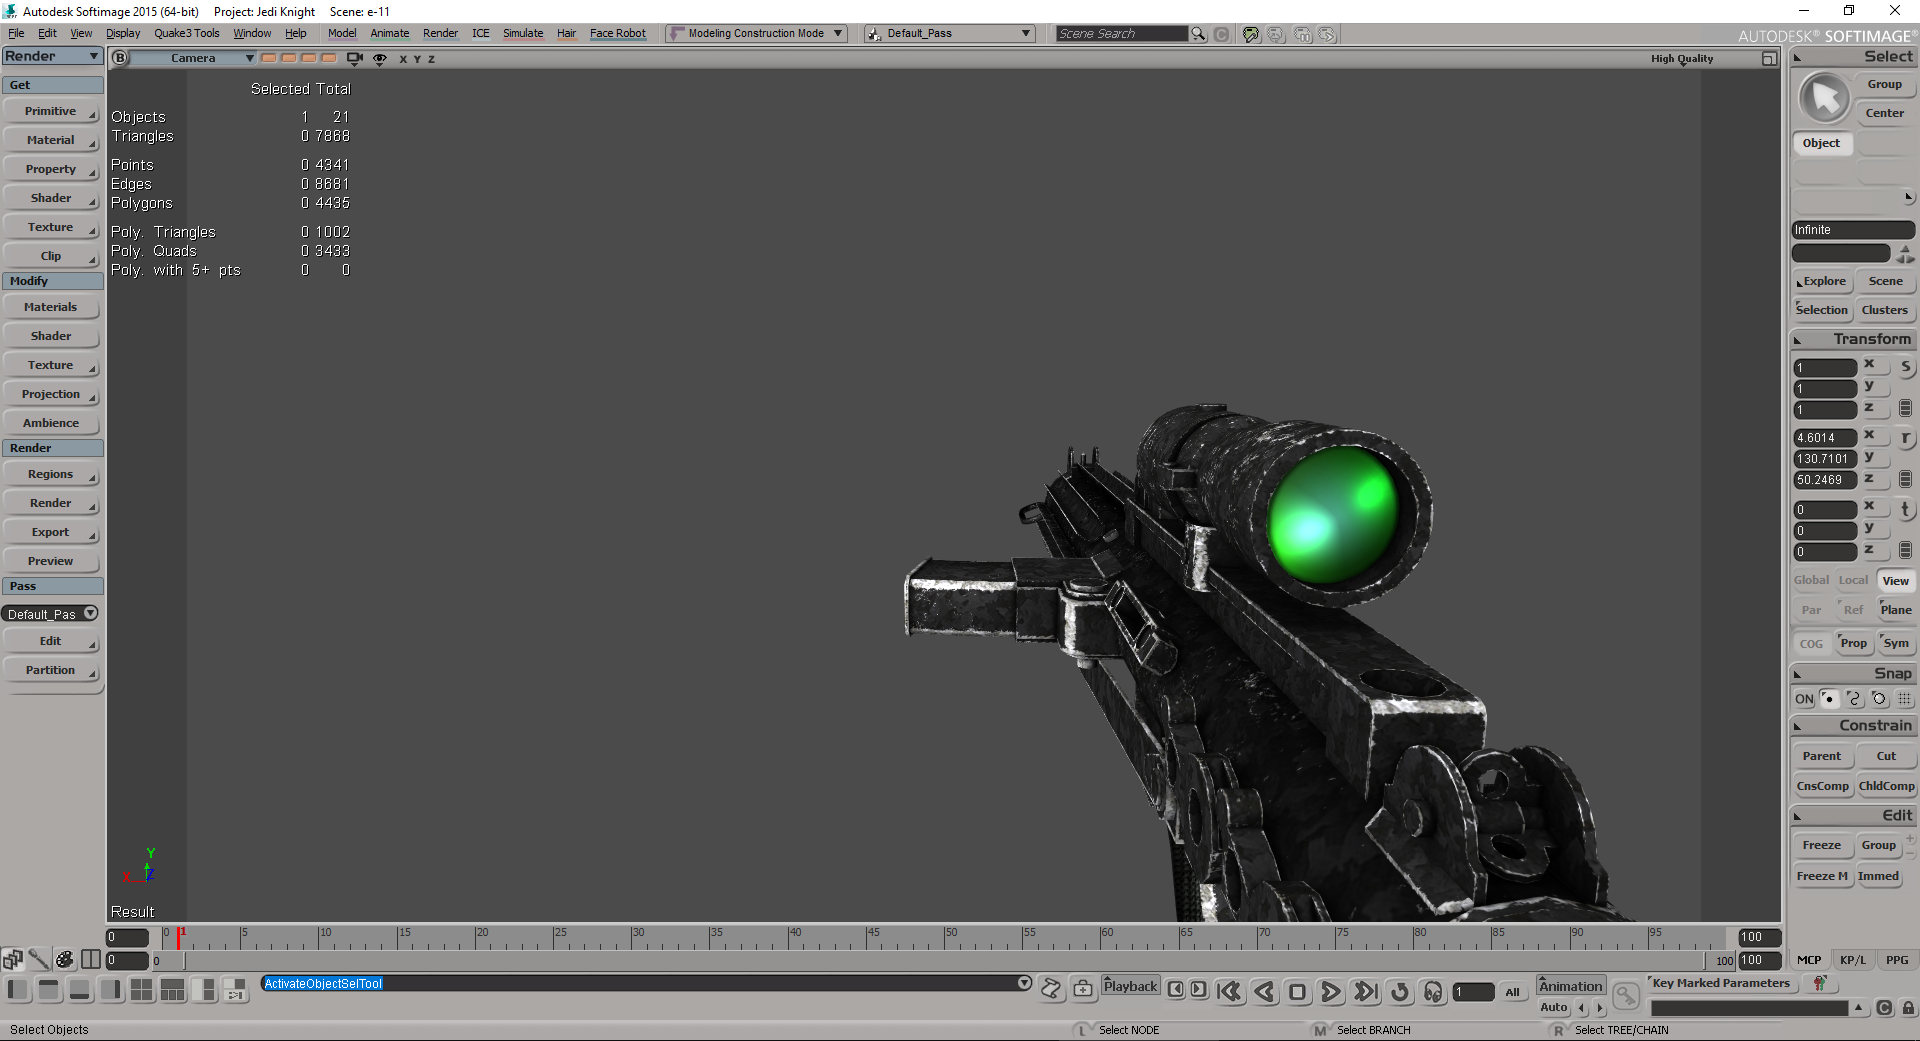
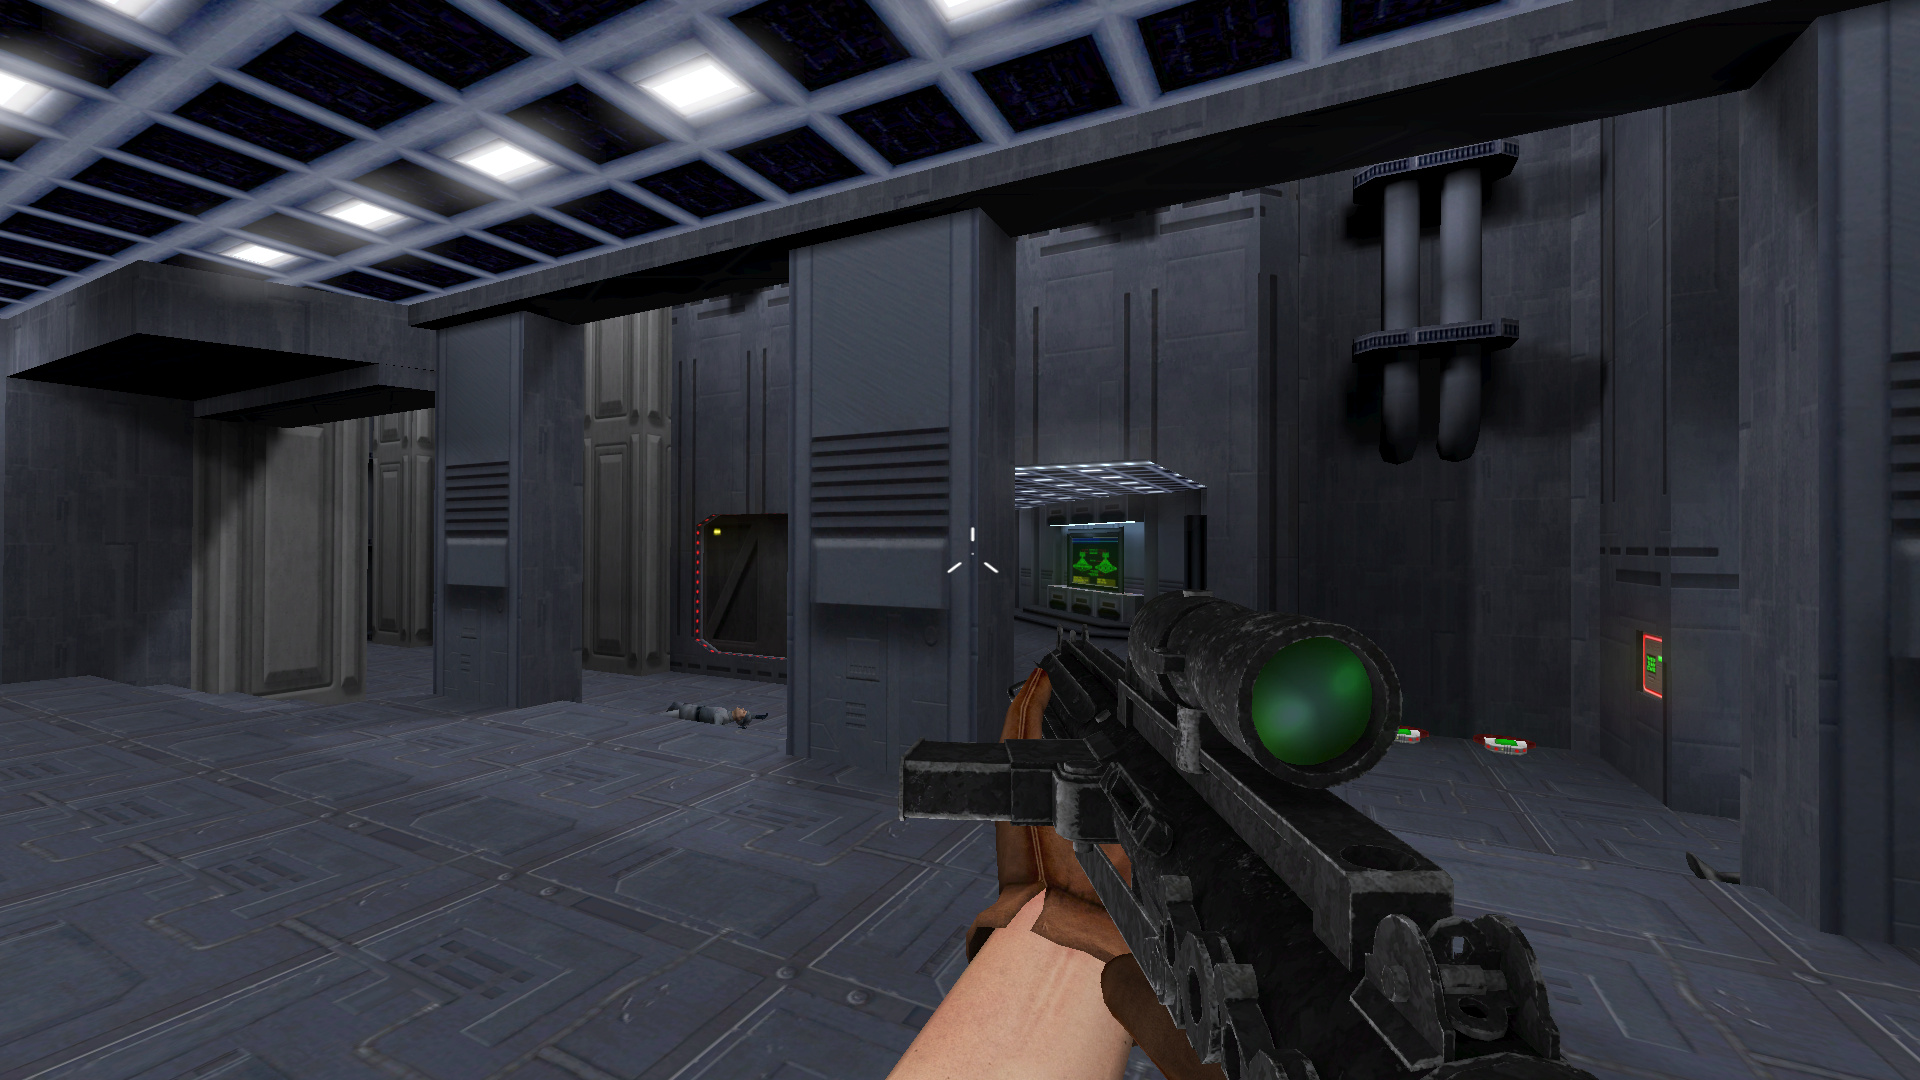
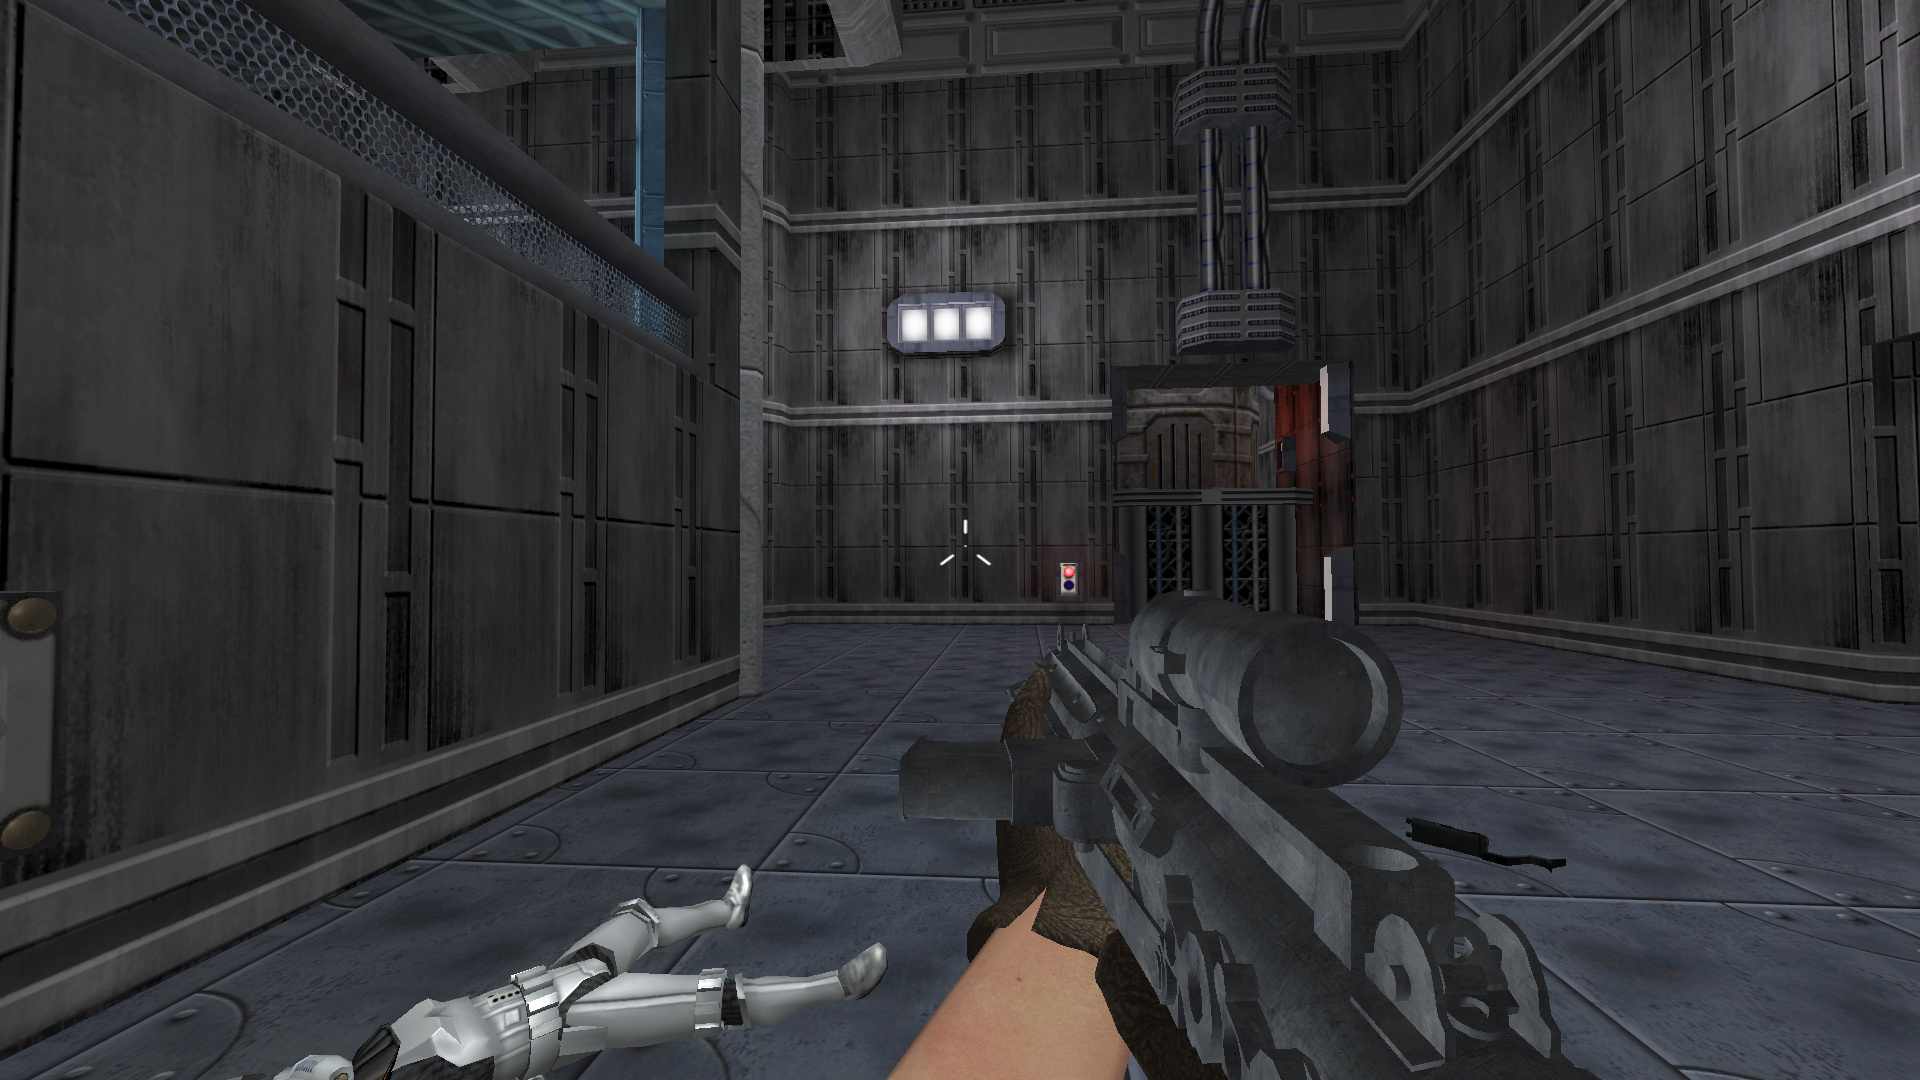
Hahaha, you noticed the venting holes, damn. By the time I finished duplicating and positioning, I didn't feel like fixing the lighting right there. But I will. I'll decrease the wear further, but I still want the gun to look battered and overused. I plan to use it on a mod and the battle weary gun tells a story. The specular light is still missing from the texture because I didn't do it yet. I'll probably delay the next update until I have everything sorted out.
-
-
I will use your smart material, but I need to get back to speed, so I would rather manually paint some stuff for now.
Maksman likes this -
I hope you're up for some serious crits @@Corto
- The modeling work is fairly solid! But I do have a points you might want to tackle before your next release. You seem to be using the exact same mesh for the view and World models. The world model does not need to have all the small circular idnentations modeled and you could delete the front and most of the right-hand-side of the view mesh to optimize the model for the game. You should also consider adding LODs to the model. As it stands right now, someone who were to use this in base JASP with a rather detailed Character model will definitely run into the Ghoul2 Transformspace error.
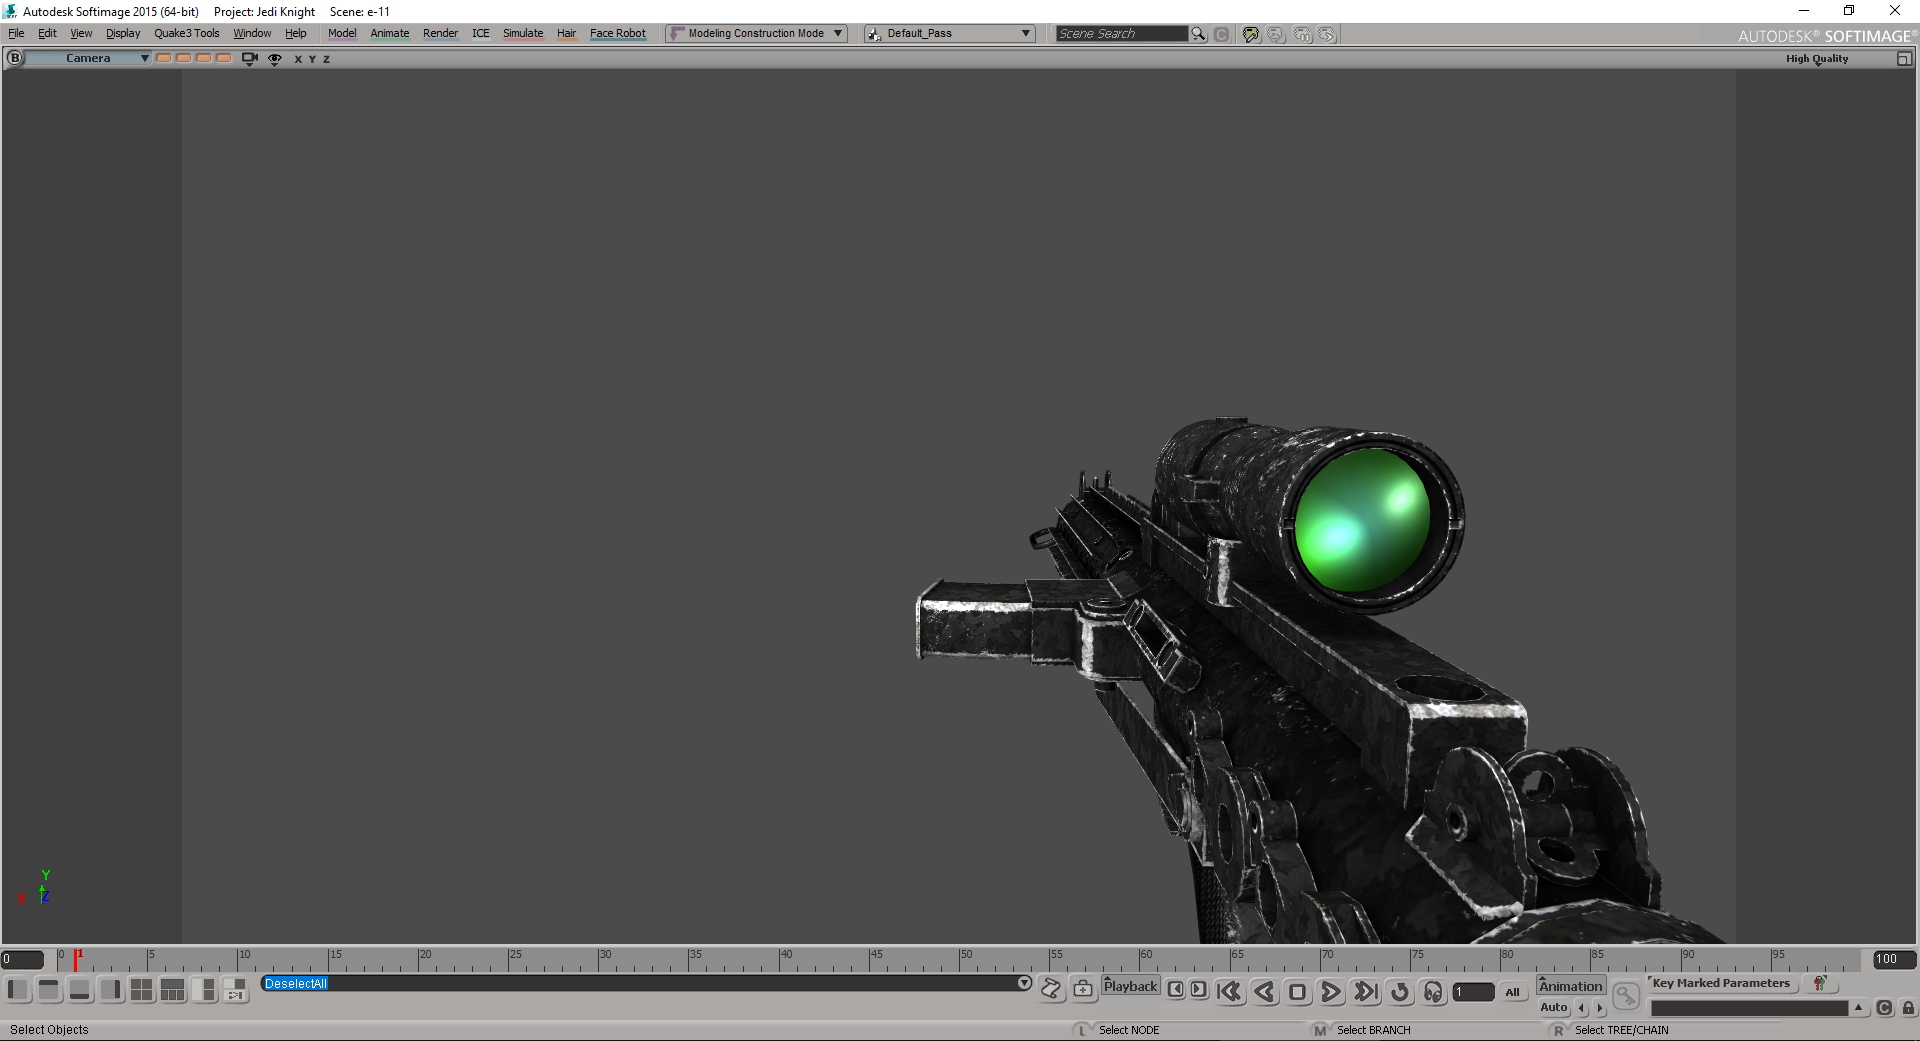
- The textures could be improved a lot, while I love the base you have for your scope atm the whole gun could use some proper highlights and shadows, in a game as old as JKA having pre-lit textures is usually the best way to go. I'd also recommend to reduce that edgewear by a LOT. Right now it looks like someone disassembled the gun and purposefully evenly scratched all edges. Place your scratches strategically. The more Occluded an area is, the less scratched it should be. Take a look at this small hole, how did that get scratched around the entire perimeter? And that is just one small example, here's another. Who took a rather hard piece of metal, put it in that nook and scrubbed it over that things bottom edge? Place your wear in places where it makes sense. From looking at your textures I'd assume that you did infact bake an an Ambient Occlusion map, you could use that to help you find the occluded spots that'd see less wear. You can also use the same AO map as a guide for where to Paint dirt, because dirt is more likely to gather in the deeper crevices and occluded areas that are rarely scrubbed over by accident and difficult to clean due to limited accessibility. You also don't need a 4k map for this gun. Especially not for the world mesh. The World mesh can do fine with a 1*1k Map while the Viewmesh can get away with 2*1k map, seeing that you only need about half the UV space for half of the gun model.
- you got some nasty UV distortion on the left side of the grip
This is all I got for the moment, if I dig further I can probably find some stuff to nitpick about but for now I'll let you focus on these bigger Issues.
Ok, I couldn't help myself and started working on the fixes right away. Here's some progress, I hope it shows. I'm going to add a lot of object detail to the textures and then work on the highlights and shadows by hand.
minilogoguy18, Wasa, Lancelot and 3 others like this - The modeling work is fairly solid! But I do have a points you might want to tackle before your next release. You seem to be using the exact same mesh for the view and World models. The world model does not need to have all the small circular idnentations modeled and you could delete the front and most of the right-hand-side of the view mesh to optimize the model for the game. You should also consider adding LODs to the model. As it stands right now, someone who were to use this in base JASP with a rather detailed Character model will definitely run into the Ghoul2 Transformspace error.
-
I went over the mod again and to be honest, it looked good back then, but now it looks so dated I feel like it needs a complete overhaul. Not just a re-skin, but an almost complete do over. I'm thinking about making a pure Star Wars shooter with the openjk code which will probably benefit this mod. Do you have someone working on the code already?
-
I downloaded the latest trial to be honest. It saves you a lot of work. I still need to try the hand painting tools, but I think it has potential.
-
You read my mind. Although I was comfortable enough to release the model, there are a lot of aspects than I don't like yet. All the points you mention are spot on. I generated the texture using Substance Painter with all the fancy stuff to find and wear down the edges. Now it needs manual work to look more realistic. I have a lot of small details in mind that need to be included in the texture. As for the rest of it, you are right and I have it in mind for my next update. Thanks for comments. One loses perspective when working several days in a row on the same thing.
-
This one is out. I'll update the file in the download section from now on.
Kualan likes this -
Obi Wan's lover is called Satine? What is this, Moulin Rogue? Nice character by the way.
The4thRemnant, KyleKatarn1995, Smoo and 1 other like this -
-

Creating First Person Perspective
in Modding Assistance
Posted
Yes, I know, but I didn't get around to that yet. But I will. I'm just getting started and up to speed.