
AshuraDX
-
Posts
2,319 -
Joined
-
Last visited
Content Type
Profiles
News Articles
Tutorials
Forums
Downloads
Posts posted by AshuraDX
-
-
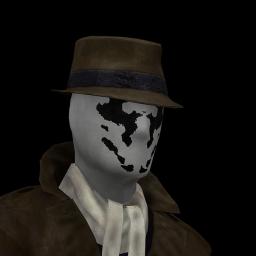
@@ArmyofGhoul
Hey, all you should need to do is to create a simple textfile, dump the following code in it, save it as sounds.cfg and drop that into the models/players/rorschach folder.jaden_male m
ArmyofGhoul likes this -
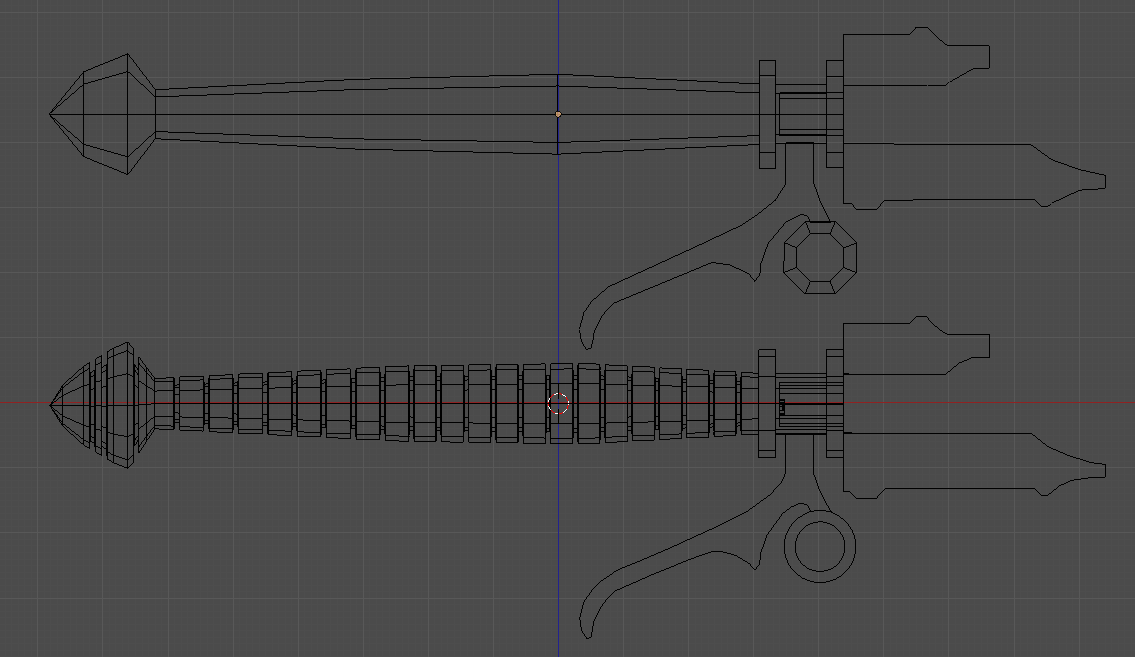
@Akagi Gin That's a pretty cool design! You don't need to model all of the tiny details into the hilt, though. JKA is an old game, and you should aim for lower poly models when possible. The best way to get the details into the texture would probably be to make a high poly mesh with all of the nice details and bake it to a low poly mesh.
I went ahead and uhhh... rebuilt it with a lot less detail so you can see. There's probably places where you could cut out more details, even. I'm not so sure about what to do with the weirdly shaped bits near the emitter to cut down on polygons. 2D planes would work well, except for the fact that they look positively ugly ingame. Right now I just have them projected so the UVs are flat. The big downside to this is that the edges can't really be textured.
Model comparison:

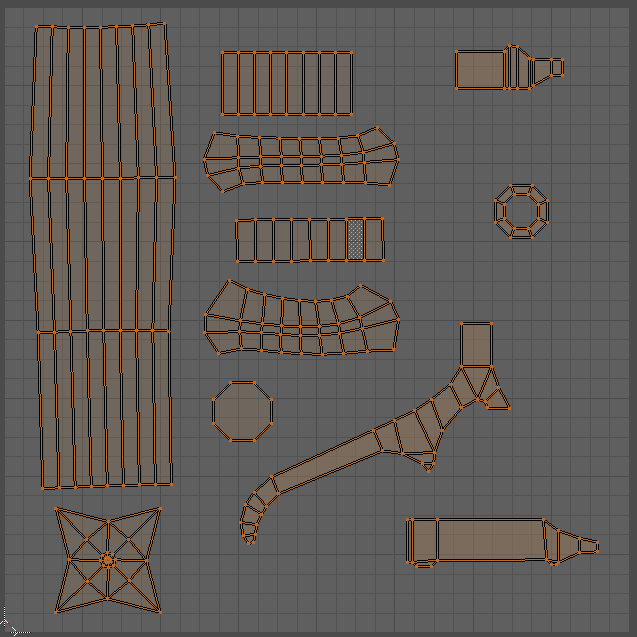
UVs (these are a bit of a mess and could be much better):
Download link for my blender file here.
A good start and since you made this for Feedback purposes I decided to go ahead and polish it up to enhance the educational value, by replacing some of the less ideal solutions that you came up with.
Here's what I did in summary:
I welded a few vertices in some spots to further decrease the weight, aligned some mismatched surfaces and deleted a face that was never to be seen between the "braking handle" and the ring that's attached to it.
I also completely remade the UV-layout, most of the time you want a seam at all 90° angles, while keeping seams away from flat, conjoined surfaces. An example for this would be the "Emitter Rings", in your layout you just sliced them apart along a vertical loop, which gave you these rather weird looking, awkward and wavy shapes on the UV Layout. Texturing those would have been a pain, if you treat these kinds of shapes like cans of baked beans or whatever and jsut slice the top and bottom parts off before making a vertical cut in the side wall you'd get something that's much easier to work with while texturing.
The same technique was applied to all of those large "flappy bits". Just slice around the sides and cut up as you see fit to get something that's very easy to work with where you can also put detail work on the sides instead of getting ugly stretching along the edges.
Now onto the conical pommel, which was pretty much treated the same way, I just gave it a slice around the thickest part which gave me 2 simple, flat circular shapes to paint on in the UV layout.
The final bit I changed is a choice thing, but highly recommended if you do your texturing the "traditional" way in 2d in Gimp or Photoshop instead of painting straight on the model.
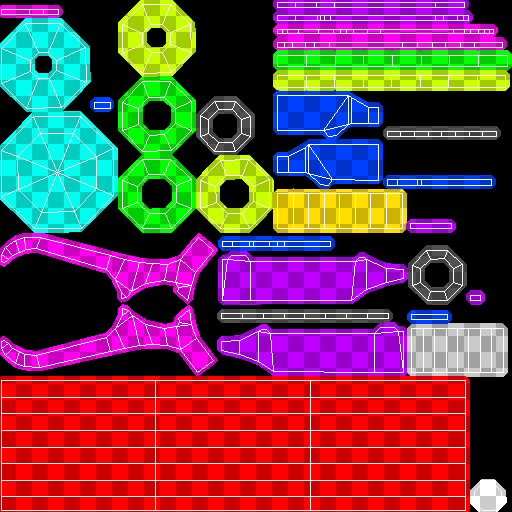
I straightened the UVs for the handle piece to get a simple rectangular shape that is insanely easy to paint, as you don't have to warp your lines to properly loop them around the model for things like handle wrapping.
And that's it. Here's what the finished UV layout looks like:
You could technically sandwich/overlap the left and right sides of a piece to improve texture space usage, but that'd come at the price of having these parts mirrored/symmetrical at all times - which I'm not a huge fan of. But you could do it.
and the updated model:
and a link to my files for those interested: https://www.dropbox.com/s/m6i1im07t7arzvu/ArtemisSaber_example.zip?dl=0
EDIT:
Besides all of this purely educational stuff, I'd recommend to smooth out some of the larger circular bits, the game can handle a few more sides. 12 sides on the largest round sections of a model will look a lot better than 8 sides while still being relatively lowpoly.
You could also use a reduction technique, as I demonstrated here: https://jkhub.org/topic/10162-some-tricks-for-model-optimization/
that way you can have a really round appeareance on the parts that stick out while keeping the more performance oriented geometry for pieces that don't have to appear quite so rounded.
-
-
Oh dear...
@ this is indeed quite the mess, but we can fix it
You should make sure that you at best only have 4 sided faces (quads) on your model, a few triangles may be unavoidable and that is not a problem. Just make sure to cut up and eliminate all faces with more than 4 sides.
Once that is through, you can give unwrapping another shot.
A clean mesh helps tremendously while unwrapping.
Most of the really badly stretched island you have there stem from concave n-gons, like the sides of that handguard.
Siegfried likes this -
Thank you so much! I can't thank you enough for the help, it's working perfectly!
great, you're welcome!
Jeff likes this -
mainly to replicate how it is in the str document itself, I also put it at the very end before the end marker if that also has something to do with it (Along with if I was supposed to put it in as z_rorschach or something else entirely)
I'm also not quite sure how to segment the file for the variants, assuming I'm supposed to do that in the first place?
Apologies for the newb questions incase you get these alot!
The "folder name" you have to place there is not the name of the .pk3 file, but the name of the folder that holds the character model and texture files
In the case of my Rorschach model it's quite simple:
\models\players\rorschach
you just need to take the name of the last fodler in that path and insert it as the tutorial says, like so:
REFERENCE          rorschach
NOTES               "For character menu"
LANG_ENGLISH        "Rorschach"
Now onto Segmenting the skin into the 3 sections, this is what the full, default .skin file for rorschach looks like:
hips,models/players/rorschach/main2.tga
torso,models/players/rorschach/main.tga
scarf,models/players/rorschach/main2.tga
l_arm,models/players/rorschach/main.tga
l_hand,models/players/rorschach/gloves.tga
l_hand_cap_l_arm_off,models/players/stormtrooper/caps.tga
l_wrist,models/players/rorschach/gloves.tga
l_arm_cap_torso_off,models/players/stormtrooper/caps.tga
l_arm_cap_l_hand_off,models/players/stormtrooper/caps.tga
r_arm,models/players/rorschach/main.tga
r_hand,models/players/rorschach/gloves.tga
r_hand_cap_r_arm_off,models/players/stormtrooper/caps.tga
r_wrist,models/players/rorschach/gloves.tga
r_arm_cap_torso_off,models/players/stormtrooper/caps.tga
r_arm_cap_r_hand_off,models/players/stormtrooper/caps.tga
belt,models/players/rorschach/main2.tga
buckle,models/players/rorschach/main.tga
head,models/players/rorschach/head.tga
hat,models/players/rorschach/head.tga
head_cap_torso_off,models/players/stormtrooper/caps.tga
chest,models/players/rorschach/main2.tga
neck,models/players/rorschach/head.tga
torso_cap_head_off,models/players/stormtrooper/caps.tga
torso_cap_r_arm_off,models/players/stormtrooper/caps.tga
torso_cap_l_arm_off,models/players/stormtrooper/caps.tga
r_leg,models/players/rorschach/main2.tga
r_shoe,models/players/rorschach/main2.tga
r_leg_cap_hips_off,models/players/stormtrooper/caps.tga
l_leg,models/players/rorschach/main2.tga
l_shoe,models/players/rorschach/main2.tga
l_leg_cap_hips_off,models/players/stormtrooper/caps.tga
hips_cap_torso_off,models/players/stormtrooper/caps.tga
hips_cap_l_leg_off,models/players/stormtrooper/caps.tga
hips_cap_r_leg_off,models/players/stormtrooper/caps.tga
torso_cap_hips_off,models/players/stormtrooper/caps.tga
Now all you have to do is split this file into 3 files by body parts, one for the head, another for the upper body and a final one for the lower body:
Head parts:
head,models/players/rorschach/head.tga
hat,models/players/rorschach/head.tga
neck,models/players/rorschach/head.tga
head_cap_torso_off,models/players/stormtrooper/caps.tga
Upper Body:
torso,models/players/rorschach/main.tga
scarf,models/players/rorschach/main2.tga
l_arm,models/players/rorschach/main.tga
l_hand,models/players/rorschach/gloves.tga
l_hand_cap_l_arm_off,models/players/stormtrooper/caps.tga
l_wrist,models/players/rorschach/gloves.tga
l_arm_cap_torso_off,models/players/stormtrooper/caps.tga
l_arm_cap_l_hand_off,models/players/stormtrooper/caps.tga
r_arm,models/players/rorschach/main.tga
r_hand,models/players/rorschach/gloves.tga
r_hand_cap_r_arm_off,models/players/stormtrooper/caps.tga
r_wrist,models/players/rorschach/gloves.tga
r_arm_cap_torso_off,models/players/stormtrooper/caps.tga
r_arm_cap_r_hand_off,models/players/stormtrooper/caps.tga
belt,models/players/rorschach/main2.tga
buckle,models/players/rorschach/main.tga
chest,models/players/rorschach/main2.tga
torso_cap_head_off,models/players/stormtrooper/caps.tga
torso_cap_r_arm_off,models/players/stormtrooper/caps.tga
torso_cap_l_arm_off,models/players/stormtrooper/caps.tga
torso_cap_hips_off,models/players/stormtrooper/caps.tga
and lower body:
hips,models/players/rorschach/main2.tga
r_leg,models/players/rorschach/main2.tga
r_shoe,models/players/rorschach/main2.tga
r_leg_cap_hips_off,models/players/stormtrooper/caps.tga
l_leg,models/players/rorschach/main2.tga
l_shoe,models/players/rorschach/main2.tga
l_leg_cap_hips_off,models/players/stormtrooper/caps.tga
hips_cap_torso_off,models/players/stormtrooper/caps.tga
hips_cap_l_leg_off,models/players/stormtrooper/caps.tga
hips_cap_r_leg_off,models/players/stormtrooper/caps.tga
just save these as head_a1.skin, torso_a1.skin and lower_a1.skin and you should be good to go.
For any variations you might' want, I'd suggest to just copy & paste the texture names from the red & blue team skins over to duplicates of the part skin files named head_b1.skin etc.
So if you wanted the option to use the head from the red teamskin, all you'd need to do is save this as head_b1.skin:
head,models/players/rorschach/head_red.tga
hat,models/players/rorschach/head_red.tga
neck,models/players/rorschach/head_red.tga
head_cap_torso_off,models/players/stormtrooper/caps.tga
or you could mix and match different pieces and textures together, maybe make a version of the default mask with the black hat from the red Teamskin.
I hope this helps
EDIT:
Here's a set of Icons you can use for these customisation options:
https://www.dropbox.com/s/id4z72r1yx04nph/Rorschach_icons.zip?dl=0
Jeff likes this -
-
Did you unwrap it already? If you have not, you'll have to get that out of the way before you can texture it.
Siegfried likes this -
Hey, glad to hear that you like the model!
Here's a tutorial that you can follow in order to make it appear in the SP customization menu:
https://jkhub.org/topic/10013-how-to-make-a-singleplayer-species-with-variants/
-
This sounds like a flaw with your importer @@Asgarath83 it seems to impprt the skeleton with a negative Z Scale, which ends up flipping it vertically on export. This is just a guess, but I can't imagine something else to be causing this issue.
About the dummies: you can just create some new ones, position them at 0,0,0 and name them appropriately.
ChalklYne likes this -
It actually is quite easy to get into JA's pose. I know because i took a stab at it and it took around 5 minutes to setup around the skeleton.
Even more so if you import the already rigged .nif files straight from Skyrim, pose it, then export the weights.
After that you should be able to just collapse the modifier stacks, reset Xforms and then delete the Skyrim skeleton while keeping the pose. When that's through add skin modifiers back in, import the weights and remap them to the equivalent jka bones, this should give you a for the most part perfectly weighted model. Only thing left to do would be hierarchy-setup and ideally LODs and you should be good to go with exporting the model.
This is just a theoretic run-through of the process, so take it with a grain of salt.
Psyk0Sith likes this -
here's a quick example of a bolt shot effect, I still need to fix that NPC hit issue. But I don't really have the time to do that this weekend.
-
Making it fire those pegs/bolts through the bow wouldn't be easy. It wouldn't look right seeing a ball of energy appear from it. Having said that, I'm not against anyone else trying it.
huh, why should it be?
I've done this in the past for a crossbow type weapon.
Lemme see if I still have it.
EDIT: It seems I don't have that one anymore, I'll see if I can find the time to wip something up.
Daedra likes this -
Interesting how you split the credits for a ported model between you two without even so much as a mention of the original creators of this model.
I don't know if you ended up paying him to port this @, but I'd advise you to be more careful with this in the future.
If you payed him for this service you essentially paid someone to commit a form of copyright fraud, which may or may not be the wrong term for this. This certainly crosses the borders of the "porting grey area" and definitely breaks out of the usual "fair-use" scenario.
Be careful with this stuff, for your own and the well being of jkhub.
-
I need to finish the new version of my customizeable saber hilt, I should have all of these parts in there.
TheWhitePhoenix and the_raven like this -
@@Lord Of Hate I'd record them myself If I had the game, generic playthrough footage is not ideal if you want to accurately reproduce an area.
-
@@Lord Of Hate
this doesn't seem tooo complex, can you get me some ingame walkthrough recordings with focus on "detail shots" from this area?
-
How is support for terrain patch meshes coming along?
Could you add vertex coloring/alpha blending to the terrain tools?
Does it support 3ds Max 2017 also?
Thanks again for making this
EDIT: Maybe you could take some inspiration from the http://dev.wallworm.com/ tools?
you used a really old build back then, the tool has been extended with alpha blending tools for terrain a few months ago.
Support for Terrain Patches has been changed slightly, it's way easier to set up now and can be monitored and edited a lot easier than before.
But in essence it still works just the same, one patch per 3-4 sided polygon.
and yes: it works in max 2017
Archangel35757 and Lwkill like this -
that's the problem, the skybox boundary is not set by some entity. It's a fixed component of the Map geometry.As long as the geometry of the map is left intact it would be fine.
-
I'd be surprised if this was easily achieveable.Hi everyone, I'm currently trying to edit default maps to have increased skybox/bounding box/playing area. I don't know the exact mapping term.
E.g. I'd like to up the size of t2_wedge, so the invisible walls reach much, much further, to allow for aerial battles and whatnot. I'm currently building a map in Lugormod that has a PVP mode centered around blowing up the buildings like in SP mode. It's convenient since people don't have to download anything to play.
Is there anyone who can point me in the right direction on how to do this? Or is anyone willing to do this for me for a few of the singleplayer maps? Thanks.
Even more so if this kind of change doesn't require a hard modification of the .bsp file.
-
I'd make all of them models to be honest, given that their forms are highly irregular and some of the details would be missed with simple brushes.
I'd agree with this.
-
WARNING: brush plane with no normal
oh, yeah I have seen that a few times. But I don't know what causes it. Q3Map2 doesn't seem to complain about that one anyway.
-
@@ChalklYne why don't you let carcass do the scaling for you?
ChalklYne likes this -
@@ChalklYne drop that spec map, Jabba doesn't shine as much. You should rather bake some of that normal detail into jabbas diffuse texture.
ChalklYne likes this


GtkRadiant 1.6.6 problem
in Modding Assistance
Posted
What's your native language? Maybe I can ping someone that speaks it who might know what you can do.