-
Posts
823 -
Joined
Content Type
News Articles
Tutorials
Forums
Downloads
Everything posted by The Punisher
-
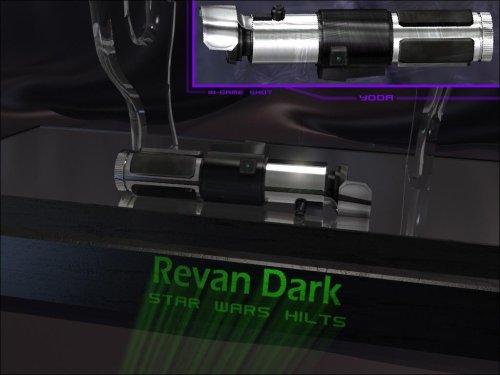
There are some great tutorials how to add sabers to SP menu at https://jkhub.org/tutorials/article/72-how-to-add-new-saber-hilts-to-the-single-player-menu/ https://jkhub.org/tutorials/article/192-sp-menu-saber-hilt-support/ I made a saber pack with over 40 saber hilts (mostly these + all TFU sabers and a few extras like Mara Jade, Ahsoka, Qu-Rahn & Kanan sabers) using these tutorials.
- 16 comments
-
- star wars
- new sounds
- (and 5 more)
-
Always like this saber. Found it simple and sad at the same time. Just for kicks in case you are interested.
-
-

Trying to add something to a model with Blender
The Punisher replied to ShenLong Kazama's topic in Modding Assistance
Check this also https://jkhub.org/topic/4905-frankensteining-with-blender/?hl=blender Hooddown is the same as HoodUp. Adding stuff is easy, especially if the models match, otherwise you will need some 3D modeling knowledge which I don't have. -
Toshi's Vader is KICK.....(you know what)...It totally ROCKS!...But you can't never have enough Vader!
-
I want Vader!!!!!!
-

Trying to add something to a model with Blender
The Punisher replied to ShenLong Kazama's topic in Modding Assistance
yes, it is possible. you can see here a version of the "Jedi Hunter" version from TFU2 put together in Blender using parts from different models, including a hood (by a total noob with 0 experience ). https://jkhub.org/topic/3553-jedi-hunter-from-tfu2/page-5 Have you taken a look at this tutorial(s)? https://jkhub.org/tutorials/article/195-blender-jka-frankenstein-modelling/ -
@@Jeff re-enabled his links. Check his Dropbox section.
-
Looks kind of the Yavin version from @@Jeff with @@DarthPhae's Yun head....
-
What he said!!!!!!!!!!!!!!!!!!!!!!!!!!!!!!!!!!! Can't wait for either version! Take your time man, we don't want you burning out.
-

Ultimate Sith Edition Starkiller
The Punisher replied to Xioth's topic in Mod Requests & Suggestions
Never had a problem with OpenJK. Anyway, after @@Seven fixed the belt/saber details, I was too lazy to rename the files back and kept the names from his file. As @ said, just rename the files. Open the model with packscapedrag and drop the folders "Galen_Hoth_Stalker" and " "Galen_Hoth_Stalker_sbh" to a temp location on your hard disk.rename the files starting with "sith_stalker_hoth_" to start with something shorter, like "hoth_stalker_".Open the "skin" files with notepad and do a search replace and replace "sith_stalker_hoth_" with "hoth_stalker_".Save the files.replace the folders in packscape with the folders from your computer (I would remove the folders from packscape first then drag and drop the folders in my HD to their original location).Save the model in packscape.It should work.Now, you could also rename the model's folders and make them shorter (i.e. rename it to "Hoth_Stalker"). In addition to replace the folder names in the "skin" files, you will also need to modify the shader and NPC files to point to the new folder name. Is pretty easy. -

Ultimate Sith Edition Starkiller
The Punisher replied to Xioth's topic in Mod Requests & Suggestions
After "someone" started to use files form people here at The HUB without authorization and make it look like he did them, I removed my links in support of the original authors, and even thought I didn't made this model nor the fixes, I wasn't going to make it easy for "him" either. Anyway, there is the updated link https://mega.nz/#!KJA0WJhR!UaFT4RIFUsGneT0M6uTArJD0_z4XeQY5ARviO1D-aRo Although I've never had a problem with it in OpenJK, I renamed the files shorter. Maybe that fix some of the issues. -
-
No need to man. Just been able to enjoy your amazing work is more than enough.
-
if you want to add the model to your Single Player character selection menu here is a "quick and dirty" way Open the model with packscapeGo to the folder "models\players\Tulak_Hord"copy the icon_default.jpg somewhere in your computermake 2 additional copies (you should have 3 copies of the icon)rename the copies toicon_head_a1.jpgicon_lower_a1.jpgicon_torso_a1.jpgCopy the "model_default.skin" to your computer and make 2 additional copiesrename the copies tohead_a1.skinlower_a1.skintorso_a1.skin(same names as the icons above, without the "icon_" part).create a text file and rename it to "playerchoice.txt"open the new file and paste the following Close and save the filePut all the files back in the Tulak_Hord folder and save it. The model should be now in the Single Player Character selection menu. Now, since is a single model (no additional parts or multiple skins), you could leave the "skin files" as they are. If you want to do it the right way: Remove everything from the head_a1,skin, except the lines related to "head", "hair", "face", etc.Remove everything from the lower_a1,skin, except the lines related to the lower parts of the model (hips, legs, boots, any extra part below the hip like an armor, robe, etc.)Remove everything from the torso_a1.skin, except the lines related to the upper body of the model (torso, chest, arms, hands, arm, any additional part in the upper body like an armored part, robe, hood, etc).
-
It means ot currently doesn't supports npcs....but lt could...you just need to create it. You can do the same thing you just did. You can create the folders locally, add the NPC(s) files with your character preferences/settings and then drag the folder into the pk3. The ext_data should be at the "root" level of your pk3. You can view the kylo ren you just used and see the folder structure.
-
Great! Glad you did it. Going through the process is the best way to learn. I joined The Hub several months back looking for some advise in a color issue I had with some blades. The great people here recommended me to use OpenJK and JA became a new game for me again. I've learned some great stuff here how the models work reading the tutorials, then learned a little bit about "Frankensteining/Kitbashing" and I am having some fun here: and now I am trying to learn how to model but my time and resources are very limited so is been a sow process for me.
-
you could: option #1 - copy the kylo-ren.npc from the Kylo Ren model somewhere on your computer, make whatever changes you want, then copy it back to the same folder where you extracted it from. option #2 - copy it to your folder, rename the copy to "kyle.npc", modify the "new" kyle.npc then copy it to the original npcs folder inside the Kylo ren model. That way you still can call the Kylo-ren.npc while using the the kyle.npc to replace Kyle. Option #3 - use the Kyle.npc file extracted from the assets1.pk3 and make trhe changes, then copy the kyle.npc in the "\ext|date\npcs" folder of the Kylo Ren pk3.
-
hi @@kalamaray! Thanks for the amazing blades. I am a huge fan of your TFA blades (been playing with your beta version while the final version came out) so my judgement might be unfair. I love the pulsing effect. So far since I only play SP, I haven't been able to appreciate it in a dark environment like in your screenshot (need to DL the Starkiller base map and try it) but the blue is as close as to the movie as I can see! And you might remember from my original feedback I love the Purple blade too (most mods Always get the purple b lade too "light", but yours is on point). Edit: Was able to enjoy the blue blade in a semi-dark environment. the pulsing effect, the color, the lightning...is AWESOME!
-
Hope you made a backup of the assets1.pk3 file before doing any changes. You should *** never *** modify the "assets" files. The changes should always be made to the custom pk3 you are trying to use (that's why I always refer to "your model"...your model's pk3 file). Also, sometimes JKA doesn't likes when mods are modified with Winrar or winzip. Always use packscape to save your files. You can find it at https://jkhub.org/files/file/89-pakscape/.
-
OK, I looked at the model. You need to: open the model with packscape.Expand all the folders (at least expand "ext_data\npcs")drag and drop your new NPC file into the npcs folder - your npc should point to either "Kylo-Ren" or "Kylo-Ren2"save the file. I didn't tested the model but for what I can see, for the "Kylo-Ren" version, the default model will have the hood up. If you want to use it with the hood down, you will need to add the "customskin" line and point it to "hooddwn" (yes, it has a missing"o").


