

SomaZ
-
Posts
440 -
Joined
-
Last visited
Content Type
News Articles
Tutorials
Forums
Downloads
Everything posted by SomaZ
-
cg_fovAspectAdjust 1 Should help with widescreen resolutions and the fov. Not sure if it requires a "vid_restart" in console afterwards.
-
Whats the issue? I don't see any. Looks like you imported a torso. Bones in the mdr format dont have any size, so this might look a little off. Theres also no base pose. Your imported mesh seemingly has LODs and this is what creates these overlapping surfaces. If you import a lower part and afterwards the torso, the torso part will be parented correctly to the lower part animation wise.
-
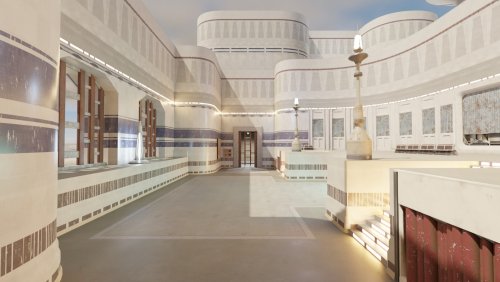 There's two cvars that need to be enabled for proper lighting on that map. r_hdr and r_floatLightmap. In the linked ui mod its the HDR and the HDR Lighting support options. The HDR setting does not refer to HDR monitor output, but calculating all colors in a bigger colorspace. Suggested cvars would be r_cubemapping 1; r_deluxemapping 1; r_parallaxMapping 1; r_tonemapping 1; r_autoexposure 1; r_hdr 1; r_floatLightmap 1 followed by a vid_restart
- 5 comments
-
- 1
-

-
- anniversary contest
- rend2
- (and 1 more)
-
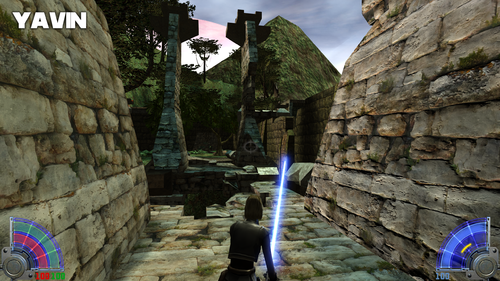 The pack itself doesn't do ray tracing nor cubemapping. It's "just" a material pack. But the rend2 renderer uses cubemapping.
 -
 I fixed rend2 to work with the released version of the map. You can get the updated version of rend2 here: Github SomaZ OpenJK releases
 -
 I'm a sucker for lighting and this is lit beautifully. Well done! Have tested it a little and I noticed you added invisible blockers for gameplay, which is nice. No stupid movement blocks. Design is great, looks great with latest rend2 features. Nothing more to say, just 5/5
- 1 comment
-
- 3
-
-
- contest entry
- duel map contest
- (and 1 more)
-

ZIP archive with JPG md3 previews
SomaZ replied to Apprentice's topic in General Modding Discussions
Oh, you are right. Looks like some image links are broken. I can make new images when I'm back home. -
ZIP archive with JPG md3 previews
SomaZ replied to Apprentice's topic in General Modding Discussions
You can find the list here in the wiki https://jkhub.org/wiki/Map_Models_-_Image_Reference_Library -
Hey SardineGuy. You can use my blender addon to import and export md3 files. Its handling is a little different as the old versions so I just link the little tutorial I wrote about it here. It also comes with instructions on how to setup the addon. Hope this helps. https://jkhub.org/tutorials/modeling/md3-importexport-using-blender-33-r185/
-
Uhm, okay. Never heard of this before. What version of the addon did you try to install? If you have instructions on how to recreate this issue, I could probably fix it, unless its a bug in the 3.1 release that the addon triggers by accident. Anyways, latest release (v0.9.96-pre) also works in more recent versions of blender like 4.2.
-
First of all, the exporter you tried using is part of wonkos addon, not mine. This exporter is supposed to export every surface as a patch mesh. Patch meshes are somewhat limited and you should avoid using patches for regular geometry except for curved surfaces. I submitted a patch to fix the exporter, but I assume you actually want to copy a complete map with that approach, which is not recommended and probably also not actually doable.
-
You definitly don't have the latest version of the addon, because I fixed this already. Get the pre-release I linked above.
-
Update the bsp importer addon to the latest version. Get it here https://github.com/SomaZ/Blender_BSP_Importer/releases/tag/v0.9.96
-
Also multiple things. A decompile of a .bsp file will always have only structural brushes. Also when they were detail in the original .map file. But I don't think its actually an issue in this case. So don't think brushes were originally structural when looking at a decompiled bsp. Weather files are generated on map load. The original jka game executables do this as well. It's not unique to that mod. And as I said, weather zones are not mandatory to make the inside/outside brushes work correctly. They are intended to speedup generation of the weather cache.
-
Ok, so theres some things to concider. Weather zones aren't just brushes but also entities. Depending on how you added those, it might not work like that. Second, weather zones are not mandatory to make inside or outside brushes work correctly. Weather zones are just used to speed up the loading of the inside/outside info. IF you have weather zones, inside or outside brushes that are NOT inside of a weather zone are ignored. Jedi Outcast only had outside brushes, Jedi Academy added inside brushes. Only one type of those brushes are allowed per map. So if you mix inside and outside brushes, the game won't load the map. Reloading a map might break the cached weather info, maybe a bug in JA:Enhanced. This needs some investigation.
-
I haven't tested it, but for easy use, you could convert the mainbsp to like an .obj and use it as guide via an misc_model entity that you delete again before compile. You can either use my blender addon for that or Noesis, which might be the easier choice.
-
Try: q3map2.exe -game ja -mergebsp -world <mainBsp.bsp> <bspToinject.bsp>
-
Just use -mergebsp with latest q3map2 version of netradiant-custom. Get it here: https://github.com/Garux/netradiant-custom/releases So, you simply build the brushes you want to add to a bsp within radiant, add lights so the brushes are lit like in the original map, run a compile, don't worry about leaks or anything related to that. After that you merge both bsps with q3map2.exe -game ja -mergebsp -world <mainBsp.bsp> <bspToinject.bsp> mainBsp is your original map in this case. Hope that helps. More info in the commit of Garux adding this feature:
-
wip [W.I.P.] (SP) Star Wars - Republic Intelligence
SomaZ replied to Lazarus's topic in WIPs, Teasers & Releases
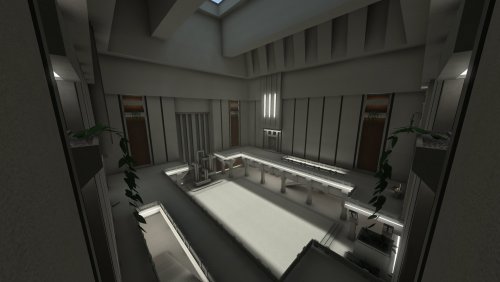
Hm, I feel like a grate with things beneath it except for dirt is kind of weird architecture. It looks nice, but feels not very grounded in reality. People will walk over it. People will have dirt on their shoes. It will pile up whatever you do. Theres two things I can imagine that could work to make it feel more gounded. Keep a lower level, but make it somewhat accessable in the sense of, someone is able to clean it easily. Like having a second entrance for the base. But what for? Is that a base that keeps dangerous animals in cages and theres this passway to transport them into the base without endangering the transport crew? What is that entrance or way used for? Second idea would be placing the whole construction on posts and let the dirt pile up under the construction. Maybe add more foliage under it so it looks like its less maintained than the surrounding area? Just my two cents about that topic. Love the progress so far. Can't wait to see what you will come up with. -
Vertex animations store vertex information per animation frame. Means, you can assign a new position and vertex normal for every vertex at any animation frame. This is pretty nice if you have alot of ununiform movement. This is at the expense of data storage as it has to store alot of data for that. In the raven jedi knight games though, theres no interpolation between animation frames so those animations are looking somewhat laggy. There are some instances in the game where it was used like the switch animation at the beginning of t1_rail, the bombs you have to defuse and I think the water pumps in vjun. Those aren't good examples to use vertex animations in general though. Edit: MD3 vertex animations are SP only, in MP you can only force the game to show one of the animation frames
-
We had a talk about this over on discord. It boils down to: GtkRadiant wasn't configured correctly and shader file name was not added to the shaderfiles.txt file in the shaders folder under base.
-
I just had a look with my WIP version of my Bsp editor, which will have some additional features. The problem is that bsp surfaces get one fog assigned. If it isn't it simply won't draw. A global fog would take place. It's also not just the door, but also the rotating fan that doesn't have the correct fog assigned. I'll try finishing some parts of my bsp editor and then we can try fixing the problem with that.
-
 You have to replace all old OpenJK files with the new ones from my repository. The communication between the game and the renderer has changed in my latest version, so it bascially cant "talk" with the old versions of the engine.
 -
Yea, I used this addon: https://github.com/c-d-a/io_export_qmap I used blender to blockout everything. Later, once I've added all the models, I build collision brushes for the models in Radiant though. Building brushes in blender is a huge pain tbh. Wouldn't recommend it. Extruded terrain is something different, I would never do this in radiant agian but always with the addon I linked.
-
Yea, I will release some of the sources when I had some time to tidy them up. One essential part for rend2 is just modern asset creation. I can't really teach that. Though there are lots of resources online for it. I planned on doing some tutorials on some things like: "How to properly bake normal maps for rend2","How and where do I place cubemaps and what do they actually do?" or "What are deluxemaps and why should I bother?" All the blender lighting/mapping stuff I'm still figuring out myself tbh. Theres some kind of workflow, but I think I could potentially streamline this much more, make it less error prone etc. Main problem about that is that I really dont have much time right now and it will just get less end of october. Trying to teach as much as possible to others and helping where I can.