
JAWSFreelao
-
Posts
995 -
Joined
-
Last visited
Content Type
Profiles
News Articles
Tutorials
Forums
Downloads
Posts posted by JAWSFreelao
-
-
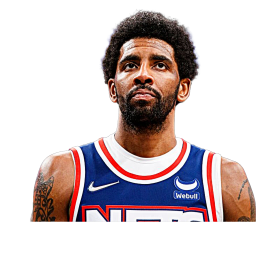
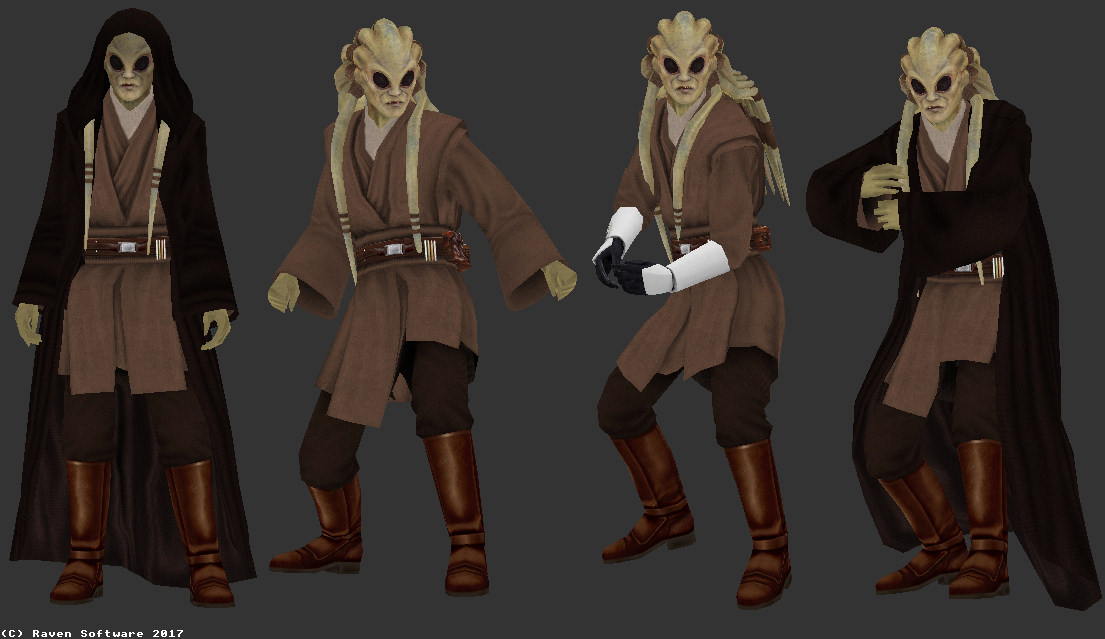
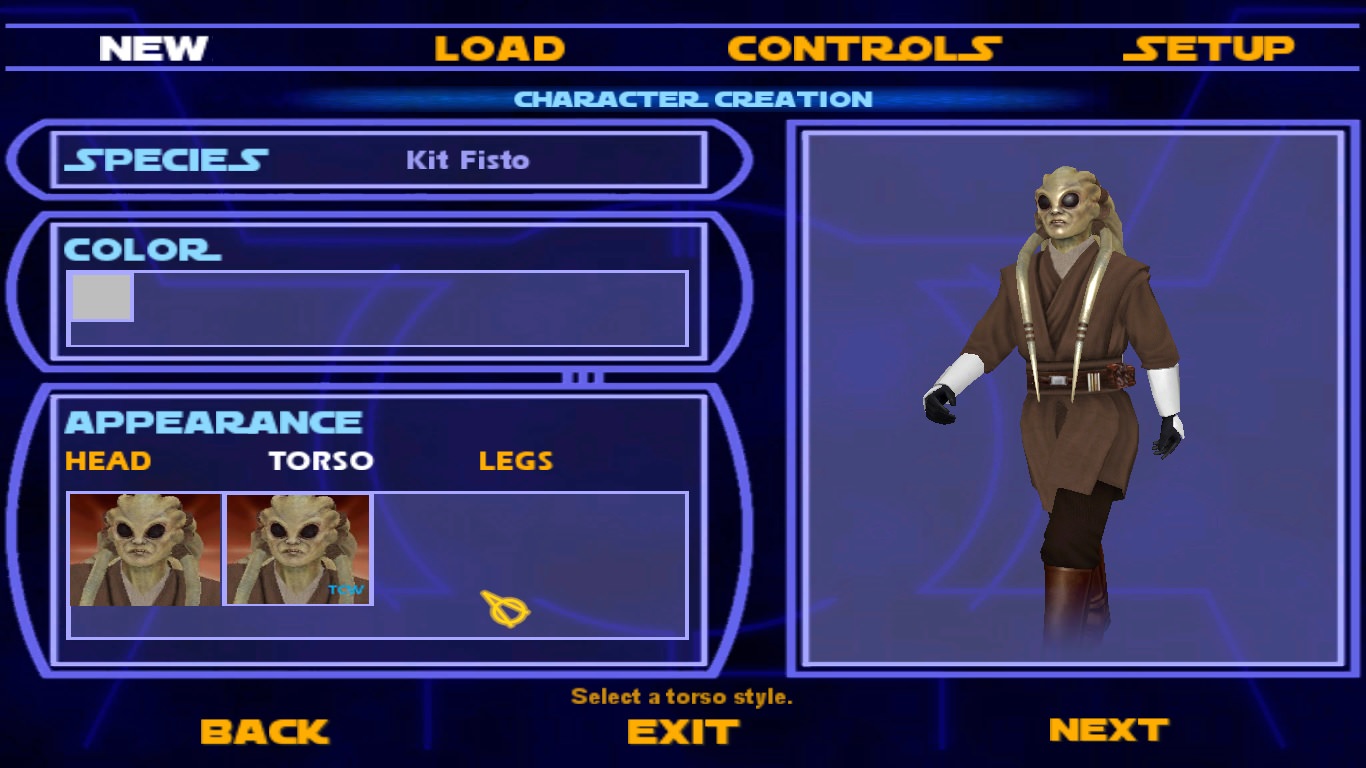
Those look an awful lot like the HS robes I retextured in my original CW Fisto.Update: New version 1.1 of Kit Fisto pack! His body textures are now accurately converted back to HS´s Obi-Wan model, menu support and LOD´s were added. It also fix wrong sabercolor in MP!
https://mega.nz/#!EN0n0RrB!UcMTtKHUuUTItbMXXJlo0TBrn65NyPTTXnGhaQeK1t4
 dark_apprentice likes this
 -
Use OpenJK
-
Have you edited the skin file? What is the piece that you duplicated named, and what is the name of the original piece
PreFXDesigns likes this -
Weird but the positition of the accessory on the other leg is wrong.
Besides that it the duplicated one has no texture although it uses the same image :/
Is it really that difficult? XD
Can you post a screenshot?
-
It wasn't the prettiest for sure but it worked.
-
I did have a Pong Krell on my computer...
Four arms and all.
ZanderNao, Jeff and GamerRedNeck like this -
Hey pal, do you want me to send you my death watch files? I did something different with their armor and you may find it helpful.
-
Yeah, star wars only. Sorry man.
-
I think I'll slowly start working on this over the next few weeks.Fulcrum Ahsoka and her lightsaber hilts, personally.. But that's probably not for here.
The head (obviously) is gonna be Cerez' Ahsoka. The rest I will start working on.
-
I might be able to frankenstein something for ya.
General Howard likes this -
Are there any weapon models or characters that you guys would like to see in JKA?
I obviously have a list of to dos as well but I'm just kind of curious as to what you guys want.
To Do
- Finish up the CW Jedi project. I think that I have all the jedi who wore those gauntlets made.
- Death Watch minipacks need to be ready for release.
- Continue to finish up the TCW style clones (that's just kind of ongoing, honestly.)
General Howard likes this -
Speaking for yourself here, pal.Unless you are great at painting or have a 3d sculpt to base your work around - yeah, photosourcing is an option. But it's not the main method anymore.
TheWhitePhoenix likes this -
Thanks, JAWS. That does explain a bit on the face part.
PM me really quick, I have quite a few little things that might provide a better example
-
Well making faces is 110% photosourcing. More often than not you'll want 2 kinds of pictures. A straight on portrait for the front of the face, and then a side or angled profile for the second. Take the two below as an example. Adding beards is also as simple as finding an angled picture. You can take a beard from any photo and use the hue and saturation (not colorize) to match the skin tones.
As for scars, I would assume just Google "scar texture png" and you'll find several usable scars. But I don't know, scars are one of the few things I don't have experience with.TheWhitePhoenix likes this -
A lot of my skills came from learning to mod NBA 2K14. Using different brush hardness + smudge, clone tool, etc etc.
I guess I just need more info. What are you trying to edit in gimp? Like what are you painting or creating
-
Could be the NPC's dismemberment probabilities
-
AHEM
so I'm going to derail my own thread for a moment.
I just want to say, thank you to all of the modelers and porters in our community. While I do agree in some cases porting is harmful, there is no need to detract from each other's work. Do I think modeling requires more skill? Of course. I don't think anybody's really disputing that. But I also feel like Porter's are simply bringing more content into the game. Content that some people simply don't wish to make, and therefore you're being saved time. I also feel that our community is becoming too poo poo, and that if we want to have a peaceful community like we had even just a couple months ago that we need to stop pooping on each other. Porter's, do your thing. While I do think eventually progressing into modeling would be a cool step, I understand having a job and not having the time to do that kind of shit. Everybody has a life. It's all good. Modelers, do your thing. Those who are few and far in-between feel free to do your thing. You guys are damn good at it, and it's noted and appreciated whenever you do release something. I just wanted to say that everybody in this community needs to start supporting each other, and while I do agree that eventually learning new skills is important, why don't we all just enjoy the game? That's what this shit is all about. And I'm tired of seeing everybody shit on each other all the time on this damn site.
Edit: y'all need to quit with the holier than thou attitude, damn
D A R K S ! D E, Xioth, Penekowski and 5 others like this -
They're called "jaig eyes."
And yeah don't take this the wrong way but this would be an easy project for you to cut your teeth on, so to speak.
Jeff, KyleKatarn1995 and PreFXDesigns like this -
This tutorial is running off of a few assumptions. The first being you have a model ready to go that has been rigged, weighed, skinned, textured, and practically game-ready. This also assumes you have Microsoft Paint, GIMP, and Modview.
This is my first tutorial, and I'd love some feedback.
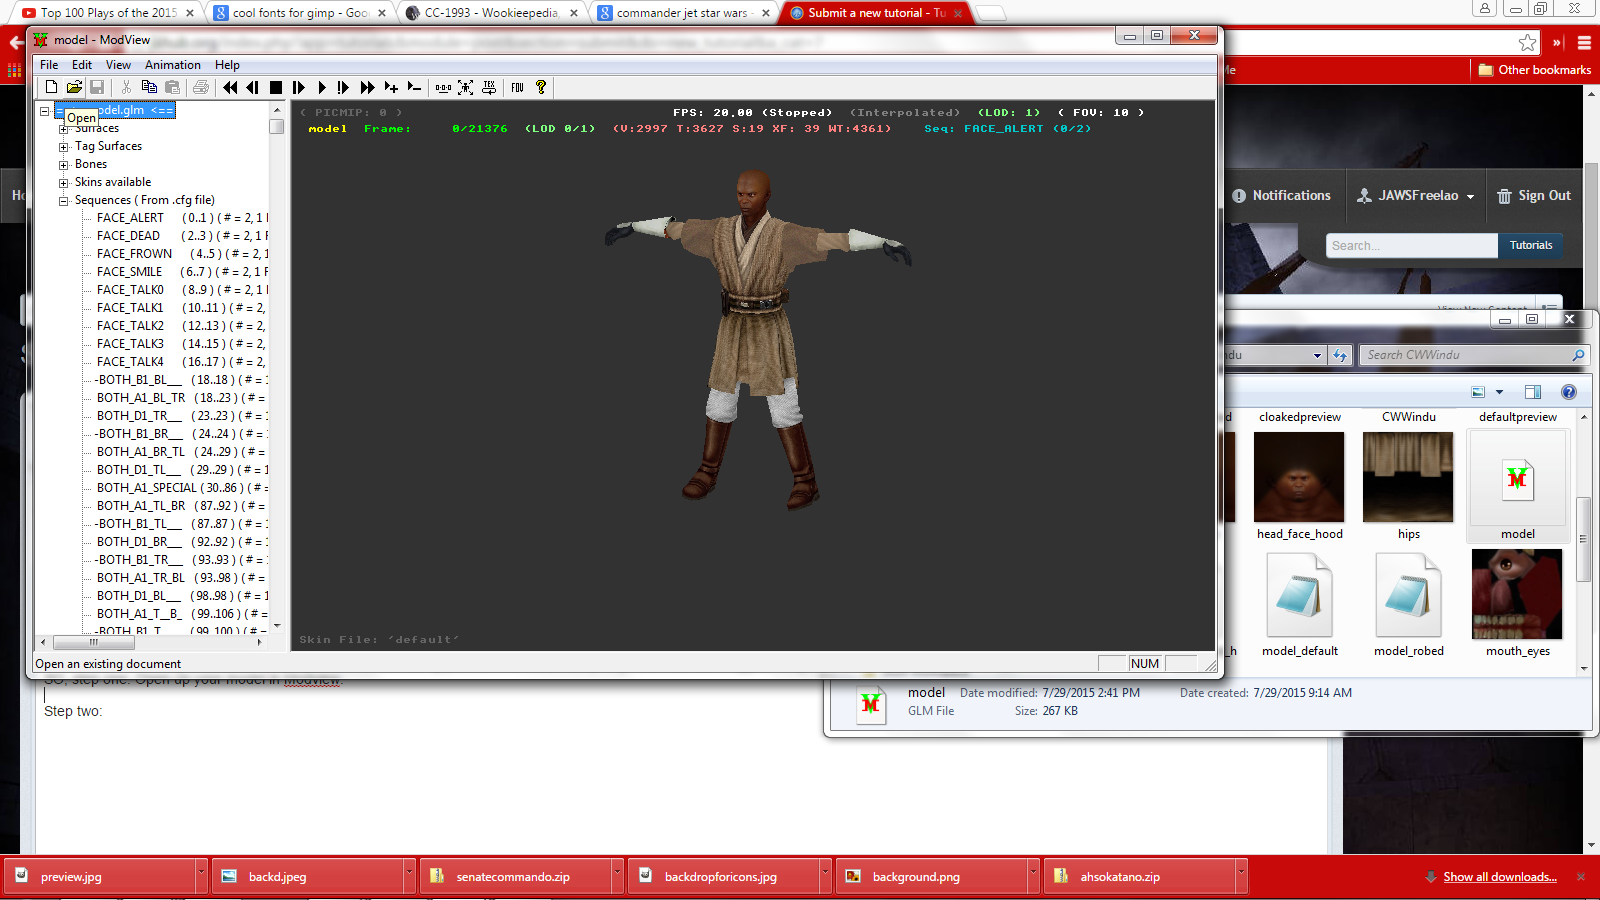
SO, step one: Open up your model in Modview.
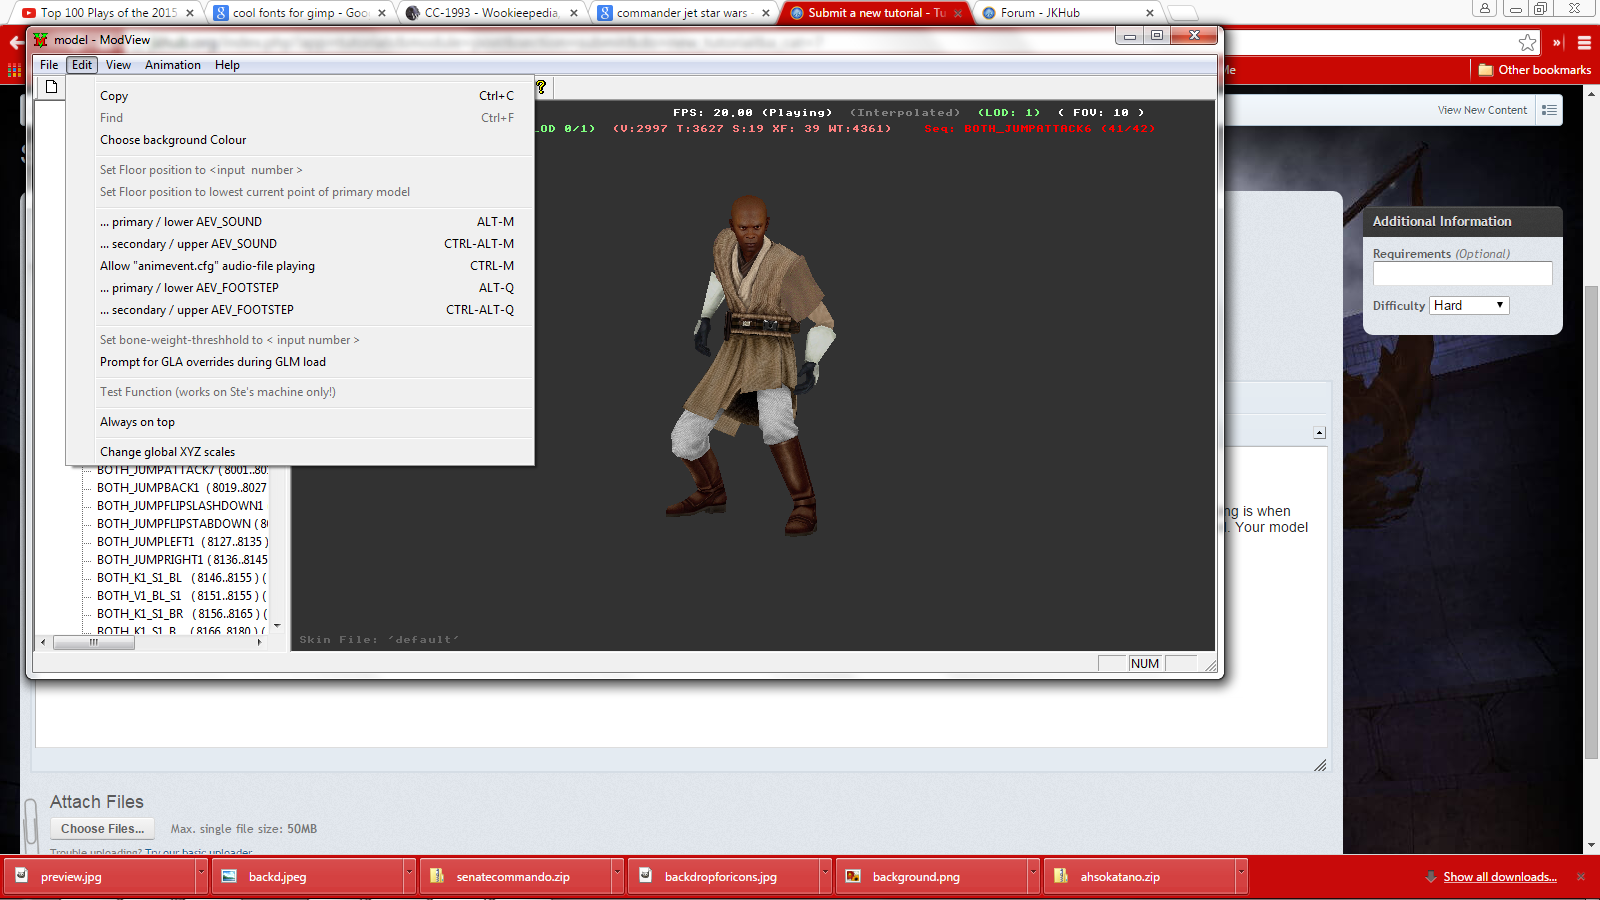
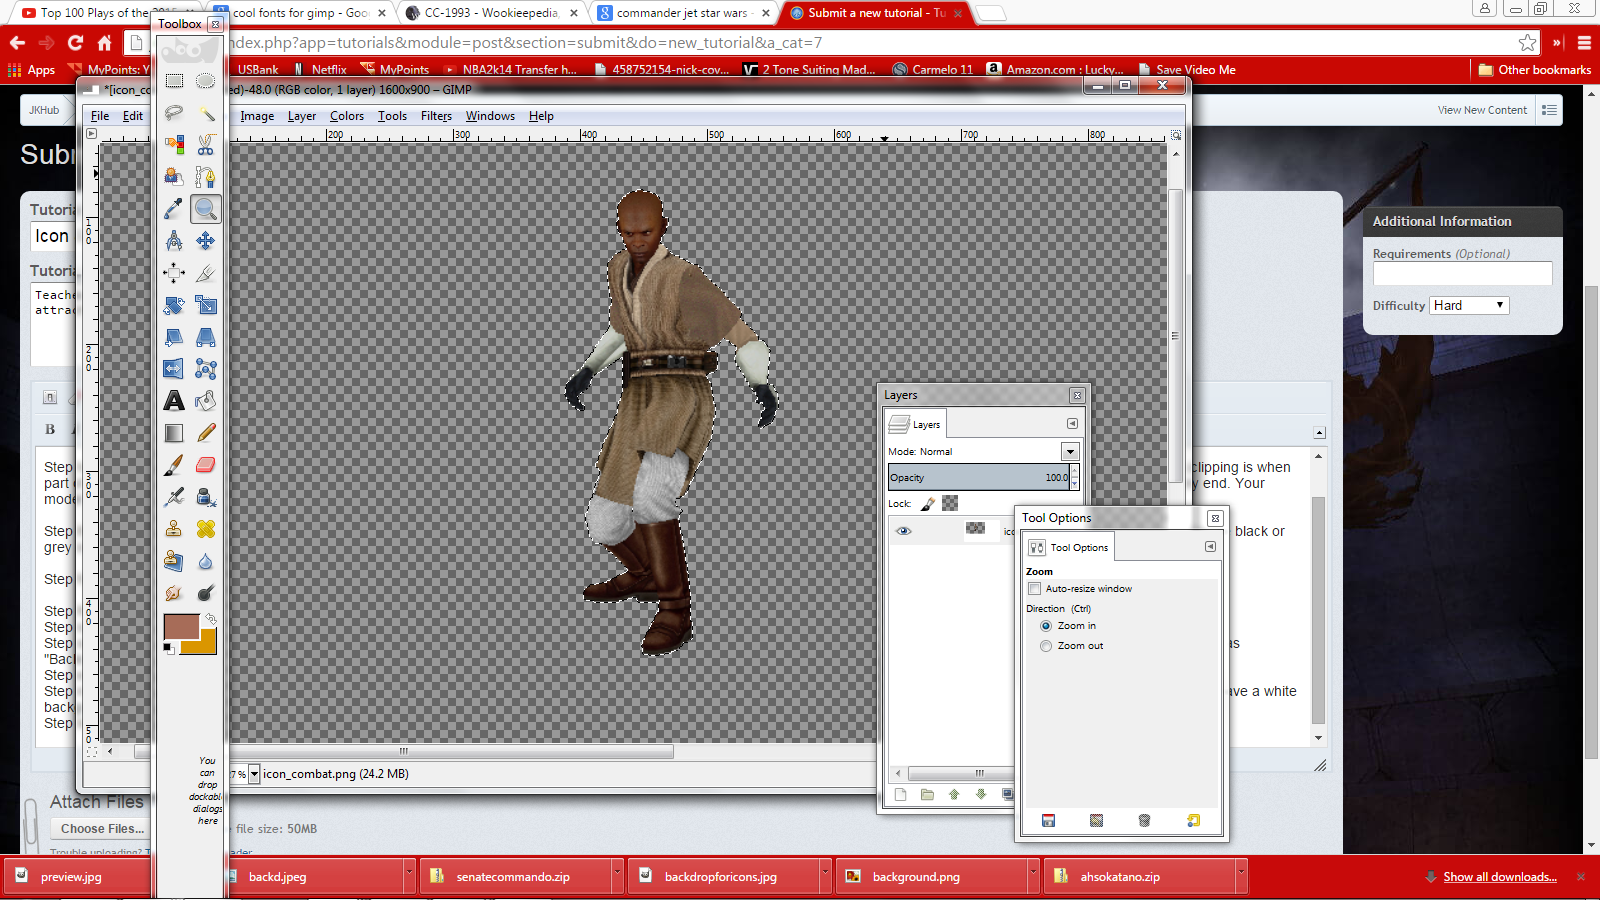
Step two: Click the + sign next to "Sequences," and go through animations. To make a good preview, you'll want to be able to see the entire body. Pick an animation without clipping (clipping is when part of the model moves through another- like the shoulder pads moving through the ARC trooper pauldron). I personally enjoy both_jumpattack6. Play the anim and wait until the very end. Your model should be in this position:
Step three: On the top of Modview, press "Edit." Scroll down, and select "Choose background color." Pick a bright color that isn't going to possibly be anywhere on the model.. If you choose black or grey or white or anything like that, you might later end up with "holes" in your character when we edit our preview/icons.
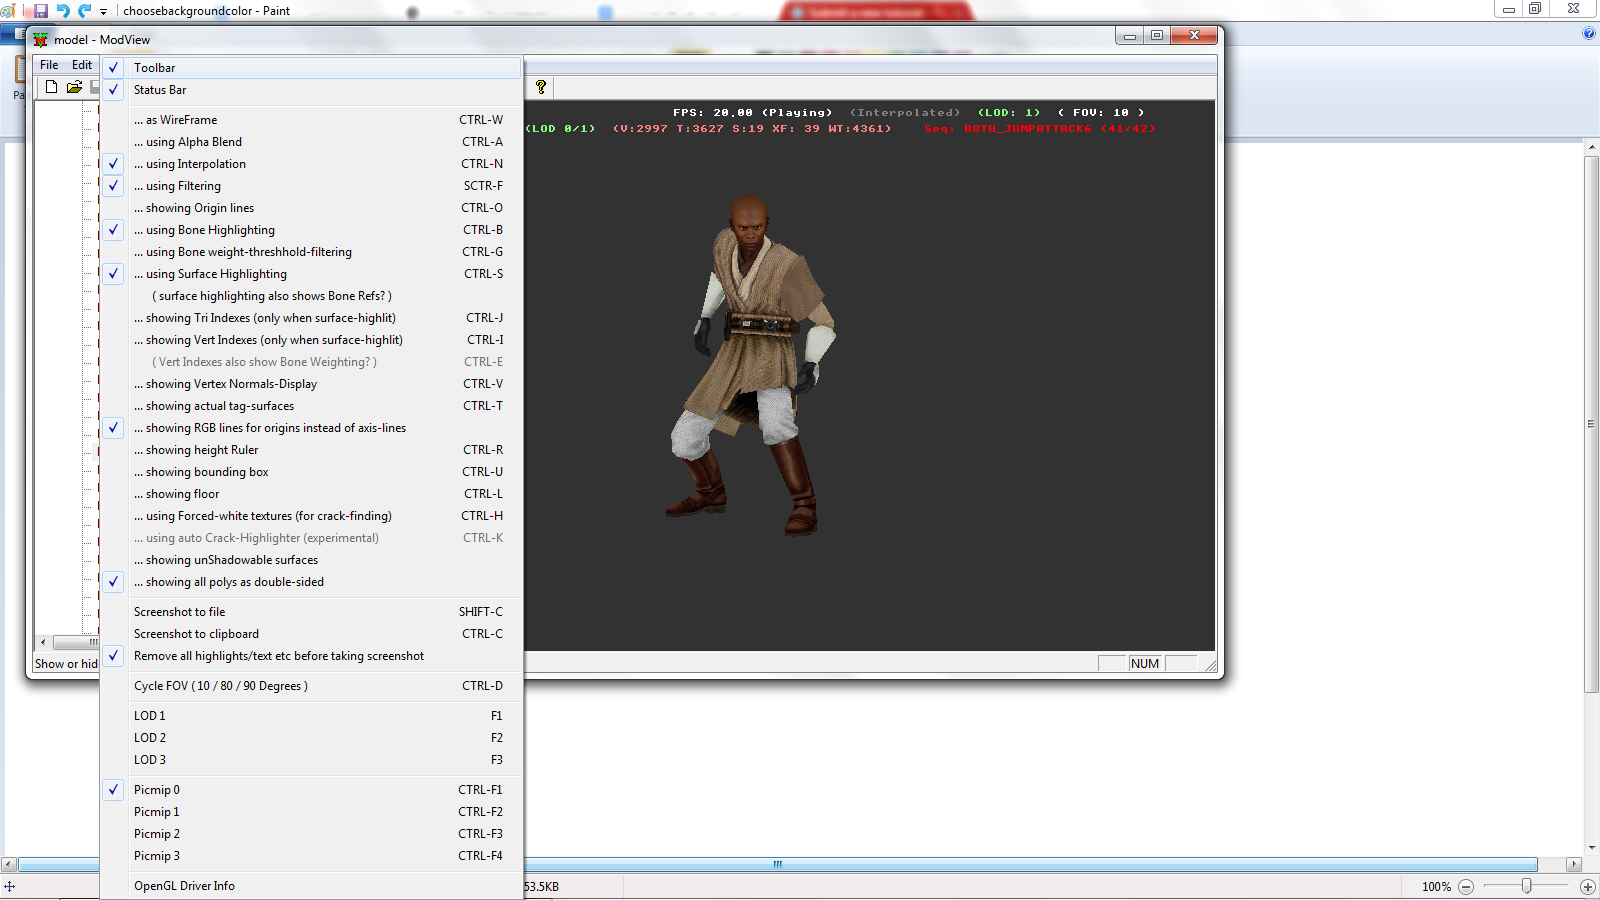
Step four: After selecting your background color, press "view" and choose "paste screenshot to clipboard."
Step five: Open up Paint.On the top (underneath the save icon) select paste, or hit CTRL+V. Your screenshot should appear.
Step six: Save this as a PNG. Name it to icon_default (or whatever icon you're creating) and save it into the folder your model is in.
Step seven: Choose a background image. I personally love using large scenic views, such as the beautiful view above Coruscant. For this tutorial we'll use that. Save the image you select as "Backdrop." The file type doesn't matter much here.
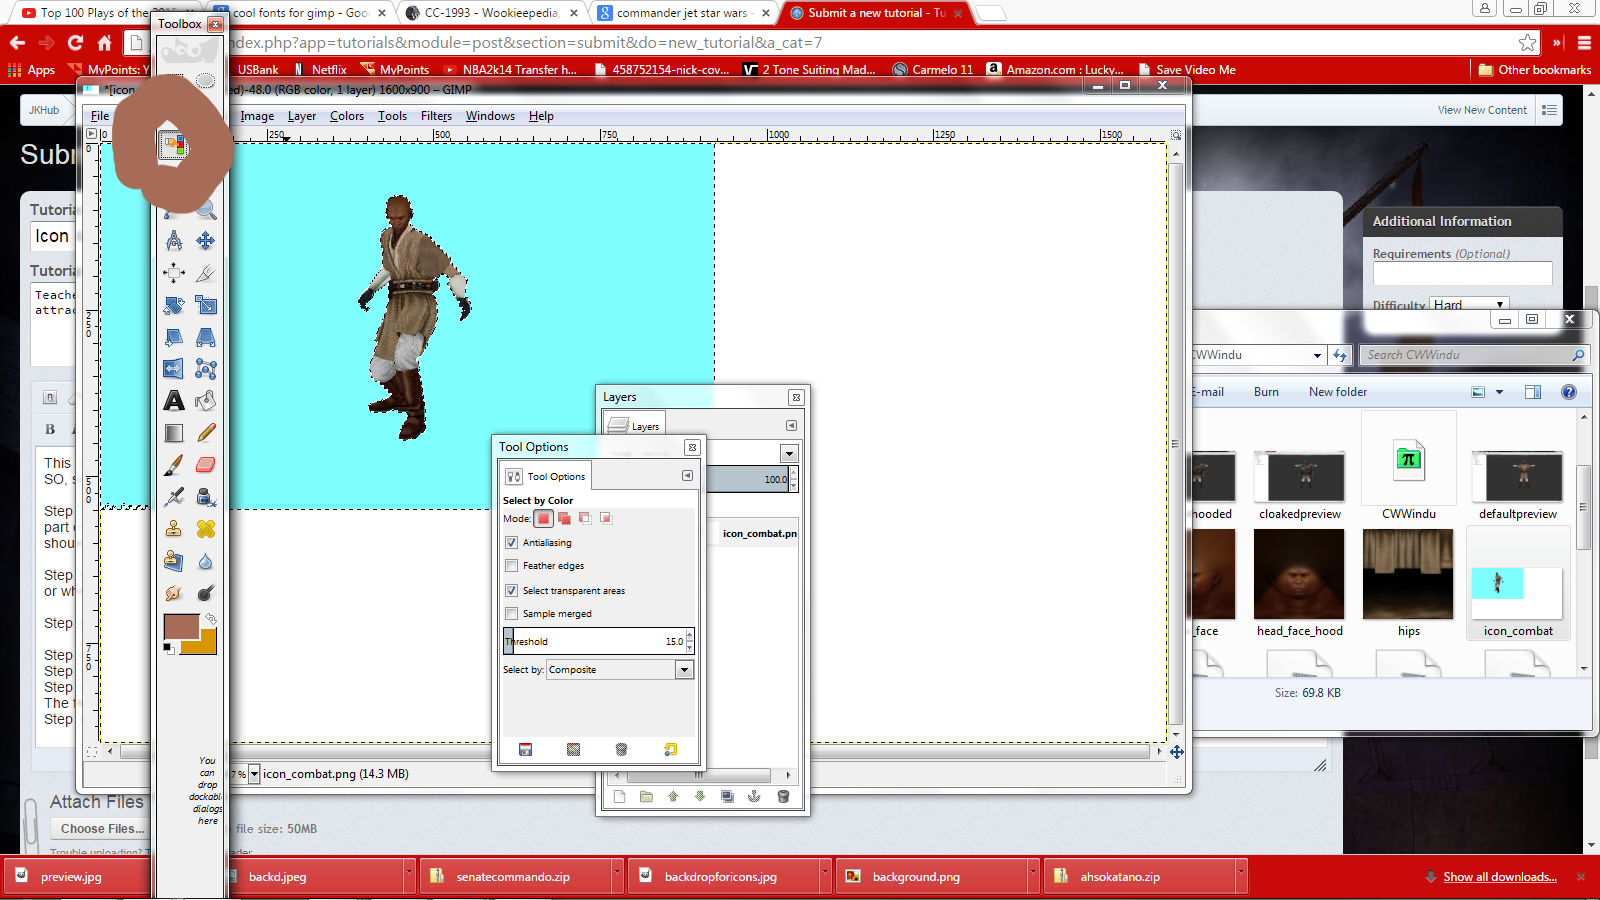
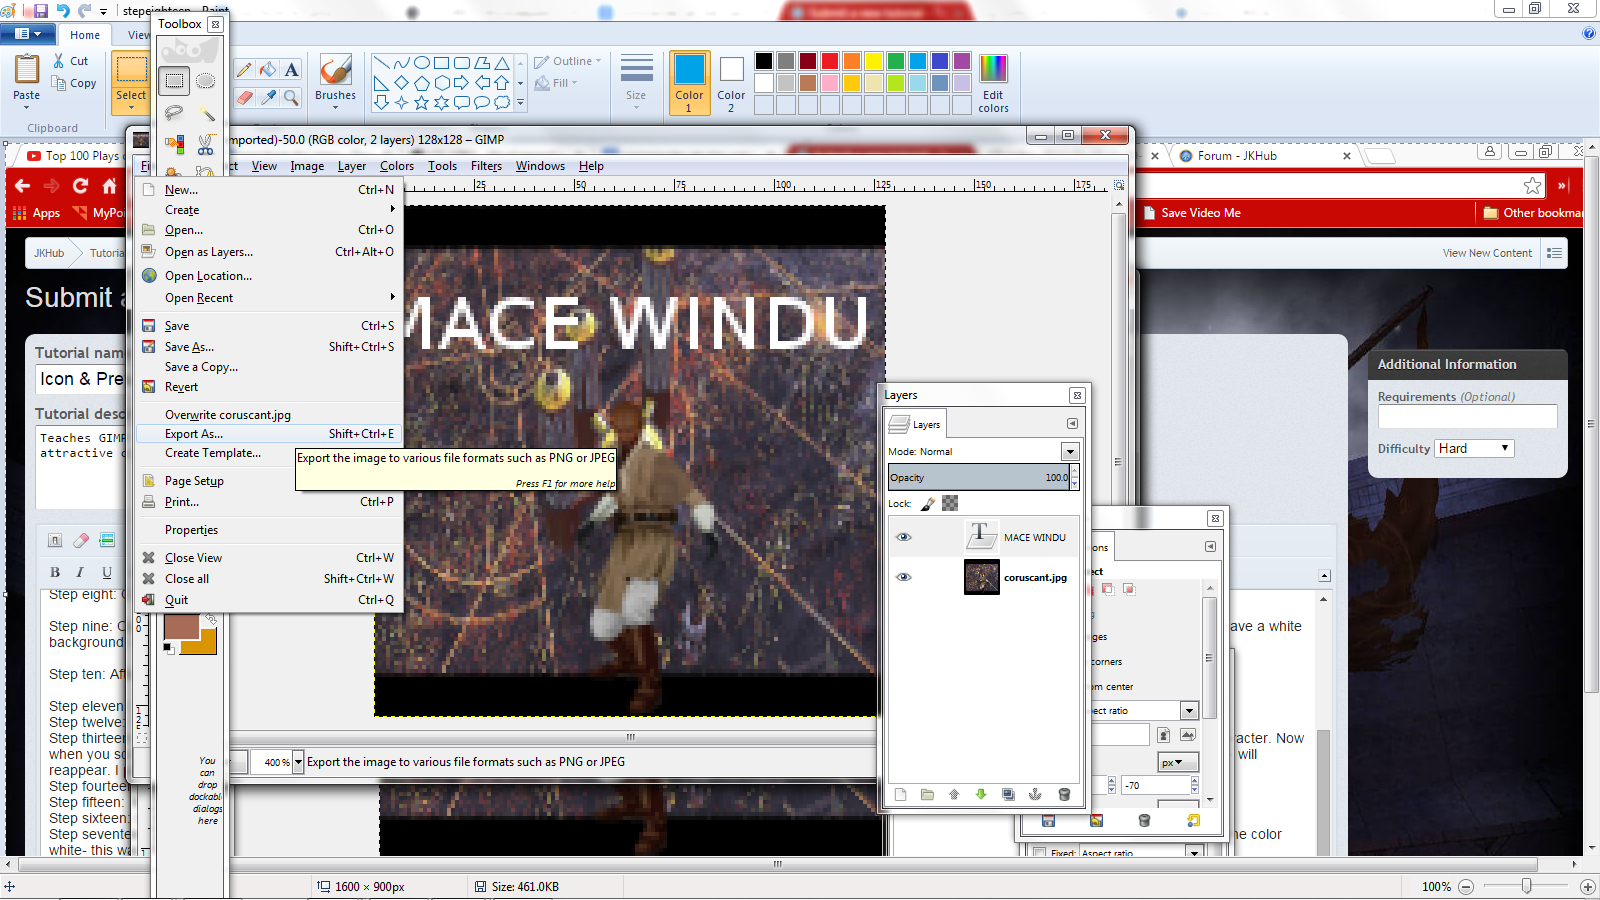
Step eight: Open your icon in GIMP. Press "color select," and select the color your chose for your background. As you can see, I've outlined the button you need to press in brown.
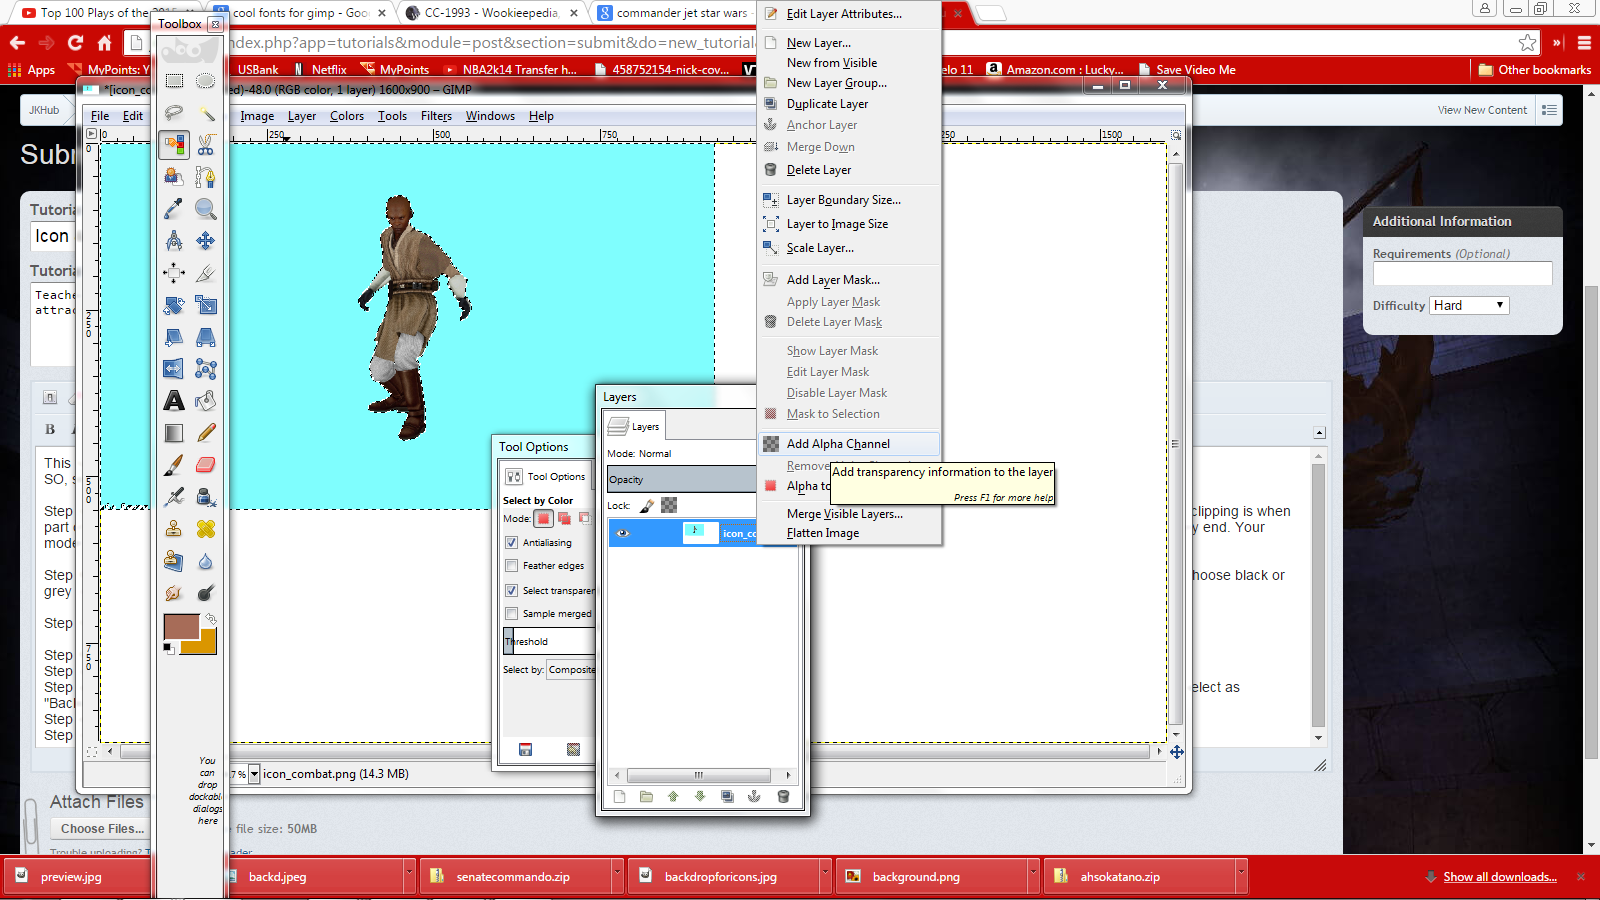
Step nine: Open up the "layers" tab by pressing CTRL+ L. Right click on the layer, and select "Add alpha channel." This is so when we erase the background color we won't automatically have a white background. We'll just have our character. *NOTE, keep the layers tab open.
Step ten: After you have added the alpha, click back onto the Icon and press "DELETE." This is what it should look like.
Step eleven: Open your "backdrop." Resize the image to 128 by 128. This is as large as icons can be. DO NOT zoom in yet, this is just the start.
Step twelve: Go back to your Icon picture. On the top, there should be a tab that says "select." Click on it, and select the "All" option. Press CTRL+C or Copy.
Step thirteen: Open backdrop, and paste onto it. Your character seems huge compared to that picture right? Well we're going to fix that. Press "scale" on the Toolbox and click on your character. Now when you scale him down, he will move. He will become invisible for a moment. But that's because he's not on top of the image. So? Move him to be above the backdrop image and he/she will reappear. I personally scale to where I can see the entire character but also leave room for text.
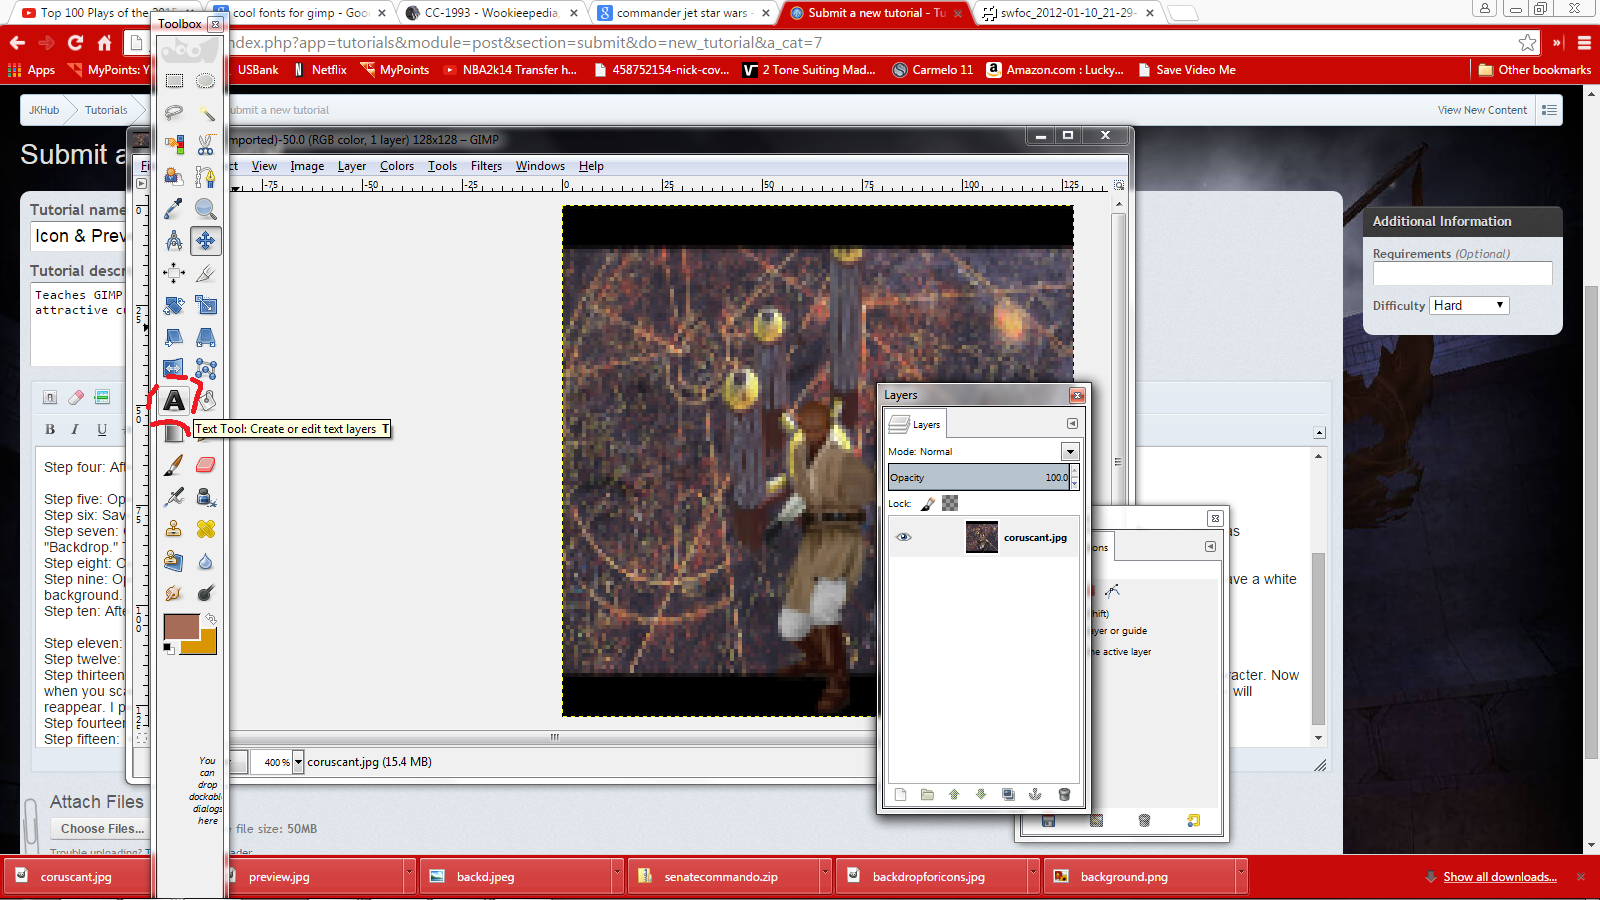
Step fourteen: Zoom in to where you can see what's going on! Press as many times as you need to.
Step fifteen: Now that you can see, press the letter "A" icon on the toolbox. We're about to create the name displayed above the character.
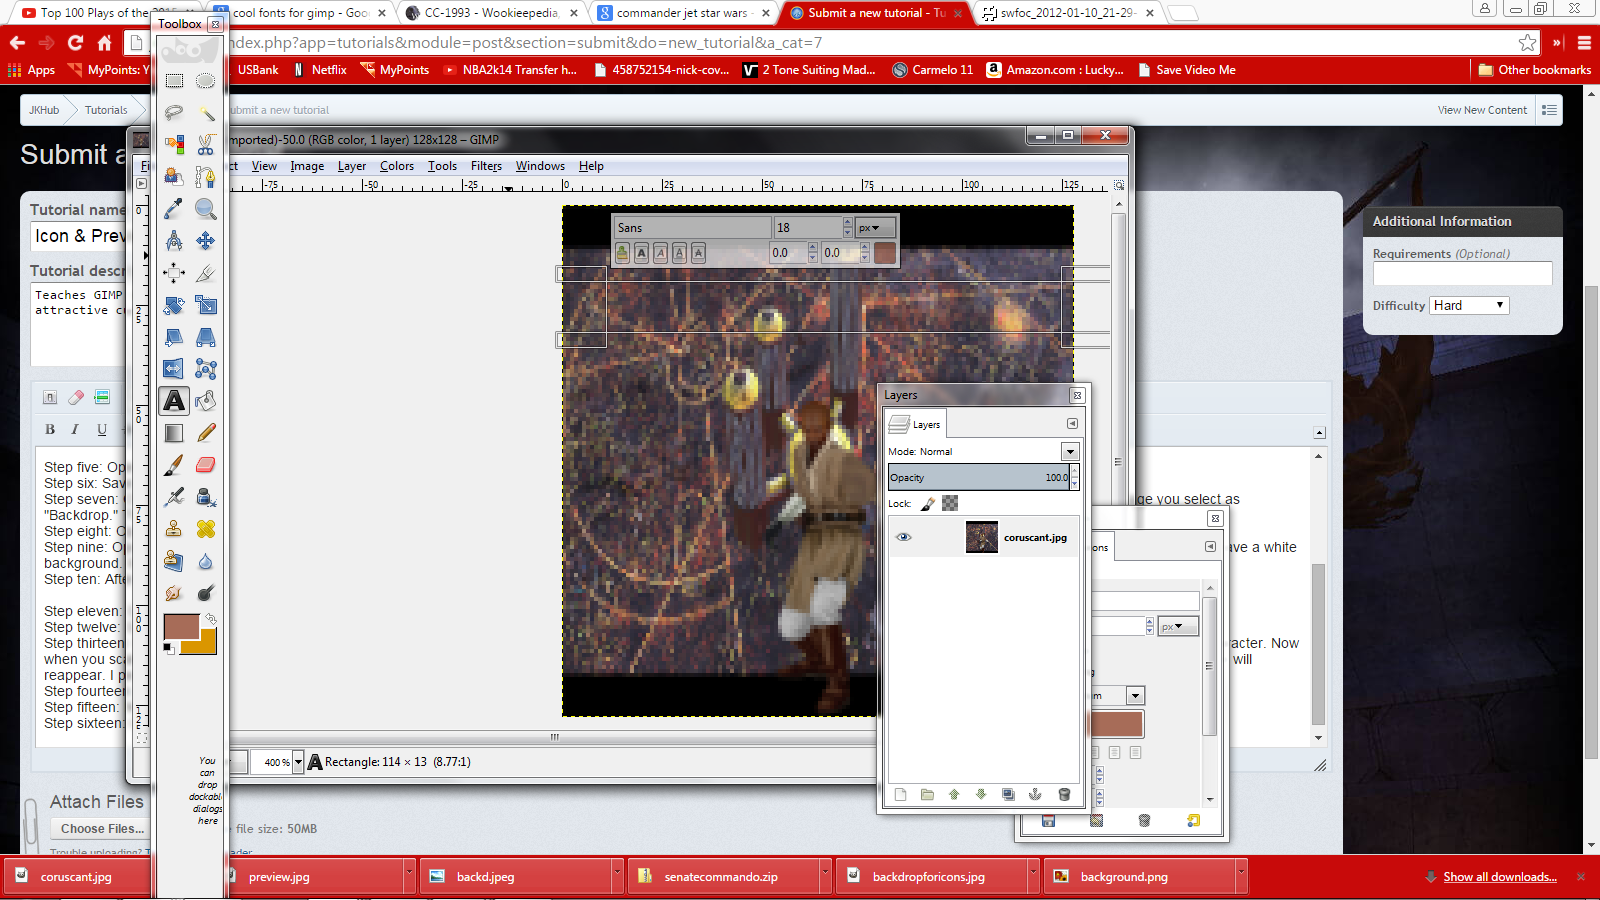
Step sixteen: Click and drag above the character. The size doesn't matter for now, just as long as it's tall and wide enough to support size 18 font. You should see this.
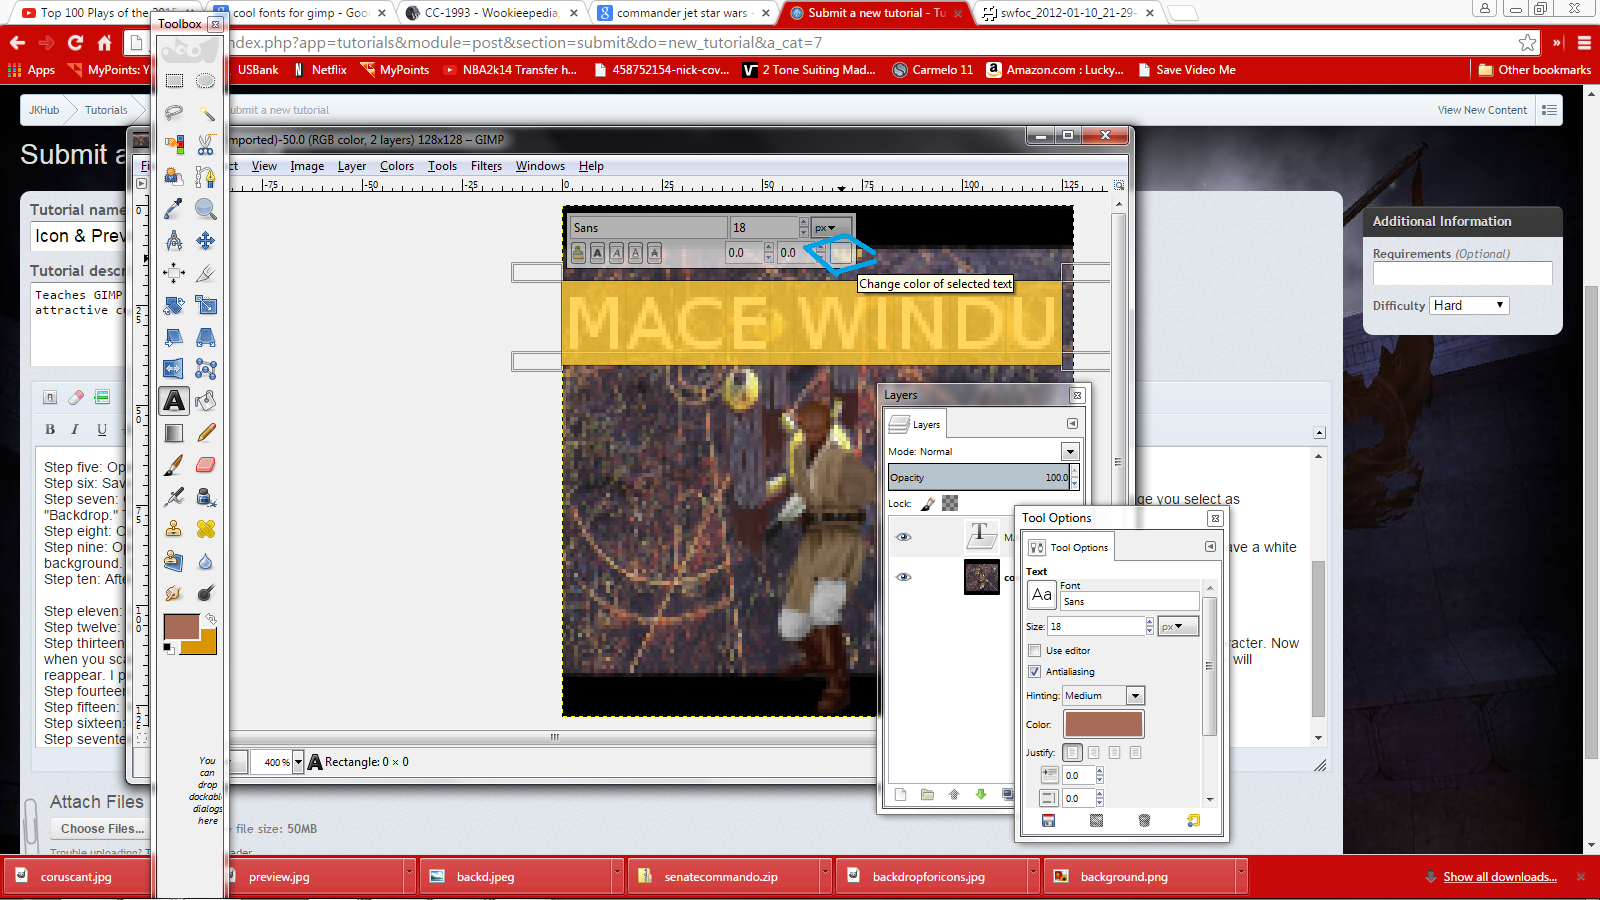
Step seventeen: Type the name in all caps. I used Mace Windu so obviously I'd type "MACE WINDU". After you've typed the name, select all of the text. Then press the square and select the color white- this way the text shows up on the background.
Step eighteen: Press "file" then "Export as". A menu should pop up. Obviously you'll name this icon_default, but change the file extension to .JPG, that way, if anything goes wrong or you feel like changing it, you'll still have the Modview screenshot you saved earlier.
Step nineteen: Copy+Paste your models/players/whateveryourmodelis folder into your PK3 (or if you have an existing PK3, open it up and copy+paste your new icon inside it) with your new icon.
Step twenty: Launch MP and enjoy your work.
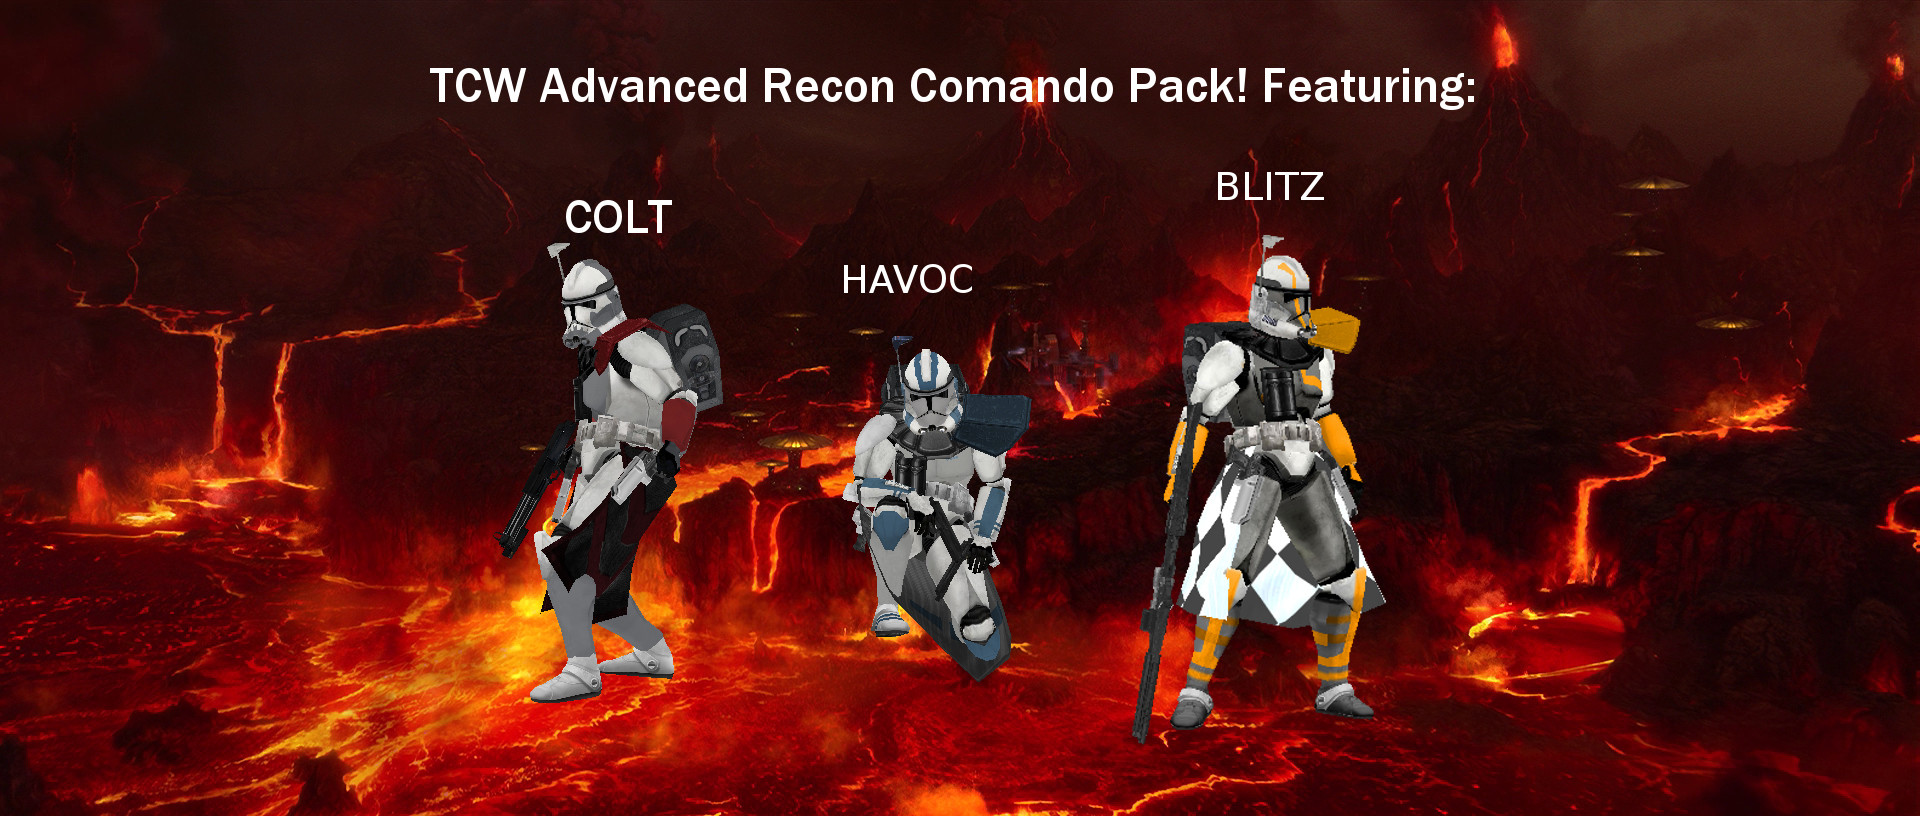
Here's a few previews I've created in my time.
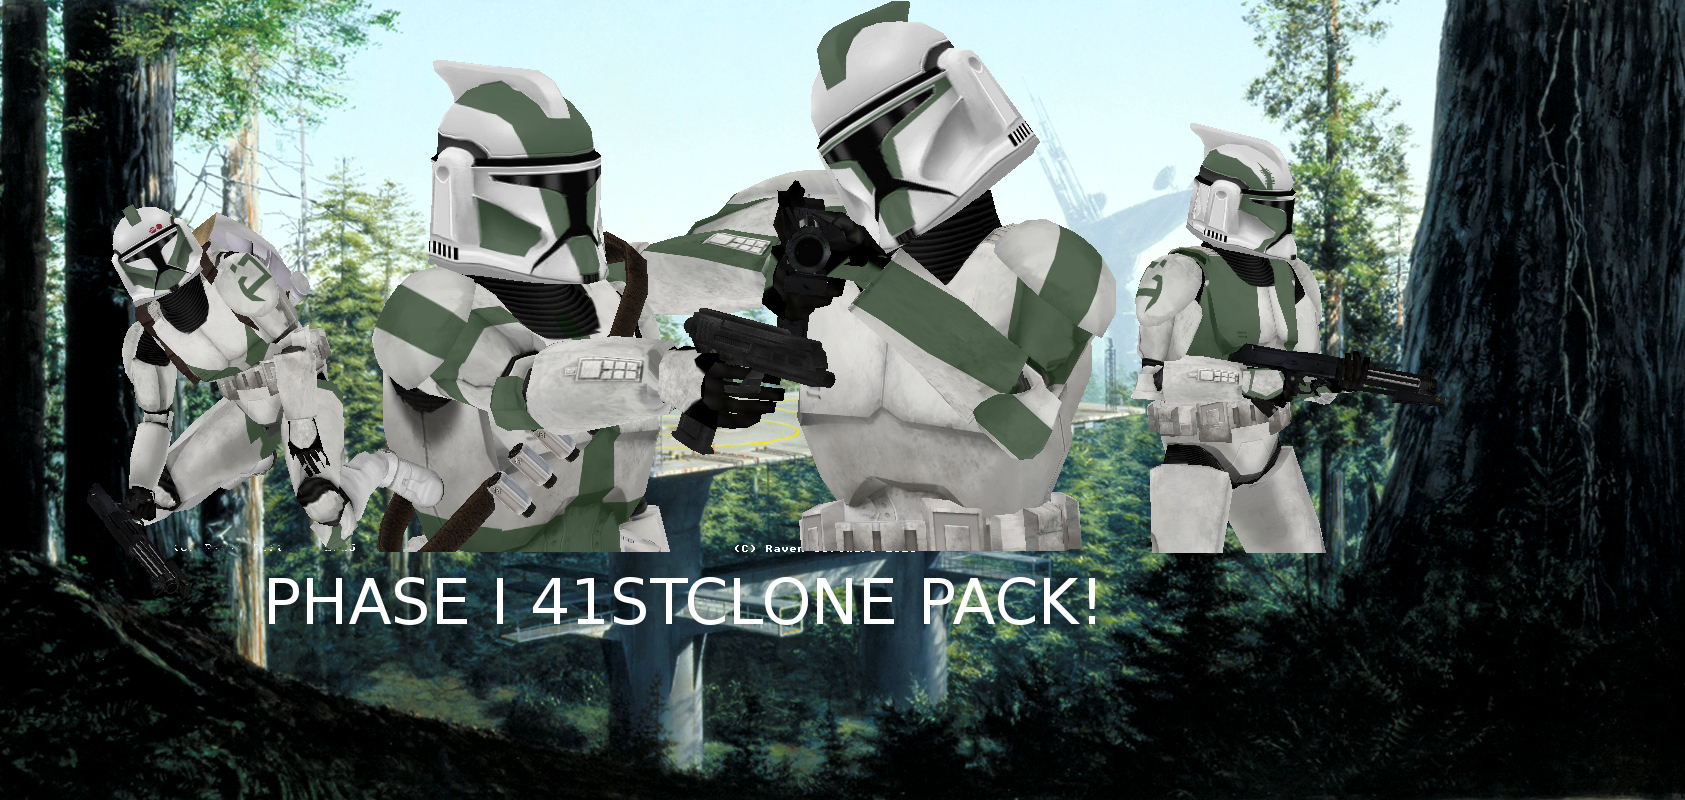
IF CREATING PREVIEWS: The dimensions of the image do not matter. The process is the same, only difference is dimensions of the images are irrelevant. The reason I mentioned keeping the layers tab open- every time you paste in GIMP, it calls the pasted section a floater, and it hasn't been assigned a layer. After you've moved the pasted section around- scaled, rotated, flipped, whatever- press the white square/page on the bottom left corner of the layer page thing. That way, if you've pasted multiple characters in, you can move layers up or down so that the characters appear to be behind/in front of the other. Look at my Phase I 41st preview below. Gree is in front of the Phase I green trooper (who is aiming down sites) even though I pasted green leader way after Gree. That's because I moved the layer which had pasted Gree above the one that contained Green Leader. This allows for screenshotted models to be overlapping without looking shoddy. I hope you guys enjoyed this tutorial. If there are any questions, feel free to PM me!
-
That's fair. I think he's best served in a wild and charismatic role. In the Lazarus Effect he was great. Same with Atlanta.I've seen him in "The Martian" and the new spider-man film and his acting turned both movies from a 3/10 to a 1/10 in less than a minute. I have never seen a less sincere acting, can't stand him at all.
-
Why Donald?I hope this movie is as good as Rogue One, but man do I dislike Donald Glover and Emilia Clarke, two of the worst actors I've ever had the displeasure of seeing.
Bek likes this -
I laughed way hard at this man, such a casual tone. Thats awesome.https://www.youtube.com/watch?v=KF0T0VNWHPw&feature=youtu.be
I know I sound like crap ... i am not much of a voice actor .. but I need to have an outline on dialogue
-
General Howard likes this
-
Just wanted to say, merry Christmas everybody!
General Howard, Ramikad and Noodle like this


Tompa's WIP thread
in WIPs, Teasers & Releases
Posted
It just looked like the textures I edited haha, no worries my brother. I just wanted to be sure buddy. all love here