

AngelModder
-
Posts
645 -
Joined
-
Last visited
Content Type
News Articles
Tutorials
Forums
Downloads
Posts posted by AngelModder
-
-
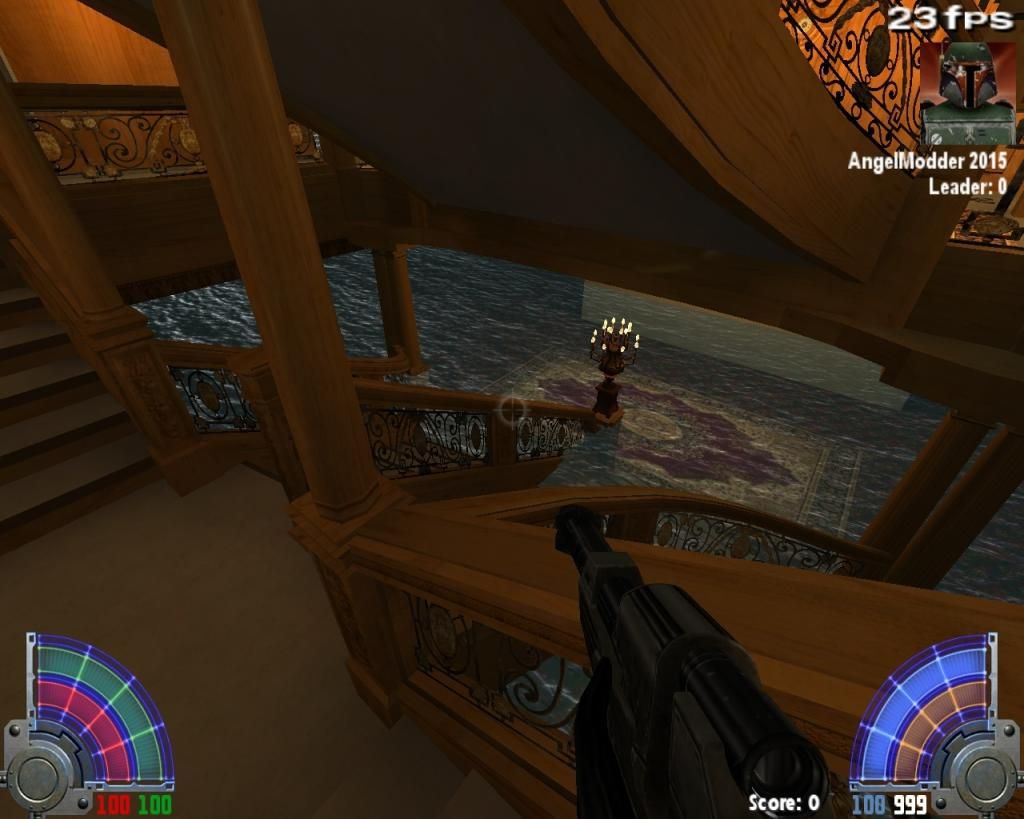
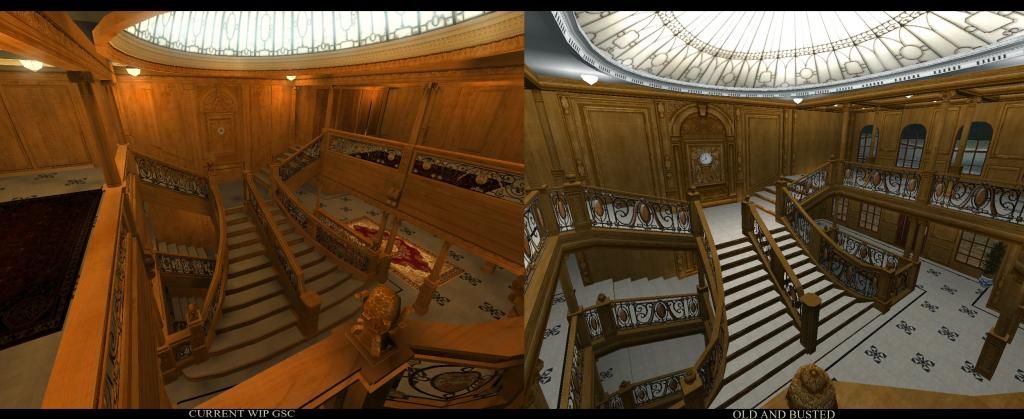
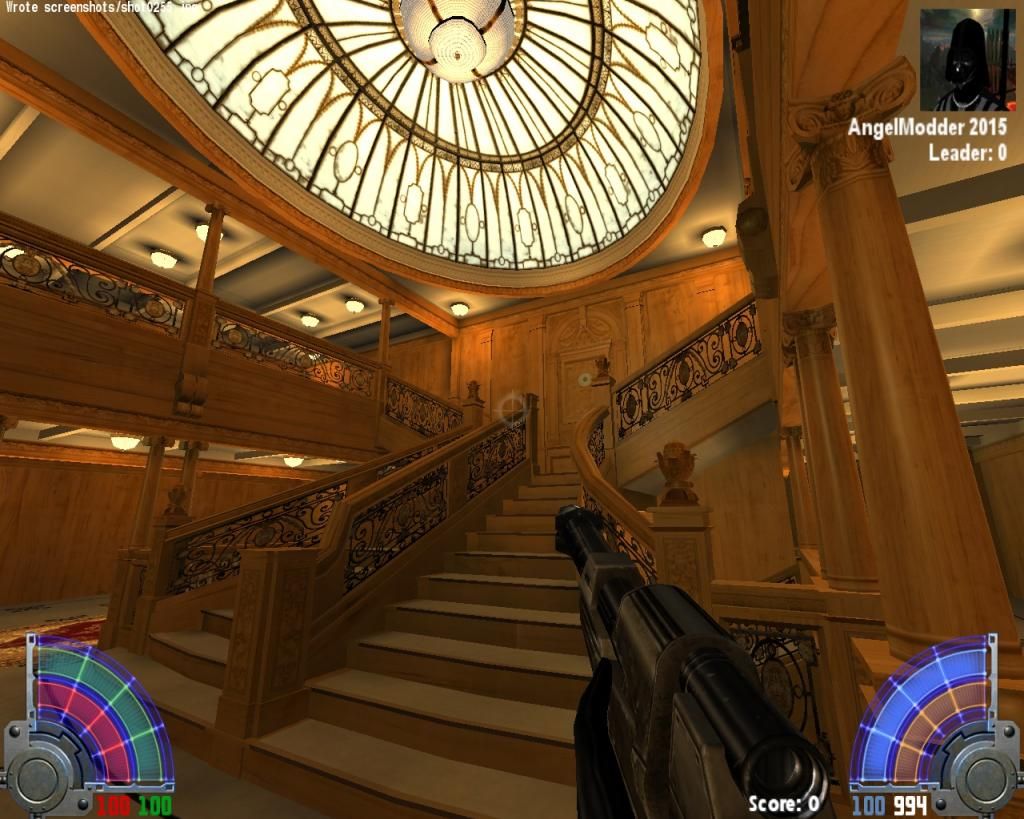
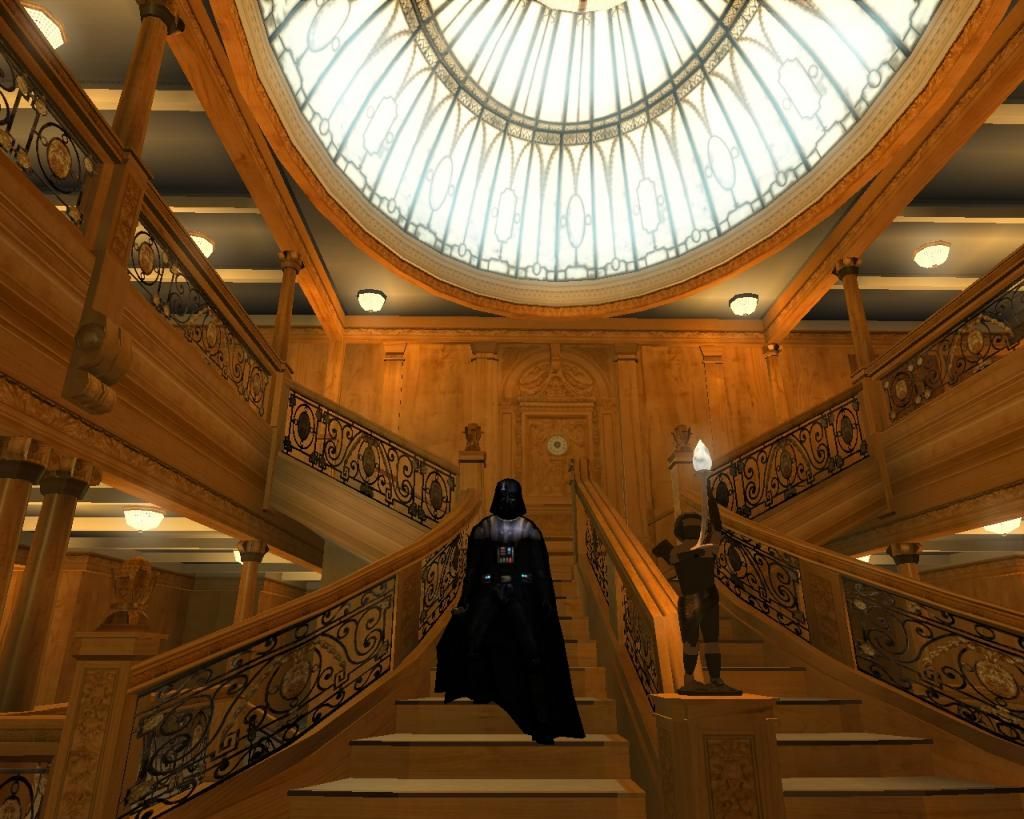
I wish it worked that easy @Zefilus. A new shot of the re worked D Deck landing of the forward grand staircase, theirs two textures I want to replace on it but it's good enough to show a preview of!
 Enjoy
Enjoy
Oh and yea... So, I made a booboo, I hired a cheap contractor to do my plumbing, click the spoiler to see what happened! afi likes this -
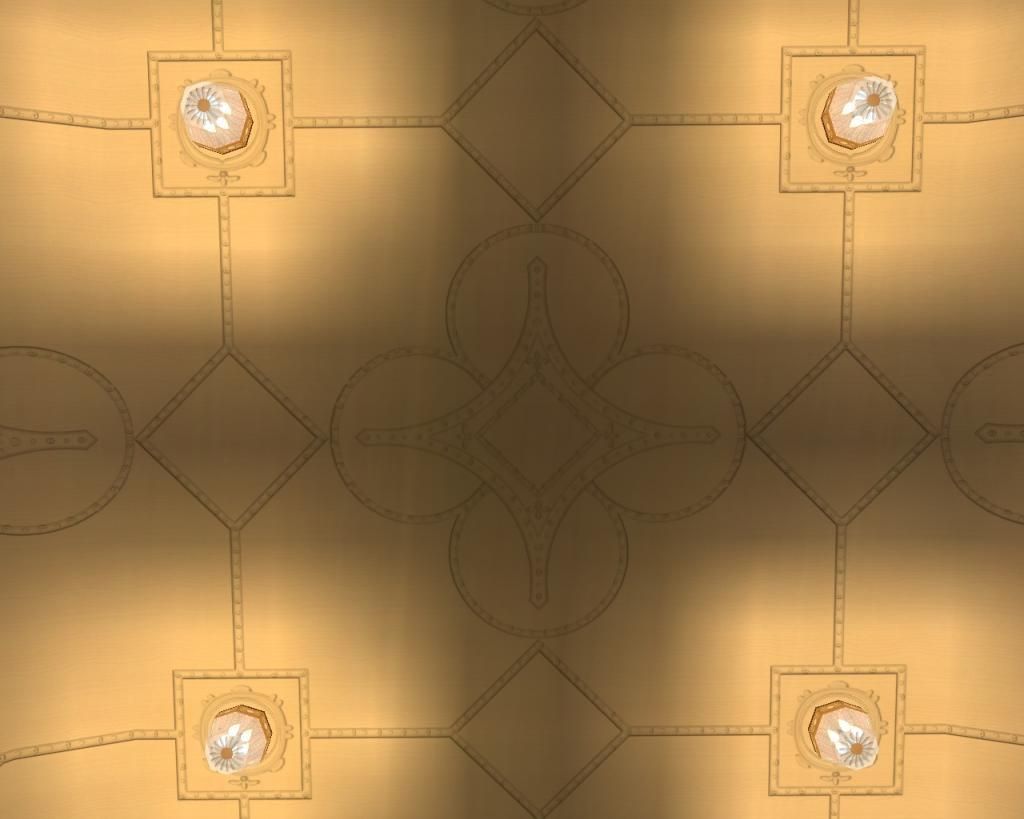
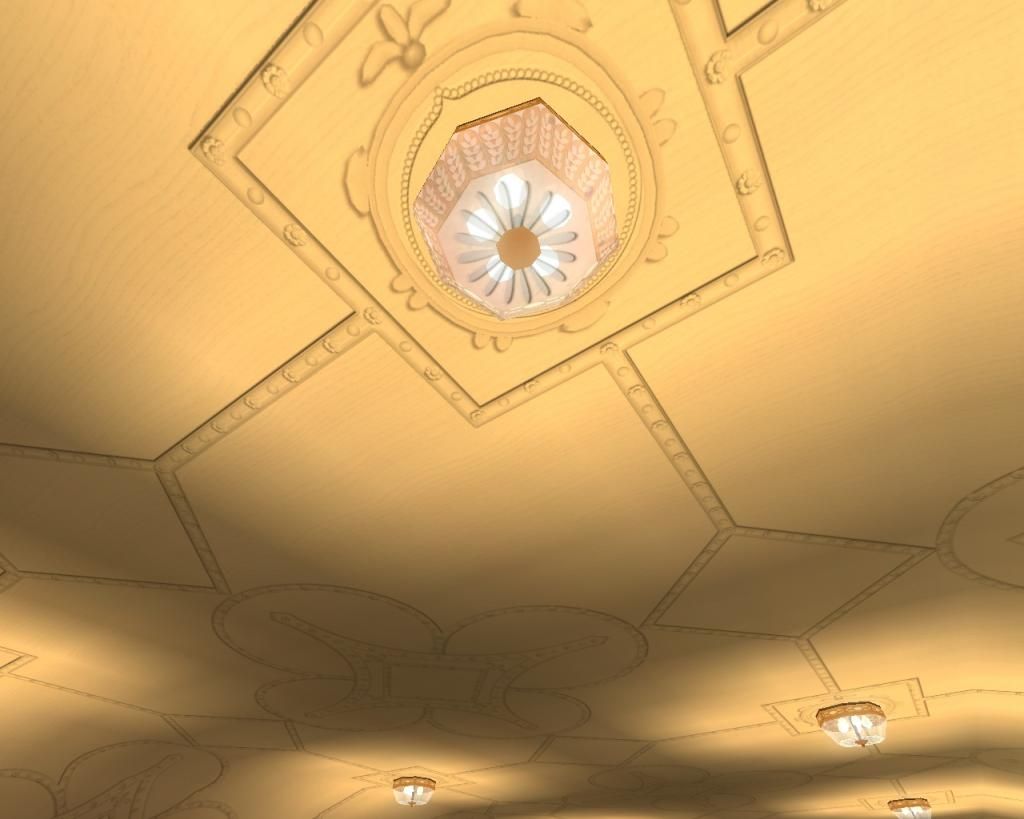
Here is a sample of the 1rst class dining saloon ceiling texture. This texture is super HD, the actual in game texture is 4096 X 4096 while my Photoshop™ PSD is a resolution of 8192 X 8192. I found that any small of a working platform cut the sharpness of the details. If your going to spend 6 hours on a texture you sure as hell don't want it to look like crap.
This texture is not to be used without my express written consent. ~ AngelModder -
Oh yea
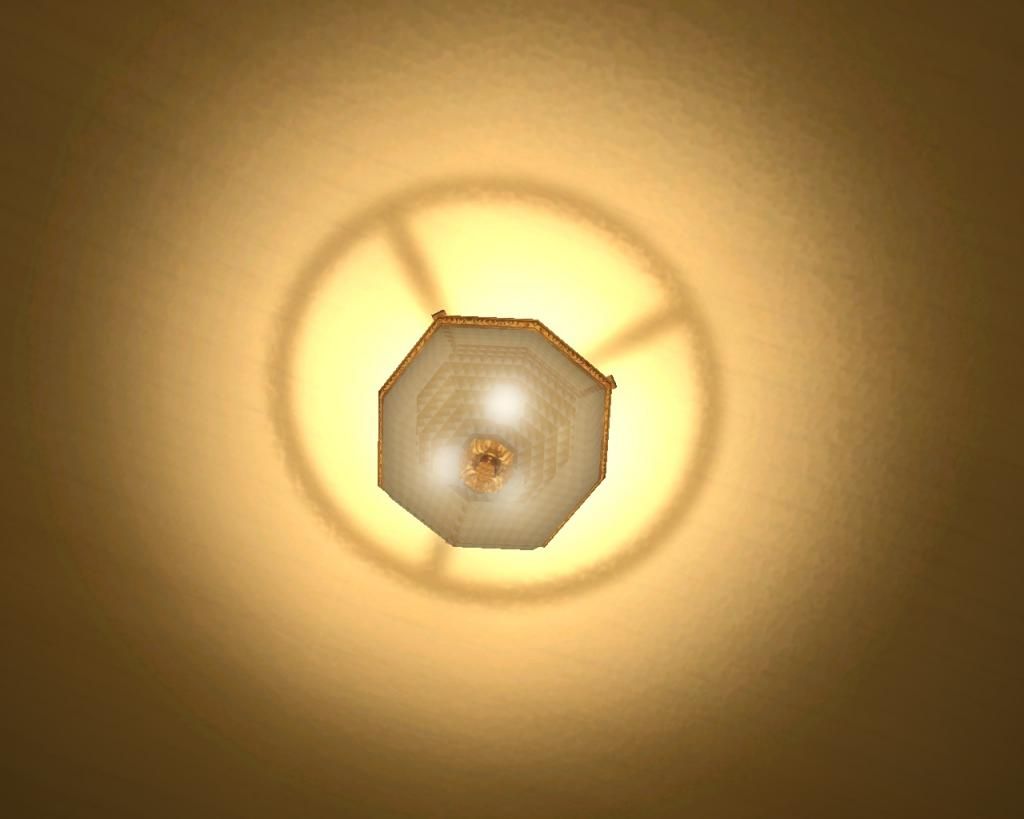
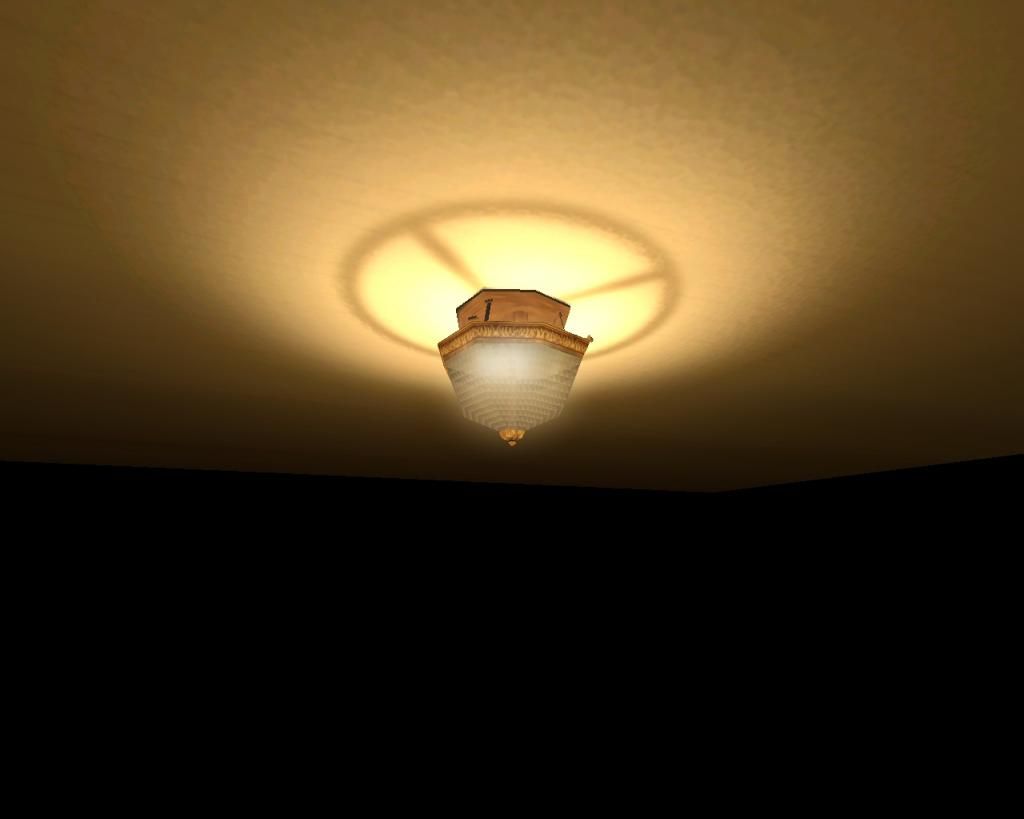
yea I did use this is idea for the lights shadowing and bloom effect. -
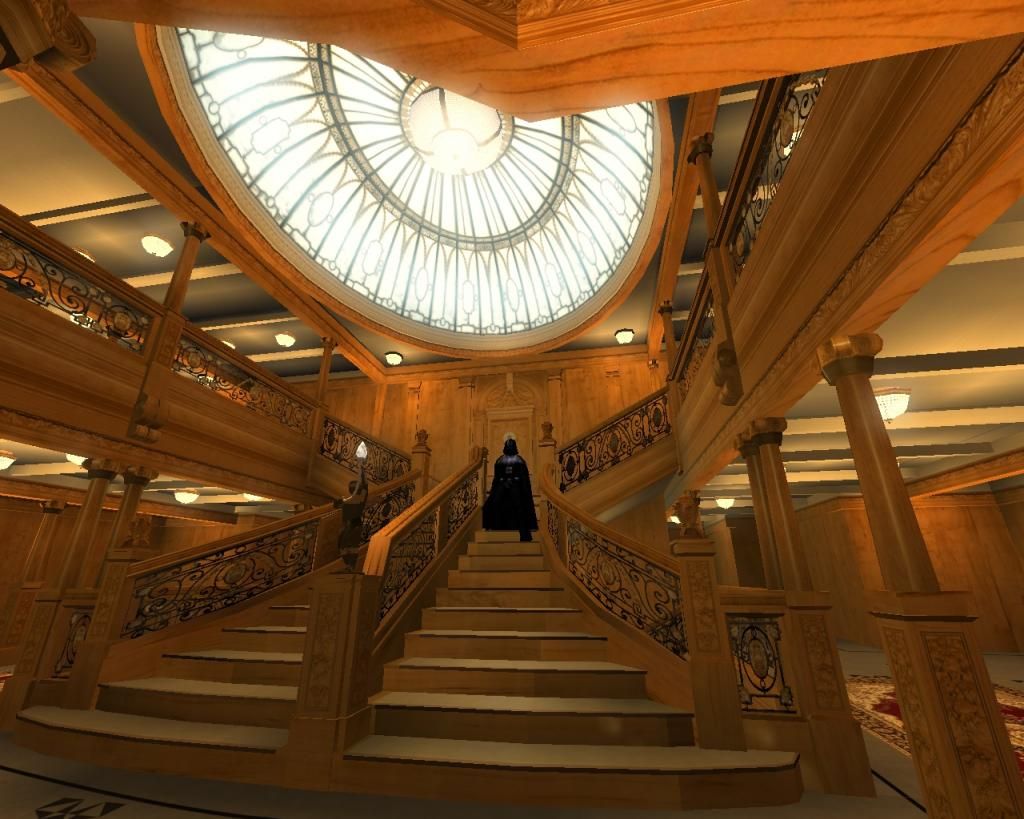
Is is just the perspective or have you made the staircase more narrow? Fantastic job by they way.
It is actually more narrow just like the original thing. Every aspect of this is map is measured out down to the inch. One of the first thing's I did was to establish a set of scales that I could agree on. At the top one person can pass through on each side, most pictures you see of replicas or even the film, greatly widen it to emphasize it's scale. But in truth it was fairly narrow at the top with just about 3 feet on either side of the center banister at the top.
Every room, every pillar in this even tables will be measured.
-
Seriously out of 50 views not one person can help? :/
-
Technique looks familiar! Nice application
What do you mean XD?
-
You could also try using the q3map2gui, it's a good program all around for compiling and converting.
-
Titanics mighty anchors.
-
Don't foget you can always use _lightmapscale to sharpen the lighting as well on particular models or func_groups. Most of my mapping is done in func_groups so I can control each area/thing's lightmap, so blurrier (_Lightmapscale 4) where theirs a lot of ambient and no real defined shadows, and (_Lightmapscale 0.125) for things I want to have a very defined shadow.
I actually really encourage folks to use the Func-Group technique in there maps, it can save you invaluable .bsp size and compile time and come out with a much better overall map image. Be warned though as some may know, the sharper the lightmapscale the more fps it seems to draw and can some times bug if you go below 0.250. You can also in turn tell different groups to cast or not to cast a shadow, such as a light source its self some times should not be casting a shadow. Use _cs 0-1 and _rs 0-1 to controll this. _cs means Cast shadows 1 is on and 0 is off, _rs is receive shadows 0 is off and 1 is on.
An example for a light source say a chandelier would be _cs 0 (meaning since it's the light it shouldn't be casting a shadow depending on how it is suppose to work realistically) and then _rs 1 meaning that things can cast shadows on the light source its self if they are able to.
These commands can also be placed of course on any model.
A side note about func groups, they can be set to structural or detail, so they can be used like normal the engine does not see them as an entity so make sure you detail and structural correctly as you normally would when using func_groups.
~AngelModder™ -
Allow me to first off state that this is not a request for passive aggressive pointing me at a tutorial. No offense intended by that of course. Rather I have been asking for weeks on a few other platforms for guidance on how to "Vis" a particular thorn in my. side. As well as more to come I am sure. My deadline for this projects end (April 10th) is quickly approaching, and I have no more time that I can waste trying to solve these problems.
What I need is an expert at "Vis" work to aid me, to look over my work on a daily bases and either guide me and teach me, or to physically lend a hand in taking care of these problems. I have included a link to a sample of one of the particular circumstances this person would be dealing with. A Multiple level area with a center well with a running staircase down it. The goal would be to set it up to where no more then 2-3 of the 7 floors of the staircase are rendering depending on the players position.
Who ever takes this position of course already understands the meaning of all this.
Again I am done trying to learn what obviously just doesn't make sense to me. I get it, but I am not an artist at vising, nor do I have any more time to waste on this with already so much on my plate for my last jka project.
Please Pm me on here if interested. Series and experienced replies only. I would also request that you not be afraid of using a microphone, as I learn best that way and or can explain it best through talking over the situation.
Thank you for your time ~ AngelModder™
(Link to example A) https://www.dropbox.com/s/ct066jheo5h2r8r/Vising.rar?dl=0 -
-
The lights will no longer cast blotchy ugly shadows, rather they will cast the correct shadow pattern and give off a bloom effect.
-
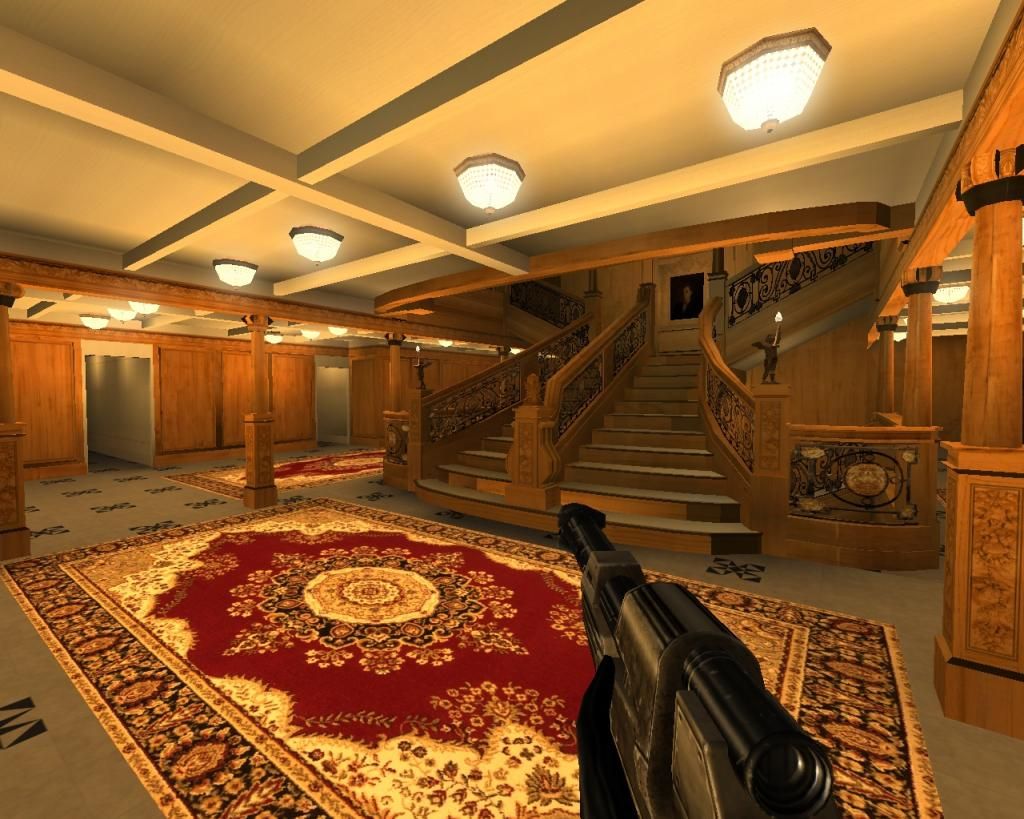
Well it's been a busy past couple of days but B Deck forward and C Deck Forward are nearly complete, just a few finishing touches and they're done. The floor and ceiling textures, the last bits of pipping and ductwork, and of course room numbers. Also included a photo of the gsc with the new pillars in, say good bye to the old floor and ceiling textures! Tonight's going to be a lot of Photoshop and shader work.
scp_chaos1, afi and Merek like this -
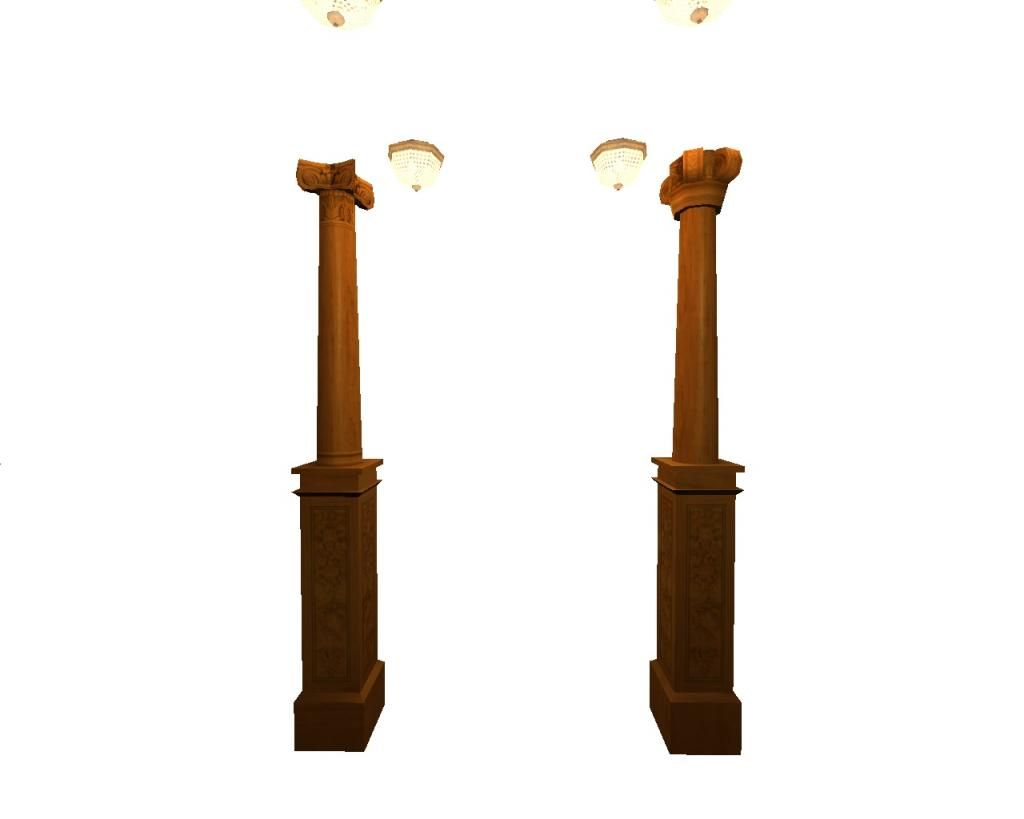
Redesigned a bit of the pillars last night, from day one the tops had bothered me. It was a hell of a search but I finally managed to find good enough photo's to piece these together.
On the left is the new one's, on the right the old.Langerd likes this -
-
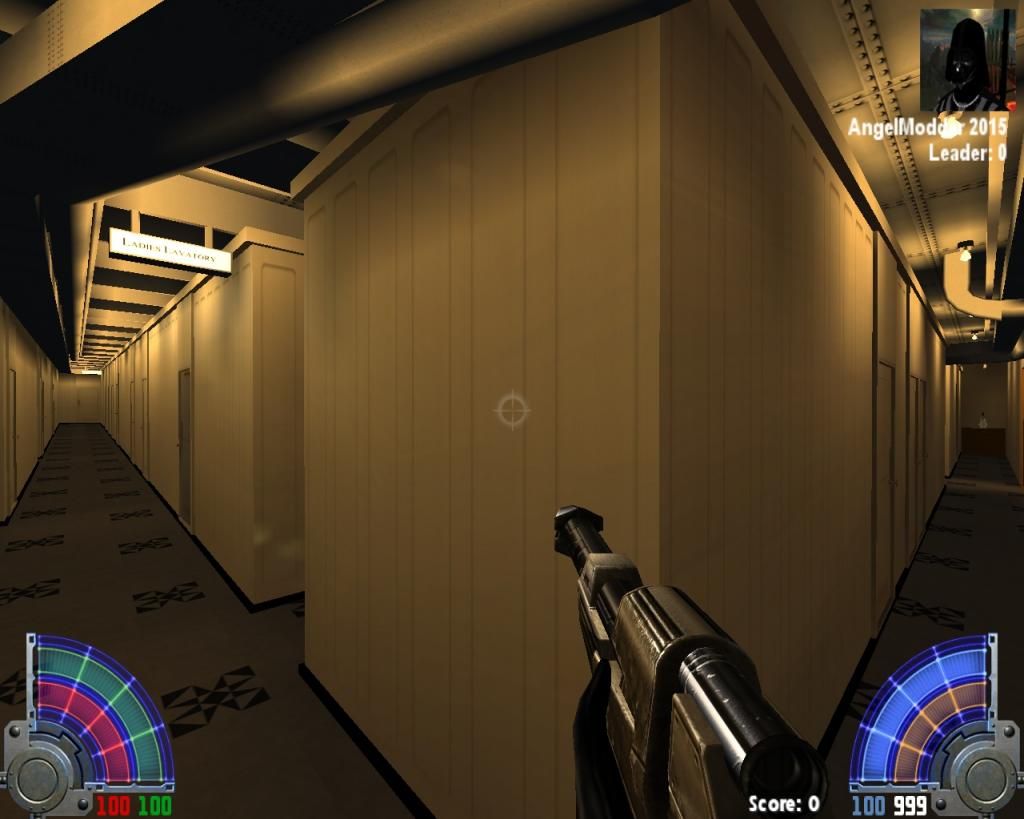
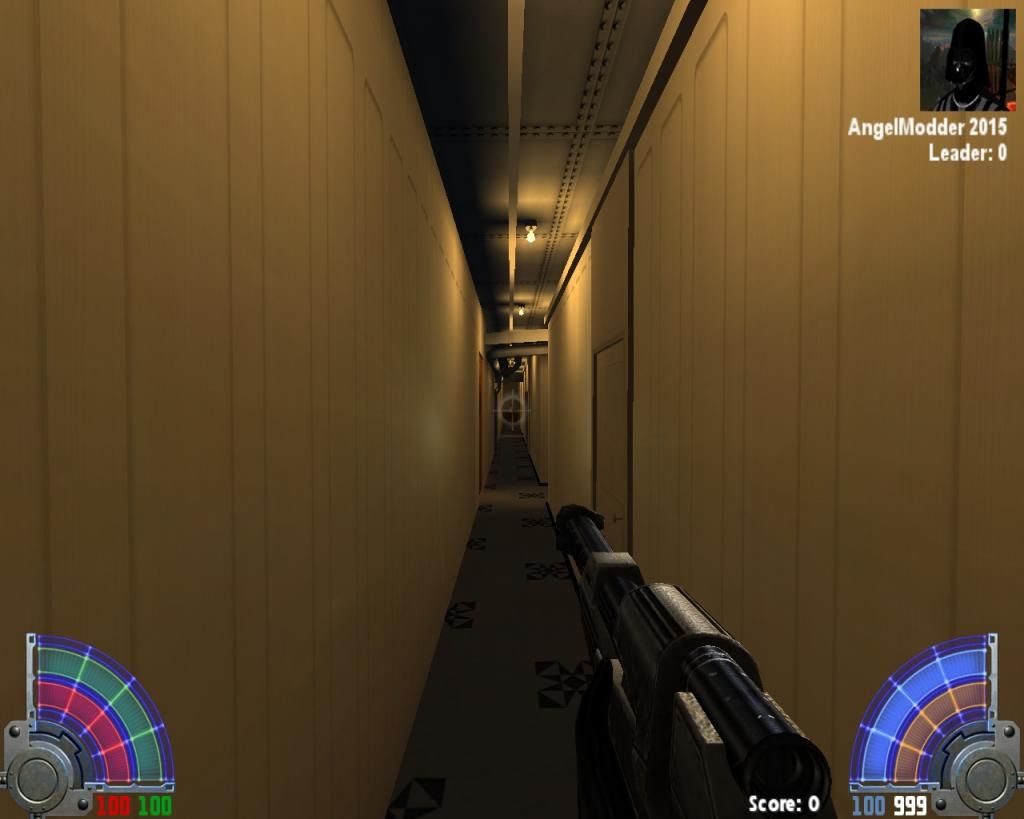
Not a big update but an important one. C Deck is nearly complete. It's probably one of my favorite areas honestly. I am unsure why I just always liked the feel of it. I'll post up some more pictures tonight after I finish up the last 2 spots on C Deck.
This is of course before the final detailing for the ceiling and floor comes in. As I've said before I do the floors and ceiling as big textures to avoid cutting my brushes a thousand different ways. It's more time consuming but looks better and saves me allot in the end. Also note this is missing signs etc. Tonight will show the final product of this area, kinda can't wait to show off my pursers office!
And yes each cabin will have the appropriate room number above it, via a decal. Having an issue with those atm where they are coming out too bright. But I'll get it fixed. Also sadly the port hole will have to just reflect the area your in, as It's impossible to get sky to work within an already sky boxed area even with area portal.scp_chaos1 and z3filus like this -
Oh man, I'll see if I can't gather up some good links for you over the next day or so. Honestly most of it is engrained in my memory from over 20 years of research, When JKA came out I was formely a UT modder, however neither UT 3k4 or 2k4 were really gonna be capable of what I wanted and needed to do. So I came the JKA community, starting off small, I had played JKO online and done some modding already for the Q3 engine but nothing to the level of a full scale map. I got lucky early on to meet very inspirational and helpful people, Darth G, @@Lazarus, Immenor, Ockniel, Mace, and many others over the years, through them I learned allot of technique.
This project is a symbol of trial and error, rip it apart and try it again. My worst enemies were max patch planes and max map visibility LOL. Now it's time for me to make the final cut. The previous attempt the "BETA" while it never was released with it's interior (although my version does have one) while it worked, for many reasons never lived up to my hopes and what I knew I could really pull off with just a little more fine tuning. Like the R.M.S. Olympic was the the Titanic, the 'BETA" was a huge learning curve for me and the test of just what could, and couldn't be done.
My personal story in this tragedy was not a good one, she lost her children husband sister and brother and law and all established family ties in a single event, so for me doing this project right, help's me understand just what that sort of moment would feel like. I've often played my sinking variant of the "BETA" I've stood in what was her bedroom, and watched it flood, knowing that at that moment her children were in the sleeping her husband and brother and law making there way down the GSC to retrieve the children, they who would be cut off by the quickly rising water, and the sister who slept in the room forward of the children would be lost as well. It honestly chilled me watching it happen.
Any ways enough rambeling from me, I'll send you some links shortly in the next day or so. http://www.encyclopedia-titanica.org/titanic-deckplans/c-deck.html This would be a good place to start however to understand the ships layout.
-
Well to fill you in @@IrocJeff_jeff, the plan is straight forward, the grand staircase of course, as well as the stern grand staircase. the b and C Deck hallways connecting those of course as well. The dinning Saloon, which is about 50% done I just refuse to show it yet as it's probably one of my finest works to date and want it held back till finished for a big reveal. The Turkish bath's as well as the swimming pool, with functional water tight bulk heads to show as an example of how they worked. For those of you who don't know the Titanic's layout, the swimming pool area took up the entire starboard side of the ship for the entire 55 foot long compartment on F Deck, the pool it's self measure 32 feet long by 14 feet wide, the pool was 8 feet deep with 6 feet of salt water (heated of course). These 2 area's will be shown in the first video walk through I'll be doing of the map shortly before beta testing begins in late march. You also will be able to explore the entire length of "Scotland Road" as well the 3rd class dinning saloon down on F Deck. The 3rd class dinning saloon is one of my favorites so far to work on, as it has a warm pub feel to it, a little less stuffy then the 1rst class, a little smaller and cozier. Theirs two really interesting things I've found about the 3rd class dinning saloon. Firstly it was separated down the middle by a water tight bulk head, with a water tight door on either side for passengers to go from one part of the room to the other, during the sinking these doors were of course shut (manually).
A common misunderstanding of Titanic is that not all the watertight doors shut automatically just the ones immediately below the water line. Most on F deck and up had to be shut manually. The second thing that's interesting about the 3rd class dinning saloon is the double staircase riding the watertight bulkhead running down the middle of it. these were place there so passengers on E Deck could easily access the chosen area of the 3rd class dinning saloon, no mater if they cam from the bow or stern. Another reason this was done was so the 3rd class single men (who's rooms were towards the bow) would be separated from the single women (who's rooms were stationed towards the stern) even during meal times, while families (who's rooms were along the middle of the ship) could choose the forward or aft section of the dinning saloon at there leisure.
What's so important about these sets of stairs is that around 1:25 AM water running along "Scotland Road" on E Deck made it's way to these stair cases, and began spilling down into boilers rooms 3 and 2, hastening the ship's decent. Boiler room 3 was caught of guard and quickly over ran with water as it had been trying to help boiler room 4 which was taking water from (to this day) mysterious source below as well as recently from above. It was the Death from above effect that killed the ship, her crew, and many passengers caught off guard trying to find there way to the boat deck.
Another area I have decided to add just recently due to it's small size and simplicity in many ways was the 1rst class smoke room aft of the aft grand staircase, this was a flip of a coin decision and also gave there more reasons to even have the aft GSC. At this time, I do not know if there will be other area's, I would like to do the Parlor Suites, Mr Andrews, Father browns, and my own great grandmothers bedrooms if time and space allow.
AngelModder™Merek likes this -
Whats exactly are you trying to go for?
Asgarath83 likes this -
OK, so gonna try a few methods today based on your information, I'll post up if it helps and what I notice. Gonna try 3 thing's.
A: reducing the overall size ove the world around the ship, in a manor of peaking. It'll still have the same left right front and back view distance, but I think I can angle the top and bottom up and down in such a way to reduce the amount of cells being drawn at once. If I'm understanding Oobah correctly, it's not so much what's in those cells, as how many are being open to you at one time, too many and the game feels a drop even if they are empty space.
B: Really looking at what area's are going to be drawn no matter what and just changing the brushes that would be drawn in those areas to detail since I've broken the map up into several area portal areas, say like the grand staircase, then a door/portal into the forward bedroom corridors, all the brushes in this area including the hallways and such can be detail, as it's all going to be drawn any way. The rooms (Most) will not have interior's so there just textured blocks, so each one as it's structural atm it splitting the bsp tree up, changing them over to detail will just make that section as it should a bunch of detail, with no need for structural brushes as it's a small enough and fps friendly area as it is.
C: Finishing out the interior plotting and seperating it as much as possible with area portals, within reasonable efforts to the original design. Doing this I only needed to place 2 doors in that were not in the original design. Originally there were curtains there, however I could not design a recreation of this I liked or that would work properly in such a manor to areaportal it. So Sadly C Deck forward and aft bedroom corridors will have doors.
I should mention that thus far the map has perfect FPS through out it, however tis whole discussion has been an effort to KEEP it that way but implementing further precautions.
-
A tut would be useful.
-
Well @@Oobah I hate to prove you wrong, but manual hint brushing is HIGHLY important in just about any map, while I do agree the engine does a great job for the most part, 60% of the time using hint allows YOU to decide how the portals will be split, not the engine which can work allot better as you will have a better understanding of what the player can see and not. The engine splits everything up into blocks (which you can adjust the size of), however some times 4 of them will all fall and line up at an area where really you don't need 4 areas to draw. and example of this would be if I were looking down the grand staircase. If I'm at A deck and stairing all the way down to F Deck I don't need the whole 100/92.5 ft of each floor drawing that it would do by these 4 groups meeting as they do. With a little brush work and manually placing hints, I set it up and drop it down to just 10 feet of details + the floors pieces only being drawn on each floor as I look down. Hinting is HIGHLY important as it is the tool that allows you to dictate where portals will be, the same as setting them up down a curved brush hallway etc.
I know you're highly intutive with how the engine works, but I feel you're missing the bigger picture when it come's to hinting, its some thing I understand but just need some guidance on applying appropriately on this massive scale. Darth G was a living example of having huge areas and HIGHLY complex and detail things in them and yet his maps would have better FPS in his worst area's then SJC's BEST areas in his dreams...
This map as made successful use so far of the other techniques you have mentioned I'll hand you that, please understand I am not mocking nor knocking any thing you said, just I feel you are laying down already know general information, and Im looking for a bit more of a deeper guidance. Even you can admit this project is esspecially different than most, and ergo requires VERY special attention to ow it functions. I find that while it will do a vis compile with all structural brushes intended laid out, it takes a VERY long time, and in some areas like the promenade deck I was unsatisfied with how some thing's were working.
I did manage to work out some of the basics, but it wasn't as simple of a question as (to sound nooby) "How I map vis?" It was a ethical question of cut and up the brush count ergo slower compile but slightly better vis (still not to my satisfactory as my main question has still gone unanswered), vs leave them as one and just accept the vis draw on either side for the sake of a faster compile. Now I've went with screw the brush count, that doesn't matter if thing's are done right.The result is a 45% satisfactory so far. However as an above post show's theirs some odd problems I can't seem to put my finger on that even hinting is not fixing.
To better understand the map Ill lay this out, all doors in and out area area portalled, no windows will view in or out, simple glow maps and env's to replicate a semi sensation, it's an acceptable sacrifice for game play reasons. I understand that from an outside point of view and without the map physically infront of you in radiant to look at it may come across as a stupid practicality thing (this entire post), however I have been mapping now for over a decade, and this project has been ongoing for many year's, a trial and error, now it is as the point where it WILL succeed, but "I" and "IT" need help to get it to where it will be all around acceptable and not a catastrophic piece of eye candy like the beta or and SJC map. This project is my final for JKA, and means a LOT to me in many ways. I only request help out of a last resort, I dislike it even to be honest. However I am willing to admit I have reached a breaking point and weakness in my own knowledge. Applying basic techniques to vis is made highly complicated by how this ship has to be...
In many ways I would love to bring on another mapper who knows some of these applications better than I do, but can respect my work and the ship enough to listen to me and the needs of the project, look over it and honestly lend a hand in area's I am strained. However it seems that point fails to come clearly to some, and it seems most have a rather passive aggressive ideal when it come's to helping that rivals the costumer support at EA.
Regards and deep sincerity if this offends you.
AngelModder™ -
Possibly. I didn't mean to be, I was just being honest. I will not read over 3000 characters without a single line break, that's unnecessarily exhausting. Thanks for inserting some.
Now it's at least somewhat readable and the only problem is the abundance of ship lingo I don't fully understand, which I suppose naturally comes with such a project, and a failure to get to the point.
Am I correct in summarizing your problem thus: "I have beams going through multiple rooms, should I cut them at the walls so parts in other rooms need not be drawn or should I use a single brush to keep the brush count low?"
If so, that's somewhat hard to tell but probably won't matter much either way in the end, proper usage of detail and structural brushes is much more important. Focus on getting that right and maybe upload your map to let some experienced mappers take a look and give you hints.
To debug vis work, you can compile with -saveprt and use the Radiant's prtview plugin to take a look at the generated portals.
I must respectfully disagree with the idea of uploading it as of yet. I'm sorry but I trust very few, I've had thing's stolen in the past, not that this has much monetary value but the point remains, good idea though IF I found one I trusted. I might trust @@Lazarus and a few others but not many.
Any ways yes you are correct Sir, and as you can see from the post above your own I did follow my instinct and cut the brush. I pulled the whole section into a separate map to toy with the idea. So far it's much better, but I am unsure as to how I should appropriately apply any hint's that may be necessary, or if I have done some thing unnecessary or wrong. That is why I even posted a GTK shot for some one to draw on and said "hey this can be put back together or hey cut this etc etc".
Regards - AngelModder™
-
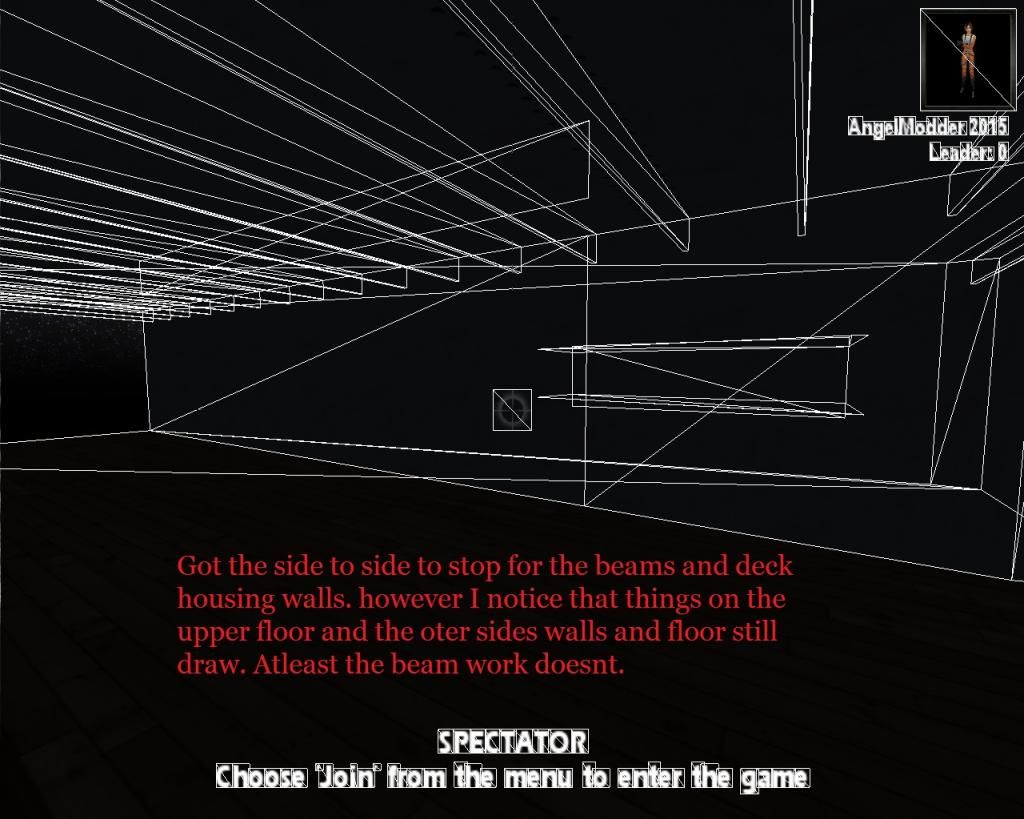
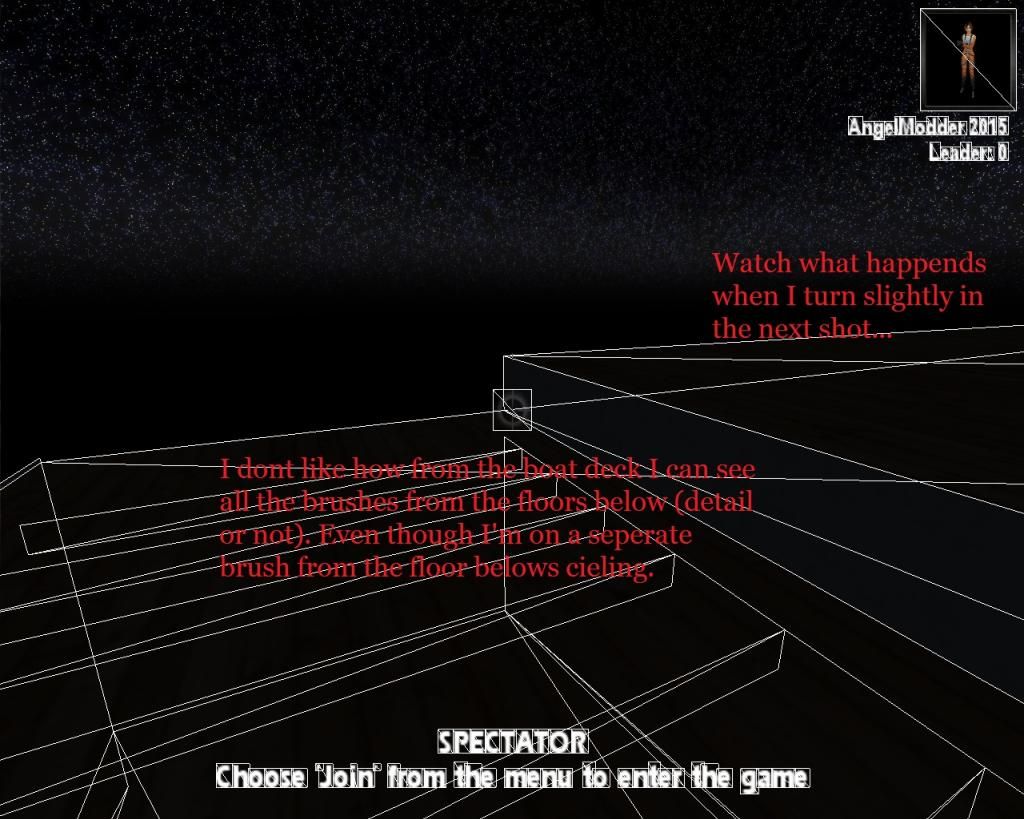
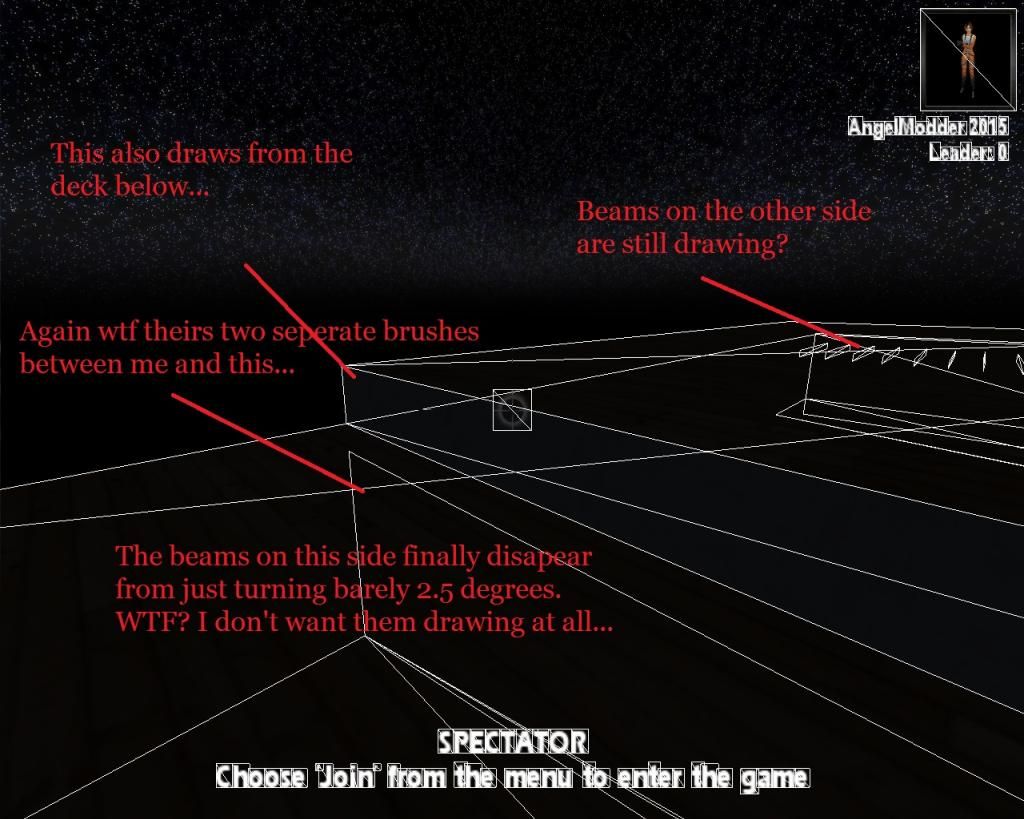
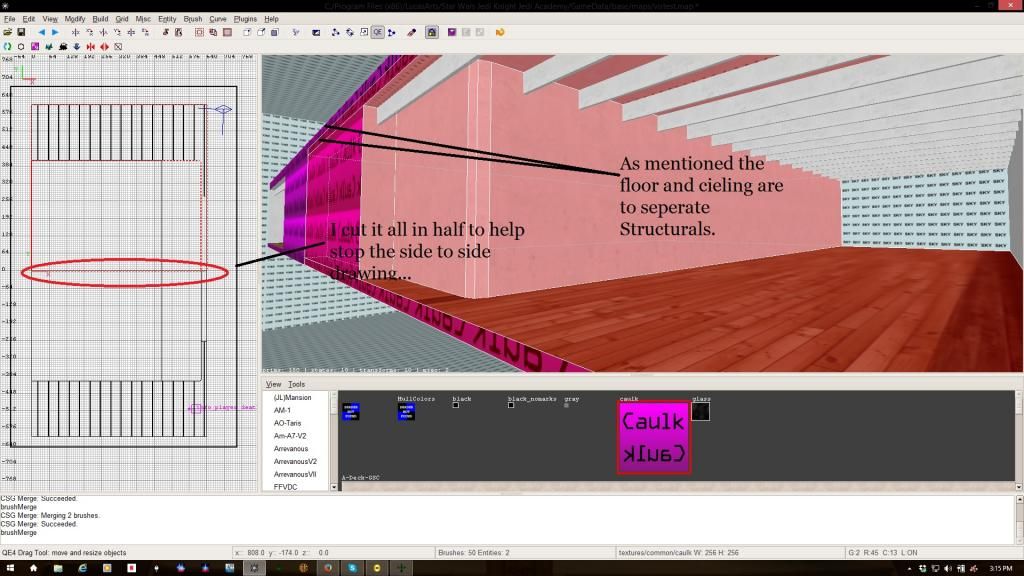
Alright so I did some playing around, however I've found some issues. I've managed to stop the beams and the deck housing walls on the opposite side from drawing by cutting it all down the middle and cutting/adjusting the beams to line up against the deck housing. However I still find that part of the floor, ceiling and that outboard mesh still draw? Does this require some sort of hinting? If so how should I apply this appropriately?
I've also noticed that the brushes from the deck above (or below depending on where I go) still draw even though the ceiling of the deck below and the floor of the deck I am on are two different brushes. Again what am I doing wrong?
 Enjoy
Enjoy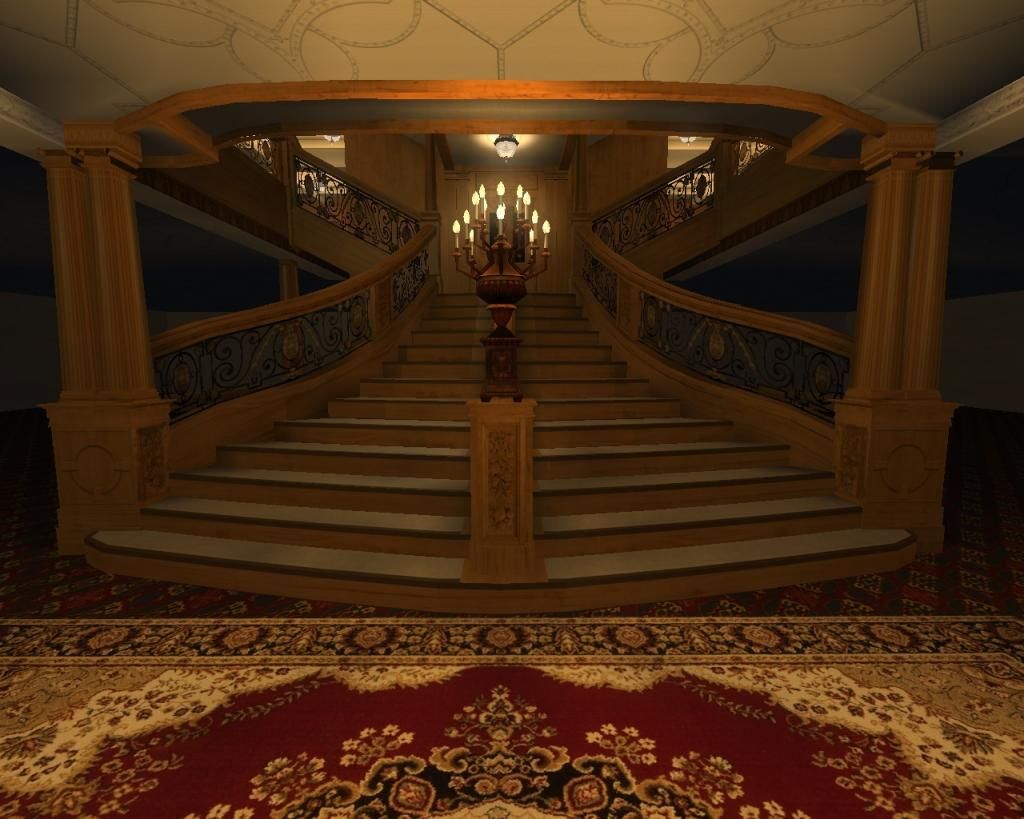
 !
! 


R.M.S. Titanic - AngelModder
in WIPs, Teasers & Releases
Posted
Well firstly I don't even know what rend2 is tbh, I keep hearing folk's mention it, but I have no real idea what it is even, must be some horrible publicizing on some one hands... Any ways, no the released version will not sink like you would think, it will have two static points (2 separate maps) for the sinking, one at around 1:25 Am just as the bow was starting to slip under, and a second at 2:18, just before she broke. Theirs sadly no FPS friendly way to sink her and not drive people's computers crazy using the q3 engine. Not at this level of detail any ways.
That having been said, the static moments she will be in however will be very detailed. for FPS reasons and functionality the first variant at 1:25 AM will have angled water brushes, at different levels for the interior and exterior.