MaceMadunusus
-
Posts
124 -
Joined
-
Last visited
MaceMadunusus's Achievements
")
Collaborator (3/10)
-
Dev Diary - Twenty Years of Movie Battles 2
MaceMadunusus posted a topic in WIPs, Teasers & Releases
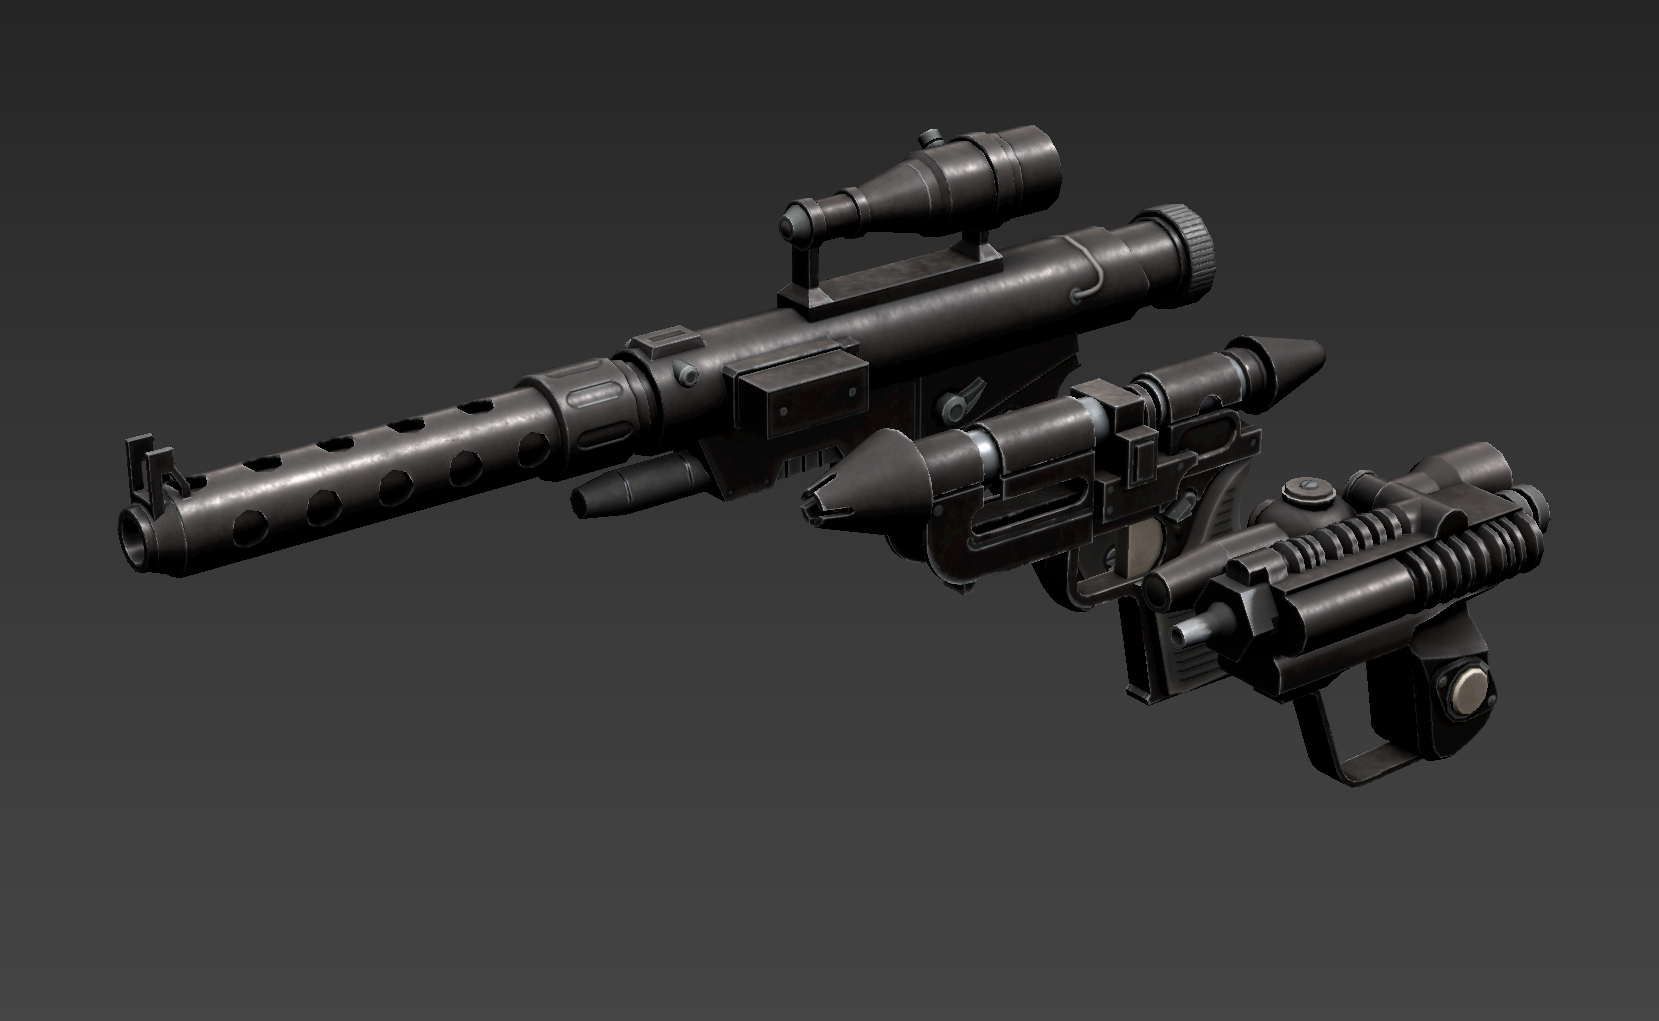
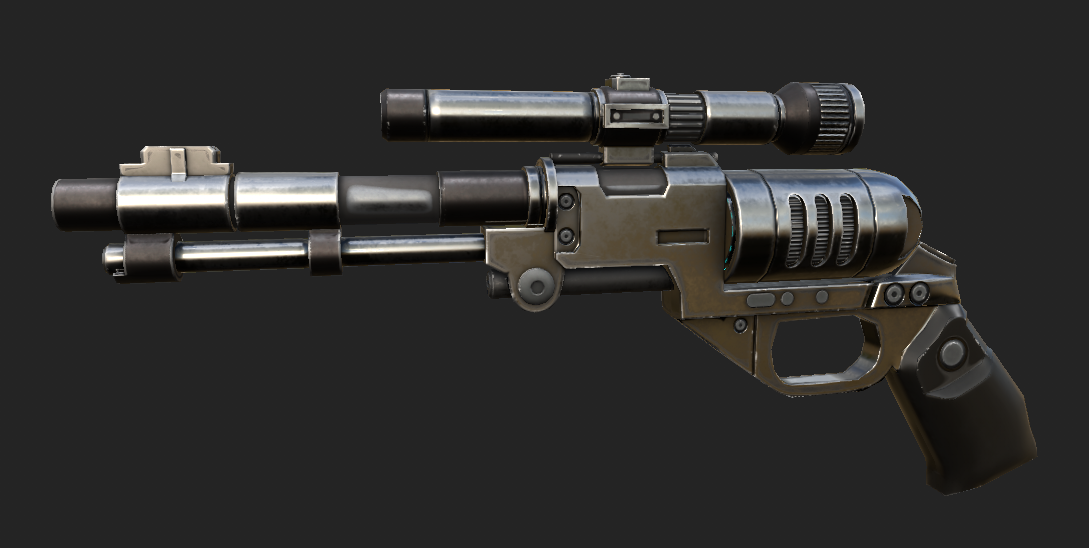
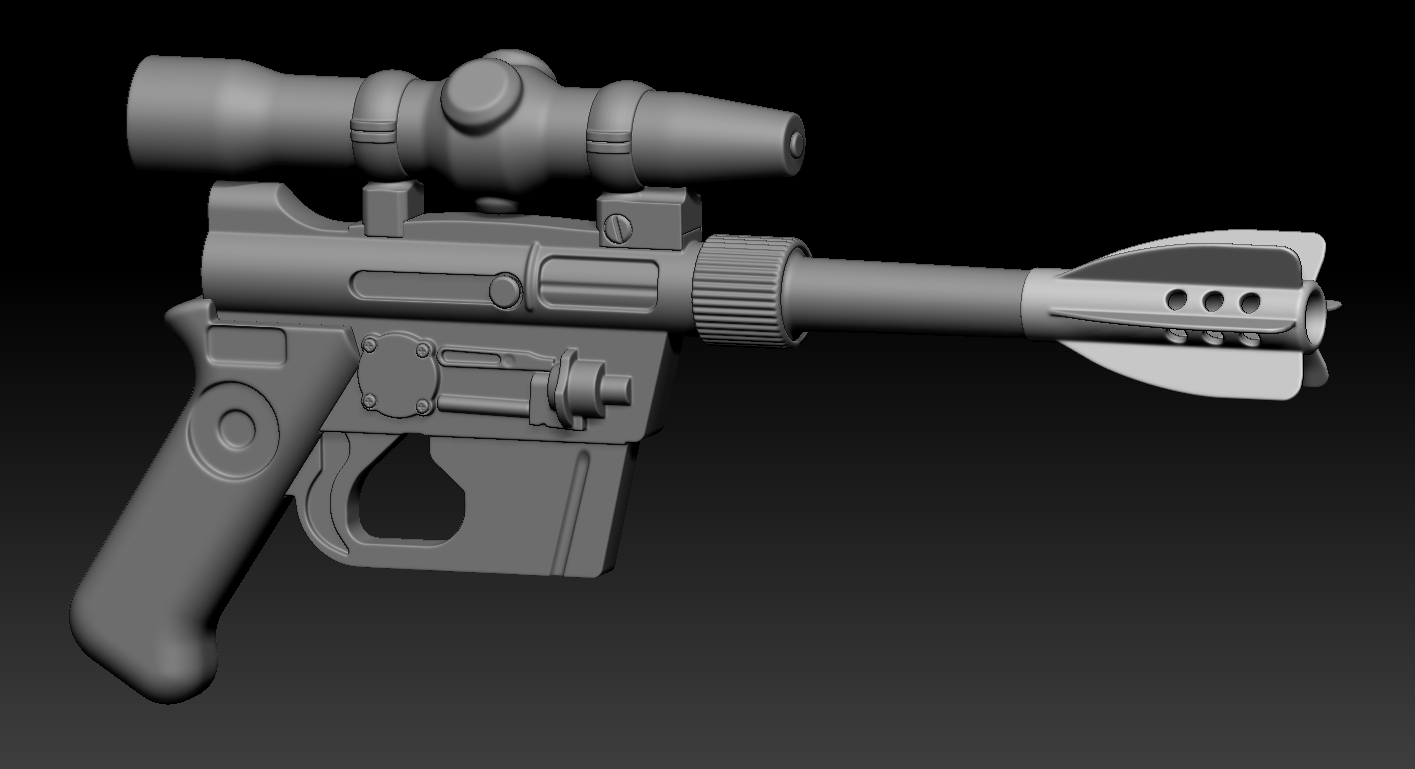
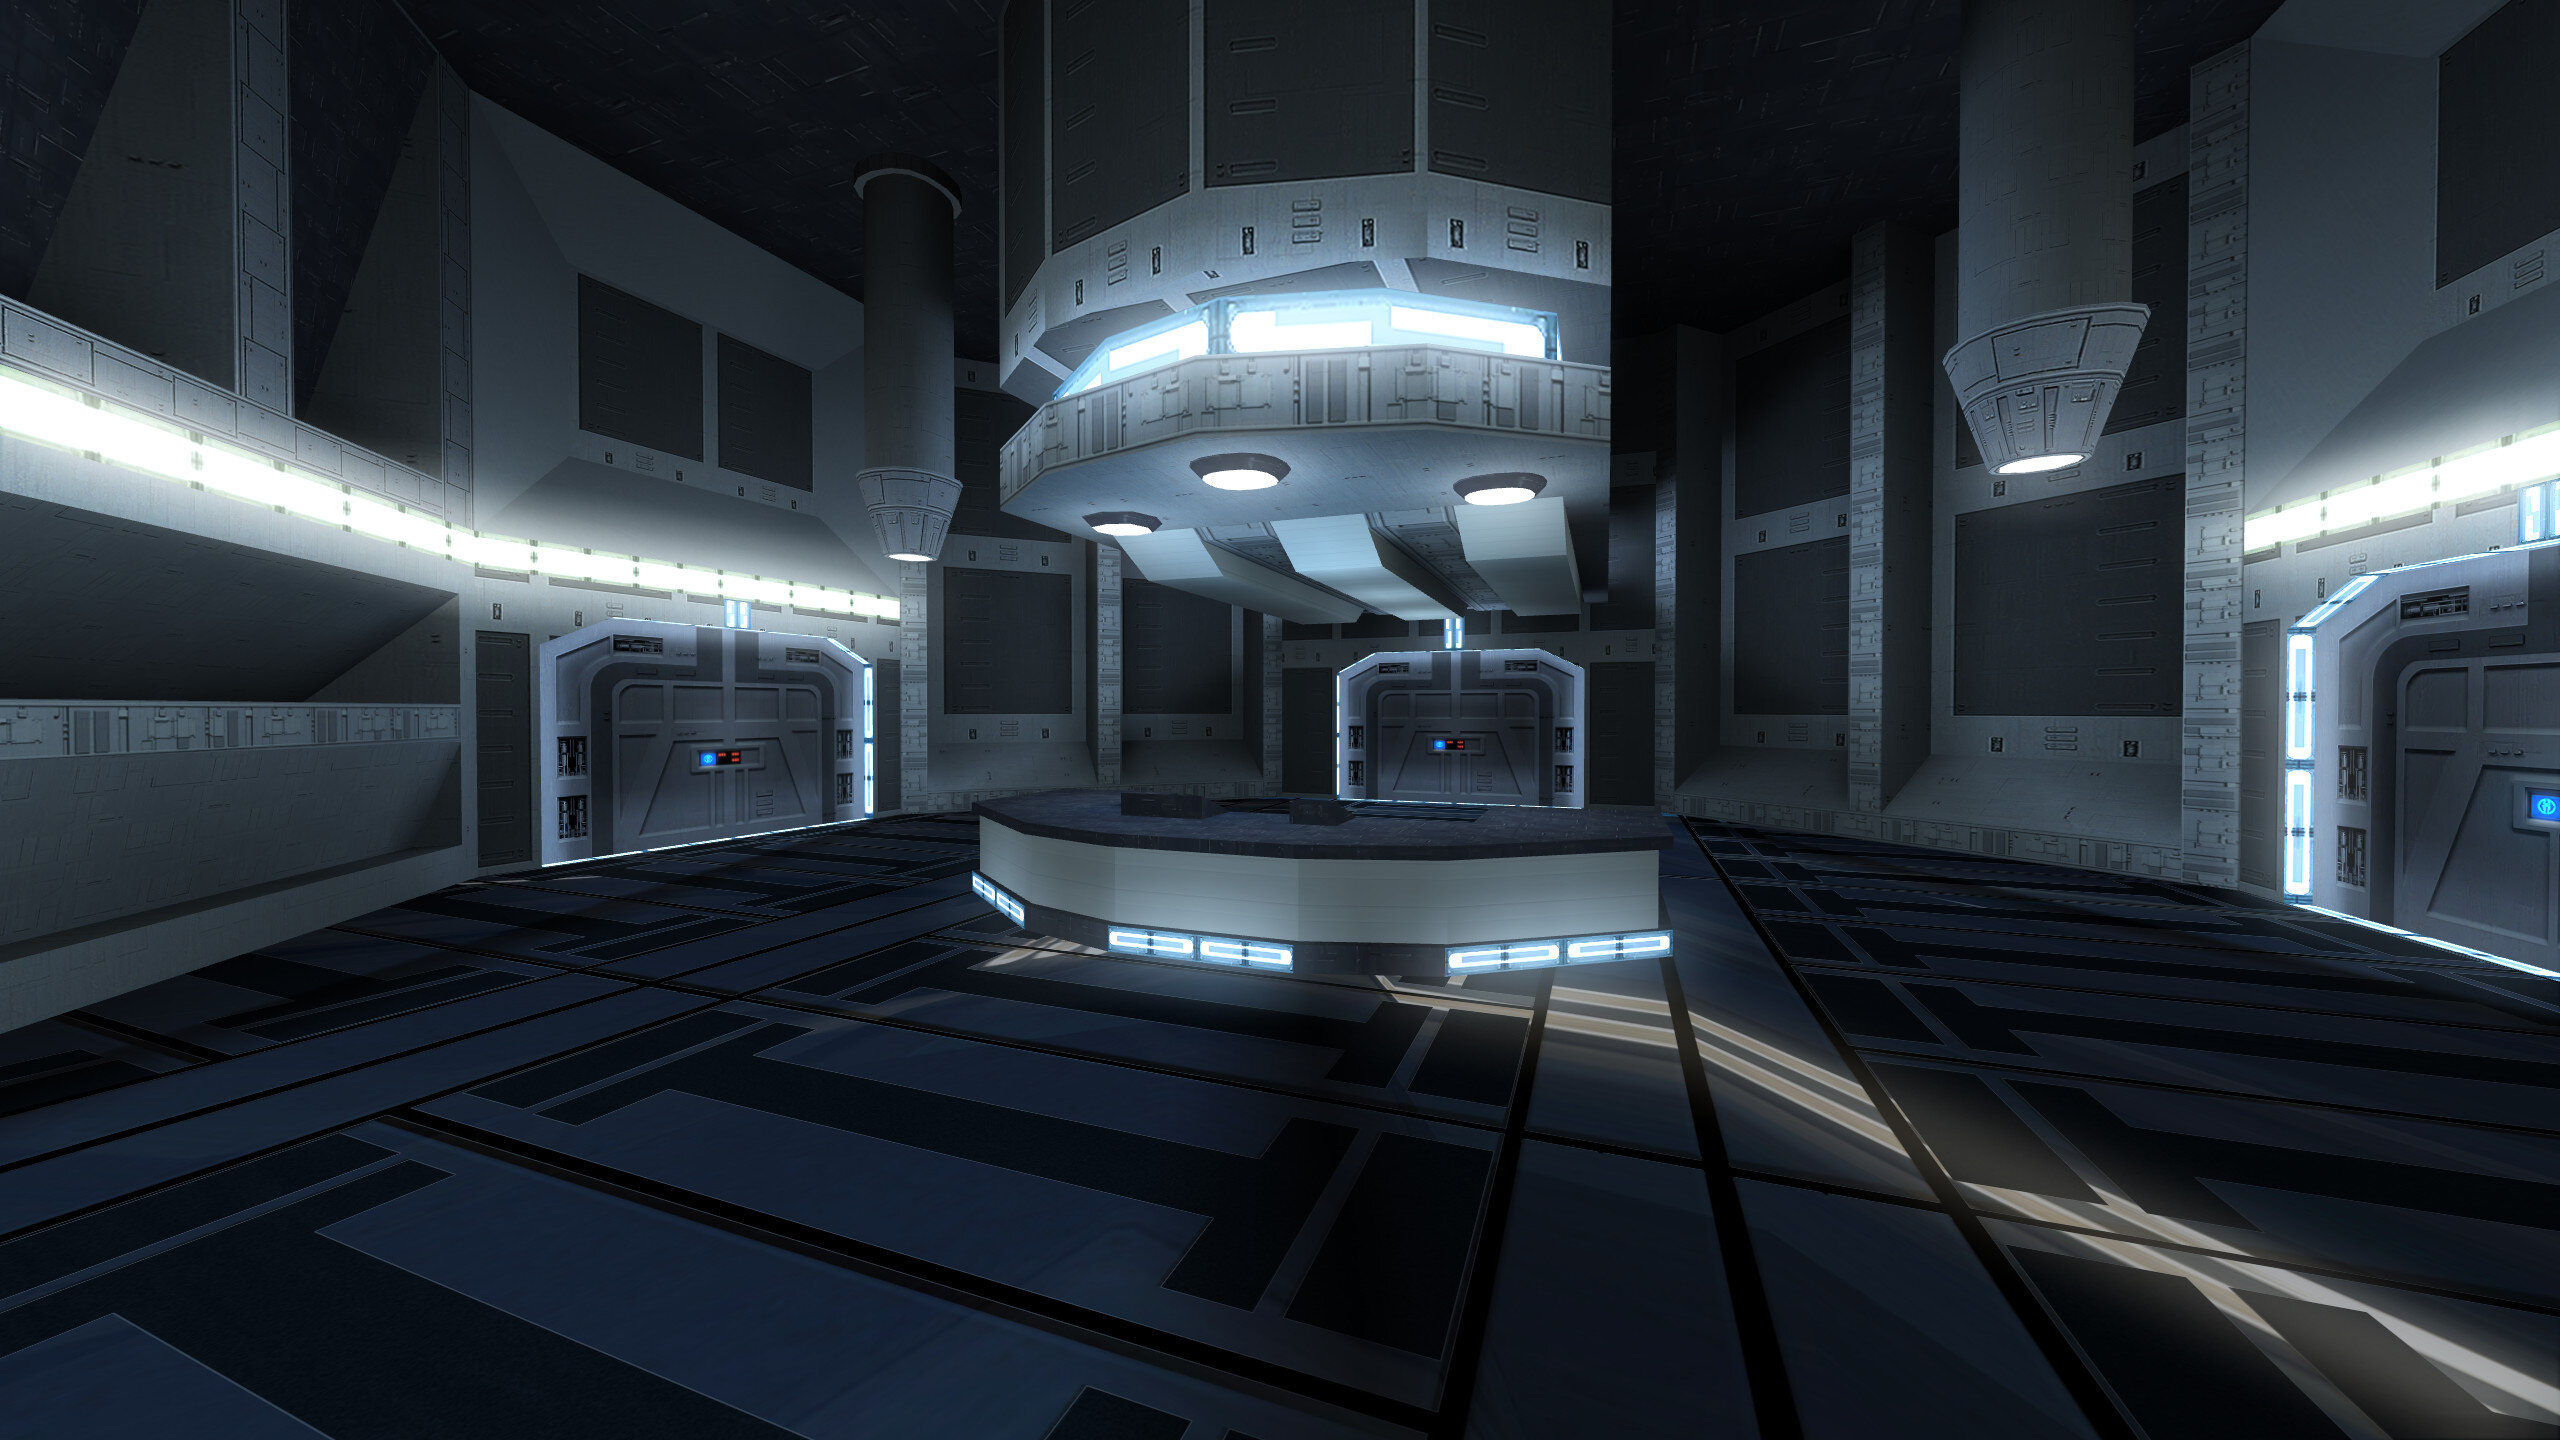
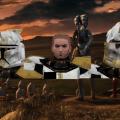
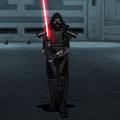
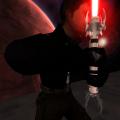
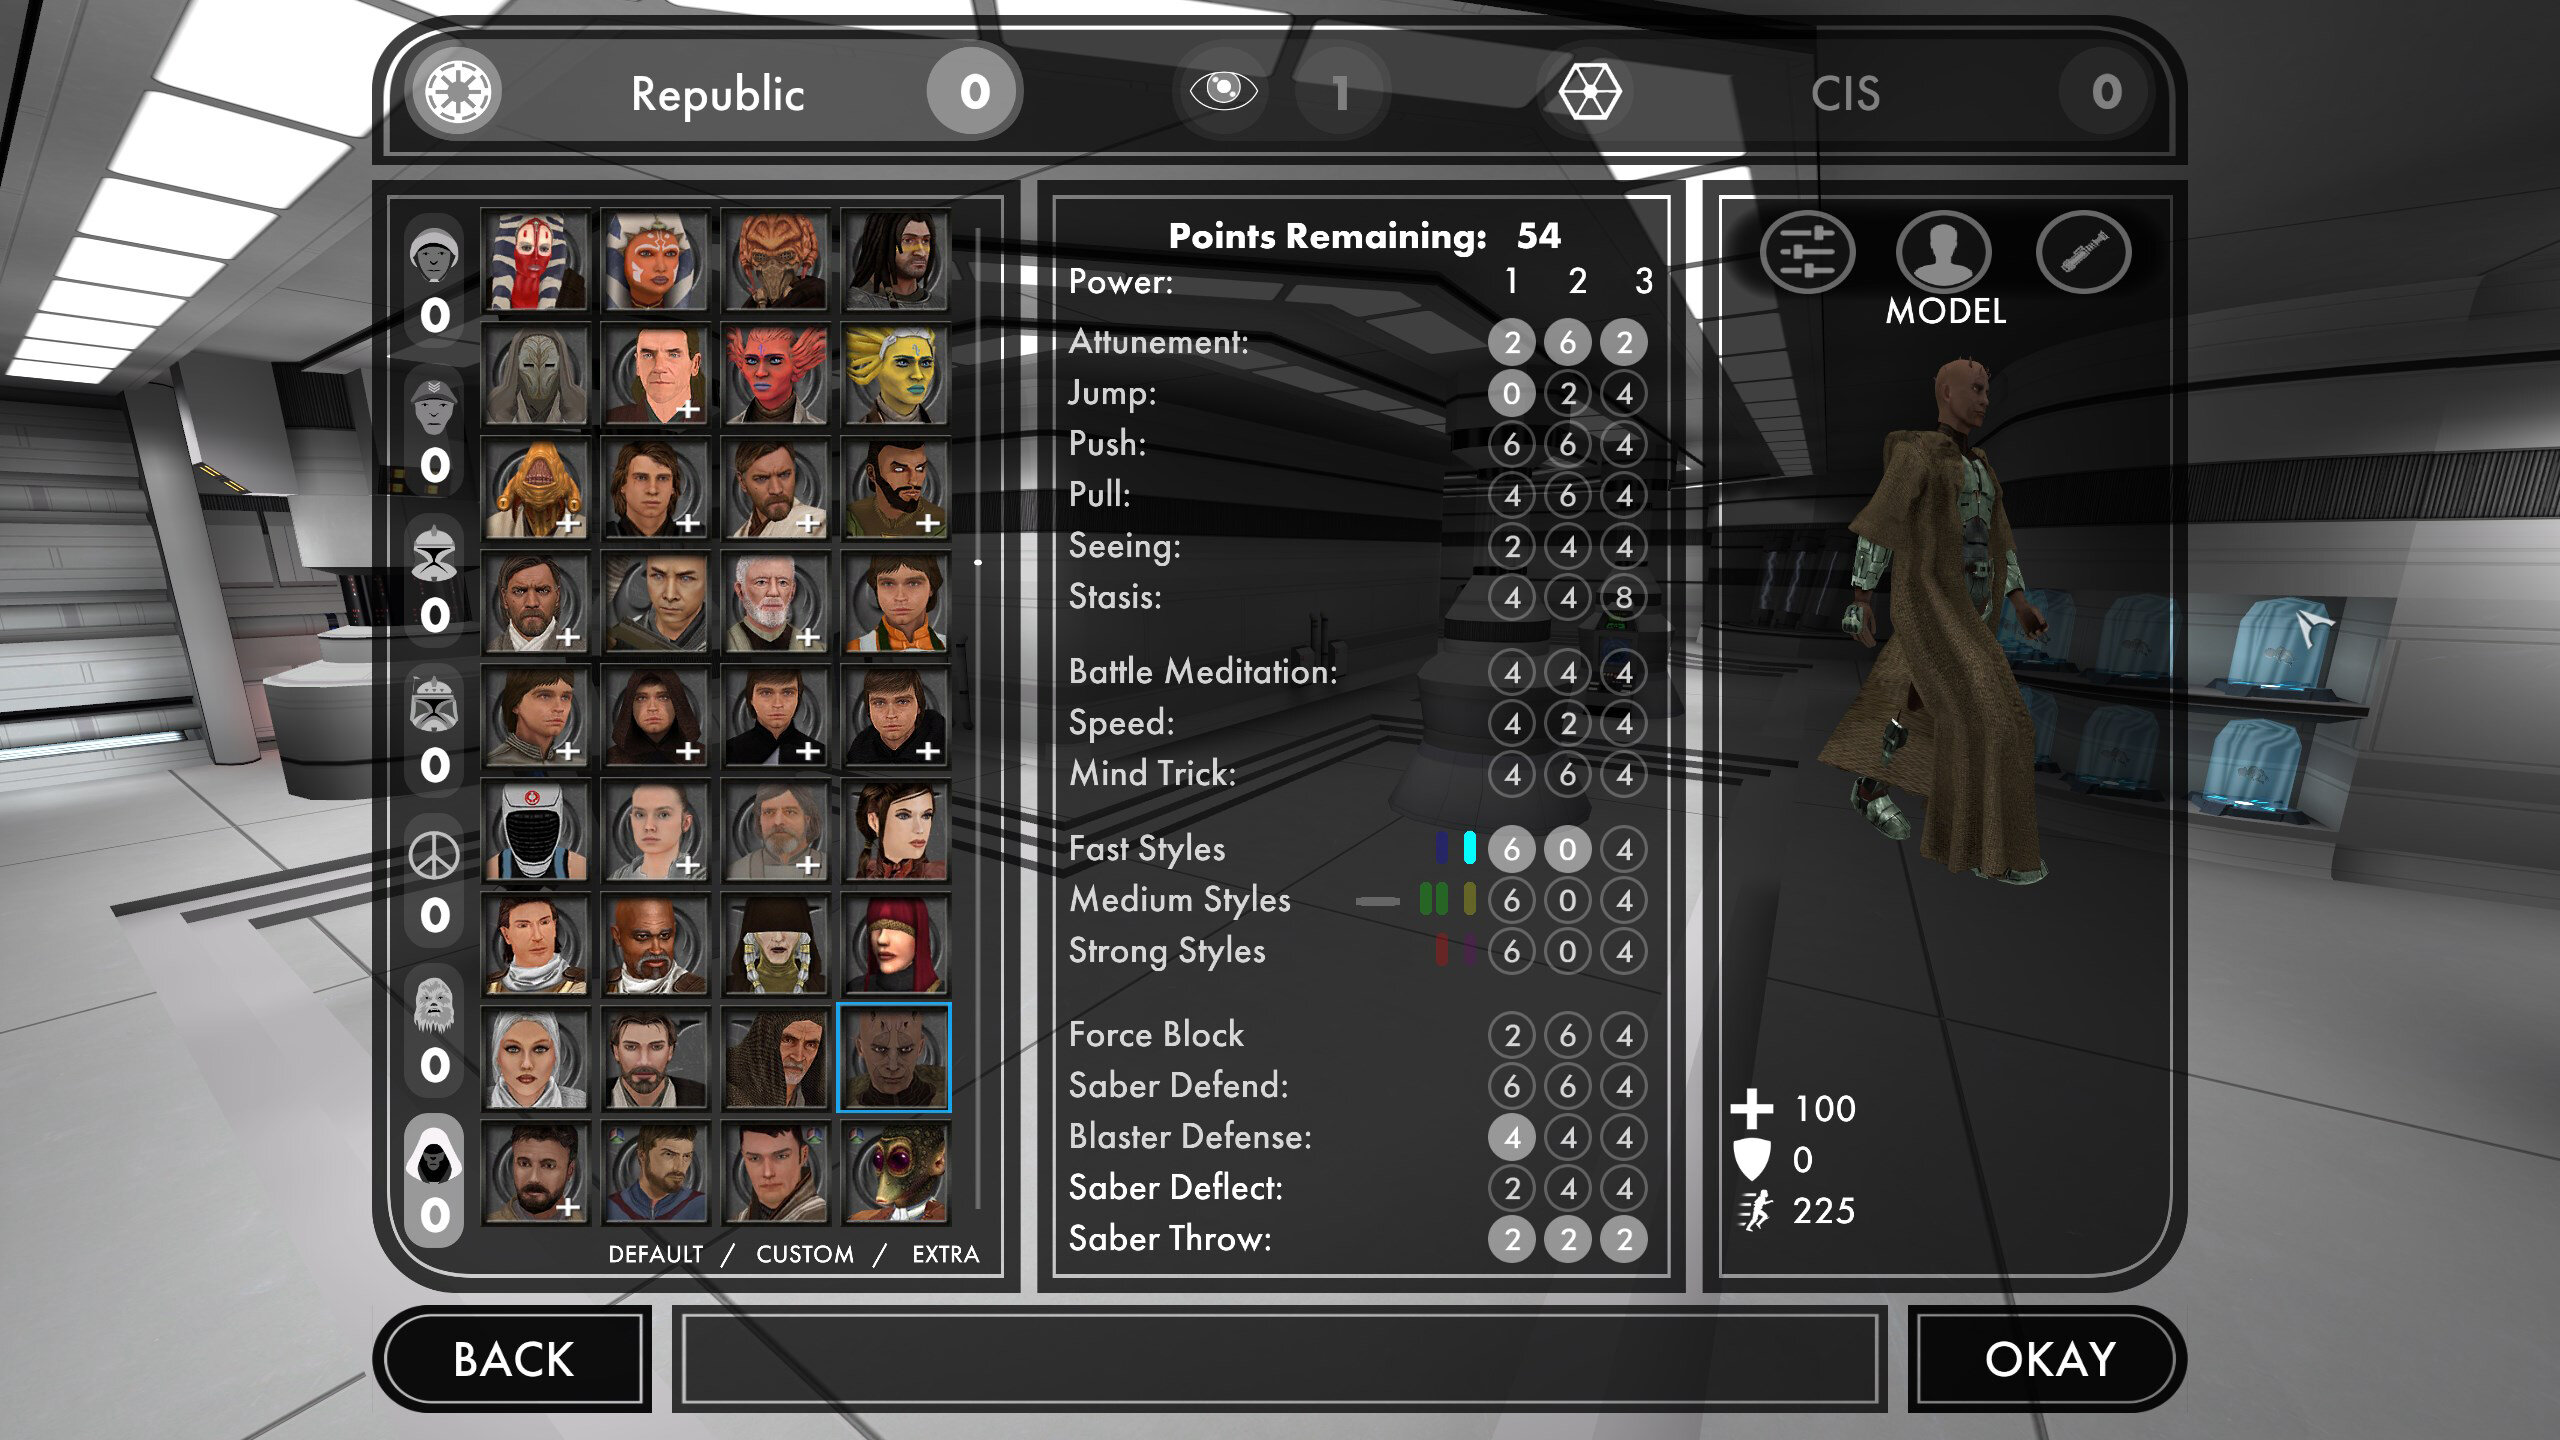
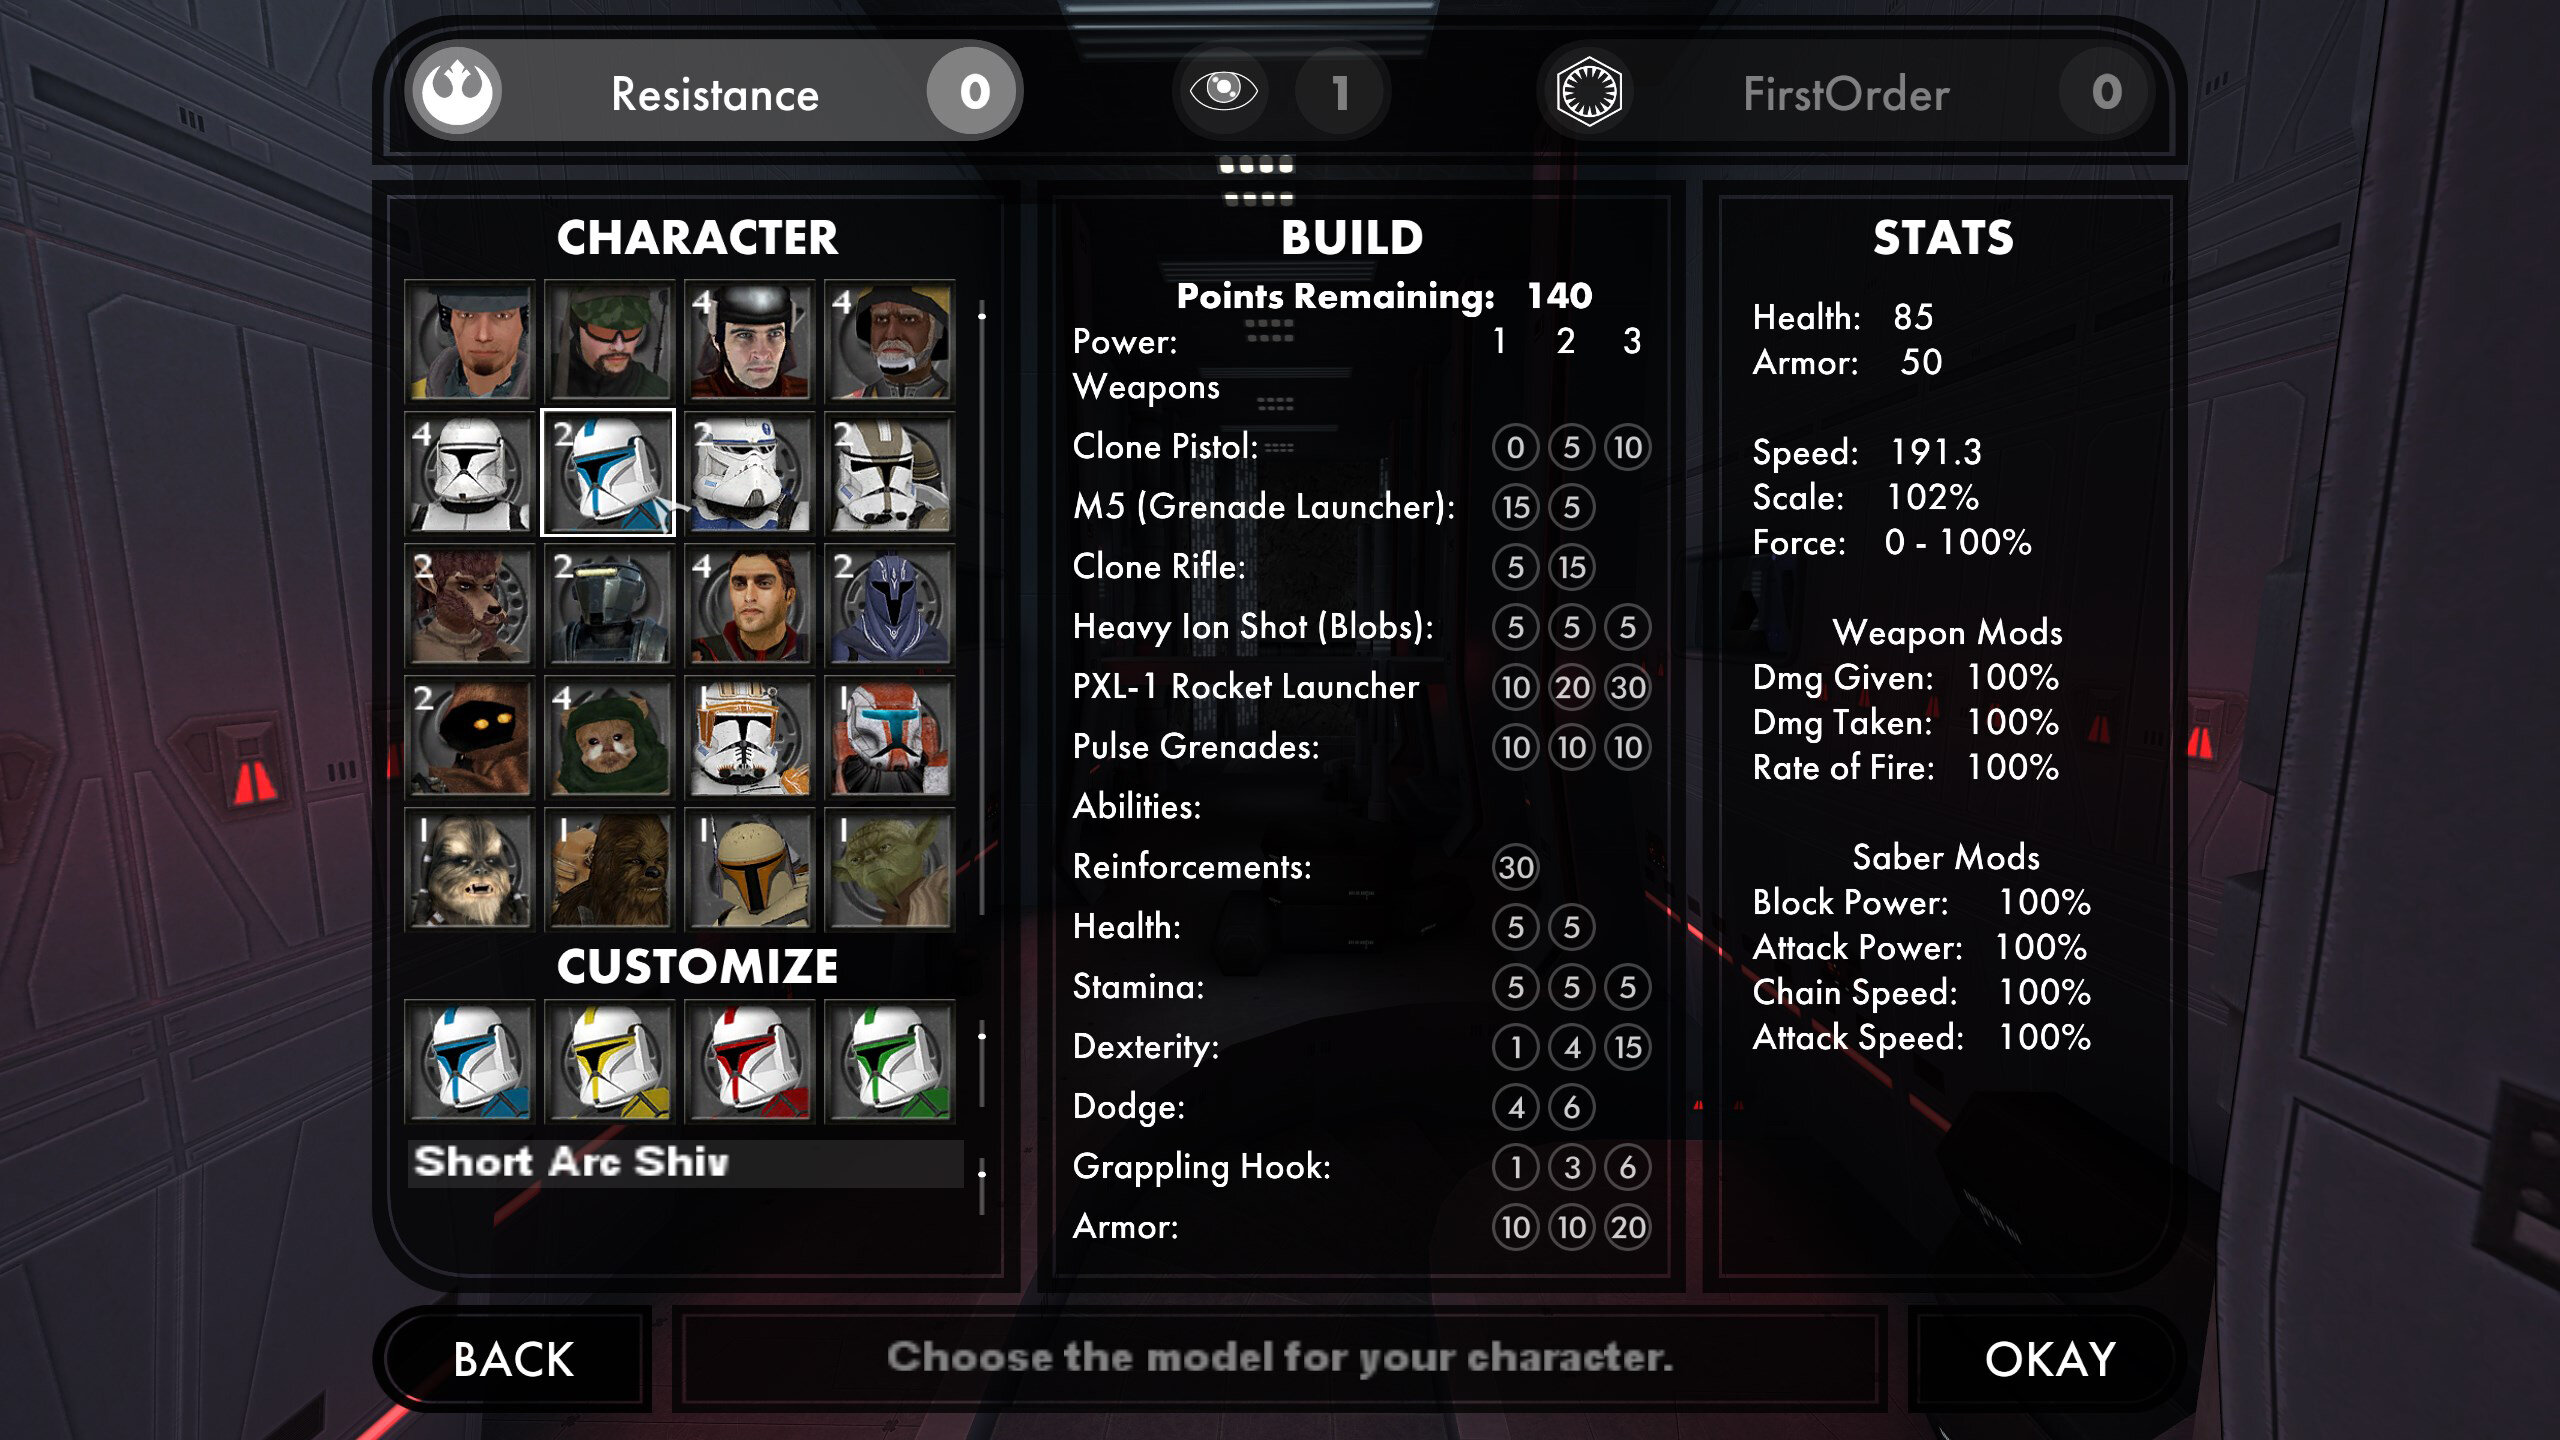
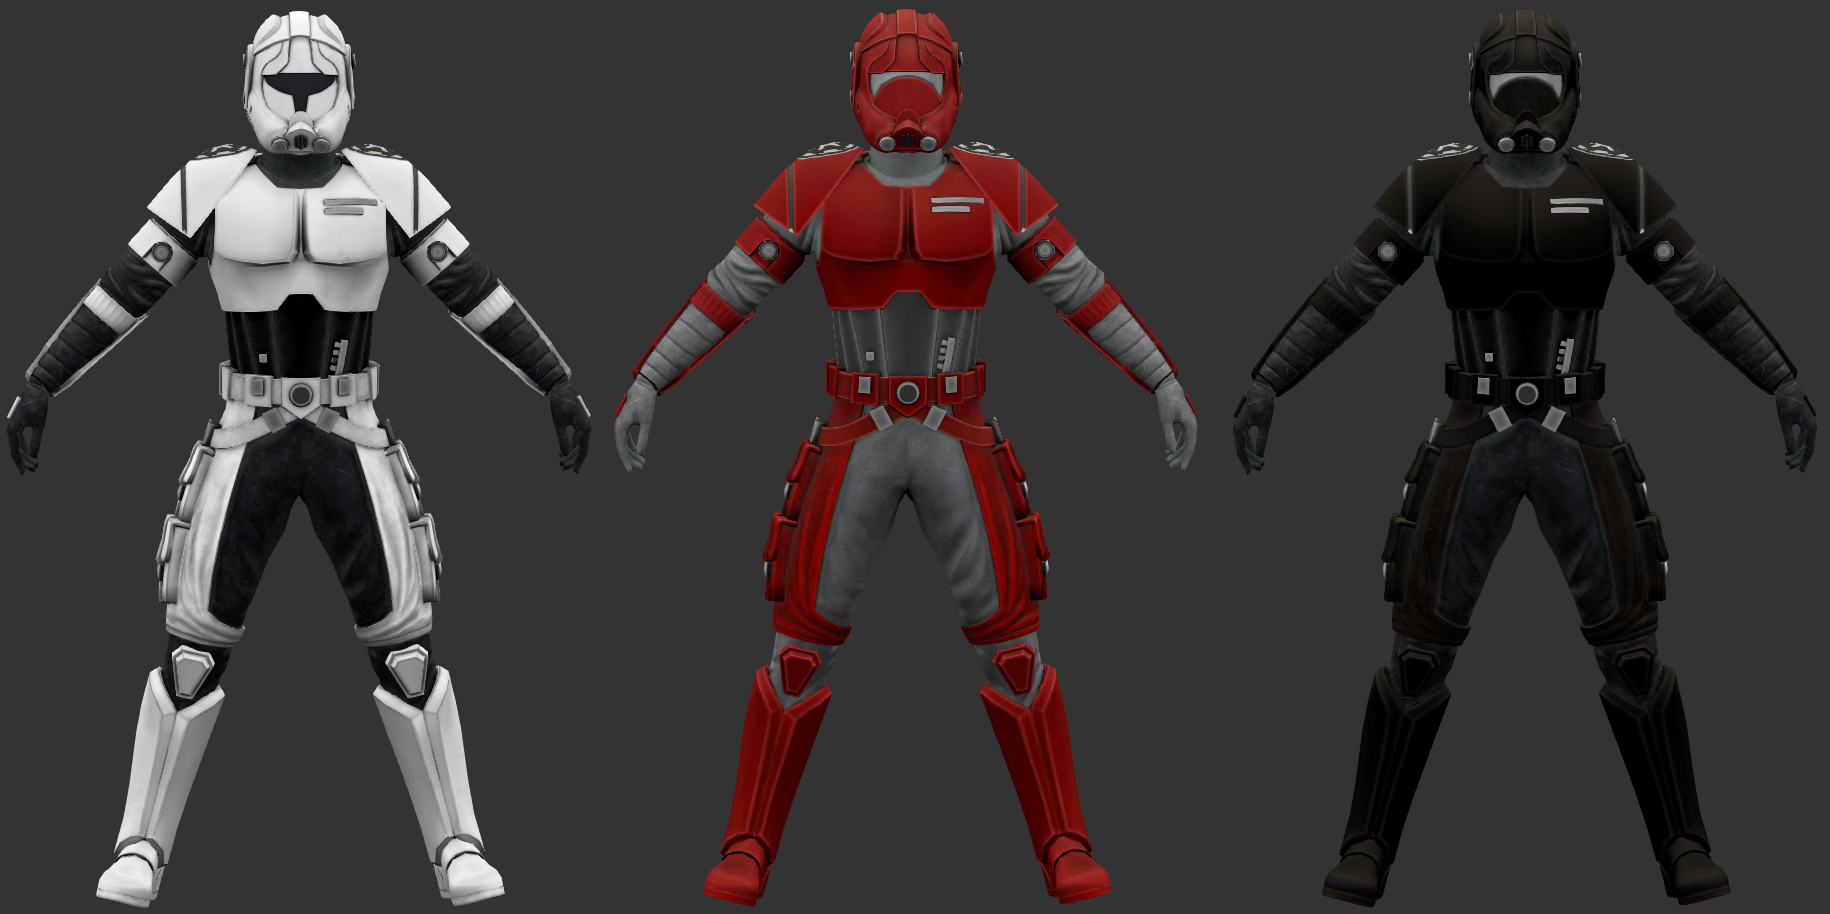
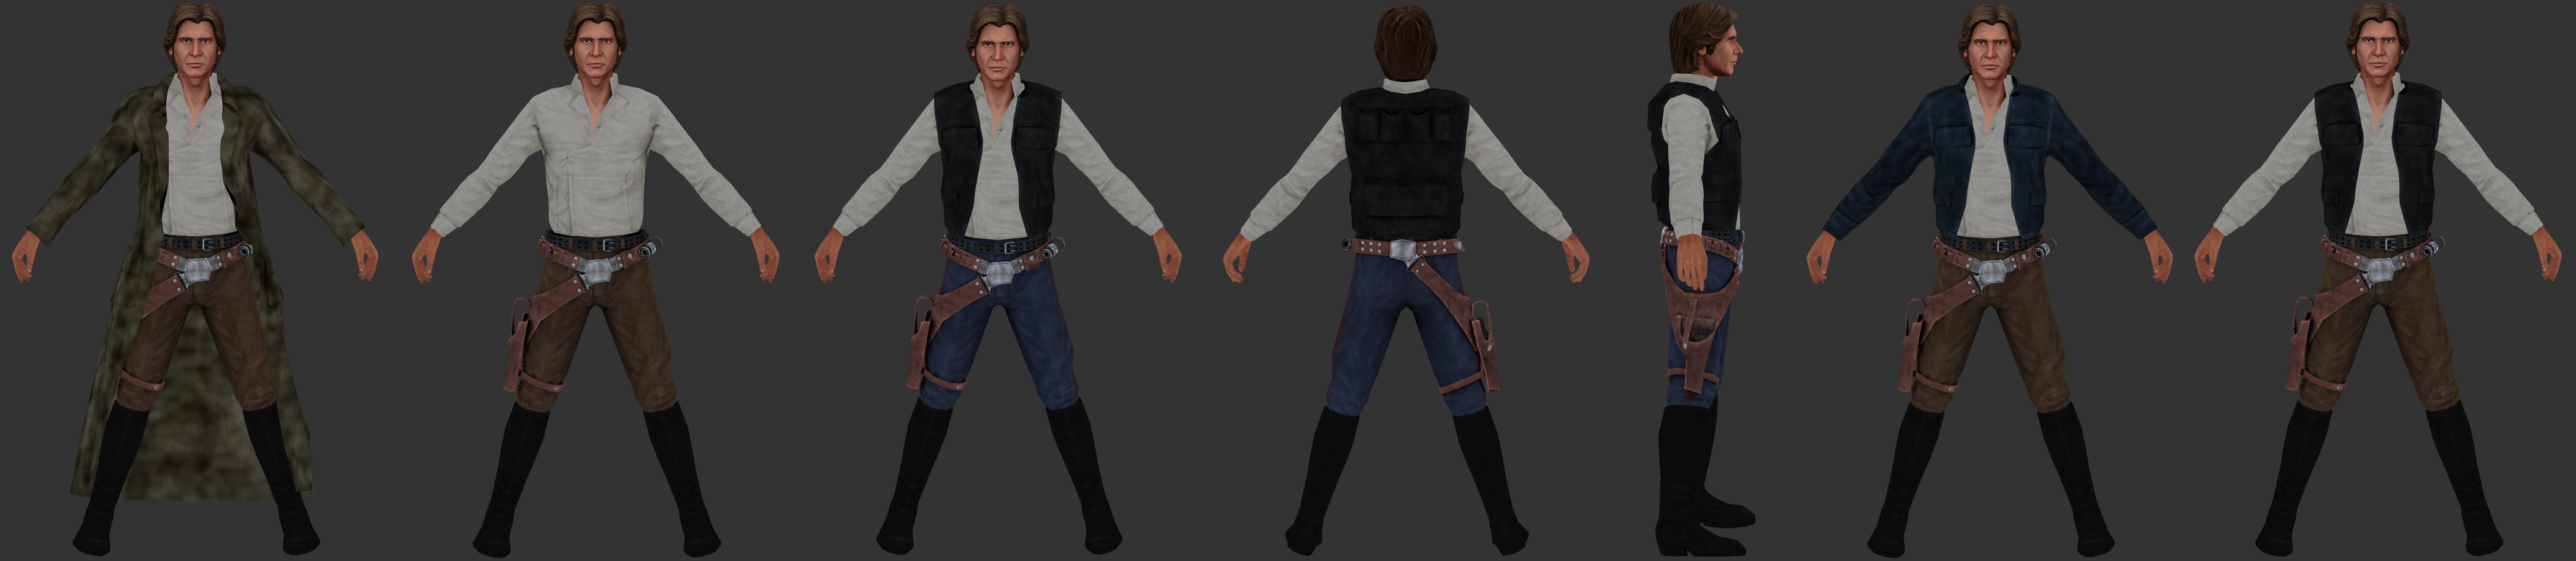
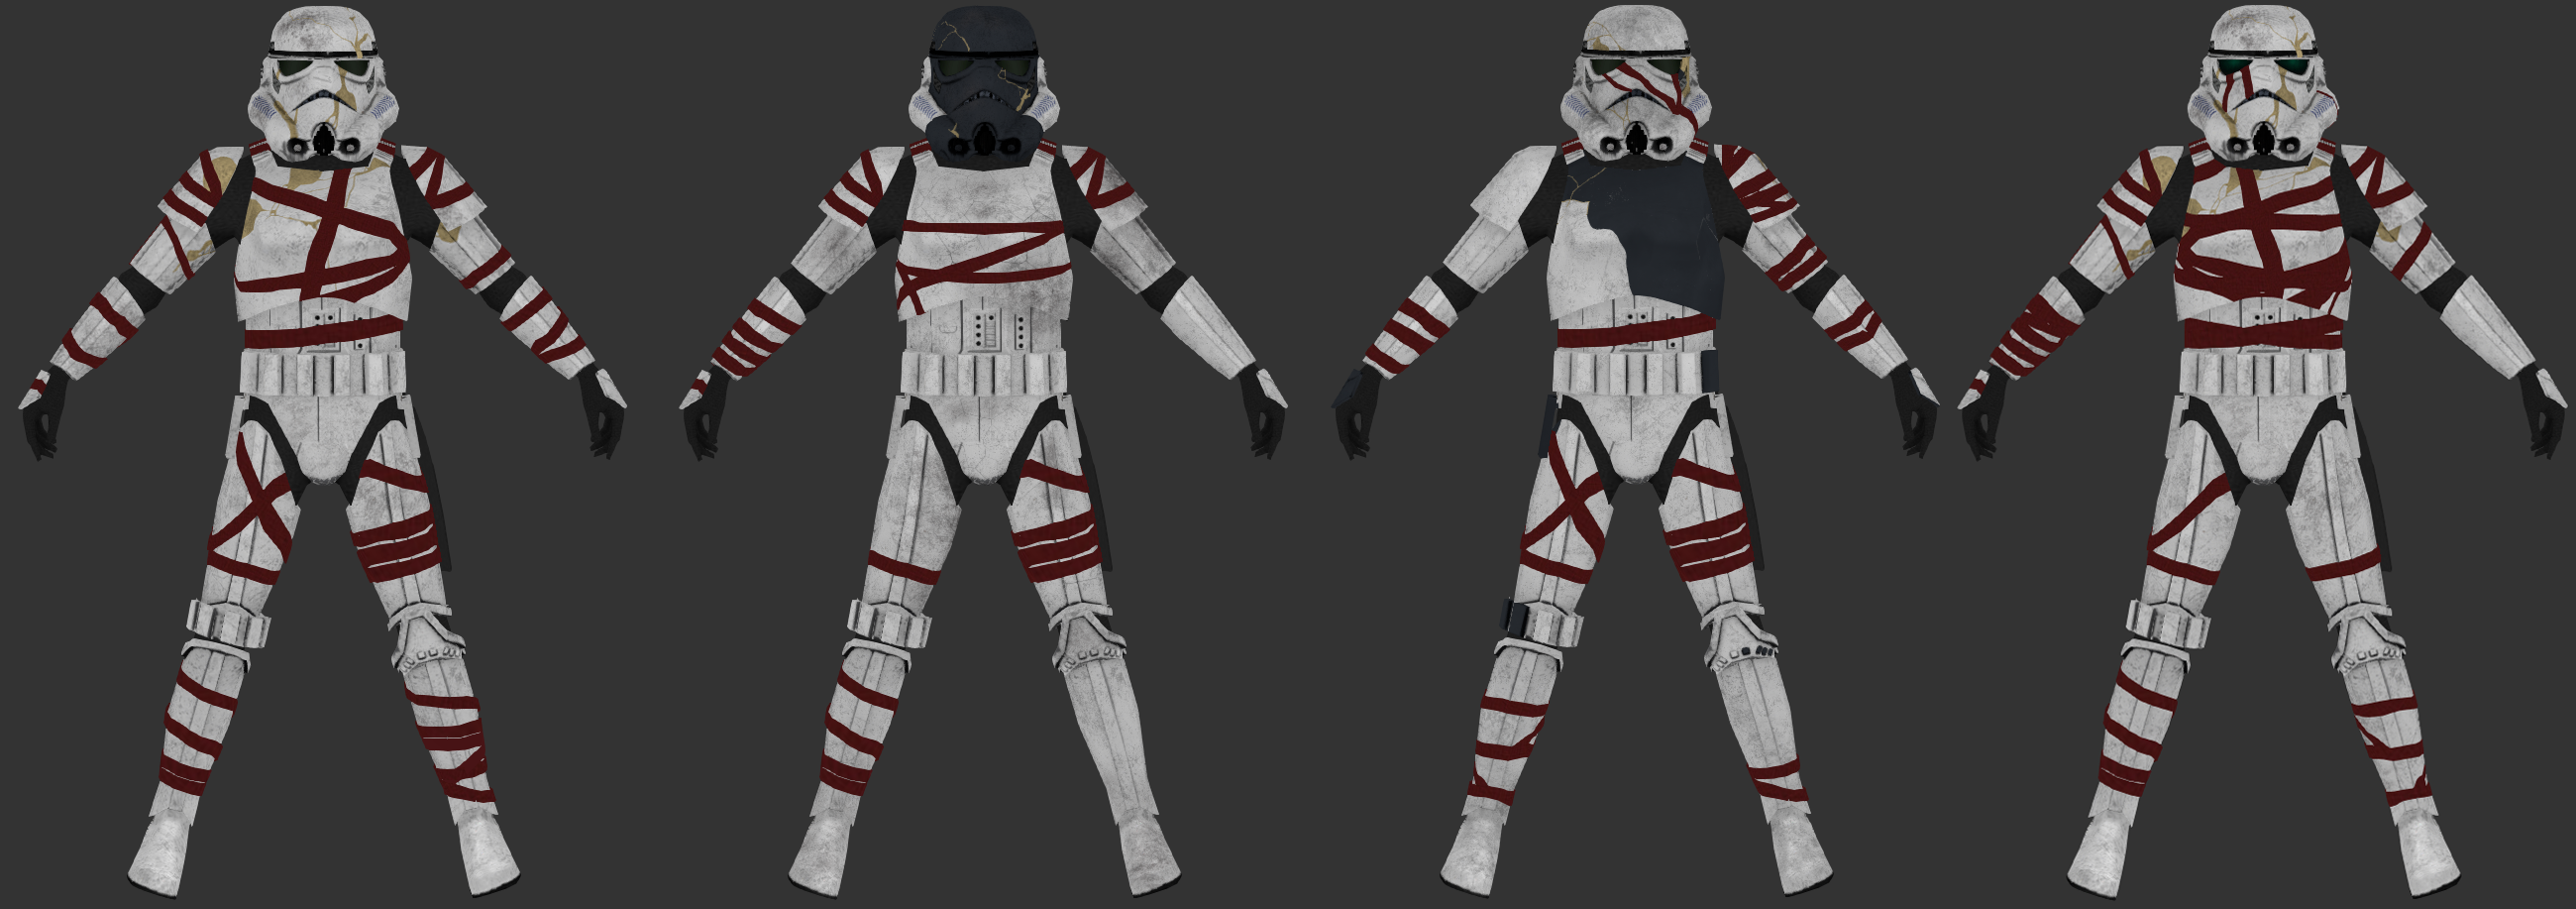
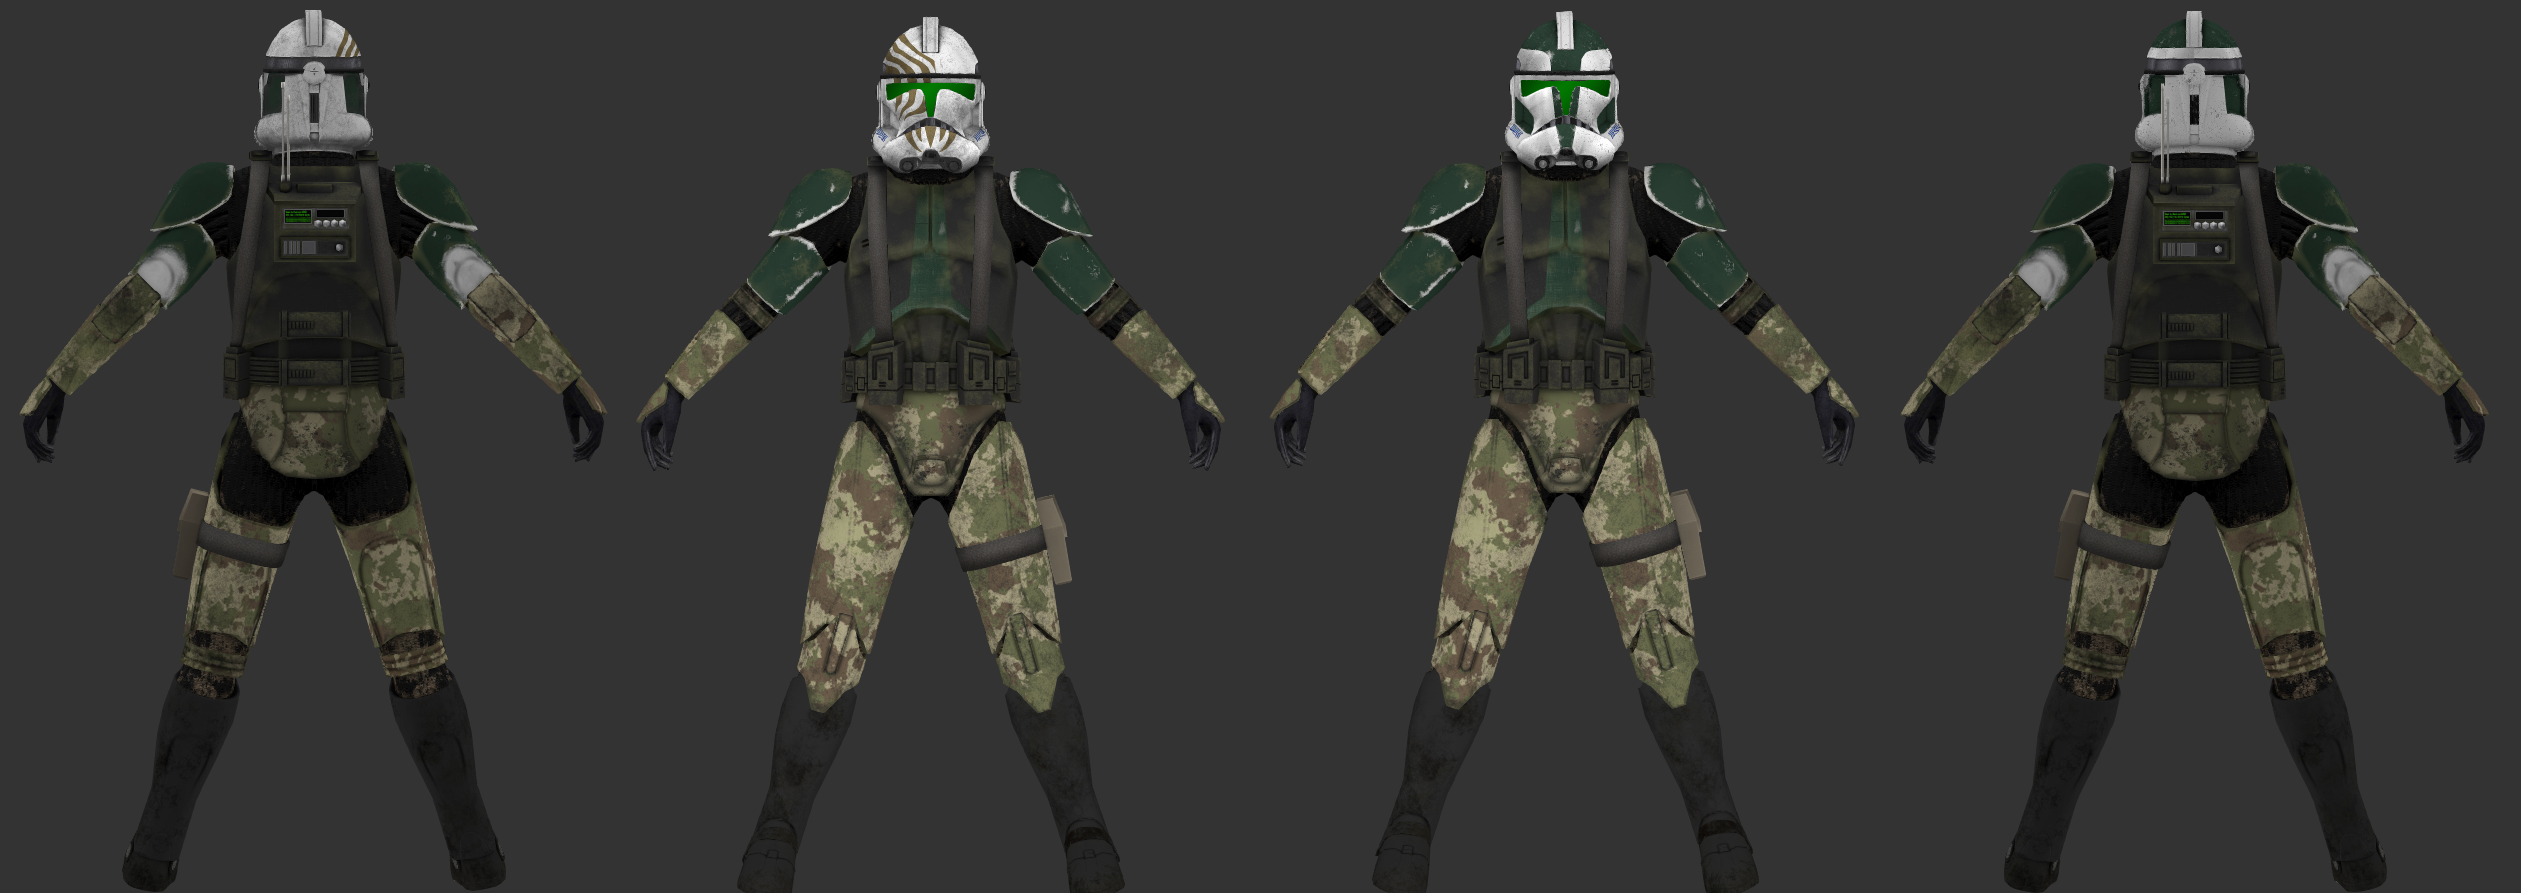
Twenty Years of Movie Battles 2 Twenty years ago today, RenegadeOfPhunk released the first build (B14) of Movie Battles 2. Last year on the twentieth anniversary of the original Movie Battles release for Jedi Outcast, we ran through a brief history of Movie Battles as well as a look into our first open mode class upgrade in years. This year we will be focusing on what is coming in the near future as well as things we plan on delivering over the course of the next year. Our focus this year is to deliver some of the largest sets of new abilities & weapons, revamps to existing ones, and overall class updates than we have ever delivered before. Back-end Refactoring Since 2019 we have been slowly working on refactoring many of the back-end systems in MB2 to make things easier for us to expand and create new content. We started with things like reworking the class back-end structure to allow us to more easily create new classes or modify existing ones. This year is no different, with some of the largest back-end reworks taking place. Below are just a few examples of the refactoring tasks coming in future patches sometime this year. The Great Weapon Split In 2020-2021 we completely reworked our backend weapon system to go from 19 weapon slots to over 200 and initially separated grenades out into their own weapons instead of being overwrites based on what class you were running. Now, we have completed the migration of every weapon in MB2 into their own slots and even restored original BaseJKA weapons to full functionality for use in modes like FA. No longer will pulled weapons morph when you pick them up. Weapons such as the DLT-20a, A-280, and M5 are no longer heavily tied together and can have multiple values for balance more independently and easily modified than ever before. Faster balance iteration is also a plus. In the end we have gone from 19 weapons with class-specific limits, to currently 41 independent weapons with more being added in the coming weeks and months. Resource System Our resource system (FP, BP, Fuel, Stamina, Battery, etc.) has been reworked and heavily simplified internally. The biggest change end users will see is the handling of Force Points. These now constantly regenerate, even when using active force powers. Force powers like Speed now have higher constant drains to compensate, but no longer pauses regeneration. BP is now separated from Fuel/Stamina/Battery/Energy/Fury. Class Special / Keybind Rework Our class special system has been entirely reworked to allow classes to have more class special abilities without using the old limited "Alternate Ability" commands. Now instead of alternate ability commands that caused class specials to change binds based on what was equipped the new system allows each class to have up to four class special abilities instead of the previous two. In addition everyone now has a dedicated universal "Melee" keybind. So be sure to check and update your keybinds when this releases! Legends & Custom Point Builds With an upcoming release we will be reviving an old work in progress feature we never completed: Custom Point Builds. Custom point builds allow authors of levels and custom legends teams to create setups for each class to have their own custom point builds, similar to open mode. Allowing users to no longer be restricted to a specific build per class choice, but allowing them a much wider range of choices similar to open mode. The next update of Legends will feature massive sweeping changes to the existing set of classes as a result of that addition and other things we are adding. Humanoid Revamp For the past few years DT has been working on building our Humanoid Revamp. This revamp standardizes how animations are made, added, and used within MB2. In addition many animations have been updated or entire new ones created for both existing and future features. One way we have made it easier is that weapons now have "Animsets" which allow us to specify groups of animations for certain weapons or types of weapons. Which means when we add a new weapon or one is used in FA, it can use a specific animation set rather than having to go through adding cases across code manually for each specific animation or use case. We will be showcasing some of the new animations in later dev diaries detailing new abilities, weapons, etc. Future Class Updates This year will be our largest year ever in terms of class updates. Over half of the classes in the game are scheduled to receive at least one item/upgrade/weapon some time this year, with some of those classes receiving major updates or changes. Huge shake-ups are about to happen. Many of the abilities are not quite ready to be shown, however today we will be teasing you with some of them. First up to bat is Jedi. As part of the saber update we have been working on the rework for this class's force powers and general ability set. Most if not all of the abilities for the class are receiving a pass of some sort to refine or add to the class. With the goal of giving players more options, as well as the ability to specify what you want out of the class more than before. This includes making "Force Whore" a fully featured part of the class's design. Now, as we are only giving you some teasers today, here is a look at the buy menu for the class. Please note though that point values are placeholders and not final values. CR-2 Heavy Blaster Pistol Jedi is far from the only class receiving an update. Next up is the reveal of a new weapon for Troopers (Rebel Soldier): the CR-2. CR-2 is a weapon seen being used by the Naboo Security forces featuring its unique green blaster bolts, a high fire rate, a modified versions of old EE-3s shot bloom mechanic, and a design focused around close-range "hip firing". DC-15A Blaster Carbine The DC-15A Blaster Carbine is a staple of the Clone Trooper that we will be finally adding into MB2. Canonically it functions similarly to an E-11, and that is not much different here. However, it will feature many stat variations to differentiate the two as well as a brand new stun mechanic, as well as the ability to use it in tandem with the previously revealed M3 Bulwark Blast Shield, with reduced accuracy of course. Model & Map Updates Our modelers have been absolute machines over the past few months. We have a whole slew of player models and skins coming in a patch later today, but we want to highlight a few here to show case some of their hard work. However, they haven't stopped there and we have a group of new models to showcase as well. Commander Gree & Nemec Ahsoka Series Nighttrooper Han Solo Upgrade Shadows of the Empire Trooper Droid pistol RG-4D, Imperial Officer RK-3, Scout Blaster EC-17 DE-10 E-11 Upgrade Highpoly DL-21 Highpoly Our newest team mapper Bob Billy has been slaving away on two new maps as well. Our first full open mode Taris map: Sith Base, and a new Manaan map: Hrakert Station. In the future he will be detailing more about these two maps but for now here is a quick teaser! Patch Day With today being such a special day, we wanted to not only give players a look into what we are working on, but also some new content to play with. Later today we will be launching the latest v1.10.1 patch for everyone. This is a small patch that focuses mainly on cosmetic upgrades and a few bugfixes. Modelers have been working overtime! General Future Plans This year, with most of the backend reworks done, we hope to deliver patches at a faster rate than last year. Many of the changes taking place for the next major patch should help us do just that, while at the same time adding a lot of content for everyone. We also hope to deliver the first new class in the mod in over 15 years. However, you're going to have to wait a bit longer for the reveal on that one.
-
We did it through MBs game code, which uses the original SDK release rather than the source release. So unknown if anyone else did anything similar. It isn't in our OpenJK fork. Well you can look at the .menu files here on our text repo: https://github.com/MBII/TextAssets it is set up pretty modularly in comparison to the old MB UI, and probably in comparison to the base UI as well (been too long since I've looked). Yeah, I'm just talking about the initial launch where JA starts at 800x600 resolution. If you use a higher resolution font so that it doesn't pixelate out for higher res monitors, the text becomes unreadable on that initial launch which also makes changing the resolution to 1080p+ a bit of an eyesore. MB makes an attempt at bypassing that a bit through our launcher. To be clear, I'm not saying the original UI doesn't need a facelift, overhaul, and updates to its flow. I just think this goes too far, and that a lot of the UX "best practices" have resulted in everything looking and feeling the same. You can have a good UI without following the rule book to a T and still having a unique look. I have found many modern UI/UX people think making the screen look clearer/cleaner is actually better for UX, when in fact it adds way more clicks and time to navigate menus. Sometimes just put all the character customization on the same page, but make it look clean, rather than putting each separate option behind its own fancy animated menu kind of thing if that makes sense.
-
Yeah this is a limitation of the game, it is possible to work around but requires changes to the code. We were able to make the change for Movie Battles and it made UI creation way easier. However, if you're just wanting to limit the mod to UI-only that does limit you quite a bit. I forget what exactly what the process was for fixing it as it was 8 years ago, but it is possible to fix. Also just a personal preference thing so don't take it too harshly, but this just feels like every other modern game, like there is no more soul. If that is what you like then fine, but just feels sterile. The way it is currently setup won't work very well on first launch, that text will get all blurred out and impossible to read. Will only work if people can change to an HD resolution before launching kinda thing.
-
Things you need: GTK Radiant 1.4 or 1.5 Adobe Photoshop Nvidia Normal map Filter Plugin for PS Any program you can use to edit/make textures (such as Photoshop or Gimp) And of course the game itself. First, you need to make a texture. Heres the one I made, it does '''not''' have to be exactly like this to work. Once you have the texture, and the Nvidia Normal map plugin installed, load up Photoshop (If it isn't already) And load your texture. When your texture is loaded, go to Filter>Nvidia Tools> Normal map filter. This window should pop up. There you have to play with some of the settings till you get a result you like. Note: With JKA you do not want a highly detailed normal map. Use the scale window to change how much depth it will have. 10-20 should be alright for now. When you are done you should have something similar to this. Now before we go and try to compile this, we need a shader. Its very simple and easy to use, here ya go: [i] textures/amace_leviathan/wall3 { q3map_normalimage textures/amace_leviathan/wall3_normalmap qer_editorimage textures/amace_leviathan/wall3 q3map_lightmapsamplesize 1x1 { map $lightmap rgbGen identity } { map textures/amace_leviathan/wall3 blendFunc GL_DST_COLOR GL_ZERO } }[/i] The q3map_normalimage is of course your actual Normal map image file location. the Q3map_lightmapsamplesize is what quality it will be made during the compile, lower number = higher quality but more space on the BSP. (Of course edit it for your own texture paths and other needs) Now once you have the shader, the images, and the shader applied somewhere in your map close to a good lighting source you should get a good result, although it is very picky at times. (Once you compile) How to apply Func_Groups in-editor to make your map less GFX intensive. Here is how you should put this method into your maps. Select whichever brushes or patches you wish to have the normal map on. Right click on the grid and go to func> Func_Group in the menu. Once that is done and you still have the brushes or patches selected hit N on your keyboard. Add these keys and values into the properties of the func_group. Key: _lightmapscale Value: .0125 The value number you may choose for yourself. The lower the number, the higher the quality. The High the number the lower the quality. (Default is 1) This allows it to single the high lightmapscale to the one area rather than the whole map, making your map more optimized and better performing as well as taking less time to compile. Now compile your level and go check it out! Here is my result after getting it in-game. For those that are wondering in the comments, there are many ways to changing how the normal maps work. One of them is just using -patchshadows compile line in the Light stage of the compile. (That one you see above, with everything else the same) Note: This only works when using your normal maps on Patches. Among that being one method to changing how your normal maps look, you can also use this line which you see in the shader above: q3map_lightmapsamplesize 1x1 Increasing the numbers lessens the quality and amount of Light Data needed in the normal map. -MaceMadunusus ===Mac notes=== Note that there is no mac-compatible Nvidia Normalmap Filter Plugin for PS. Normal Map Generator achieves pretty much the same thing.
-
There is probably more at play here than just simple compile lines, like sun shader settings, detail vs structural not simple enough, unrestrained lightgrid, an underpowered computer, etc. For a map like this, I don't personally see the point in doing a bounce compile.
-
The -fast compile parameter is the cause of that. If you read what fast actually does below, you'll kind of understand why it does that. You can do what the wiki says above to compensate, but you can also do things like a key of _mingridlight in the worldspawn, with a light value for the value and it will bump up the light grids ambient value only rather than the entire map. However, I would just recommend removing the fast parameter from the compile and doing things the normal way. I have personally found bounce 2 to not be worth the compile time. The detail is negligible in-game and most people wont notice unless you have a specific case that takes advantage of it. Which these maps definitely do not do. I usually do bounce 1 instead. Using super is also part of your issue, again to quote the wiki: This is the light parameters I use for a majority of levels: -light -patchshadows -v -samples 4 -thresh 0.1 -bounce 1 -bouncegrid Depending on the level, I'll add things like -filter, -samplesize, -bouncescale.
-

-
-
-
-
-
-
-
-

.png.9d54d04b5148f0da9421f2b814675e05.png)