

Psyk0Sith
-
Posts
790 -
Joined
-
Last visited
Content Type
News Articles
Tutorials
Forums
Downloads
Everything posted by Psyk0Sith
-
Better start learning and practicing then
-

Request for a skin of The Clone Wars
Psyk0Sith replied to Metatronicks's topic in Mod Requests & Suggestions
There's no estimate on time of release, it will take as long as needed. -
If you can afford to print a 1:1 replica and do a cast or something...the cheap alternative would be to photoshop it on a selfie
-
Request for a skin of The Clone Wars
Psyk0Sith replied to Metatronicks's topic in Mod Requests & Suggestions
Sure, this is part of what i have so far: http://jkhub.org/topic/6362-jedi-hunter-droid-sorta/ Long ways to go. -
No, it's actually quite easy to do
-
You'd have to change some things to make it backwards compatible...like renaming bones and changing the weights/bones on the left hand tag. Possibly right hand bone needs renaming too.
-
Mesh normals broken along UV seam in-game...
Psyk0Sith replied to Archangel35757's topic in Modding Assistance
That's right, only 1 per vertex BUT when uv mapped you create a NEW vert. So there's 2. Same goes for smoothing groups or custom normals. It already exists in textools for that exact purpose! \m/ -
Mesh normals broken along UV seam in-game...
Psyk0Sith replied to Archangel35757's topic in Modding Assistance
Read The part "Welcome to splitville" http://www.ericchadwick.com/examples/provost/byf2.html And then... http://www.polycount.com/forum/showpost.php?p=767368&postcount=64 -
If you guys think this is good enough, a Kylo Ren model might be possible. Still a few things to add but you get the idea.
- 38 replies
-
- 10
-

-
How's substance painter gonna guess fold behavior just from picking a material? Sculpting is the major part of the process, if you do a hack job you end up with a hack texture.
-
We just hate the characters that's all.
-
REBOOT SKIN MODELING CONTEST OPE
Psyk0Sith replied to KillerRebel359's topic in Mod Requests & Suggestions
What's the rush? plenty of time! -
I'm sticking to the concept sheet and add my own take when needed. If you don't like it, make your own.
-
No idea, i didnt keep track. Finding what works or not is what takes the longest since i have to "concept" as i go along.
-
I'll spare you the wait...there's no big secret. It's a high poly source not meant to be animated so i throw a retarded amount of geometry at it, plain and simple. Everything starts with extremely low poly blockouts, throw subd on it, add details, repeat if necessary. When topology doesnt line up correctly for details i just drop floaters.
-
Nope all done in Max.
-
Model released, pending approval: https://jkhub.org/files/file/2763-eg-5-jedi-hunter-droid/ I've only got basic references to go by so don't expect a carbon copy, more of an improvised version. This thing will take a while so don't hold your breath. Latest Update
-
Request for a skin of The Clone Wars
Psyk0Sith replied to Metatronicks's topic in Mod Requests & Suggestions
Je crois pas être en mesure de terminer avant la fin d'octobre mais j'essayerai de débuter quelque chose. -
He meant pic i believe As for the beard, layer more of them alphas / rework alpha channels by adding some clumps. Have one set of alpha be thicker and fuller while having thinner ones sprinkled here and there, you should be able to style the hair in real time by shuffling those planes around. The hair could have a similar pass (textured clumps), looks too hand painted with a 1 pixel brush if you know what i mean. I think you did an amazing job so far, more tweaking and it'll be even better.
-
[WIP] Raven's Claw 1st Person Cockpit...
Psyk0Sith replied to Archangel35757's topic in WIPs, Teasers & Releases
Imo it needs more SW inspiration for the design, the controls need to fit the classic retro look. Like this: http://www.therpf.com/showthread.php?t=102451&page=65 I know it's not exactly a priority but just my 2 cents. Carry on! -
Warp those planes every which way possible, don't reuse the same flat plane over and over. That way you maximize texture space and break symmetry.
-
That's news to me! If it looks like crap just switch it off, problem solved!
-
Go ahead and work on whatever you want people, i'm way too busy to focus on anything right now.
-
Version 1.0
179 downloads
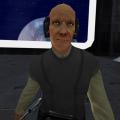
Never far from Baron Administrator Lando Calrissian's side was Lobot, Calrissian's aide and Cloud City's computer liaison officer. Lobot is a human male with a shiny, brain-enhancing device wrapped around the back of his skull that allowed him to contact directly with the city's central computer. -
@@minilogoguy18 was working on it for DFII project but no updates.