

Psyk0Sith
-
Posts
790 -
Joined
-
Last visited
Content Type
News Articles
Tutorials
Forums
Downloads
Posts posted by Psyk0Sith
-
-
That's why carcass is still the best troubleshooting tool, it will freak out on the most basic errors and tell you what is wrong. A missing mesh in a LOD level would halt the compiling process right away. Not sure blender workflow can use it tho.
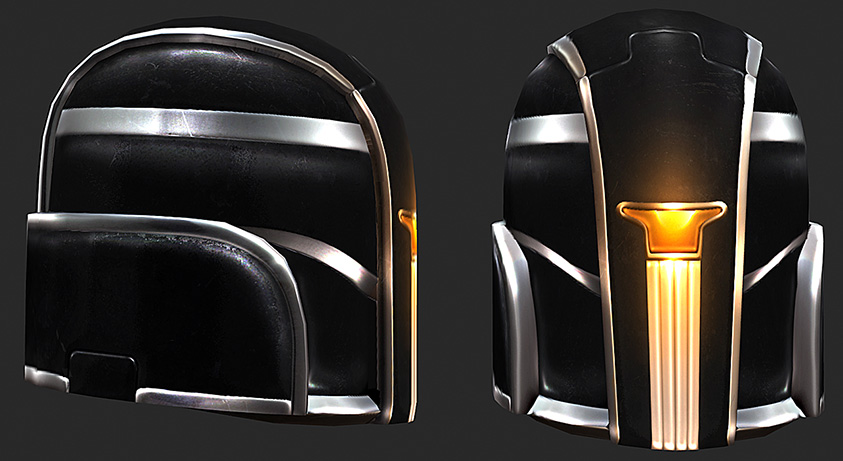
As much as i like this new hybrid, the textures are killing it for me, need more polishing but i'm very picky
 DarthDementous likes this
 -
Finally started on textures.
Srethem, The Punisher, Delmi and 8 others like this -
@, your hierarchy is incorrect, you linked everything to the head. You can't do that, you have to follow the universal hierarchy. There might be a script or a reference for this step in blender, all that stuff is done via script in max so i never bothered to write it down. You'll have to open a working model and look under "stupidtriangle_off" to see how the linking works. Or checkout minilogo's XSI tutorials, there's most likely a diagram for it.
Another major problem is you have no tags in the hierarchy either, that's also really bad. All those little triangles that you imported along with the original models are mandatory (well one set of tags needs to be there, no duplicates).
If this model attempted to be compiled the old fashioned way, there's no chance it would have been turned into a .glm Also the .gla in your .pk3 is useless you can take it out.
EDIT:Checkout the hierarchy section in Tim's tutorial.
Archangel35757 likes this -
If you haven't already, you should fudge around with the pivot point itself and not touch the tag geometry.
Archangel35757 likes this -
can I use a dublicate model on the same position with some kind of sorting to be "on top of the other" without z-fighting?
Model wise it's quite easy to do, duplicate model and add something like a push modifier set to 0.01, it just offsets the model enough to get rid of the z-fighting. If you're asking shader wise...i'm not sure that's even possible.
-
I'm guessing you're working with blender so i can only offer general tips:
-If the armor covers the whole body you have to break it into separate pieces and link to corresponding body part (the UV mapping should be final before you do this).
-Name each armor part with a straight forward name (prefix the same as its parent mesh) i.e.: torso_armor, l_arm_armor, l_leg_armor etc.
-Add skin weights to the new meshes.
-Export / compile and keep fingers crossed.
-If previous step succeeded, check / edit the .skin files to have the new armor chunks added and pointing to the correct path and textures.
-
This might be what you're looking for:
https://jkhub.org/tutorials/article/210-splitting-up-a-model-with-noesis-fast/
-
Because it took me exactly 5 seconds to make it and i wasn't aware the game had flat colors
If there's a way to fix the floor issue i'm all ears (i could move it up but then that would clip through the players feet even more...)Default green color
npc spawn greenscreen (no floor)
npc spawn greenscreen2 (with floor)
Additional colors:
npc spawn greenscreen_black
npc spawn greenscreen_blue
npc spawn greenscreen_gray
npc spawn greenscreen_orange
npc spawn greenscreen_red
Additional colors with the floor, add "2" at the end like so:
npc spawn greenscreen_black2
npc spawn greenscreen_blue2
npc spawn greenscreen_gray2
npc spawn greenscreen_orange2
npc spawn greenscreen_red2 -
@ Hit this DOWNLOAD link for the final version. Type npc spawn greenscreen for the version without a floor and greenscreen2 for the floor model. There's a glitch with the floor version, it can't be used in far away shots (the game's floor seems to z-fight with it) but as long as the player stands relatively close to the back wall it will work. Big thanks to @@AshuraDX for providing a better alternative.
AshuraDX likes this -
It also makes me wonder what the possibilities would be for a green screen parallel to the floor mapped to the player model's feet, but I'm getting greedy and getting the normal up and down version is quite an advancement!
@Psyk0Sith by the shader to make it a true color, I assume you mean so it doesn't react to the map lighting as much?
If you want a floor added it's no problem (can be turned off via .skin files anyway). Hell you could even use an inverted box or cylinder so you get a better coverage no matter where the camera shoots. Yes, the shader means the lights won't affect the color, it will always be the same, so no fussing around when you "alpha" it out of the picture.
@@AshuraDX good idea, that would get rid of the crooked screen completely. One major problem tho is that i'm still on max 2010 and can't load the original scene, i'll see if i can re-import the .glm instead.
-
I know it's an odd request, but Jedi Academy has remained the definitive engine for my film group's machinima efforts for over a decade because there is a constant flow of amazing content from all these talented individuals, and it can be implemented into game so easily. The one thing that has eluded us, though, is being able to specifically position green screen elements into existing maps.
Would it be possible to make an invisible player model with a head to toe, three body lengths wide rectangle attached to their torso (so it wouldn't move even when they do their idle head back and forth motion)?
As a noclipped player it could be positioned into any spot, and as an NPC you could drop it conveniently into several spots...
Is it too strange of a request? Or could someone besides me have use for it as well?
Try this un-tested version the screen is weighted to the pelvis but if that doesn't work well i can change it. It will need a shader to make it a pure color. I will do fixes later if needed.
-
@@AshuraDX
Almost done, except windows 7 and the xsi plugin don't cooperate for now. -
Sure. It's strange but has a purpose and quite easy to do.
GMRobinHood likes this -
Looks like you forgot that most of the modeled parts come from Darth Shiftee's work not Lizfizz...how about you give him credit instead?
The Punisher likes this -
-
A bunch of KOTOR characters already have been converted, you just have to ask the right people i guess. Porting is for people that lack skills and don't want to spend years learning, so it is less difficult and less time consuming. It's not illegal for us to teach the process of rigging, the extraction of copyrighted content is the illegal part. Also you should create models from scratch if you enjoy the process and prefer to customize everything to your liking.
If you want to use XSI mod tool, here's a guide
https://jkhub.org/tutorials/article/90-softimagexsi-joja-skeleton-bonestags-and-compiling-guide/
For 3D Studio Max:
There's my tutorials:
http://psyko3d.50webs.com/tuts.html
+
Paul Greveson's walkthrough of the skin modifier
and this one
https://jkhub.org/tutorials/article/166-character-modeling-for-jk-in-3ds-max-walkthrough/
Blender is another software that can do it:
https://jkhub.org/tutorials/article/195-blender-jka-frankenstein-modelling/
-
For the first problem you might be able to do it automatically using noesis tool:
https://jkhub.org/tutorials/article/210-splitting-up-a-model-with-noesis-fast/
For the FX glitch you might be able to do it in blender.
-
-
Limitation would be the correct term. The solution is to break the model into different chunks / reduce the complexity of the model...it would be easy to do yourself.
-
Could you post reference images?, that would help.
-
Yeah, I got 2 LOD's, trying to crunch it down any further just makes everything look all wacky, besides having 2 LOD's plus the main mesh should be good enough.
It doesnt matter, it should look all wacky because the lower LODs should never be seen up-close anyway, just look at Kyle's details at the lowest and tell me he doesnt look wacky?
-
Have you tried youtube? There's probably cinematics that would help solve the problem.
-
-
You did fine with the weights, at least the early version you sent me was working great.

 If there's a way to fix the floor issue i'm all ears (i could move it up but then that would clip through the players feet even more...)

HUMANOID SKEL NPC: Heavy Male Civilian
in Dark Forces II Mod
Posted
Thanks for the support guys, i would've loved to do more work for this mod.