IrocJeff Posted October 21, 2013 Author Share Posted October 21, 2013 I like it so far. Also I enjoy tunnels. Tunnels are great.I do have tunnels!! In fact, at one end of the utility room I made a hatch door in the floor, made a ladder, and created maintenance tunnels that may take you to some rooms that have locked doors around the station.. Link to comment
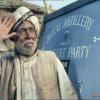
Futuza Posted October 22, 2013 Share Posted October 22, 2013 This picture just screamed tunnel: Link to comment
IrocJeff Posted October 22, 2013 Author Share Posted October 22, 2013 This picture just screamed tunnel: I just know them as hallways, hehe. Link to comment
Asgarath83 Posted October 22, 2013 Share Posted October 22, 2013 Nice project. I like very much Link to comment
Futuza Posted October 22, 2013 Share Posted October 22, 2013 I just know them as hallways, hehe. What I meant is an access tunnel underneath the floor (like where those grates are). Link to comment
IrocJeff Posted October 23, 2013 Author Share Posted October 23, 2013 What I meant is an access tunnel underneath the floor (like where those grates are).You will have to use your imagination on any tunnels under those grates. I have about 24 grid units between this level and the basement level. I really couldn't do much with it. Link to comment
Futuza Posted October 23, 2013 Share Posted October 23, 2013 ..Sure you could moving the entire thing up a few grid units isn't that bad. Link to comment
Jango40 Posted October 23, 2013 Share Posted October 23, 2013 Will you play as Kyle or someone else? Link to comment
IrocJeff Posted October 23, 2013 Author Share Posted October 23, 2013 Will you play as Kyle or someone else? That's a good question. My original idea is someone Kyle-like. I may have to sub-contract that part of this out so if anyone out there has an ideal replacement for Kyle I'm all for it. It really won't matter much, to be honest, unless you'll use 3rd person view. There are no lightsabers in my map so seeing the player doesn't really matter much. Link to comment
IrocJeff Posted October 23, 2013 Author Share Posted October 23, 2013 ..Sure you could moving the entire thing up a few grid units isn't that bad. Oh believe me... it would be a mess. I was going cross eyed trying to find brushes everything is so densely packed. Blame me for that one. I had to fit everything I wanted into a shell of a station since I already have the terrain cut out for it... hehehe. Basically, I just have to drop all this in. The downside is that its built like a real building and man, that is a pain to see in Radiant... Link to comment
IrocJeff Posted October 23, 2013 Author Share Posted October 23, 2013 I already fixed the 2 doors on the right hand bottom cabinet. I just aligned them to the wrong brush but that are where they should be now.Just in case anyone notices... Yeah, I made a freakin' break room. This was more of a test room to see if I can find and include my own textures. I have the 3 vending machines, the fridge, and the microwave as newly imported textures. The coffee pot and bottles were from the Nar Shadaa bar modelset. I even made a sink and faucet.. hehe. i didn't have any clue what to do in this one room so I just threw this in there for comic relief. I even had one of those workplace posters about lifting but I don't know how to make decals so it looked dumb on the wall 1 unit thick. I do need to learn decals, though. At any rate, this will be the last interior image of Ice Station Wampa. My architecture is done. I now have to add the station to the snowy terrain, add in a new skybox, and do the outdoor part. Then, actually put in the bad guys and stuff like that. That will bring me towards the completion of Level 1 of Ice Station Wampa. Omicron, Onysfx, Futuza and 1 other like this Link to comment
Circa Posted October 23, 2013 Share Posted October 23, 2013 Ha! Very nice. Feel free to use a better Sprite machine texture... :wacko: Link to comment
Futuza Posted October 24, 2013 Share Posted October 24, 2013 Actually considering it is Starwars, DON'T use a Sprite machine, use a JAWA JUICE machine! I don't remember if you said you were releasing this for jka too? Link to comment
IrocJeff Posted October 24, 2013 Author Share Posted October 24, 2013 Ha! Very nice. Feel free to use a better Sprite machine texture... :wacko: Yeah, that is one of the little detail changes I have to do. There are some good frontal images of all red coke ones and some other generics I found on Google so I'll change that out. Actually considering it is Starwars, DON'T use a Sprite machine, use a JAWA JUICE machine! I don't remember if you said you were releasing this for jka too? I was going to try and texture an Imperial Cola machine or something. I was thinking of throwing this in as a secret area or something but even intergalactic, Imperial-backed, meth pushers need to take a break now and then. So, I left it in the game. And no, this is Jedi Outcast only. However, once I am done I'd be more than happy to let anyone make a JKA version if they want. I don't own that game so I really don't know what would be involved. Link to comment
Circa Posted October 24, 2013 Share Posted October 24, 2013 You should get it. It's pretty dang cheap now. It wouldn't involve much of anything different. Maybe some minor things. Link to comment
IrocJeff Posted October 27, 2013 Author Share Posted October 27, 2013 Here is a shot of the outdoor part. This is a really small part of the level itself and is there just for a setting. My brush count was running rather high so I had to use a backup terrain I made and made my entire station underground. I had designed the base itself to be above ground. So, I used a smaller, less detailed terrain and made a trench system in it, some large doors where the supply ships enter and leave, and some other small buildings including the access area to the base itself. I was going to make an electric fence around the base but decided to go the Call of Duty 1&2 route and borrow the landmine sign. I went on google and found some landmine signs and then found the star wars basic font and made my own signs. They say "Danger! Mines", but, in the star wars language font. I'm really liking making or hacking up textures in my case.. hehe.. As of now, my terrain is connected to the underground base so the entire level is actually done. I'm still working on the texturing of the outdoor part and the skybox. Then, I have to learn about scripting and how to put in the bad guys and stuff. Here is an alternate image of the snowy part done in a dirt/sand texture. The only reason I did this is because the terrain isn't 100% smooth and may end up better with a mineral texture instead of snow. Since my story involves meth, i can still call it Ice Station Jawa if I go this route. hehehe. Ice being slang for meth. I wanted the double meaning in the title with a snowy world and meth but I'm happy either way. Circa and KhorneSyrup like this Link to comment
IrocJeff Posted November 8, 2013 Author Share Posted November 8, 2013 Progress Update All architecture is now done. Barring my issues this past 2 weeks I think my level turned out for the best. I also just finished up around 30 nit-picky things as well today. I am now moving into NPC addition. So, if anyone can point me to any good tutorials outside of the Rich Diesel ones I'd appreciate it. Asgarath83 likes this Link to comment
Asgarath83 Posted November 9, 2013 Share Posted November 9, 2013 Adding NPC and entity ending the map. Well, when i am doing a map sometime i use that's procedure:1: create the skybox and the weather and ground.2: create and assembling the map.3: make the level.4: putting door, elevator, and breakable, misc model, funcs entity and make it functionally. .5: adding NPC. the NPC part for me has two phase: in the first, i simply put all NPC i wanna for level, and i set the trigger that spawn with all npc conencted at the trigger with the same targetname. i use name like "eagle1", "eagle2" "squa1" "squad2" .after i make the scriptrunner and are the script to spawn the NPCS with use "targetname" and NOT more the trigger itself. in spawnscript i can set specially parameter for NPCs, so i can set for every NPC an amount of health, armor, force power, and ability different. that's allow me to make the NPC with a large variety of skills, so fight is not much reperititve. because every enemy os litttle different. there is the weaker, the stronger, the altfire enemy, the armored shield enemy ... also with fleescript is possible to make ulterior customization of the enemy : when the health of enemy reach 50% of value yu can change parameters, recharge his armor, change his weapons, make he use altfire and others. the NPCS waves. so i can test the level and fight with NPC that appear in the areas when i go over and over and over...6: put bonus \ item \ ammos. secret area \ check point.7: script the NPC behavior, parameters, events, music, etc etc.8: cinematics and detailed scripting of particular event of area.9: light.yes, i put the lights for last because i test the level ever in BSP META build and i using the final BUILD only at the end, because the buuild time of the light map is more long of make simply a meta.10 debugging. Link to comment
Szico VII Posted November 10, 2013 Share Posted November 10, 2013 For the utilities room, those lights on the floor are emitting way too much light for their size. Either decrease the light or increase the source to make it look more realistic. Going in nice places though, like the style so far. Link to comment
IrocJeff Posted November 11, 2013 Author Share Posted November 11, 2013 For the utilities room, those lights on the floor are emitting way too much light for their size. Either decrease the light or increase the source to make it look more realistic. Going in nice places though, like the style so far. I had a smaller light entity above the main one just to make it a bit brighter. I took that second light out. Adding NPC and entity ending the map. Well, when i am doing a map sometime i use that's procedure:1: create the skybox and the weather and ground.2: create and assembling the map.3: make the level.4: putting door, elevator, and breakable, misc model, funcs entity and make it functionally. .5: adding NPC. the NPC part for me has two phase: in the first, i simply put all NPC i wanna for level, and i set the trigger that spawn with all npc conencted at the trigger with the same targetname. i use name like "eagle1", "eagle2" "squa1" "squad2" .after i make the scriptrunner and are the script to spawn the NPCS with use "targetname" and NOT more the trigger itself. in spawnscript i can set specially parameter for NPCs, so i can set for every NPC an amount of health, armor, force power, and ability different. that's allow me to make the NPC with a large variety of skills, so fight is not much reperititve. because every enemy os litttle different. there is the weaker, the stronger, the altfire enemy, the armored shield enemy ... also with fleescript is possible to make ulterior customization of the enemy : when the health of enemy reach 50% of value yu can change parameters, recharge his armor, change his weapons, make he use altfire and others. the NPCS waves. so i can test the level and fight with NPC that appear in the areas when i go over and over and over...6: put bonus \ item \ ammos. secret area \ check point.7: script the NPC behavior, parameters, events, music, etc etc.8: cinematics and detailed scripting of particular event of area.9: light.yes, i put the lights for last because i test the level ever in BSP META build and i using the final BUILD only at the end, because the buuild time of the light map is more long of make simply a meta.10 debugging. That's a really interesting process. I'm on your steps 7 now. I'm having quite a bit of problems with getting my script to work in game so I'm heading over to the scripting forum and hopefully I'll figure it out. Link to comment
Asgarath83 Posted November 11, 2013 Share Posted November 11, 2013 I had a smaller light entity above the main one just to make it a bit brighter. I took that second light out. That's a really interesting process. I'm on your steps 7 now. I'm having quite a bit of problems with getting my script to work in game so I'm heading over to the scripting forum and hopefully I'll figure it out.Good Luck! Link to comment
IrocJeff Posted November 20, 2013 Author Share Posted November 20, 2013 As of today I have nearly all my NPC's placed in the map. They are all scripted which was pretty easy once I figured it all out. Well, its easy for NPC's. Was able to add some alt-fire guys, better aim, and so on. When the player only has 100 health and no shields it makes it interesting. I also gave up on limited ammo on start up and am just going for no shields instead. I also just made my opening text crawl!! WOO HOO! I didn't want the map to start cold so at least I have this. It sets the story and explains why the player is there so I'm pretty happy. Here is how I did it. 1) Make a .tga file with a size of 512 x 2048 and give it an alpha channel. I used The Gimp 2 for this. 2) Add WHITE text over the image. Again, I used The Gimp 2's Text tool. The font is Franklin Gothic Bold for the titles and Franklin Gothic demi for text. I used whatever The Gimp had for Franklin Gothic and it worked out well. Font size I have no clue on. Just make the text bigger for the title and a bit smaller for the body and it should be fine. Then, make sure you adjust the separations between paragraphs as equal as you can. 3) Save this file as tc_engl.tga. DO NOT replace the original file in game. Make a folder named MENU. Inside this, create a folder called VIDEO. Inside this VIDEO folder, put the tc_engl.tga file in that folder. Menu/Video/tc_engl.tgaPlace the MENU folder inside a .PK3 file and name it whatever you want. I named mine crawl.pk3. Finally, place this in your gamedata/base directory. 4) Make a room in Radiant. A small one will do. Texture it but do not light it. Add a misc_camera somewhere in the room and add a Key: targetnameValue: ********** <----- anything you want to name it. I named it Cam_start1 5) Now, add in an Info_null entity in the same room. Select the misc_camera and then select the Info_null and connect them with Ctrl-K. Now the camera is pointed at the null and we are done with this room. 6) The script now needs to be made. Open BehavED and create a new script. Below is an image of the one i followed. In the first line, the file name jk0101_sw is the opening video from Jedi Outcast with the Star Wars logo and music and stuff. You'll use this file. For JA, though, you may have to look at see what that video is named. In the MOVE and PAN lines, you name the tag part the same as you named your misc_camera targetname. I have no idea what the PAN line does or if its needed but that's what I read so that's what I used. It works. Save and compile your script with whatever name you want. I saved mine as Crawl 7) In your regular, lit, playable map or room, add in a target_scriptrunner.Give it aKey: usescriptValue: Script directory/ Script name. Mine was Icestationwampa/crawl Next, add in a trigger_once brush and have it touching your info_player_start entity. I put my Info_player_start inside the trigger brush.Finally, select the trigger brush and the scriptrunner and connect them in that order. 8) Compile your map and run it. You should get the Star Wars logo and your new scrolling text. Asgarath83, katanamaru and Circa like this Link to comment
IrocJeff Posted December 8, 2013 Author Share Posted December 8, 2013 Well, I have had plenty of ups and downs since the last update. My level hit about 11,000 some brushes and I ran into a shader issue where it just stopped drawing them. I think I hit a limit or something. Kyle started to look like the liquid metal terminator from T2.. hehe. So, once you go down the big platform to the bowels of the facility I had to stop there. The map was a bit short to play so I figured I make another area and release both at the same time. This shot shows the second room starting part2. It's basically a hangar that now has crates all over it. The view is from the catwalk above where you access the crane to get across the cavern that isn't shown to the other side. You go into the gondola and it will take you to another smaller, similar hangar across the gorge. Here is the hangar from the bottom. You can see the pallets, cargo containers, and the overhead crane much better. From here, you'll reach the second hangar but all the doors are locked. There is, however, a ladder down to a maintenance access area where you go through some ducting and you end up in a pretty nasty place. You don't exactly start here, but, this is a really dark, gloomy area and the screenshots turn out much darker than they appear. This is the waste treatment area of the facility. I've started using textures from Texturelib.com since they are free. I can only download 1 per day, but, again, they are free! The 3 pipes are a new texture. The wall textures area actually stock game textures. This shot shows an open hatch to a dangerous area. You can see on the hatch some signs that are slightly modified. I decided to find hazard/danger/electrical/toxic ect... signs on google and using the Gimp change the text to the Star Wars Font. The sign basically says " Respirators must be worn beyond this point " and "Toxic Chemicals". I have quite a bit of these throughout the level and it just adds a nice touch I think. This part is nearing completion for the basic structural/light/main architecture stuff. Should be another week. I have to find a Geiger counter sound so if anyone has any ideas or has one let me know. I'm going to add in radiation detection and damage with triggers. Then, go through and fine tune it, add more detail, and npc's. Hopefully I'll be all done at the end of the month. Boothand, Agent Jones, Circa and 2 others like this Link to comment
Recommended Posts
Create an account or sign in to comment
You need to be a member in order to leave a comment
Create an account
Sign up for a new account in our community. It's easy!
Register a new accountSign in
Already have an account? Sign in here.
Sign In Now