

SomaZ
-
Posts
439 -
Joined
-
Last visited
Content Type
News Articles
Tutorials
Forums
Downloads
Posts posted by SomaZ
-
-
You can find the list here in the wiki
https://jkhub.org/wiki/Map_Models_-_Image_Reference_Library -
Hey SardineGuy.
You can use my blender addon to import and export md3 files. Its handling is a little different as the old versions so I just link the little tutorial I wrote about it here. It also comes with instructions on how to setup the addon. Hope this helps.
https://jkhub.org/tutorials/modeling/md3-importexport-using-blender-33-r185/ -
On 9/6/2024 at 6:50 PM, undeadslayer said:
@SomaZ I do have one more question, I can't seem to get the bps to export to map format. I keep getting this error:

How do I fix this so I can export the map?
First of all, the exporter you tried using is part of wonkos addon, not mine. This exporter is supposed to export every surface as a patch mesh. Patch meshes are somewhat limited and you should avoid using patches for regular geometry except for curved surfaces.
I submitted a patch to fix the exporter, but I assume you actually want to copy a complete map with that approach, which is not recommended and probably also not actually doable.
-
1 hour ago, undeadslayer said:
You definitly don't have the latest version of the addon, because I fixed this already. Get the pre-release I linked above.
-
Update the bsp importer addon to the latest version. Get it here
https://github.com/SomaZ/Blender_BSP_Importer/releases/tag/v0.9.96 -
31 minutes ago, RebornKyle said:
From what I understood from looking at base Jedi Academy maps, weatherzones need to be changed to the misc_weather_zone entity, and made a structural brush. Anything else I'm missing? I wont attempt to add the inside brushes further, but they were also structural, but considered worldspawn brushes
Finally, the weather cache is an interesting one. JAEnhanced generates a separate .weather file into the MyGames/JAEnhanced/maps section. I didn't even know it was possible to generate one of those, I didn't see any info for that on JKHub. But regardless, my working theory is that at first load, Jedi Academy attempts to read from a .weather file (found in base maps folder) to reduce load time. If there are none, someone at JAEnhanced figured out to generate a new .weather file for a map so that this isn't an issue in the future, and no error is thrown. Jedi Academy is able to recognize the original outside brushes in Jedi Outcast and utilize them. But every time you reload the map, the .weather file that was generated, couldn't find the nonexistent weatherzones when made, so it rains globally instead.
I'll try later to just add weatherzones to the outside brushes and see if that works. Maybe someone from JAEnhanced is still active and could explain/could be contacted about the generating .weather?Also multiple things. A decompile of a .bsp file will always have only structural brushes. Also when they were detail in the original .map file. But I don't think its actually an issue in this case. So don't think brushes were originally structural when looking at a decompiled bsp.
Weather files are generated on map load. The original jka game executables do this as well. It's not unique to that mod. And as I said, weather zones are not mandatory to make the inside/outside brushes work correctly. They are intended to speedup generation of the weather cache.
-
8 hours ago, RebornKyle said:
Ok, so after hours of testing, I got the brushes to appear in netradiant when importing BSP into the editor, I did this by taking the map, decompiling it, adding the brushes to where I wanted, deleted EVERYTHING except those brushes, merged that with main. All to avoid a compile. LOL. However, attempting to select the level in-game brought an immediate crash before the loading screen even appeared. So frankly, I'm at a loss, but I've made significant progress.
To give a broad overview, I'm attempting to fix yavin_swamp from Jedi Academy Outcast mod, so it has proper weatherzones like before and generally looks like it did in Outcast. I have managed to accomplish everything, from fixed shaders to scripting, EXCEPT for the weatherzones, as they are brushes. Not only that, but there are already outside brushes all over yavin_swamp (in strange places I might add imo) that don't have weatherzones.
Long story short, everything is functional, except it rains indoors.
There is ONE exception to this however. Upon first compile and loading of the map, and as long as you don't reload it AT ALL, some of the old weatherzones do work! I don't know why, and perhaps someone with more knowledge can explain this. I've attached the two zones that I found that works when this happens, in addition to the console output upon first compile and load.
The other two images are what the game looks like with fixed water, fog, rain, etc.Ok, so theres some things to concider. Weather zones aren't just brushes but also entities. Depending on how you added those, it might not work like that. Second, weather zones are not mandatory to make inside or outside brushes work correctly. Weather zones are just used to speed up the loading of the inside/outside info. IF you have weather zones, inside or outside brushes that are NOT inside of a weather zone are ignored. Jedi Outcast only had outside brushes, Jedi Academy added inside brushes. Only one type of those brushes are allowed per map. So if you mix inside and outside brushes, the game won't load the map. Reloading a map might break the cached weather info, maybe a bug in JA:Enhanced. This needs some investigation.
-
6 hours ago, RebornKyle said:
Haha thank you, figured out as soon as I posted it. Now to just align the brushes properly I guess
I haven't tested it, but for easy use, you could convert the mainbsp to like an .obj and use it as guide via an misc_model entity that you delete again before compile. You can either use my blender addon for that or Noesis, which might be the easier choice.
-
7 minutes ago, RebornKyle said:
Hm, when trying to do this, it complains that its not in IBSP format. I checked both files and they're RBSP with version 1. I also checked a base Jedi Academy map just to confirm, and it also has RBSP v1. What am I doing wrong in this case?
Try:
q3map2.exe -game ja -mergebsp -world <mainBsp.bsp> <bspToinject.bsp> -
Just use -mergebsp with latest q3map2 version of netradiant-custom. Get it here: https://github.com/Garux/netradiant-custom/releases
So, you simply build the brushes you want to add to a bsp within radiant, add lights so the brushes are lit like in the original map, run a compile, don't worry about leaks or anything related to that.
After that you merge both bsps with q3map2.exe -game ja -mergebsp -world <mainBsp.bsp> <bspToinject.bsp>
mainBsp is your original map in this case. Hope that helps.
More info in the commit of Garux adding this feature:
Spoiler* -mergebsp [options] <mainBsp.bsp> <bspToinject.bsp>: Inject latter ……BSP to former. Tree and vis data of the main one are preserved. * -mergebsp -fixnames: Make incoming BSP target/targetname names unique to not collide with existing names * -mergebsp -world: Also merge worldspawn model (brushes as if they were detail, no BSP tree is affected) (only merges entities by default)
mrwonko likes this -
Spoiler
Working on it , its a an idea spirngin in my mind, but need to make some new textures for console lights
Hm, I feel like a grate with things beneath it except for dirt is kind of weird architecture. It looks nice, but feels not very grounded in reality. People will walk over it. People will have dirt on their shoes. It will pile up whatever you do. Theres two things I can imagine that could work to make it feel more gounded.
Keep a lower level, but make it somewhat accessable in the sense of, someone is able to clean it easily. Like having a second entrance for the base. But what for? Is that a base that keeps dangerous animals in cages and theres this passway to transport them into the base without endangering the transport crew? What is that entrance or way used for?
Second idea would be placing the whole construction on posts and let the dirt pile up under the construction. Maybe add more foliage under it so it looks like its less maintained than the surrounding area?Just my two cents about that topic. Love the progress so far. Can't wait to see what you will come up with.

-
We had a talk about this over on discord. It boils down to:
GtkRadiant wasn't configured correctly and shader file name was not added to the shaderfiles.txt file in the shaders folder under base.
NAB622 likes this -
I just had a look with my WIP version of my Bsp editor, which will have some additional features. The problem is that bsp surfaces get one fog assigned. If it isn't it simply won't draw. A global fog would take place. It's also not just the door, but also the rotating fan that doesn't have the correct fog assigned. I'll try finishing some parts of my bsp editor and then we can try fixing the problem with that.
-
4 hours ago, Noodle said:
Was the mapping part done in blender too or did you do it in GTKRadiant and just applied the textures to it?
Yea, I used this addon: https://github.com/c-d-a/io_export_qmap
I used blender to blockout everything. Later, once I've added all the models, I build collision brushes for the models in Radiant though. Building brushes in blender is a huge pain tbh. Wouldn't recommend it. Extruded terrain is something different, I would never do this in radiant agian but always with the addon I linked.
PierceDoughty and DarthValeria like this -
Just now, Futuza said:
Anyway you'd consider including the source stuff for this for other modders that want to try and see an example for how to do things with rend2? I'd like to add rend2 to JKG at some point, but I'm not much of a mapper and not really too sure where I'd have to start with that aspect of it - plus I gotta merge rend2 with JKG's source too. I'm not really ready to do it quite yet as I'm busy with some other things for the mod that take priority, but I imagine there's other projects like ours that would like more instruction for how to use/implement rend2.
Yea, I will release some of the sources when I had some time to tidy them up. One essential part for rend2 is just modern asset creation. I can't really teach that. Though there are lots of resources online for it. I planned on doing some tutorials on some things like: "How to properly bake normal maps for rend2","How and where do I place cubemaps and what do they actually do?" or "What are deluxemaps and why should I bother?"

All the blender lighting/mapping stuff I'm still figuring out myself tbh. Theres some kind of workflow, but I think I could potentially streamline this much more, make it less error prone etc. Main problem about that is that I really dont have much time right now and it will just get less end of october. Trying to teach as much as possible to others and helping where I can.
Futuza likes this -
So, I started baking the remaining textures for the vanilla mp/duel1 map. Once I've finished the remaining ones, I'll update the download.
scp_chaos1, DarthValeria, OCD2 and 1 other like this -
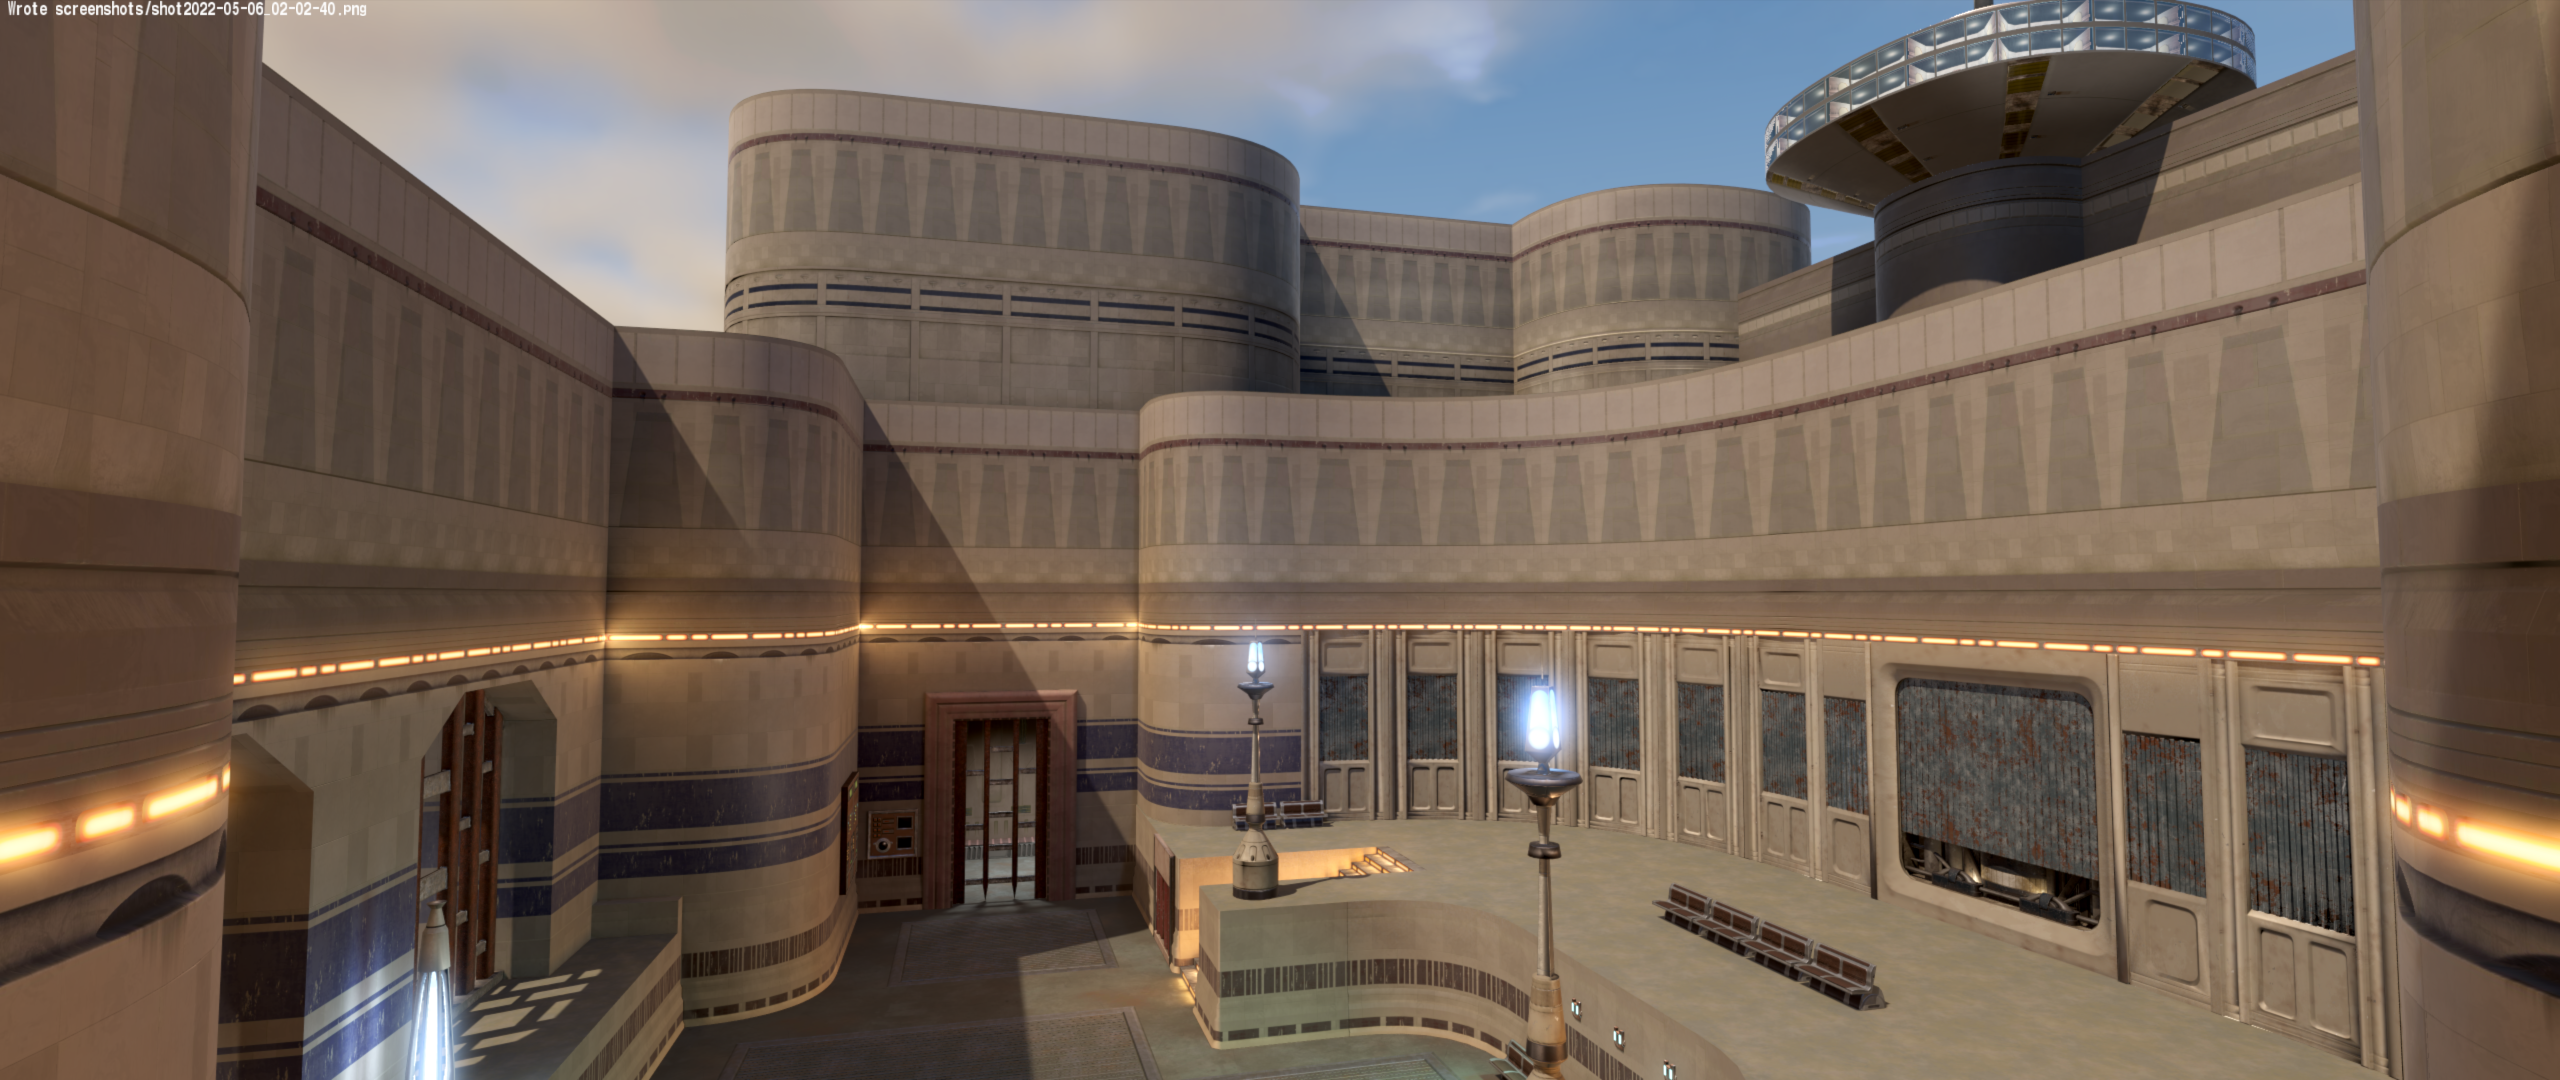
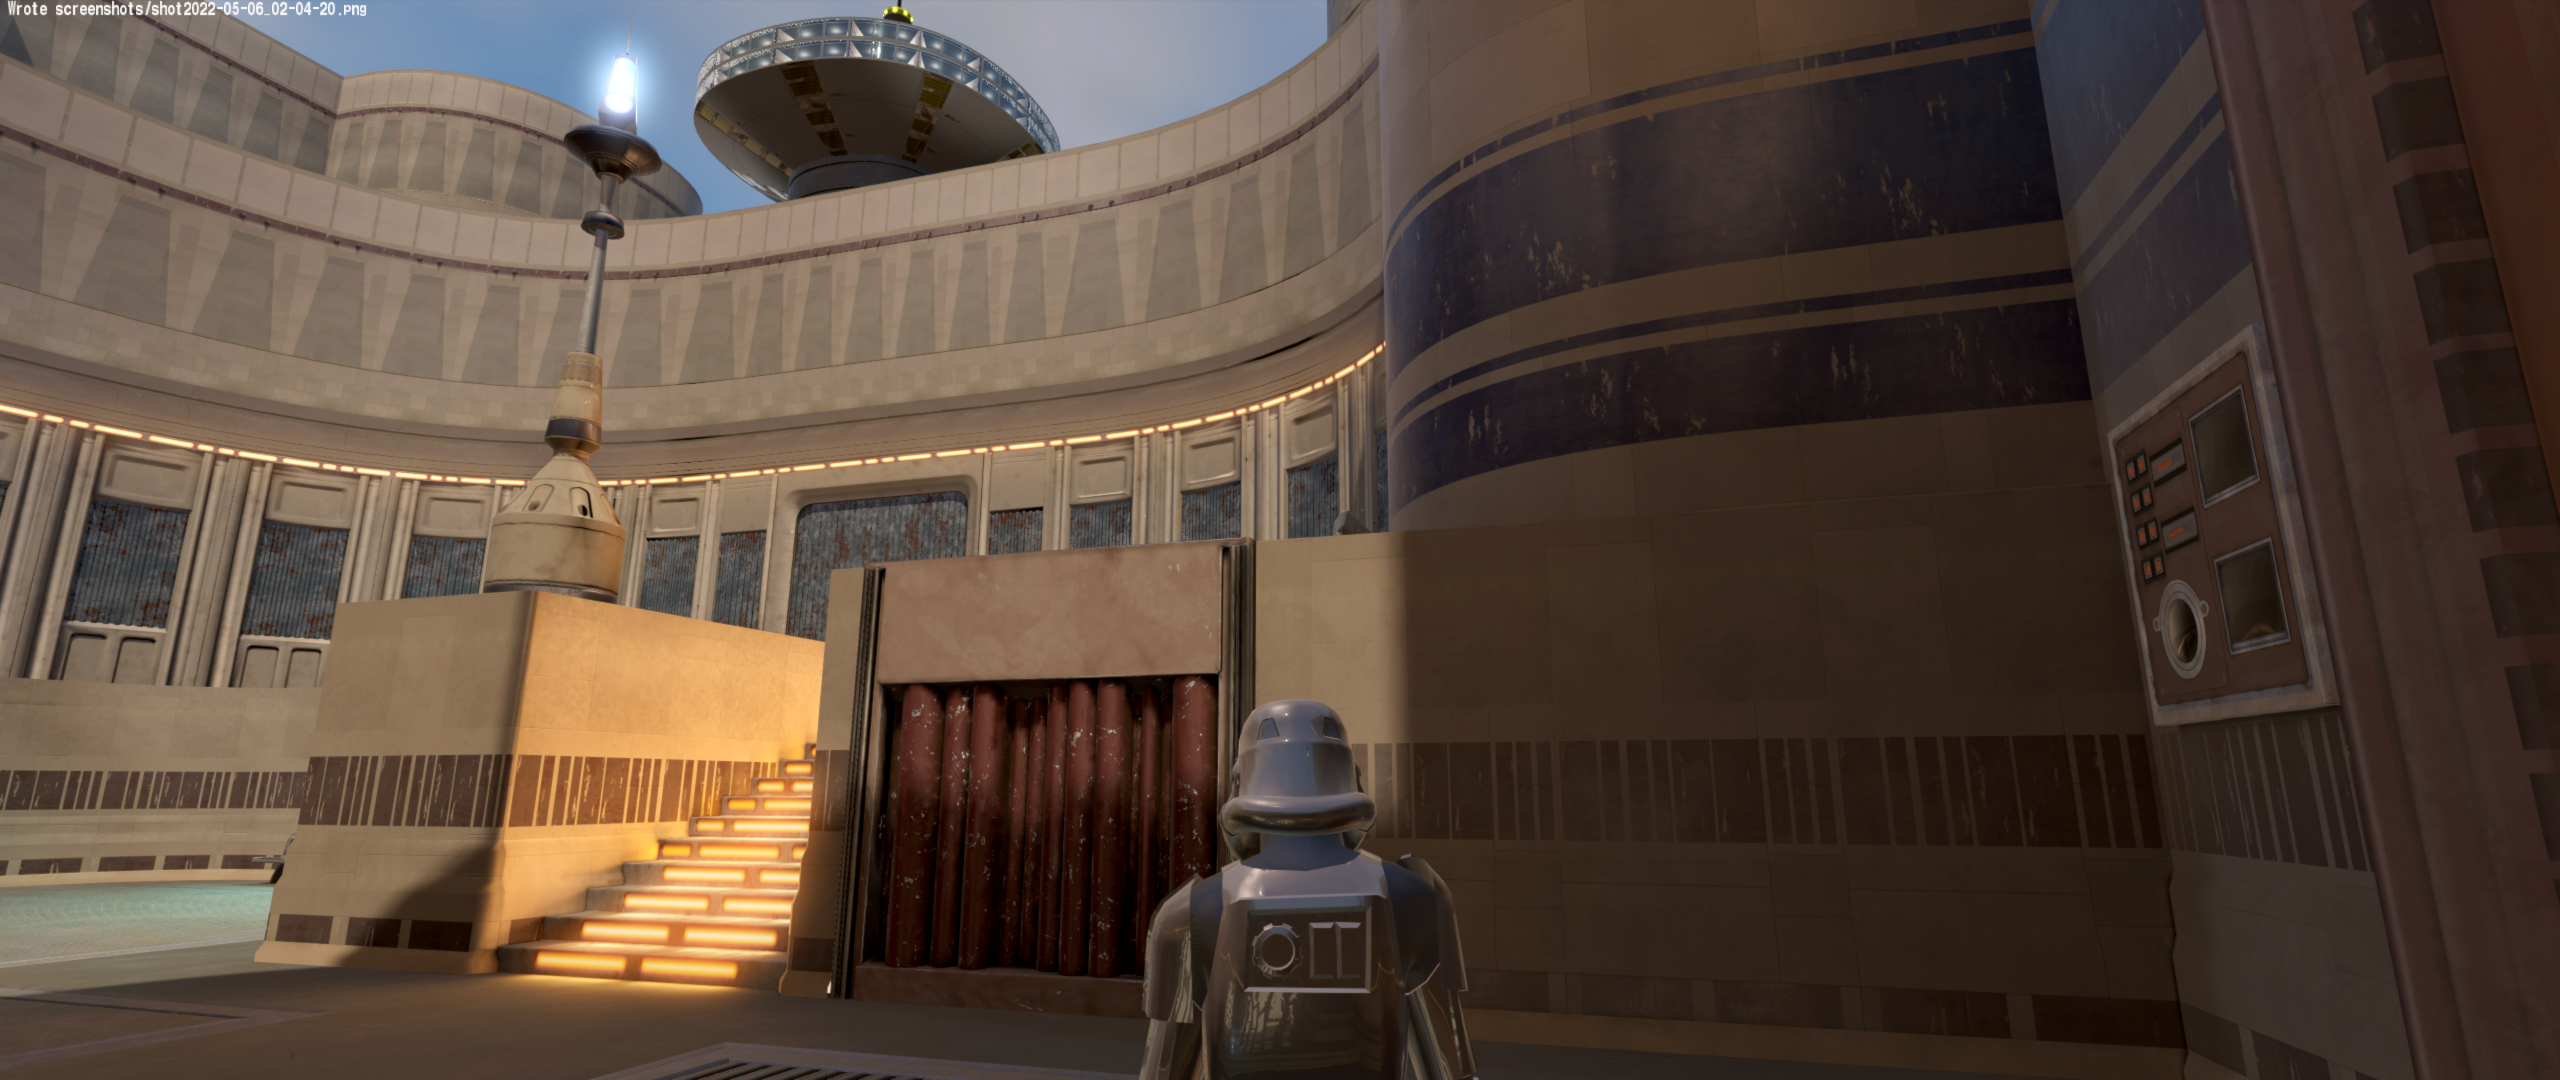
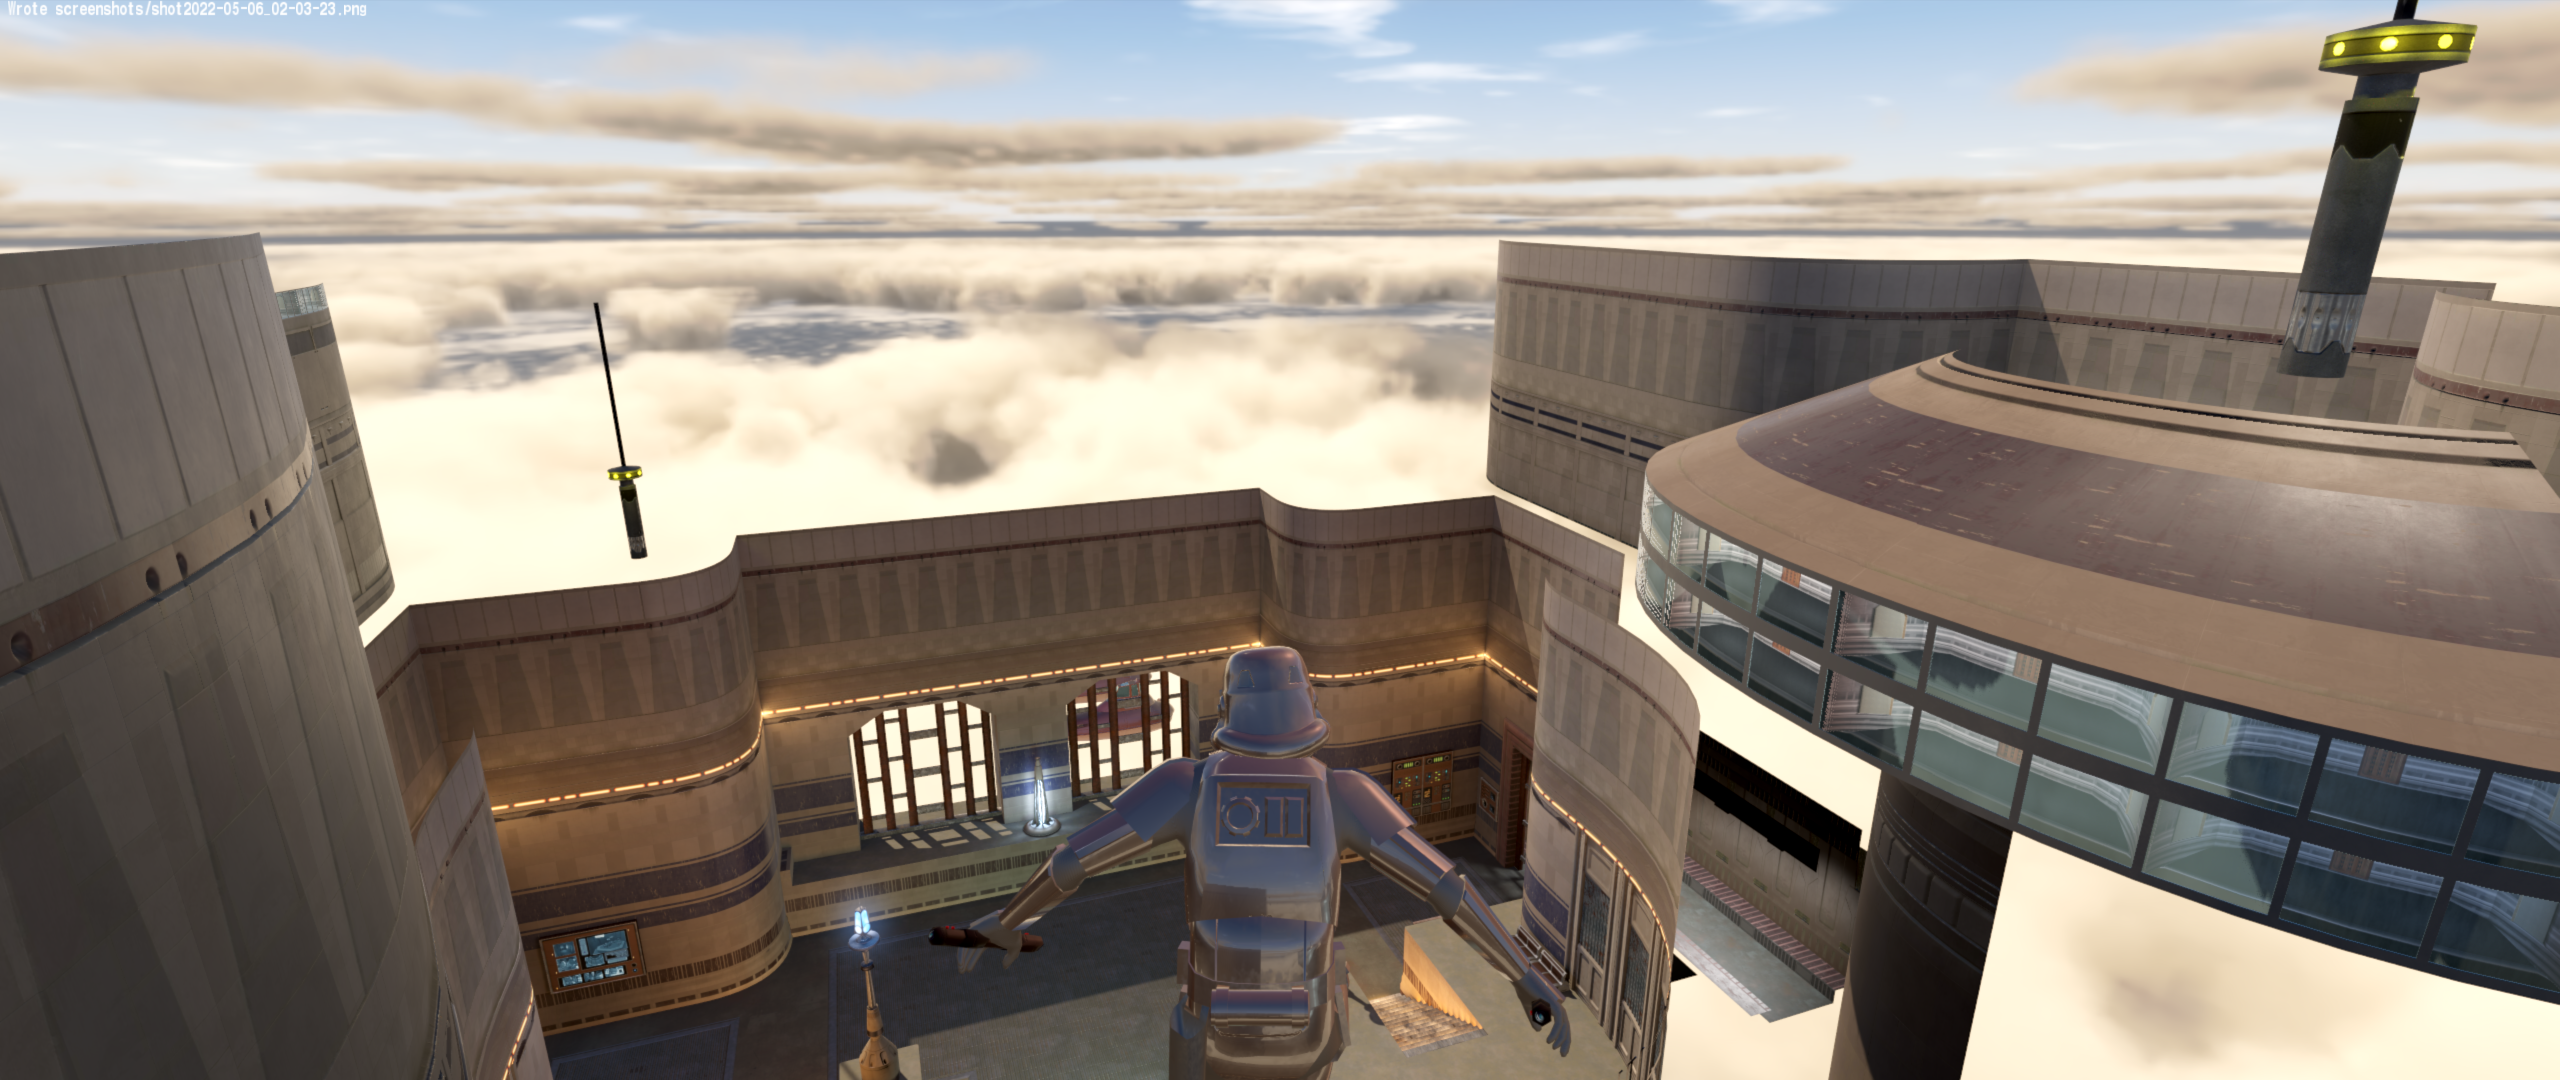
So this is intended to be some "behind-the-scenes" and/or feedback thread for the released Bespin Duel Reborn mod, which you can grab here:
The idea behind this mod is simple: I need something to show the modern rend2 features. Duel1 is quite small, so lets just remake this. Easy
Like so often in life, things aren't as easy as they seem at first glance. I imported the original duel1 map into blender and realised that this will take quite some time to actually remake the complete map. This is like redoing 40 materials and rend2 requires Albedo/BaseColor textures, normal maps, roughness maps, metalness maps, ambient occulsion maps and in some cases hight maps. Uff.
Spoiler
Image by @AshuraDX

Since most of the walls are based on the same materials, I created one material from scratch. This material I repurposed as a master material in substance designer. All other wall materials are based on this master material.
Spoiler
First material made in Substance Designer
Reusable material graph derived from the first material
Another material using the resusable one
Another material using the resusable one
Here are some images when I was testing the first iterations of the textures in-game
Spoiler
After finishing all the materials I wanted to replace completely, I started modeling all the missing parts of the map.
SpoilerLeft model is the highpoly model, right model is the lowpoly version with baked normal map
After that I started building the new map.
Spoiler
After I added all the materials and models to the map, I started working on the lighting in blender. The first iteration of a lighted map looked like this
Spoiler
I worked on a proper sky for a night time version of the map, but was never really satisfied, so I started working on a day time version instead
Spoiler
Last few edits for the materials and some adjustments to the lighting
Spoiler
If you are interested in more details of some of the workflows or if you want to know more about a specific model or material, feel free to ask.
OCD2, DarthValeria, scp_chaos1 and 1 other like this -
In your latest example the line must be
surfOn "torso_galaktorso_off torso_collar_off torso_galakface_off torso_eyes_mouth_off torso_galakhead_off"
Single arguments dont need quotation marks, multiple arguments must use them like above demonstrated.
But this still won't work in JA because you need to use the .skin file instead. Or maybe both is required?
-
Aren't we completely on the wrong track here? The mod is used in JA not in JO right? If I understand it correctly, JA uses the .skin file for visability and not the npc file?
mrwonko and RobiWanKen0bi like this -
56 minutes ago, RobiWanKen0bi said:
Tried it, doesn't work. Tried it with and without "" but no luck so far. It says in the console: WARNING: UNKNOWN KEYWORD "TORSO_COLLAR_OFF" WHILE PARSING "GALAK_MECH"
I even tried mixing everything. The helmet turns off but not the rest. Tried throwing out the collar, but the message is still the same with the others.
Galak_Mech
{
	playerModel	galak_mech
//	customSkin	gal
	surfOn		"torso_eyes_mouth_off" "torso_galakhead_off"
	surfOff		"helmet" "torso_galakface_off"
	weapon		WP_REPEATER
	health		1000
......... etc.
Have you tried this?
surfOn		"torso_eyes_mouth_off torso_galakhead_off"
surfOff		"helmet torso_galakface_off"
-
On 5/13/2023 at 11:28 PM, EvasionStudios said:
So as the disclaimer has said in the posts, most of these photos were created in Blender. However, we have every confidence that with the proper shader files, and some other modifications - that JA will be able to handle all of these effects without hindering performance.
Looking very good so far!
Be warned that jedi academy lighting can actually just darken your diffuse images though. Just because it is often just mutliplied and lightmaps and diffuse images are in 8bit (per channel) color depth. If you are interested I could show you how to use a blender addon that I've written to properly bake lighting with blender. I could also offer help if you are interested in providing rend2 support with your maps.
Blender addon in action:
SpoilerOld version of rend2 in action:
SpoilerGeoBall and EvasionStudios like this -
I just released the first verison of rend2 in a very long time. I've been busy with fixing and reworking alot of things. The weather system is fully functional now as also alot of other things.
You can grab the latest release here:
https://github.com/SomaZ/OpenJK/releasesChangelog:
- MSAA antialisaing cvar changed to r_ext_multisample which is the same as in the vanilla openjk renderer
- Added external hdr lightmap support
- Added autoload of images with following suffix "_specGloss", "_rmo" and "_orm"
- Realtime sun shadows won't flicker anymore when the player is moving around
- Some fixes regarding the HDR rendering pipeline (means rendering in hdr colors, but there's no HDR display support (and never will because OpenGL))
- Thanks to @Almightygirfor contributing a velvet shader (you can use it per shader stage, just add a 'cloth' to it (same as with glow or detail)) and fixes regarding pbr shading
- Added a shader stage keyword to "pull out" parallax mapped surfaces ('parallaxBias [0.0 ... 1.0]', you can easily test this with r_forceParallaxBias [0.0 ... 1.0])
- Added mikkTSpace for normal mapping (means baking normal maps in blender or substance will result in the same shading in rend2 now)
- Fixed rendering cloud layers
- Fixed wrong camera exposure on maps with sky portals
- Fixed alot of problems regarding fog
- Added flare rendering back
- Added most features back to surface sprites (only thing missing afaik is wind handling, swaying is implemented though)
- Speed up rendering dynamic lights with parallax occusion mapped surfaces by alot
- Added distortion rendering back (invicibility sphere, push/pull sphere)
- Added glass shattering back
- Added ghoul2 sabermarks back
- Added r_showTris 1 back
- Fixed a crash regarding md3 model caching
- Lots of other small thingsI think that's all for now.
Some WIP pictures of my bespin duel remake with hdr lightmaps
Spoiler
-
1 hour ago, NAB622 said:
Wait.....For some reason I was thinking you used misc_bsp. If all you did was add a target_level_change, where did you add it on the entity list? I think depending on where you put it, it might change which entity is linked to the lightmap, and that would definitely break all switched lights.
That is not a thing. Q3map2 assignes lightstyles to surfaces, not entities. The entities are just linked by target and targetName keys in the triggers and target entities. So, as long as theres the keys intact, this shouldn't be a problem at all. Sounds more like q3map2 just clears the lightstyles on the corresponding surfaces.
@KyleFanwould you mind sending me your patched bsp file in a dm? This would make the debugging process much easier.
NAB622 likes this -
Might be a compiler bug or something like that. I'm not entirely sure how triggering lightstlyes works, but it looks like its using the actual light entities. Those are usually removed on compile in newer versions of q3map2. I guess, you did an ents only compile to add your "level change" entity. You might want to try doing this again, but add a "_keeplights" "1" to your worldspawn before. Else, we could try adding the entity via my blender addon to the bsp and see if the problem still exists.


ZIP archive with JPG md3 previews
in General Modding Discussions
Posted
Oh, you are right. Looks like some image links are broken. I can make new images when I'm back home.