-
Posts
28 -
Joined
-
Last visited
Content Type
News Articles
Tutorials
Forums
Downloads
Everything posted by ksgWXfan
-
-
I'm sorry you're experiencing that. Pull down the console (~) and see if there are any relevant error messages. Paste a screenshot of it here. Thanks! Also, another question. Does it look any different after it is thrown? (the game uses 'thermal_w.glm' as the model when holding it, and 'thermal_proj.md3' for when thrown). UPDATE: I realized I forgot to include a file in the original upload that is used in the shader. More than likely, that is what caused the problem. I'm sorry. @ShadowThanks for bringing it to my attention. I fixed it (and decreased the hud-imagery size) and submitted it for upload. So now we just have to wait for it to be mod-approved.
-
Version 1.01
49 downloads
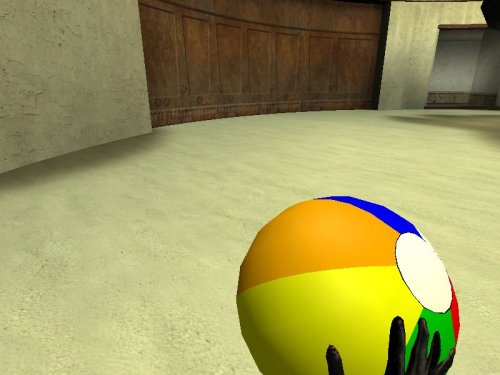
************************************* THERMAL BEACH BALL ************************************* by ksgwxfan (submission for 2021 summer contest) - Just place the file 'zzz_thermal_beachball.pk3' in your base folder and play! CREDITS: - Created by me using Blender v2.79b (using Mr. Wonko's tools) USE: - how ever you like; no attribution sought for -
170 downloads
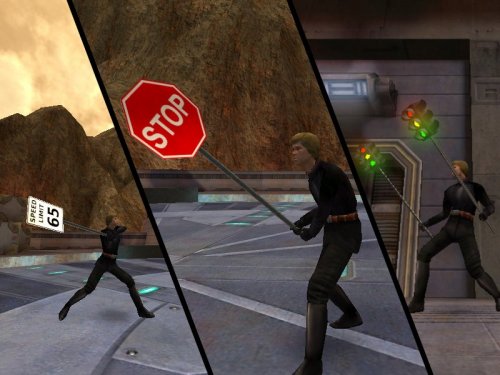
**************************************** SIGN SABERS v1.0 **************************************** by ksgWXfan DESCRIPTION ----------- This saber pack has 3 sabers of a general street-sign theme. Stop Sign --------- * model name: stop_sign Speed Limit Sign ---------------- * model name: speed_limit_sign Traffic Light ------------- * model name: traffic_light * has working lights with glow! - These sabers were made with Blender v2.79b CREDITS ------- - Thanks always to MrWonko's Blender tools - Textures were made in Inkscape - Shaders were made with the assistance of ShaderEd2 - Sounds come from tusken_staff and sword weapon audio from in-game. Hit sounds were customized from existing sounds via Goldwave USE --- - Use however you want; Attribution is all I ask Take out traffic-frustration on NPC's using road signs as sabers. -
The hand tags (*l_hand_0 tag, *r_hand_0) are found parented to the l_hand_0 and r_hand_0, respectively. Try copying them / pasting them from an existing model. The reason this is recommended is because they already have proper associated vertex groups for the correct bone associations on the skeleton. * When you do this, it will likely look huge and it will import a copy of the skeleton from the other model as well. Don't panic! simply delete the skeleton. * First parent the tags to the existing l_hand and r_hand. (Select tag ->Object Properties -> Parent -> l_hand/r_hand) * If the scale is right, the tag should essentially sit in the player's hand. If it is offset, it means you likely have to scale it. Make sure you're in Object Mode. Scale it (if I was a betting man, I'd say scale it by 0.1. This would shrink it.) Now, importantly, you must Apply the scale via CTRL+A -> Apply Scale * NOT quite done yet! Ensure the tag is selected, and goto the Modifiers tab. It should be a red box indicating the deleted skeleton. Simply choose the correct skeleton. Try to export it then. Repeat the above for any of the tags you seem to be missing (there's like 3 or 4 total in the lower half of the arm; use another model for reference)
-
Just curious, which weapon are you looking to replace with your new model? * Do you have mrwonko's Import/Export Tools Blender plugin? https://jkhub.org/files/file/3521-blender-279-jedi-academy-plugin-suite/ * Get MD3View and ModView *** I HIGHLY recommend this! It helps you size correctly and such. The following are some tips I've ran into as a frequent mrwonko's blender tools user: EXPORTING FROM MD3View * in MD3View, when exporting, and if using with Jedi Academy, USE the "Export as GLM (Ghoul2) *without* 90-degree skewing for JA" option I learned the hard way. IMPORTING INTO BLENDER * Remember with MD3View, you're EXPORTING the MD3 as a GLM so that you can import the GLM representation of the MD3 into Blender. And once you're done building in Blender, you can then export as an MD3. * When importing that GLM representation of the MD3 into Blender, clear the skin box (it says 'default') because md3's don't need it, and it will throw an error otherwise. BUILDING * Stay true to the hierarchal setup: scene_root (an empty) -> model_root_0 (an empty) -> your_model_goes_here_0 * you can have multiple meshes as part of your model; it being best to parent them to model_root_0 * all mesh origins should be centered at the world origin (0,0,0); any rotation, scaling, translating should be done only in Edit mode; if anything like that is done outside of edit mode, you'll have to manually move the origin back to the center (includes ensuring the 3D cursor is set at the center: SHFT+S -> cursor to center; then in object mode with the mesh selected, SHFT+CTRL+ALT+C -> Origin to 3D Cursor) * If the scale is changed outside of edit mode, Apply the scale/rotation of the mesh (CTRL+A). * Tags should be empties. The naming convention should be tag_<name>. So if you have the flash or fubar tag, they should be called tag_flash and tag_fubar, respectively. * When a GLM representation is imported, the tags are imported as well, but they are meshes, named like their glm counterparts (*flash; *fubar) Think of them as placeholders. The empties should be placed at the same location as the right-angle of the mesh placeholder. (in edit mode of the placeholder, select the right-angle vertex, SHFT+S -> Cursor to Selected; then exit edit mode; add a new empty. it should be added at the new location of the 3D Cursor). Remember to rename the new empties properly. * Shaders: each mesh part of your model needs a custom property called md3shader. Then the value of that property should direct the game to the location of the texture defining the mesh (i.e. models/weapons2/thermal/xyz_texture.tga). Select the mesh, then the custom properties can be added via the Object tab in properties (right-bottom panel); it's at the very bottom. EXPORTING * More than likely, your MD3 won't have animations. I have no idea how to handle it if it does. BUT, if it doesn't, as I suspect it doesn't, on the timeline, ensure the start frame is 1 and the end frame is 1. * You then need to select each part of the new MD3 you want exported. Remember to select the tags as well. This is advantageous because you can have other meshes to assist you in building your model, but if they're not selected, they won't bother with the exported MD3. * Go to file -> export -> JA MD3 * if you had imported a GLM representation as reference, you probably hadn't changed the scale from the default of 0.1. If you chose to do that, just remember when you export the new MD3, scale it by 10.0 to set the MD3 back to the proper size, or it will appear very small in-game.
-
51 downloads
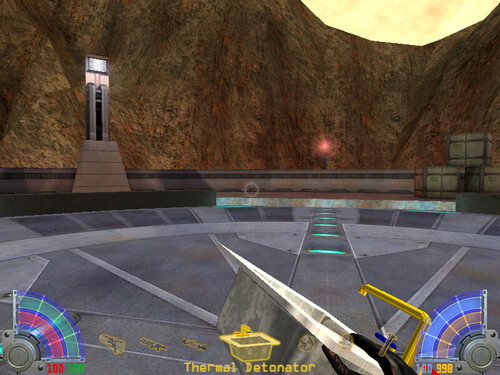
******************** KITCHEN SINK v1.1 (thermal detonator replacement) ******************** by ksgwxfan So you've tried to beat the game with no luck, and you might say you've thrown everything at it but the kitchen sink. Well, now you can claim that you have! This mod replaces the thermal detonator with a kitchen sink. INSTRUCTIONS: ------------- * If you had downloaded a previous version, just delete it first * Place 'zzz_thermal_kitchen_sink_v1p1.pk3' in your base folder. CREDITS: -------- * Used Mr. Wonko's Blender JA plugin for the model * Used Inkscape and Paint dot net for the texturing * Use/modify how you'd like! -
135 downloads
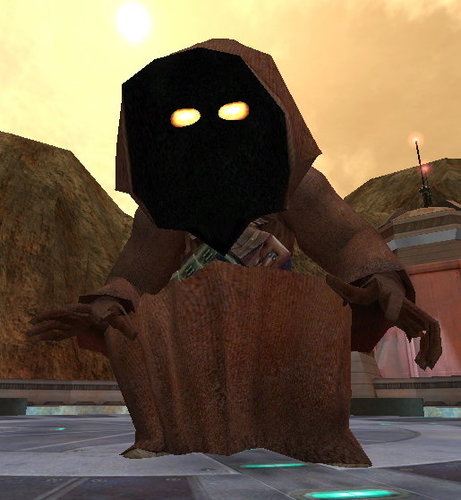
The Jawa replaces the Rancor in this mod. For once, the jawas get an upper-hand. They are now the predator. Literally. They can't get enough of chowing down on stormtroopers or cultists. Nor can they control the cannibalistic urge towards their smaller desert kin INSTRUCTIONS: Place 'zzz_rancorjawa.pk3' in the base folder and play. Spawned via the rancor npc (npc spawn rancor) - if wanting to see delight in the jawa rancor hunting the tusken raiders, use the tuskensniper npc, as the rancor won't natively attack the regular npc tusken - Used Blender v2.79 (Mr. Wonko's Tools) - Me for shaping the Jawa model to the Rancor skeleton; renaming vertex groups to match the rancor bones - I also replaced a lot of the Rancor sounds with the Jawas to make the experience more authentic; this, i believe does change sounds of the mutant rancor though -
101 downloads
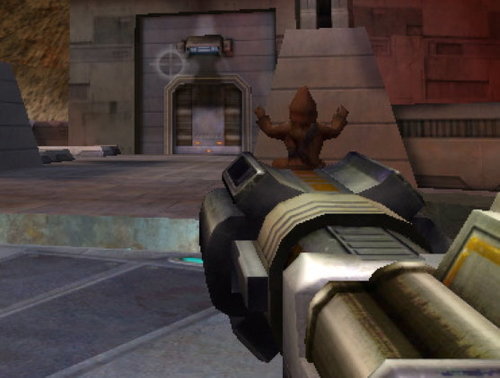
Let's face it. In JK3, the Jawas get an unfair shake. They appear in one level where their role is as the helpless victims, tormented by the Tusken Raiders. It is assumed all of the jawas die, as Luke says in post-mission: "It's too bad about the Jawas." So This mod gives them a more prominent role in the game, albeit an unmerciful one. Somehow you convinced the jawas that they can assist you in your mission by directing fired rockets. As you fire them from the Merr Sonn, all they can do is hopelessly cling to the fired rocket as it sails toward the target. In addition, the Merr Sonn has also been upgraded to include a Jawa Hood Ornament, as a thank-you for supporting the greater role of Jawas in the SWU. INSTRUCTIONS: place 'zzz_jawarocket.pk3' in your base folder and play. ATST's and Enemy Rocket Troopers will also be equipped with the upgraded Merr Sonn. ------- - used Blender v2.79 (Mr. Wonko's plugins) - used Goldwave to mix the jawa terrified scream loop -
87 downloads
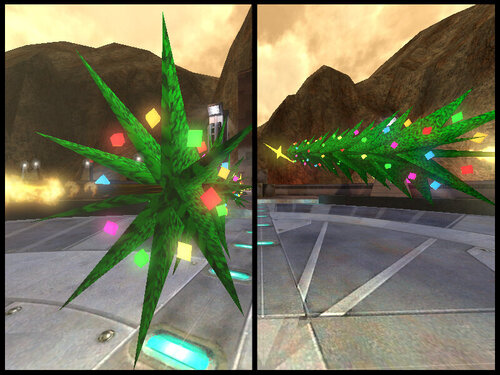
************************* CHRISTMAS TREE ROCKETS v2 by ksgwxfan (Updated Dec. 2020) ************************* DESCRIPTION: Replaces projectile from Merr Sonn with Rocket-Propelled Christmas Trees! The trees even play some popular carols to let stormtroopers know of their impending doom. INSTRUCTIONS: Place 'zzz_christmastreerocket_v2.pk3' in your base folder. SOFTWARE USED - made by me with Blender v2.79, via Mr. Wonko's plugins - made tunes in LMMS - used Inkscape for the textures Feeling festive? Share that spirit with some stormtroopers who don't have time to put buy trees or decorations this year. -
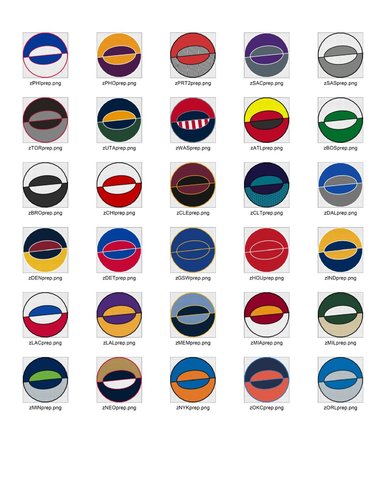
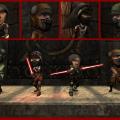
Thermal Basketball View File ************************************* THERMAL BASKETBALL v1.0 - by ksgWXfan ************************************* DESCRIPTION: Basketball season is here. Give JKA thermal-detonating basketballs. Includes bounce noises, charge music, and crowd-cheering upon explosion. Also included are optional skin-packs, themed for your favorite pro ball club. INSTRUCTIONS: - (REQUIRED) - place 'zzz_thermal_bball.pk3' into your "..GameData/base/" folder. This is the default orange roundball. - (OPTIONAL) - the other zip file includes pk3 files ('zzz_thermal_bball_<cityabbr>.pk3') of team-themed bballs. These will only work one-at-a-time. Find the abbreviation for the city/ball club you want and place it into your base folder as well and play! MAKE YOUR OWN SKINS: - "basketball_template.svg" was included to assist making your own skins. It does require knowledge of using InkScape (or illustrator). Another hiccup is that Inkscape only outputs to PNG, so if you use that to JPG. Make sure you save two identical copies of the files as "thermal.jpg" and "thermal_w_1.jpg", respectively. CREDITS: - Me (ksgwxfan) - Modelling and Skinning - Colors: got most from team logos - LucasArts/Raven - Original files (the hand) - Sounds - freesound.org (see details below) SOUNDS: - Bounce noises: https://freesound.org/people/Cribbler/sounds/396308/ - Crowd Cheer noise: https://freesound.org/people/temawas/sounds/179869/ - Jingle (upon Charge): I made using LMMS (https://lmms.io/) FROM WAY DOWNTOWN! Light-up some storm troopers. Includes pro-team themes (optional) Submitter ksgWXfan Submitted 11/20/19 Category Guns & Explosives
-
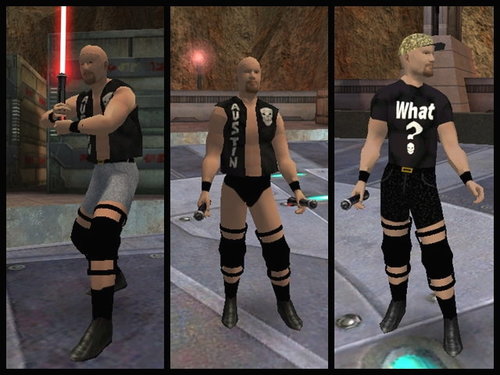
Stone Cold Steve Austin View File ******************************** STONE COLD Player Model v1.0 ******************************** *** Credit to RavenSoft/LucasArts for the model used; I used the playermodel 'jedi' to modify *** Created/Assembled in Blender v2.79 *** Skins created/modified by me; used InkScape and Paint.NET (Paint dot NET) DESCRIPTION: *GLASS BREAK* Dun-Dun Dun-Dun-Dun-Dun, WAAAOOO! Dun-Dun Dun-Dun-Dun-Dun, WEEWoooo! That's right, It's Stone Cold Steve Austin. Welcome the Texas Rattlesnake to the SWU. Open-up a can on some reborns and stormtroopers. And that's the bottom line, cause Stone Cold said so! PlayerModel Name: stonecold Author: ksgWXfan IN-GAME SUPPORTS ------------------------- NPCs/playermodels Included: stonecold (classic wrestling garb; including vest) stonecold_shorts (shorts, no shirt, with vest) stonecold_what (shorts, 'what' shirt, camo hat) Bot Support: No MP Support: Yes SP Support: Yes; all skins Sounds: Yes, lifted from an old game, WWF Attitude (thanks to youtube) -------------------------- COPYRIGHTS: Sounds - Akklaim (or whoever owns them now, lol); WWE COPYRIGHTS: Logos - offshoots of stonecold classic logos -------------------------- HOW TO INSTALL: Extract the stonecold.pk3 file into your JK3 GameData/base directory. Consult the "IN-GAME SUPPORTS" section above to see spawn/play options. See Stormtrooper. Stomp mudhole in said stormtrooper. Proceed to walk it dry. Submitter ksgWXfan Submitted 11/20/19 Category Player Models
-
How to use a Jedi Academy multiplayer skin in singleplayer
ksgWXfan commented on Circa's tutorial in Console Commands & Cvars
I'm going to infer another benefit. This sounds like it would save you from building-up your npc count just for the benefit of being able to change your playermodel on the fly. And if you wanted to generate NPC files/include them in your release, it also lets you test your model before making npc files for it. AMAZING tip! EDIT: Has there been a way found to spawn an npc this way (it didn't work for me anyway; just the playermodel method worked)? -
261 downloads
******************************** STONE COLD Player Model v1.0 ******************************** *** Credit to RavenSoft/LucasArts for the model used; I used the playermodel 'jedi' to modify *** Created/Assembled in Blender v2.79 *** Skins created/modified by me; used InkScape and Paint.NET (Paint dot NET) DESCRIPTION: *GLASS BREAK* Dun-Dun Dun-Dun-Dun-Dun, WAAAOOO! Dun-Dun Dun-Dun-Dun-Dun, WEEWoooo! That's right, It's Stone Cold Steve Austin. Welcome the Texas Rattlesnake to the SWU. Open-up a can on some reborns and stormtroopers. And that's the bottom line, cause Stone Cold said so! PlayerModel Name: stonecold Author: ksgWXfan IN-GAME SUPPORTS ------------------------- NPCs/playermodels Included: stonecold (classic wrestling garb; including vest) stonecold_shorts (shorts, no shirt, with vest) stonecold_what (shorts, 'what' shirt, camo hat) Bot Support: No MP Support: Yes SP Support: Yes; all skins Sounds: Yes, lifted from an old game, WWF Attitude (thanks to youtube) -------------------------- COPYRIGHTS: Sounds - Akklaim (or whoever owns them now, lol); WWE COPYRIGHTS: Logos - offshoots of stonecold classic logos -------------------------- HOW TO INSTALL: Extract the stonecold.pk3 file into your JK3 GameData/base directory. Consult the "IN-GAME SUPPORTS" section above to see spawn/play options. See Stormtrooper. Stomp mudhole in said stormtrooper. Proceed to walk it dry. -
51 downloads
************************************* THERMAL BASKETBALL v1.0 - by ksgWXfan ************************************* DESCRIPTION: Basketball season is here. Give JKA thermal-detonating basketballs. Includes bounce noises, charge music, and crowd-cheering upon explosion. Also included are optional skin-packs, themed for your favorite pro ball club. INSTRUCTIONS: - (REQUIRED) - place 'zzz_thermal_bball.pk3' into your "..GameData/base/" folder. This is the default orange roundball. - (OPTIONAL) - the other zip file includes pk3 files ('zzz_thermal_bball_<cityabbr>.pk3') of team-themed bballs. These will only work one-at-a-time. Find the abbreviation for the city/ball club you want and place it into your base folder as well and play! MAKE YOUR OWN SKINS: - "basketball_template.svg" was included to assist making your own skins. It does require knowledge of using InkScape (or illustrator). Another hiccup is that Inkscape only outputs to PNG, so if you use that to JPG. Make sure you save two identical copies of the files as "thermal.jpg" and "thermal_w_1.jpg", respectively. CREDITS: - Me (ksgwxfan) - Modelling and Skinning - Colors: got most from team logos - LucasArts/Raven - Original files (the hand) - Sounds - freesound.org (see details below) SOUNDS: - Bounce noises: https://freesound.org/people/Cribbler/sounds/396308/ - Crowd Cheer noise: https://freesound.org/people/temawas/sounds/179869/ - Jingle (upon Charge): I made using LMMS (https://lmms.io/) FROM WAY DOWNTOWN! Light-up some storm troopers. Includes pro-team themes (optional) -
56 downloads
************************************* CULTIST INFLATED EGO v1 - by ksgWXfan ************************************* DESCRIPTION: "You can't stop me.", "Puny jedi!", "Come get me, Jedi!", "Let's see what you've got!", "You are weak.", "Let's see how good you are." This simple mod gives cultists, reborns (reborn_new), and Kothos Twins (and the like) (reborn_twin) big heads to match their inflated egos. INSTRUCTIONS: Just place the included file, 'zzz_cultist_bighead.pk3' in the base directory of the game (../GameData/base) and play. CREDITS: Me; Blender v2.79 was used to tweak the head-size (guess I should also credit mrwonkos import/export plugin for blender) USE: Modify however you want It does work in multiplayer as well, but the head-size does kind of hinder your view if you choose them as your character. If you'd like me to include changes to other characters, feel free to comment a suggestion. -
433 downloads
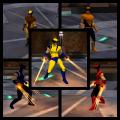
************************************* WOLVERINE Player Model v1.0 ************************************* * Credit to ksk_h2o's GrayFox model. Most of the body comes from that * Credit to yasuakiNk for his Mace Windu (maceWinduNk) model. I franken- steined the head * Credit me for skinning and mask model * Skins created/modified in Inkscape and Paint.NET (Paint dot NET) * Model modified using Blender v2.79 DESCRIPTION: A playble model of Wolverine: my forever favorite of the X-Men. Wolverine enters theSWU and gets a claw upgrade (see below). Yes, the playermodel/npcs do have berserker rage (darkrage force). Includes 5 different skins. Should be compatible with any JK3 version; tested on OpenJK. Probably also compatible with JK2:JO considering the base model was for JK2. * PlayerModel/NPC Variants (5): ... wolv_classic (yellow w/black stripes; blue secondary) ... wolv_alt1 (yellow and brown) ... wolv_alt2 (blue and orange [evolution]) ... wolv_blue (blue top; black pants) ... wolv_red (red top; black pants) * Sabers included (1): ... wolvclaws (single type; best used as dual sabers; used the "boltToWrist" setting to make themlike claws) Author: ksgWXfan IN-GAME SUPPORTS ---------------- - Bot Support: No - MP Support: Yes - SP Support: Yes; all skins (choose different heads to choose different skins* Selectable at start of new game - Sounds: most sounds come from the human_merc playermodel; felt he had proper grunge to his voiceto fit Wolverine. -------------------------- COPYRIGHTS: Sounds - LucasArts/Raven(?); Character: Marvel * Screenshots were taken using the CamSP mod (https://jkhub.org/files/file/1829-camsp/) -------------------------- DISCLAIMER OF USE: The creator assumes no liability in using this work. This work may be modified as you wish to fit your wants as long as you credit the author (me) and those credited at the beginning of the file. HOW TO INSTALL: Extract the wolv.pk3 file into your JK3 GameData/base directory. Consult sections above for spawning/selections. Enjoy. It's different than what else is available out there. What's your favorite Wolverine skin?- 3 comments
- 5 reviews
-
- npc support
- celebrity skin or model
- (and 3 more)
-
- 10 comments
-
- team support
- npc support
-
(and 1 more)
Tagged with:
-
444 downloads
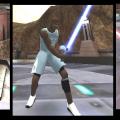
Michael Jordan: The greatest basketball player of all time. Compatible in SP and MP; no bot support Filename: MJGOAT.zip From the included Readme: ******************************** MICHAEL JORDAN Player Model v1.0 ******************************** *** Credit to ksk_h2o's GrayFox model. Most of the body comes from that *** Credit to yasuakiNk for his Mace Windu (maceWinduNk) model. I frankensteined the head *** Credit to NBA Live Series Center (www.nba-live.com). A cyberface for MJ was used from that (https://forums.nba-live.com/downloads.php?view=detail&df_id=9459) *** Created/Assembled in Blender v2.79 *** Skins created/modified in Paint.NET (Paint dot NET) DESCRIPTION: A playble model of Michael Jordan; aka, Air Jordan; The GOAT. MJ reigns supreme with the aid of force jump. Includes 3 different playable skins. Included (what I believe to be) the Jordan 11s.Compatible with JK3:JA. Probably also compatible with JK2:JO considering the base model was for JK2. The face doesn't look right due to poor quality from the cyberface and my inability to tweak the head shape correctly. PlayerModel Name: michaeljordan Author: ksgWXfan IN-GAME SUPPORTS ------------------------- NPCs Included: michaeljordan (Bulls Home Jersey; saber color red) michaeljordan_red (Bulls Away Jersey; saber color red); michaeljordan_blue (Vintage UNC Away Jersey; saber color blue) Bot Support: No MP Support: Yes SP Support: Yes; all skins * Selectable at start of new game * Selectable using Circa's Ingame Character and Saber Menu (https://jkhub.org/files/file/562-ingame-character-and-saber-menu/) Sounds: Some (but not robust quantity) -------------------------- COPYRIGHTS: Sounds - NBA, ESPN, Warner Brothers, Jordan Brand COPYRIGHTS: Logos - Jordan Brand (used on shoes) -------------------------- DISCLAIMER OF USE: The creator assumes no liability in using this work. This work may be modified as you wish to fit your wants as long as you credit the author (me) and those credited at the beginning of the file. HOW TO INSTALL: Extract the michaeljordan.pk3 file into your JK3 GameData/base directory. Consult the "IN-GAME SUPPORTS" section above to see spawn/play options. Hope everyone enjoys slicing up some ST's courtesy of Air Jordan. See Readme for spawn/play instructions and other important info- 10 comments
- 9 reviews
-
- team support
- npc support
-
(and 1 more)
Tagged with:
-
So, I've been fiddling with Blender for a few weeks now, working on a Michael Jordan (and happens to be my first) model/skin; making it for JK3. I used a GrayFox (JK2) model and Frankensteined a MaceWinduNK (JK3) head... I finally got to where I was happy with the way it looked (still not completely done with skinning). Blender exports the model as it is right now. But then the trouble (and unknown) begins. Some more info: From what I can tell, the hierarchy looks correct; The armband, legband, shorts, and jersey top are additions I added (they are their own individual objects(?); Everything was rooted to the skeleton; Everything was properly parented. So like I said, it lets me export the GLM file. I then created a 'model_default.skin' file, made an npc file, pk3'd it (inc. textures), and tested it. Upon loading the model, it shows this: Then if I try to import the model.glm file that I successfully exported, it gives me this error: and the import looks like this, with virtually everything unparented and the UV maps/textures messed up: I'm not 100% sure where something is going wrong. On other JK2 models I import, then export, I can import the exported versions just fine. Sidenote (that may be of worth to those with experience): With part of my troubleshooting, I decided to delete the additional objects I had made to see if it would export okay but it gives a LOD error: torso_0 … suggesting that I split the UV mesh somewhere (but I have no idea if it is the torso, or a child of the torso that needs more edge splits, and know of no quick way to tell where a seam is merged, and thus needs to split...especially if it is an imported object foreign to Blender). But this error is not thrown when I export it with the jersey. It's odd. So there's a lot of info. If anyone can make sense of any of it, I'd appreciate it. I'd hate to throw this away given how much time I've invested in it the past few weeks.
-
I'm fairly new to Blender (and 3D modelling for that matter), so I'm not familiar with all of the proper terminology, so bear with me... So I traced the seams that I wanted, followed by unwrapping. The result is fine...but I'd rather modify a few things on the UV map(?) The bottom two pieces are the same, just on different sides of the model. - Ultimately, I'd like to get the bottom pieces overlayed one another so that when I do the texture, I only have to do it once. How would I go about doing this? - I believe I can figure out a way to translate some UV coordinates, but a problem is when I select the seamed area, it also selects the edge of the first(top) piece. How can I isolate one of the bottom selections to play around with translation? Any help would be appreciated; thanks from a 1337 noob.


