
AshuraDX
-
Posts
2,319 -
Joined
-
Last visited
Content Type
News Articles
Tutorials
Forums
Downloads
Everything posted by AshuraDX
-
.warnbox { background: #e3f6e5 url( images/icons/exclamation.png ) no-repeat 9px 10px; border: 1px solid #b4e3b9; color: #475949; } Topic moved to Mod Requests & Suggestions.
-
 @@L303 to some extend, yes. it is based around scripts that effect the npc spawner that spawned the npc.
 -
That depends on the version of substance painter @@Akkarin is using. I havn't updated in a long time.
-
That tutorial is meant for mapping applications. These are basically premade NPC behaviours for custom maps. So unless you want to get into making custom maps these won't do anything for you.
-
[WIP] Q3ME: a 3ds Max Level Design Plugin
AshuraDX replied to AshuraDX's topic in WIPs, Teasers & Releases
@@DT85 It's on my todo list, but not top priority atm. -
Good question. I don't know actually, I spent weeks working on my clone trooper. I still have to get V2 ingame. How long it takes really depends on the model and how much time you are willing to put into reference research and detail work.
-
[WIP] Q3ME: a 3ds Max Level Design Plugin
AshuraDX replied to AshuraDX's topic in WIPs, Teasers & Releases
Okay, here we go. This became incredibly rambly and kinda rushed but here it is: a terribly badly commented demonstration video showcasing how to export terrain from 3ds max with my plugin. here's the .map file for those itnerested: https://www.dropbox.com/s/uyf8o0t5zz35ygb/TerDemo1.map?dl=0 The tutorial I was referring to that explains the cocnept of alpha poles/fade brushes: http://www.simonoc.com/pages/articles/terrain2_1.htm and last but not least the textures and shaders I used: http://www.simonoc.com/pages/artwork/tp_terrain.htm @@Langerd -
[WIP] Q3ME: a 3ds Max Level Design Plugin
AshuraDX replied to AshuraDX's topic in WIPs, Teasers & Releases
These are exported as brushes. Terrain works a bit differently, this is really just like wrapping the entire object in plastic and using that hull for collision. Which isn't ideal for terrain. I'll record a quick terrain demo later. -
[WIP] Q3ME: a 3ds Max Level Design Plugin
AshuraDX replied to AshuraDX's topic in WIPs, Teasers & Releases
-
@@ZeroRaven this is bizarre Can you upload the shader?
-
@@ZeroRaven That shader excerpt is looking fine, so I doubt that that's your problem. But here's a silly idea, something that quite a few people run into that can really mess with you... Are you displaying file extensions on windows? If you're not it may be that you have some filename shenanigans like the following going on: myawesomeshader.shader.txtI remember finding this after a long and painful time of searching for the reason why someone elses shaders wouldn't work.
-
That is because it's not a single picture, but a link to a larger album of pictures. Click it and bask in their glory.
-
@@Lwkill I sent you a pm
-
What's your native language? Maybe I can ping someone that speaks it who might know what you can do.
-
How do I change the intended gender of a species I've added?
AshuraDX replied to ArmyofGhoul's topic in Modding Assistance
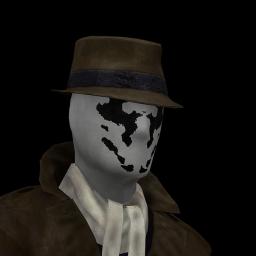
@@ArmyofGhoul Hey, all you should need to do is to create a simple textfile, dump the following code in it, save it as sounds.cfg and drop that into the models/players/rorschach folder. jaden_male m -
Finishing Hilt Model + Texturing it (Help / Request)
AshuraDX replied to Siegfried's topic in Mod Requests & Suggestions
A good start and since you made this for Feedback purposes I decided to go ahead and polish it up to enhance the educational value, by replacing some of the less ideal solutions that you came up with. Here's what I did in summary: I welded a few vertices in some spots to further decrease the weight, aligned some mismatched surfaces and deleted a face that was never to be seen between the "braking handle" and the ring that's attached to it. I also completely remade the UV-layout, most of the time you want a seam at all 90° angles, while keeping seams away from flat, conjoined surfaces. An example for this would be the "Emitter Rings", in your layout you just sliced them apart along a vertical loop, which gave you these rather weird looking, awkward and wavy shapes on the UV Layout. Texturing those would have been a pain, if you treat these kinds of shapes like cans of baked beans or whatever and jsut slice the top and bottom parts off before making a vertical cut in the side wall you'd get something that's much easier to work with while texturing. The same technique was applied to all of those large "flappy bits". Just slice around the sides and cut up as you see fit to get something that's very easy to work with where you can also put detail work on the sides instead of getting ugly stretching along the edges. Now onto the conical pommel, which was pretty much treated the same way, I just gave it a slice around the thickest part which gave me 2 simple, flat circular shapes to paint on in the UV layout. The final bit I changed is a choice thing, but highly recommended if you do your texturing the "traditional" way in 2d in Gimp or Photoshop instead of painting straight on the model. I straightened the UVs for the handle piece to get a simple rectangular shape that is insanely easy to paint, as you don't have to warp your lines to properly loop them around the model for things like handle wrapping. And that's it. Here's what the finished UV layout looks like: You could technically sandwich/overlap the left and right sides of a piece to improve texture space usage, but that'd come at the price of having these parts mirrored/symmetrical at all times - which I'm not a huge fan of. But you could do it. and the updated model: and a link to my files for those interested: https://www.dropbox.com/s/m6i1im07t7arzvu/ArtemisSaber_example.zip?dl=0 EDIT: Besides all of this purely educational stuff, I'd recommend to smooth out some of the larger circular bits, the game can handle a few more sides. 12 sides on the largest round sections of a model will look a lot better than 8 sides while still being relatively lowpoly. You could also use a reduction technique, as I demonstrated here: https://jkhub.org/topic/10162-some-tricks-for-model-optimization/ that way you can have a really round appeareance on the parts that stick out while keeping the more performance oriented geometry for pieces that don't have to appear quite so rounded. -
@ I'd assume that you have to create a ".skin" file for the hilt you are trieing to import.
-
Finishing Hilt Model + Texturing it (Help / Request)
AshuraDX replied to Siegfried's topic in Mod Requests & Suggestions
Oh dear... @ this is indeed quite the mess, but we can fix it You should make sure that you at best only have 4 sided faces (quads) on your model, a few triangles may be unavoidable and that is not a problem. Just make sure to cut up and eliminate all faces with more than 4 sides. Once that is through, you can give unwrapping another shot. A clean mesh helps tremendously while unwrapping. Most of the really badly stretched island you have there stem from concave n-gons, like the sides of that handguard. -
"Porting" a multiplayer model to singleplayer?
AshuraDX replied to ArmyofGhoul's topic in Modding Assistance
great, you're welcome! -
"Porting" a multiplayer model to singleplayer?
AshuraDX replied to ArmyofGhoul's topic in Modding Assistance
I'm also not quite sure how to segment the file for the variants, assuming I'm supposed to do that in the first place? Apologies for the newb questions incase you get these alot! The "folder name" you have to place there is not the name of the .pk3 file, but the name of the folder that holds the character model and texture files In the case of my Rorschach model it's quite simple: \models\players\rorschach you just need to take the name of the last fodler in that path and insert it as the tutorial says, like so: REFERENCE rorschach NOTES "For character menu" LANG_ENGLISH "Rorschach" Now onto Segmenting the skin into the 3 sections, this is what the full, default .skin file for rorschach looks like: Now all you have to do is split this file into 3 files by body parts, one for the head, another for the upper body and a final one for the lower body: Head parts: Upper Body: and lower body: just save these as head_a1.skin, torso_a1.skin and lower_a1.skin and you should be good to go. For any variations you might' want, I'd suggest to just copy & paste the texture names from the red & blue team skins over to duplicates of the part skin files named head_b1.skin etc. So if you wanted the option to use the head from the red teamskin, all you'd need to do is save this as head_b1.skin: or you could mix and match different pieces and textures together, maybe make a version of the default mask with the black hat from the red Teamskin. I hope this helps EDIT: Here's a set of Icons you can use for these customisation options: https://www.dropbox.com/s/id4z72r1yx04nph/Rorschach_icons.zip?dl=0 -
Finishing Hilt Model + Texturing it (Help / Request)
AshuraDX replied to Siegfried's topic in Mod Requests & Suggestions
@ I don't use Blender, so I can't tell you were to click to do it. But I can review the UV Layout you create after watching this Tutorial: I watched the first half of it and this guy does a great job at explaining it while demonstrating how to do it in Blender. -
Finishing Hilt Model + Texturing it (Help / Request)
AshuraDX replied to Siegfried's topic in Mod Requests & Suggestions
Did you unwrap it already? If you have not, you'll have to get that out of the way before you can texture it. -
"Porting" a multiplayer model to singleplayer?
AshuraDX replied to ArmyofGhoul's topic in Modding Assistance
@@ArmyofGhoul Hey, glad to hear that you like the model! Here's a tutorial that you can follow in order to make it appear in the SP customization menu: https://jkhub.org/topic/10013-how-to-make-a-singleplayer-species-with-variants/ -
Need a lot of help. i wanna to learn not humanoid animations.
AshuraDX replied to Asgarath83's topic in Modding Assistance
This sounds like a flaw with your importer @@Asgarath83 it seems to impprt the skeleton with a negative Z Scale, which ends up flipping it vertically on export. This is just a guess, but I can't imagine something else to be causing this issue. About the dummies: you can just create some new ones, position them at 0,0,0 and name them appropriately. -
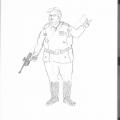 it was submitted as Artwork, which it is. That's why it was approved.
