This will explain how to find those hidden textures in the .pngs of JKA's mysterious skin files the proper way; not using paint to save them or gimp which never worked for me. I've had a lot of issues when I was learning the in's and out's of creating a functional RGB texture. The biggest problem was finding the hidden textures in png's from the base textures, most of the online help suggests simply re-saving the image in paint, or opening it up in GIMP. Neither of these worked for me, and there was literally no help online for it in regards to Photoshop. So I did some researching and this was the solution, I hope that it helps you as much as it has for me.
Finding hidden textures
Open Assets1.pk3 in pakscape, this can be found from within your game's install directory within the base folder. Once found, open up the following set of folders/sub folders to navigate through to your desired skin folder:

- Models / Players / (CHOOSE A FOLDER)
Drag this folder into a location on your computer. For ease of use with Modview in the future when making skins I create a "base" folder on my computer and mimic the same sub folders shown in the assets file; this is a requirement for viewing models in Modview so will be handy in the future for testing out your skins before you test them in-game!

Once you have dragged one of the folders out of pakscape, open it up and drag in the PNG file with RGB/transparency into Adobe Photoshop that you wish to modify.

Click layer from the top menu, then layer mask - from transparency. You will notice that now the layer in the layer panel has been assigned a mask.

All you need to do now is disable the mask (right click the layer's mask preview in the layer panel > delete layer mask), and you will then be given the big reveal of what the hidden texture looks like!

For editing purposes I duplicate the layer first, then do this process on one of the layers so that I have one layer showing the complete texture to work from, and a secondary layer as a backup so I can easily re-save my own edit of the hidden texture for future RGB goodness!
Creating your own hidden textures
Open the texture that you have created that you would like to be made RGB compatible into Adobe Photoshop. Once you have done this, you will need to create a designated area that you want to have the effect of RGB in-game. For ease of use when learning this I would suggest using an existing base game model as explained in the previous step, so that you have a template to easily re-create RGB textures, but once you get the hang of it this can easily be applied to ANY model's texture!

If you have lots of layers, then I would suggest doing what I have done in the screenshot and grouping them all into a folder in the layers panel, then create a new layer and select: "Image" - Apply image from the top menu. This will create a single layer image of all of your active layers. Once this has been done, create one more layer where you create a solid colour fill of the area that you want to apply the RGB to, then hide this layer. This can be in any colour as you will just be using it to quickly select a designated area for a transparency mask while hidden from visibility).
I would suggest creating a low saturated/monochrome texture for the RGB area so that you get the best results in-game when playing with the colour sliders.
You will notice that the base skins use a low saturated texture, as this creates an interesting default colour, but allows full availability on colour selection; if you chose a bold, highly saturated colour texture to be RGB'd, it wouldn't give you the full spectrum of colours to choose from in-game. Always imagine your RGB texture as a bucket of paint, if you start with a dark/strong colour, there's little you can do to change it, but if you start with a light colour/white, you can easily make any colour of your choice!
Now you are ready to create an RGB-ready texture in the next step.

With all layers hidden except from the layer we "applied image" on to save all active texture layers into one, hold CTRL on the keyboard and click onto the "RGB filled area" layer from the layer panel in the little square preview box next to the name of the layer, this will create a marquee tool/marching ants effect around the area we want to add RGB to. Then click "Layer" from the top menu, and click "Layer mask - Hide selection". This will then create a layer mask to the image, where the RGB area is hidden from view unless you view in Modview/In-Game or open and repeat the process at the top of this tutorial.

All you need to do is save it as a PNG and then it can be used for your own RGB skin.

If you haven't done so already, remember to use the same shader data/modify it if you want to add any additional effects such as specular/glow etc from the base game, and alter to match the texture path for your newly created one:
Quotemodels/players/jedi_kdm/torso_2
{
{
map models/players/jedi_kdm/torso_2
blendFunc GL_ONE GL_ZERO
rgbGen lightingDiffuseEntity
}
{
map models/players/jedi_kdm/torso_2
blendFunc GL_SRC_ALPHA GL_ONE_MINUS_SRC_ALPHA
rgbGen lightingDiffuse
}
}
I hope this tutorial helps, I know it's something minor but it has helped me greatly as this was never explained or shown in any tutorials. It always bugged me not being able to find where these mystery textures were hiding!


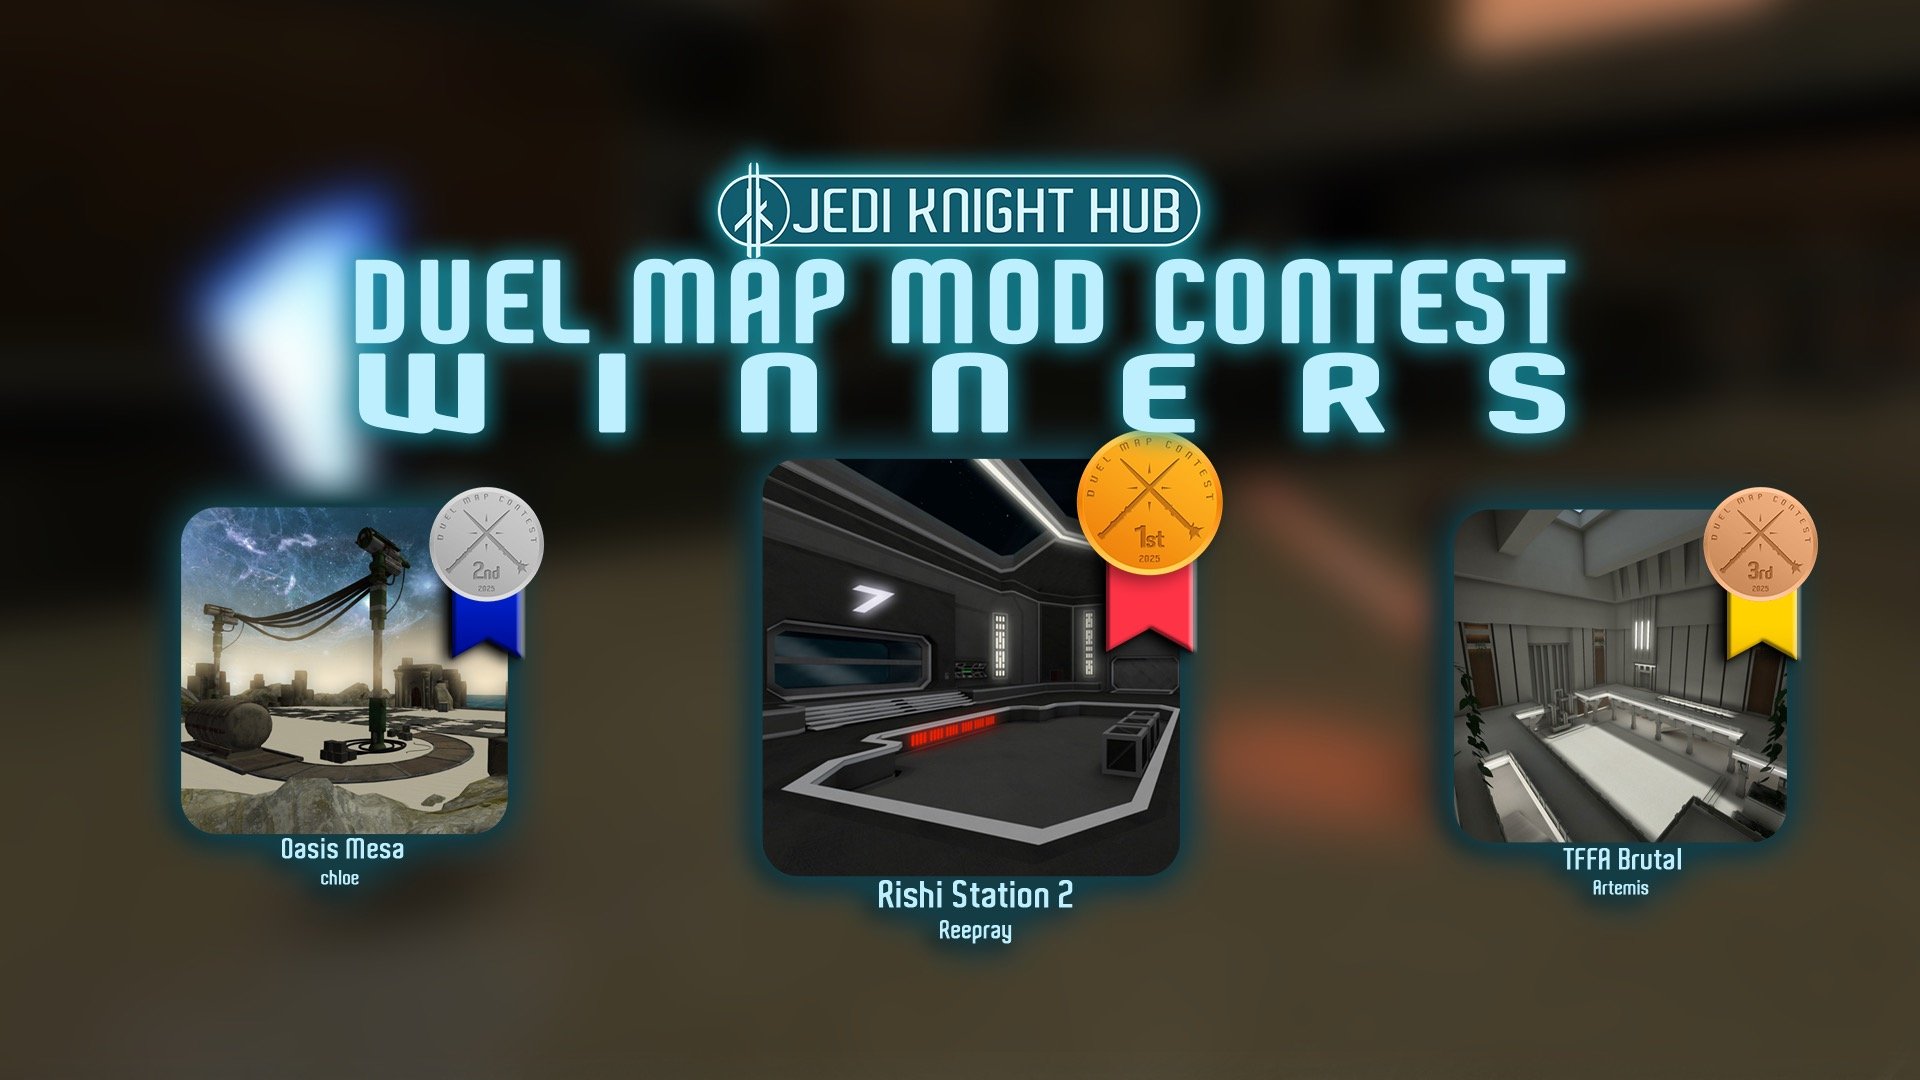
 1st Place Winner Reepray with Rishi Station 2,
  2nd Place Winner chloe with Oasis Mesa, and
  3rd Place Winner Artemis with TFFA Brutal! Amazing submissions by everyone!



Recommended Comments
Create an account or sign in to comment
You need to be a member in order to leave a comment
Create an account
Sign up for a new account in our community. It's easy!
Register a new accountSign in
Already have an account? Sign in here.
Sign In Now