
 1st Place Winner Reepray with Rishi Station 2,
  2nd Place Winner chloe with Oasis Mesa, and
  3rd Place Winner Artemis with TFFA Brutal! Amazing submissions by everyone!


Well, I thought this was common knowledge, but I guess it isn't. The title of this tutorial says it all - you can make ASE models using nothing but GTKRadiant and a simple trick.
Before we get into details, I'll start out by giving you the advantages of using ASE models over MD3s:
• ASE models do not need UV mapped. They get textured like everything else in Radiant.
• Because they reference the original textures, this can reduce load times. Think about it - if your map already uses the textures you apply to your model, it has no new textures to load!
• ASE models do not have the "always drawn" glitch that MD3 models do. This saves a few FPS.
• ASE models zip up very nicely, since it's just a text file.
• You can use curve patches in your ASE models.
• Making an ASE in Radiant is just as accurate as making an MD3 in a professional program. I know what you're thinking - Radiant's grid is not small enough. Just trust me on this, I'll explain it later on. It's actually more accurate to make a model in Radiant, because you are forced to snap everything to the grid, meaning no offset origins.
Now, to be fair, there are a few downsides:
• Since there is no UV mapping, you can't get quite as much texture variety.
• You can't use these models for anything else in JA - just map objects.
• Misc_model is the ONLY entity that can use ASE models. Everything else requires an MD3 model. This includes the model2 key on func_ entities.
This will be short and sweet, so let's cut to the chase.
Start GTKRadiant. Once it is open, you need to ingrain this message into your head:
Build everything at least four times as large as you want it to be!
This is important! The entire process hinges on this. Not only will it be easier to edit, but this is what enables you to make higher detail models.
In Radiant, you will see the origin (0, 0, 0) point of the grid. This is where the base of the misc_model will be. Build your model anywhere on the grid. You'll have to move it at the end, though.
For this tutorial, I'm going to pull up an old, somewhat lame model I made of a lantern.
Click here to download the lantern's source files.
I would suggest following along with them the first time around, and once you get the hang of this, you can do it on your own.
Don't forget to add lantern.shader to shaderlist.txt if you use this example!

Not the best model, but it worked for what I needed. Anyway, here's a look at the grid view. Check out the scaling:
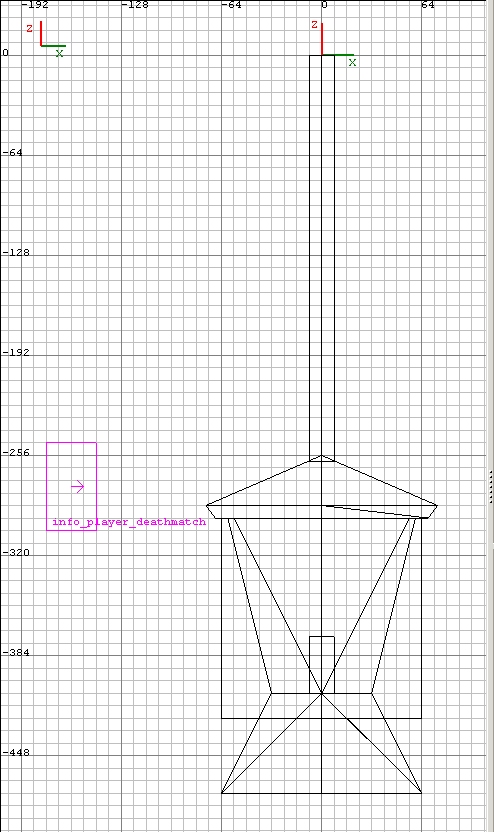
As you can see, this thing is MONSTROUS. That's because I made it 10 times bigger than I wanted it to be. Notice that the textures are stretched large on it as well. There is a reason for this.
<a name="important" style="color: rgb(238, 255, 255); font-family: 'Times New Roman'; text-align: -webkit-center; background-color: rgb(0, 0, 90); font-size: medium; ">IMPORTANT:
Your model must have AT LEAST one structural brush somewhere on it. This is easy to cheat on - just add a structural brush of caulking in a random location. It won't affect your model in any way, and it's invisible, so it doesn't matter where. In the lantern example, I made everything detail except the stem of the lantern. I don't know why I bothered, but I did.
If you fail to do this, no ase file will be created and no warnings will be given.
Additionally:
You need to get the origin at the correct spot. This is critical! You can't put the origin in the middle of the model, or it won't work properly. Whatever part of this model will be attached to something is where the origin in Radiant must be.
To put it simply: If your model is going to hang from the ceiling, you need to make the top of your model touch the map's origin in Radiant (The lantern is a good example of this). If it's going to sit on the ground, you need to make it touch the bottom. If it's going to hang on a wall, you need the origin to be against the side of your model that will be against the wall. You'll see why this is important.
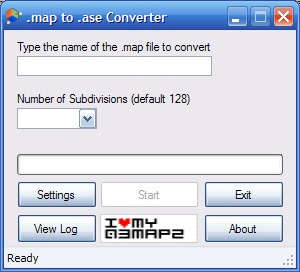
Now, let's convert this into an ASE model. I use Yzmo's .map to .ase Converter Utility to create ASEs, but you can also do it with q3map2GUI, q3map2build, or even just with cmd.exe and q3map2.exe if you like. I'm going to use the .map to .ase converter, because it's easiest to explain and use. Once you have it downloaded and installed, read on.
Once the program is running, click the settings button and give the program the paths to q3map2.exe file and your GameData/base/maps folder. Uncheck the Make Window Semi Transparent box if you like, then click ok. You should see this:
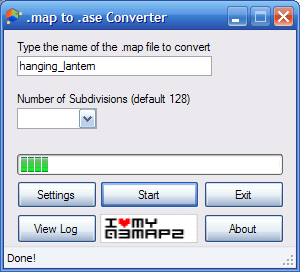
Now for the juicy part. Make sure the .map you want to convert is in your GameData/maps folder.
Now, just type the name of your .map file (minus the .map extension) into the first box. You can leave the second one blank if you like. Press enter and watch it go.
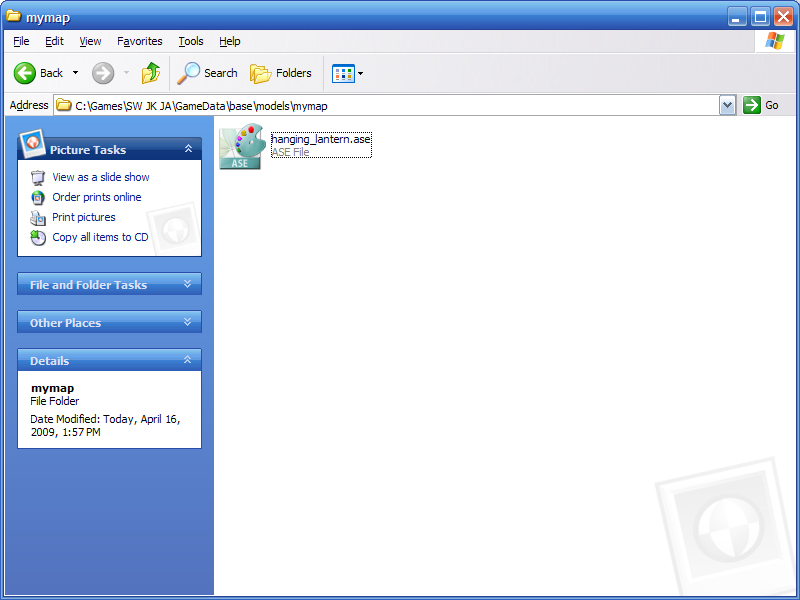
Open up your GameData/Maps folder. You should see two new files: lantern.srf and lantern.ase.
Delete the .srf file and copy the .ase file to whatever folder you want. I'll copy it to GameData/models/mymap as an example.
If you do not see any files, make sure you read the warnings above and try again.
We're almost done. Now we just need to add the model to our map. Load up whatever map you want to add this model to.
Find where you want to place the model, right-click on the grid and create a misc_model.
Note: misc_model_static does not work with ASE models!
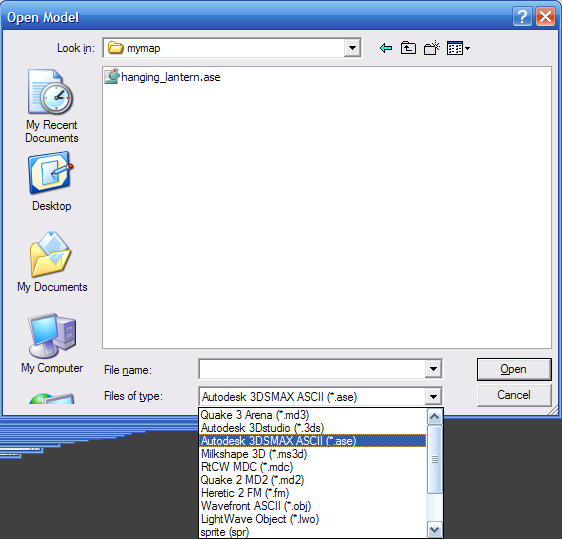
When opening the model, You'll have to change the format to .ASE to see it:
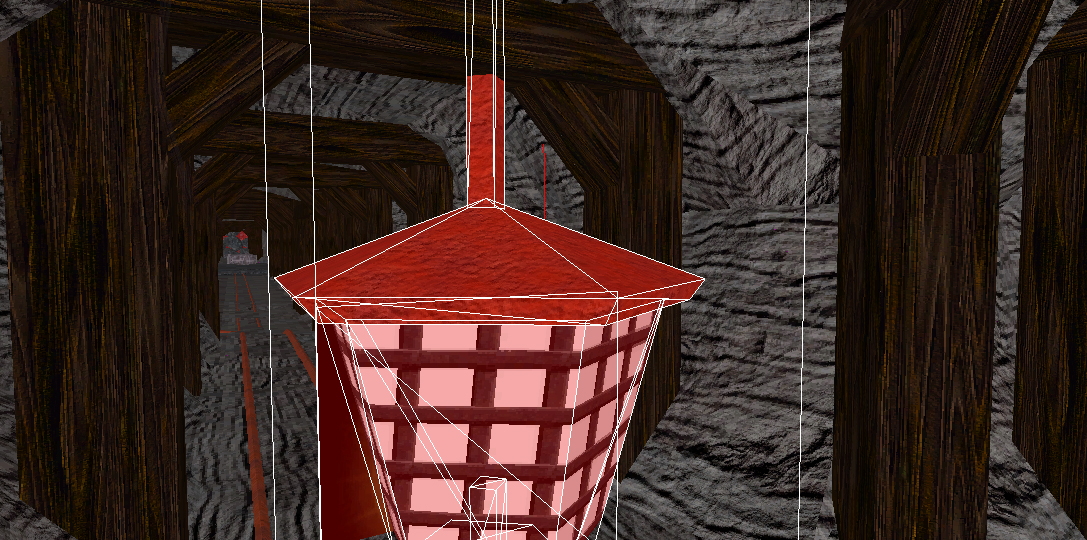
Once you get the model loaded, you should see it's massive bulk eat up a ton of space in your map. We're going to fix that next.
With the model still selected, press N to bring up the entity window. Depending on what scale you built your model to, you'll have to scale it differently. If you made your model four times the size you wanted, you'll need to enter:
Key: modelscale
Value: .25
If you built it to a scale of ten, like I did, you'll need to enter:
Key: modelscale
Value: .1
If you built it to a scale of two, you would enter:
Key: modelscale
Value: .5
Here's what the entity should look like if you built it on a scale of 10:
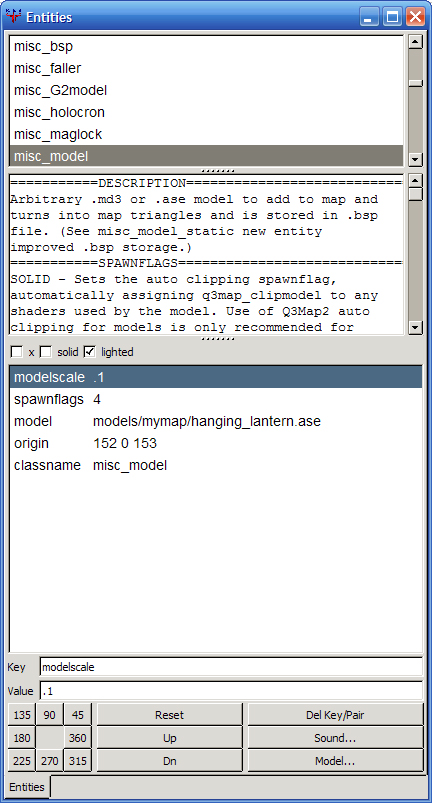
For extra realism, you can also check the "lighted" checkbox.
If you do not have a "lighted" checkbox, you need Darth G's updated entity definitions.
Here's what it looks like with the correct modelscale value:

Much nicer, isn't it?
Few things in closing. Instead of using the modelscale key, you can use modelscale_vec and give it three different values (.4 .8 2) and scale it on each axis individually. Also, instead of using the angle key to rotate your model, you can use the angles key to rotate it on every axis individually as well (20 45 90).
Thanks for reading this tutorial, and I hope it helps you in one way or another!


Recommended Comments
Create an account or sign in to comment
You need to be a member in order to leave a comment
Create an account
Sign up for a new account in our community. It's easy!
Register a new accountSign in
Already have an account? Sign in here.
Sign In Now