
 1st Place Winner Reepray with Rishi Station 2,
  2nd Place Winner chloe with Oasis Mesa, and
  3rd Place Winner Artemis with TFFA Brutal! Amazing submissions by everyone!


The Making of the Bumpmapping Mod
Section One:
Introduction
So here I am, writing a tutorial in Microsoft Word about how to write shaders and make textures for specularly enhanced models. There were a few of you that expressed interest in getting this tutorial in their hands, so here it is, at long last. This tutorial may be short, but for all of you that are fond of the “bumpmapping” effect my solution puts on the gun models, you will be delighted to know that the effect can actually work on ANY model in the game. Unfortunately, though, it doesn’t work well on all map textures, just…because. It probably has something to do with the tris…or…something. That’s the problem I ran into with putting this effect on the default map textures, in case you were wondering why I hadn’t lived up to that. Anyway! On to what I came here to do!
Section Two:
Making the Texture
And now we come to the main purpose of this document. If you follow these simple steps correctly, you will soon have your very own “bumpmapped” model.
DEFINITION OF SPECULAR LIGHTING: Lighting on a surface that is calculated by the game engine and can move—or be moved—across that surface like a shiny highlight.
As you may have guessed, this is the method by which I have made this mod. I manufactured the textures in GIMP (a FREE alternative to the $400-$900 Photoshop program) using Lighting Effects and then used them as a Specular Map on a given model, using specialized shaders. A Specular Map is the texture that is overlaid onto the existing texture of a surface when the light hits that area. This is what allows the shiny appearance. Its shader keyword is “lightingSpecular.” However, we’ll discuss that later, in Section Three. For now, let’s just get through those steps of manufacturing such a texture. Follow me to the next page, where we’ll see the texture we’ll be modifying.
NOTE: If you do not have GIMP or Photoshop, YOU WILL NEED THEM. This tutorial is written under the assumption that the user is utilizing GIMP. Download GIMP here: http://www.gimp.org/downloads/ . Click the link, press “Gimp 2.4” at the topmost download section, and you should have the program in a little while. Patience!
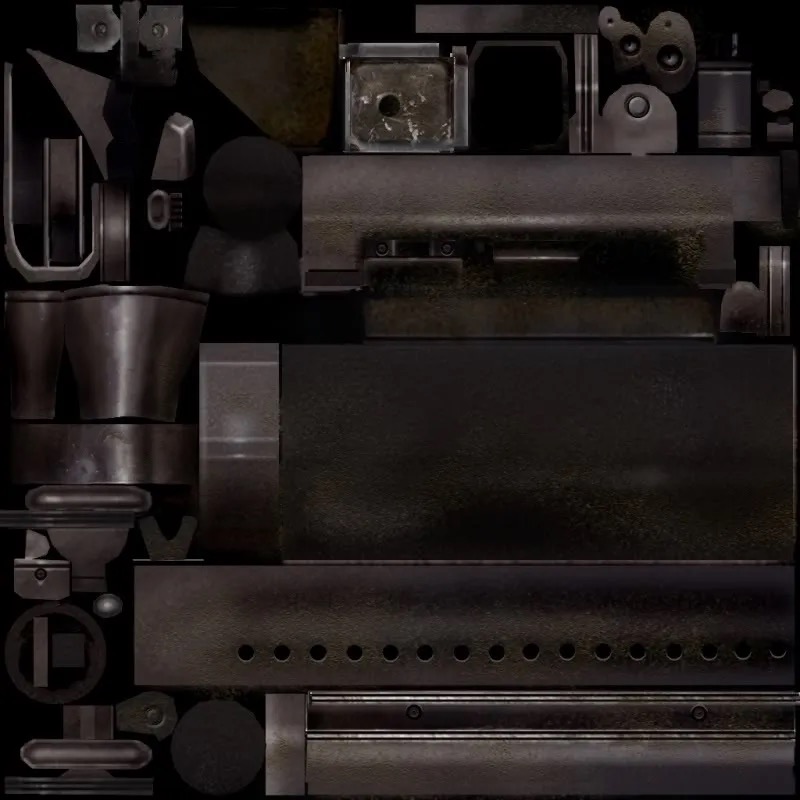
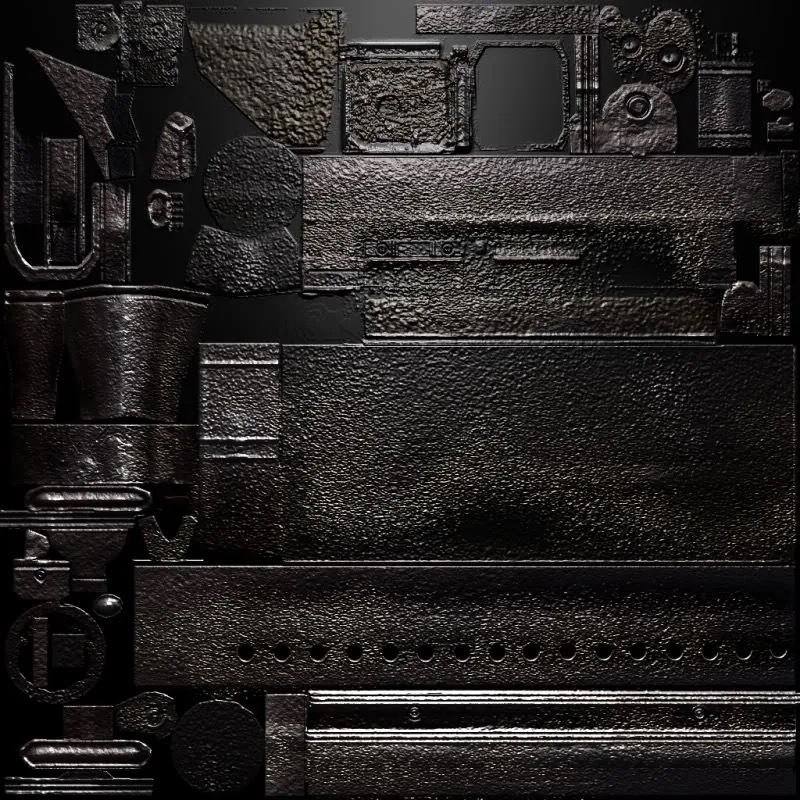
THIS IS THE TEXTURE!
IT IS THE SKIN FOR THE BLASTER RIFLE.
Start up GIMP or Photoshop and open up this included image (blaster_r.jpg) that is contained in the “Bumpmapping” folder included in the .zip folder you downloaded for this tutorial. Once you have the file open, you can immediately begin lighting the texture with bumpmapping for the finished Specular Map. Go to Filters > Light Effects > Lighting Effects to get to the menu where you can apply the effect. Follow these steps…
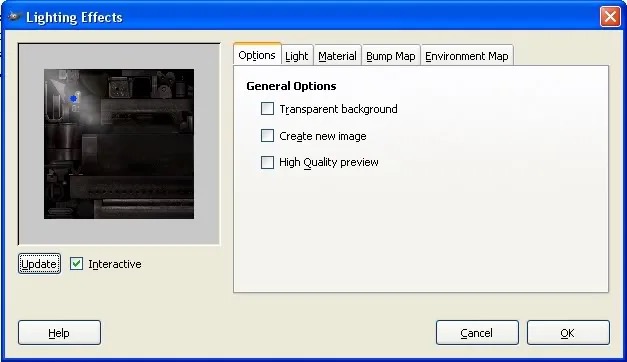
Step 1: The Menu
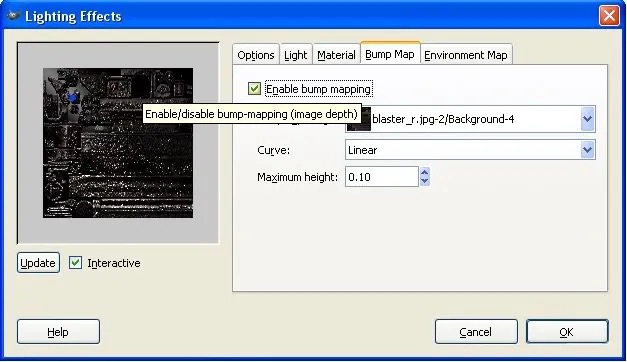
Step 2: Turn on Bumpmapping under the Bump Map Tab
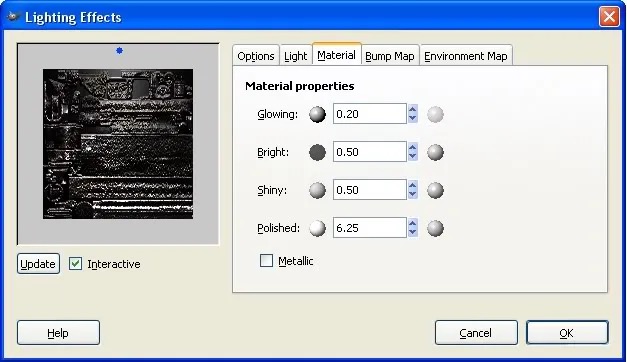
Step 3: Decrease “Maximum Height” to 0.03 and then move on to the Materials tab and enter the following values, moving the blue dot in the Preview Pane to the shown position
Step 4: Press Okay
This was only a quick mock-up of what this kind of Specular Map should look like. If you want the finished effect to look more like my Bumpmapping mod does, you’re going to have to increase the “Shiny” value to something like 1.50 or above. After applying this filter with the settings shown in Step 3, you should end up with something that looks basically like this (turn to next page to see)…
Does this look too bumpy for you—or, possibly, not bumpy enough? No problem. Just press Ctrl and Z to undo these changes and then go back to the Lighting Effects menu and tweak some parameters around. I don’t have that luxury right now, since I’m the one writing the tutorial, so…let’s get on to writing the Specular Shader!
Section Three:
Writing the Shader
So now you’ve gone to all the trouble of downloading GIMP (well, maybe) and baking this texture with one of its many filters, right? Well, you should have, and if you didn’t, I command you to, right here and now, march right back to the beginning of Section Two and bake that texture. Honestly, it doesn’t really matter if you use this texture or not—you can use any you want; this was just an example.
Well, all your hard work won’t pay off unless you write a shader file! Never written one before? Well, that’s fine—that’s not what this tutorial is about. In fact, I’m going to GIVE YOU THE SHADER and just have you paste it in there! Sound easy? That’s because it is! Now open up Notepad. If you don’t know what THAT is, then you’re pretty sad. Still, I should probably tell you how to open it anyway! Press “Start” (that’s down on the big bar at the bottom of the screen right now, you know) and then go to All Programs, Accessories, and then click on Notepad. It will open up right away—it’s not that big of a program.
Copy and paste the entire below block of text into the blank .txt Notepad gives you:
models/weapons2/blaster_r/blaster_r
{
q3map_nolightmap
{
map models/weapons2/blaster_r/blaster_r
rgbGen lightingDiffuse
}
{
map models/weapons2/blaster_r/blaster_r_spec
blendFunc GL_SRC_ALPHA GL_ONE
rgbGen identity
alphaGen lightingSpecular
}
}
If the directory “models/weapons2/blaster_r” doesn’t already exist in the base folder of your JA directory, you’ll have to create it, then save the new Specular Map you just made into “models/weapons2/blaster_r”. The Specular Map needs to be named “blaster_r_specmask.jpg” for this to work, unless you change the Specular Lighting stage to refer to a different filename/directory. If you have no idea what I’m talking about, then just leave your new shader as it is and save it as whatever you want.
HOWEVER! You WILL need to save it as a .shader file, which means that in the Save window you will have to select the All Files *.* option and then type the .shader file extension after the filename (blaster_spec.shader , for example). If you do not save it in this manner, the mod WILL NOT WORK.
After you’ve done all this, it is safe to compile it all into a new .pk3 using Pakscape and release to the community (if you want)! If you don’t want to release it, just put the .pk3 in your base folder and it will work as a new mod, and whatever model texture you just modified will, if all goes well, shine with specular brilliance next time you look at it.
Hmm. Do you know how to make .pk3s? Am I being too cautious? Well, maybe, on both accounts. And, though it pains me to do so and this is NOT a tutorial on .pk3-making, I should probably put an extra section in here, anyway, just in case you DON’T know how to.
Grrrrrrr…………………..Well, here it is!
Section Four:
Pakscape and Compiling the Mod
You people make me really angry, you know that? Anyway, here we go.
Step 1: Downloading Pakscape
If you don’t already have Pakscape, you can get it here: http://jediknight3.f.../Pakscape;31681
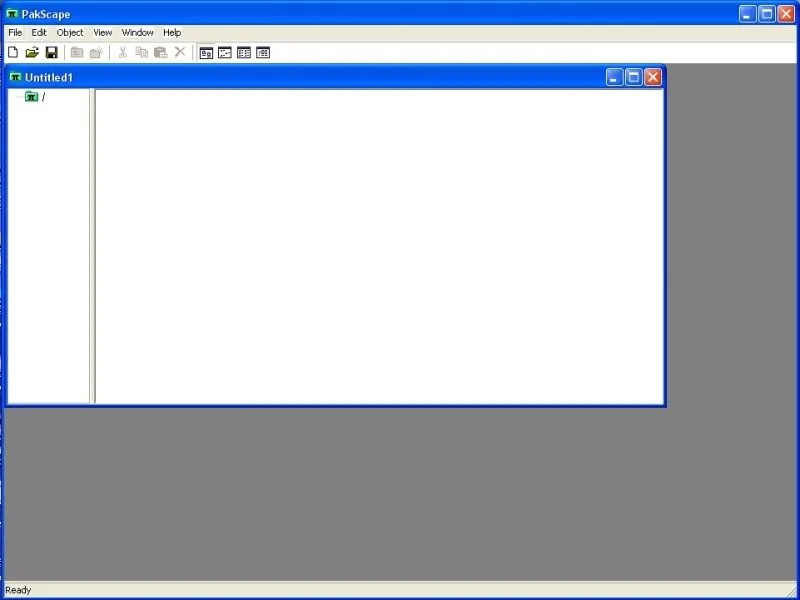
Step 2: Create Your .pk3
Press File > New to open up a blank .pk3 template. Here is what it looks like:
Step 3: Populate the .pk3
This is where you “fill the real estate” of your new template. There is one guideline you must go by, though. In order for any of your .pk3 content to work, you must make it refer to the original content it replaces. For instance, you want to place your new Specular Map in the right directory so it doesn’t show up as a missing texture in-game. So, you need to know which directory it should go in. See that second “paragraph” (it’s actually called a “pass”—each “pass” is closed off by a block of this: { and this: } so that it can be properly organized) in the shader code I gave you in Section Three—the one that starts off with map models/weapons2/blaster_r/blaster_r_spec? Well, that’s the paragraph that tells the mod where the Specular Map is located and what to do with it. Map, at the very beginning of the “paragraph,” tells what texture to draw there, so if that texture can’t be found, then there’s going to be some “black-and-white box trouble”! We’d better fix it so that doesn’t happen, wouldn’t you say?
To do this you need to recreate that exact directory—models/weapons2/blaster_r/—to tell the game where to look for that special texture. Do this by first clicking on that little slash underneath “Untitled1” in the blank Pakscape template and then going up the “Object” menu and clicking New Directory. Name the new directory models. Double-click on models to enter it and then, once inside, create another new directory called weapons2. Finally, inside weapons2 you should create the folder blaster_r and you’re all set to import your Specular Map! So, go up to the Object menu again and click “Import File”. Travel in the new window that pops up to the place where you stored the image and double-click on it to import it. After populating the Specular Map directory and file, you also need the shader to make it all work. So click on that little slash under Untitled1 again, create a new directory there called shaders, and import the file you put my little block of shader text into.
There! If you followed every step correctly, you should now end up with a .pk3 that looks basically like this in its directory tree:
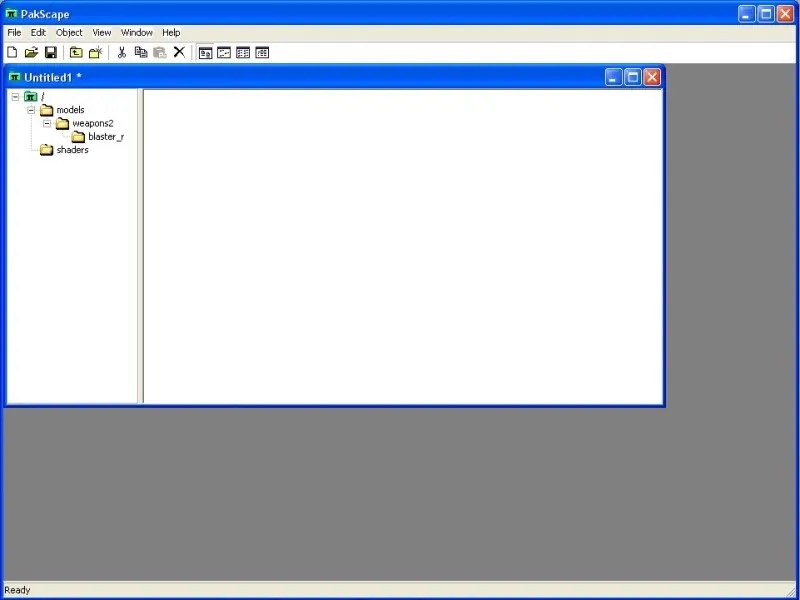
If it does and you have put everything in the right place, then your mod should WORK—just once you save it in your base folder! Yes, that’s where you put all your OTHER mods, as well—but this time you have made your OWN! Hoorah!
Step 4: TEST AND ENJOY
Once you have done all this, open up your game, switch your gun to the Blaster Rifle, and see it shine! If it doesn’t, you’ve done something wrong—or you just need to make the Specular Map shine a bit more intense.
Congratulations! You’ve just made your own shiny blaster! Good luck on all your future exploits, whether they be in furthering your modding talents or using the talents you already have.
User Feedback
-
Recently Updated
-
-
Recent Tutorial Activity
-
8
Setting a custom resolution or widescreen in Jedi Outcast or Jedi Academy
https://www.youtube.com/watch?v=K_MdsPXIiHI Basically, you need to set it to open as Admin, set DPI to "Application" (if it wasn't before) and to change/add seta cg_fov 95. It helped me with my laptop 1080x1920 -
-
-
1
How to install multiple modded clients on the same system
Is there any particular reason that the start-up script is failing to load the asset pack? I've checked the application name, and the path and copied the script exactly, but it's giving me the "default.cfg" error. -
6
MD3 Import/Export Using Blender 3.3
Whats the issue? I don't see any. Looks like you imported a torso. Bones in the mdr format dont have any size, so this might look a little off. Theres also no base pose. Your imported mesh seemingly has LODs and this is what creates these overlapping surfaces. If you import a lower part and afterwards the torso, the torso part will be parented correctly to the lower part animation wise. -
-


Recommended Comments
There are no comments to display.
Create an account or sign in to comment
You need to be a member in order to leave a comment
Create an account
Sign up for a new account in our community. It's easy!
Register a new accountSign in
Already have an account? Sign in here.
Sign In Now