Window Setup
When you have opened GTKRadiant, you SHOULD see something like this:

The tall, thin window on the far left side, I do not use, because I have never figured out it's name or it's purpose. The view with the gridlines and numbers is what I call the grid view. (How creative!) There are two windows on the right side. The top one is called the 3d view, and the one on the bottom is called the texture window. The small window on the very bottom is the console output window, but that's not very important just yet. You may also have noticed that you can resize these windows by putting your cursor in the space between them, then clicking and dragging them. I would resize them the following way:
- The tall window on the left side should be almost completely gone (it does have some uses, but I just need a little tiny bit for them).
- The Grid View should extend to a little less than half the screen's width.
- The 3d View should take up more than half the vertical space, leaving the texture window with barely less than half.
- The Console Output window should have three to five lines of text visible.
If you would like to enable a few cool features in Radiant or you are having errors with the 3d display window, click here for suggestions.
Please note that the higher your screen resolution is, the more you will be able to see, which may help your mapping efficiency. My screen's resolution is set for 1920 x 1200, and I can see plenty with Radiant in full screen mode. I notice a big difference when I switch to a 1024 x 768 display. It's livable, but you should put your resolution up as high as your screen can go (as long as you can still read it).
Open a map
Click the open icon  to open a map file. Radiant 1.4 has many sample maps included with it, and I would highly recommend downloading it to get them. Raven has released some of the JA maps as open-source, so you can have fun with them. You can open whatever map you want, but for sentimental reasons, I'll open FFA5 for this tutorial.
• Click the open button, then go into the 'mp' folder. Open the map 'ffa5_sample.map.'
Once the map is opened, Radiant should look somewhat like this:

This should be self-explanatory, but I'll make sure it's clear.
- The 3d view shows you the current product. The big problem is that RADIANT CANNOT SHOW LIGHTING. If you click on a light entity, it will show you the area the light will affect, but it will NOT show your lighting.
- The Console Output Window will show you what Radiant has been doing to load the map. Usually, you will see a lot of textures being loaded as the map loads, and every once in a while, you will probably see a message that says "Warning: brush plane with no normal". For now, if you see it, just ignore it. We'll get there later.
- The Grid View shows you lines where the brushes, curve patches and entities are. This is also what you will use to resize things and move them around. (If you decide to use the 3d view for doing that, more power to you, but it's very hard to do and quite unpredictable sometimes.) Right-clicking in this window will also give you options for creating or modifying entities.
- The Texture Window shows the textures your map is currently using. If you are modifying anything, this makes it easy to find a texture you are already using, and if you want to use another texture that isn't currently used, you can open the texture set that contains it (more on that later).
So you've opened a map. Big deal. But before you can get into anything really fun, you need to learn how to move around.
Moving Around
In order to display a 3d image, Radiant has to set up an imaginary 'camera.' This camera is displayed on the Grid View as a blue diamond shape with two blue lines coming out of it.

The diamond shape is the camera itself, and the two lines indicate where the camera is pointing (in the picture, the camera is pointing towards the top of the picture). The camera can move through anything in your 3d creations (nothing is solid to it), but when the camera moves inside of a brush, it (the brush) will disappear. Now it is time to move the camera.
• Right-click your mouse anywhere in the 3d View. Your pointer will disappear, and a small crosshair will appear in the middle of the 3d view. You can now rotate the camera around by moving the mouse. When you want to stop rotating the camera and get your pointer back, just right-click again.
• To move the imaginary camera around within the map, you can do one of two things. If you have a 3-button mouse, you can use your scroll wheel to go forward and backward. If you don't have one, then the up and down arrows will move the camera forward and backward. If you are also rotating the camera, the camera will move in the direction the camera is aimed. Otherwise, it will move straight forward or straight backward.
Some questions can be raised about how to move around in delicate areas. If things are bunched up too close together, how would you get the camera between them? There are two ways. You can hide one or more of the brushes (more on that later), or you can strafe the camera into the area. Note: Camera strafing in this way does not work in GTKRadiant 1.5! To strafe the camera, right-click in the 3d view, hold down the Ctrl key and move the mouse around. You should notice that the camera isn't rotating, but it is moving. If you were lined up sideways with the area you wanted to get the camera into, you could hold down Ctrl and then slide right in. As stated above, this does NOT work in Radiant 1.5. In 1.5, you would use the greater than and less than symbols on the keyboard to go sideways. This is actually one of the main reasons I prefer using 1.4 (I'm picky).
Another more interesting way to move the camera around is to hold down the Ctrl key and middle click in the grid view where you want to place the camera. This is especially effective in rather large maps, as you can get places almost instantly, without waiting for the camera to crawl through and/or between hallways to a destination. Usage of the grid view will be covered next.
You can now go anywhere and look at anything inside any map!
The Grid View
Before you can do anything to your map, you need to know how to use the Grid View to move, resize and create things. It's quite simple, but it is another vital skill that you cannot do without.
First, you need to know how to move the grid view around to see the entire map. It's easy enough; just hold down the right mouse button and move it around. Your pointer will disappear, and the grid view will move. When you are done moving, let go of the right mouse button and you will get your pointer back again. That's great, but you can't see enough to do a whole lot, can you? There's an answer for that, too. If you have a 3-button mouse, then you can use your scroll wheel to zoom in and out. If you do not have a 3-button mouse, then you can use the delete and insert keys to zoom in and out, respectively.
• Right-click and hold to move the grid view around.
• The scroll wheel on your mouse will zoom in and out, or you can use the insert and delete keys.
Note: To use the scroll wheel to zoom in and out in the grid view, you don't have to be clicking anything. Just put the pointer over the grid view.
You've probably also noticed that the grid view is 'looking down' on the map. Maps can't just be made by looking down on them. In reality, there are three dimensions, referred to as x, y, and z. In the top left corner of GTKRadiant's grid view, you will see a small angle symbol with two of the dimensions listed. The dimension that is not listed is the one you are looking from.


To change between the different axes on the grid view, push Ctrl + tab or push the xyz button  on the toolbar.
One final thing about the grid view. As you've noticed, the blocks on the grid are a pretty decent size, but it is just large enough to make high-precision mapping nearly impossible. Radiant lets you change the size of the grid blocks to suit your needs.
• Use any of the number buttons above the letters on the keyboard (1, 2, 3, 4, 5, 6, 7, 8 & 9) to change the grid setting, or go to the grid menu and choose a size.Note also that pushing 0 will toggle between showing and hiding the gridlines to make it easy to see very detailed work. If you want to increase or decrease the grid size and don't care to know where it's at, use the [ and ] buttons to do it.
That's about it for the grid view. It's very simple to learn and easy to use. Learn to do it well and you're well on your way to some good mapping!
Selecting Brushes
Besides moving the camera, working with brushes is the most important thing you can learn in Radiant. Brushes are used for most visible objects in a map, and being able to easily manipulate and stretch them is crucial to your success as a mapper.
GTKRadiant follows the same select-then-do pattern as the rest or the computer world does, so it's quite simple to use. Also, remember that the term brush is the Quake 3 engine's term for a solid 3d object. First, let's select an existing brush from the map that was opened earlier.
• If you want to be choosy, move the camera around until you see something you want to select. Hold down the shift key, then click on the brush you want to select.
You probably won't be able to tell where the different brushes are, but don't worry about it. Just click randomly on a wall. You should see the part you clicked on become a shade of red and have a white outline. If it is visible in the grid view, it will be outlined in yellow (or, if you changed it earlier, it will bed reddish-orange). It is selected. Select another brush using the same method. Keep selecting things until you have a bunch of brushes selected.
Now, shift click on one of the ones you already have selected. It will be deselected, and the red shade and white border will disappear. Also note that the outline on the grid view will disappear too (as it should).

Now let's say you don't want that selection any more.
• To deselect everything you have selected, press the Esc key. All selections will disappear!

This is one of the most important things you can learn in Radiant, so it is imperative that you get it right, and that you learn all the tricks involved with it.
Next, let's try drag selecting a bunch of brushes.
•In the 3d View, Hold in the shift key, then hold down the left mouse button and drag the cursor over a bunch of brushes.

This is a quick and useful method for making large selections. Still, if you wanted to select an entire map, or most of it, that might take a while. Or will it?
• Press the i key on the keyboard. This will invert your selection. Every brush you had selected is now deselected, and everything else in the entire map is selected.

This is useful in many ways. First off, if you want to select an entire map, just deselect everything and then invert your selection. You can move the entire map anywhere you want on the grid, delete it, resize it (although that's not a good idea) and many other things. Also, if you want to hide all but a certain few brushes for easy editing or CSG subtracting, you can select the brushes you want to edit, invert your selection, and then hide the unwanted brushes (more on hiding next, andCSG subtracting later).
When dealing with brush entities, using Ctrl + Alt + left click on a brush will select the entire brush entity. This is quite useful when moving things around. That's a bit ahead of where we are now, so it will also be brought back up in the next tutorial.
Hiding and Showing Brushes
Sometimes, to see or edit things easier, it may be necessary to hide some brushes from view. This is a very common scenario during highly detailed work, but you should know it whether you do detailed work or not.
• Select as many brushes as you like.

• Now push the h key. The brush(es) will disappear.

• To make the hidden brushes visible again, push shift + h.

There are several things you should know about hiding brushes. First off, you can hide as many brushes as you want at any given time. Also, you can hide them at different times. You don't have to hide them, then unhide and rehide all over again.
Also, and most importantly, inverting selections will NOT affect hidden brushes. This means a couple things:
• If you are moving an entire map around, make SURE that you don't have any brushes hidden, or they will be missed during the move.
• You can use this to your advantage to select only certain parts of a map, as shown below.
• Select some brushes.

• Push the i key to invert the selection.

• Now push h to hide all the selected brushes.

If you were going to do some in-depth editing on that door, you could now do it without seeing everything else in the way. It is much easier to edit the door correctly.
That's pretty much all you need to know to get off to a good start in GTKRadiant! If you are confused at all, reread the tutorial, and if that doesn't help, there is a chat box and an entire forum for you to post questions, comments and missed material. Have fun, and don't be shy; you can sign up on the forum anyway for just some plain old fun chat. Hope you have fun mapping, and that you give it your best shot!


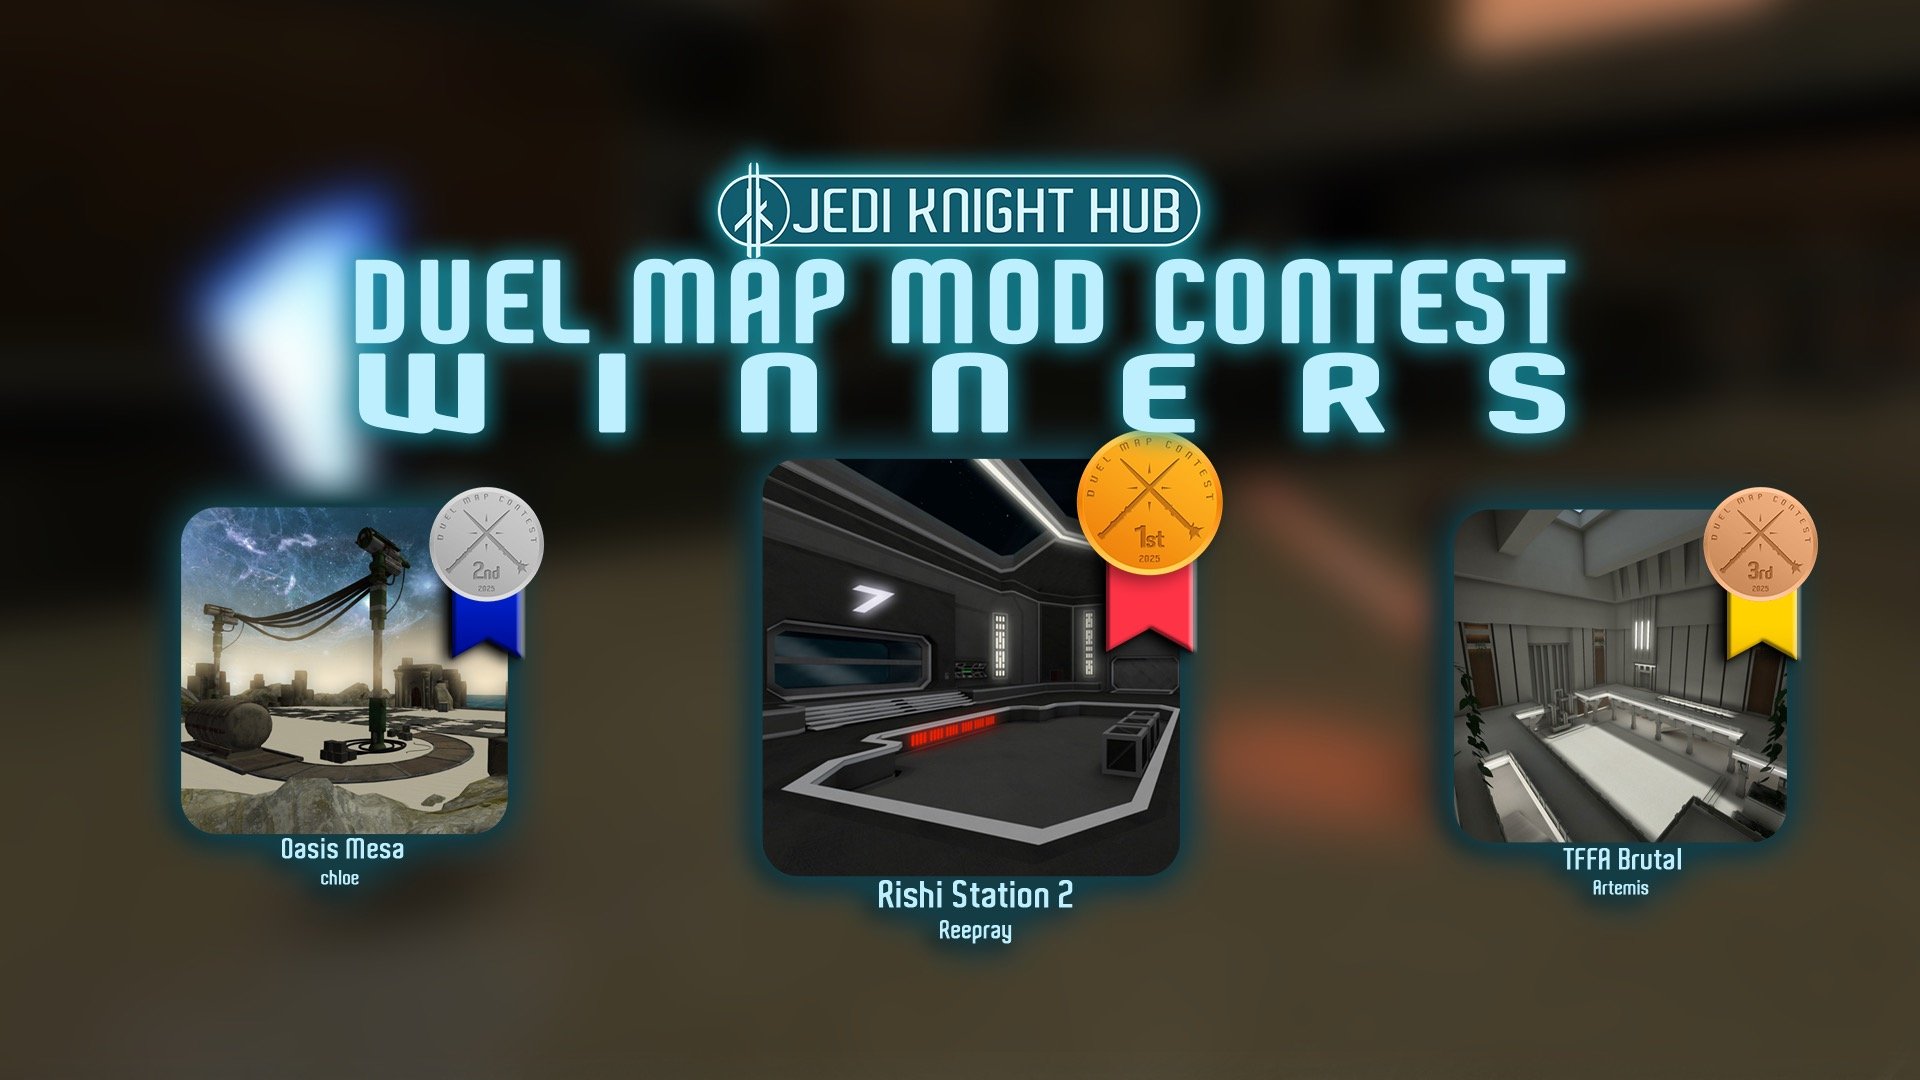
 1st Place Winner Reepray with Rishi Station 2,
  2nd Place Winner chloe with Oasis Mesa, and
  3rd Place Winner Artemis with TFFA Brutal! Amazing submissions by everyone!



Recommended Comments
There are no comments to display.
Create an account or sign in to comment
You need to be a member in order to leave a comment
Create an account
Sign up for a new account in our community. It's easy!
Register a new accountSign in
Already have an account? Sign in here.
Sign In Now