
 1st Place Winner Reepray with Rishi Station 2,
  2nd Place Winner chloe with Oasis Mesa, and
  3rd Place Winner Artemis with TFFA Brutal! Amazing submissions by everyone!


Tutorial: Export & Compile Animations for Jedi Knight Jedi Academy
Introduction
This Tutorial will teach you how to export animations made with the Jedi Knight CAT Rig for 3DS MAX and compile them for use in Jedi Knight Jedi Academy. With a minor change, this Tutorial will also work for Jedi Knight Jedi Outcast.
Requirements
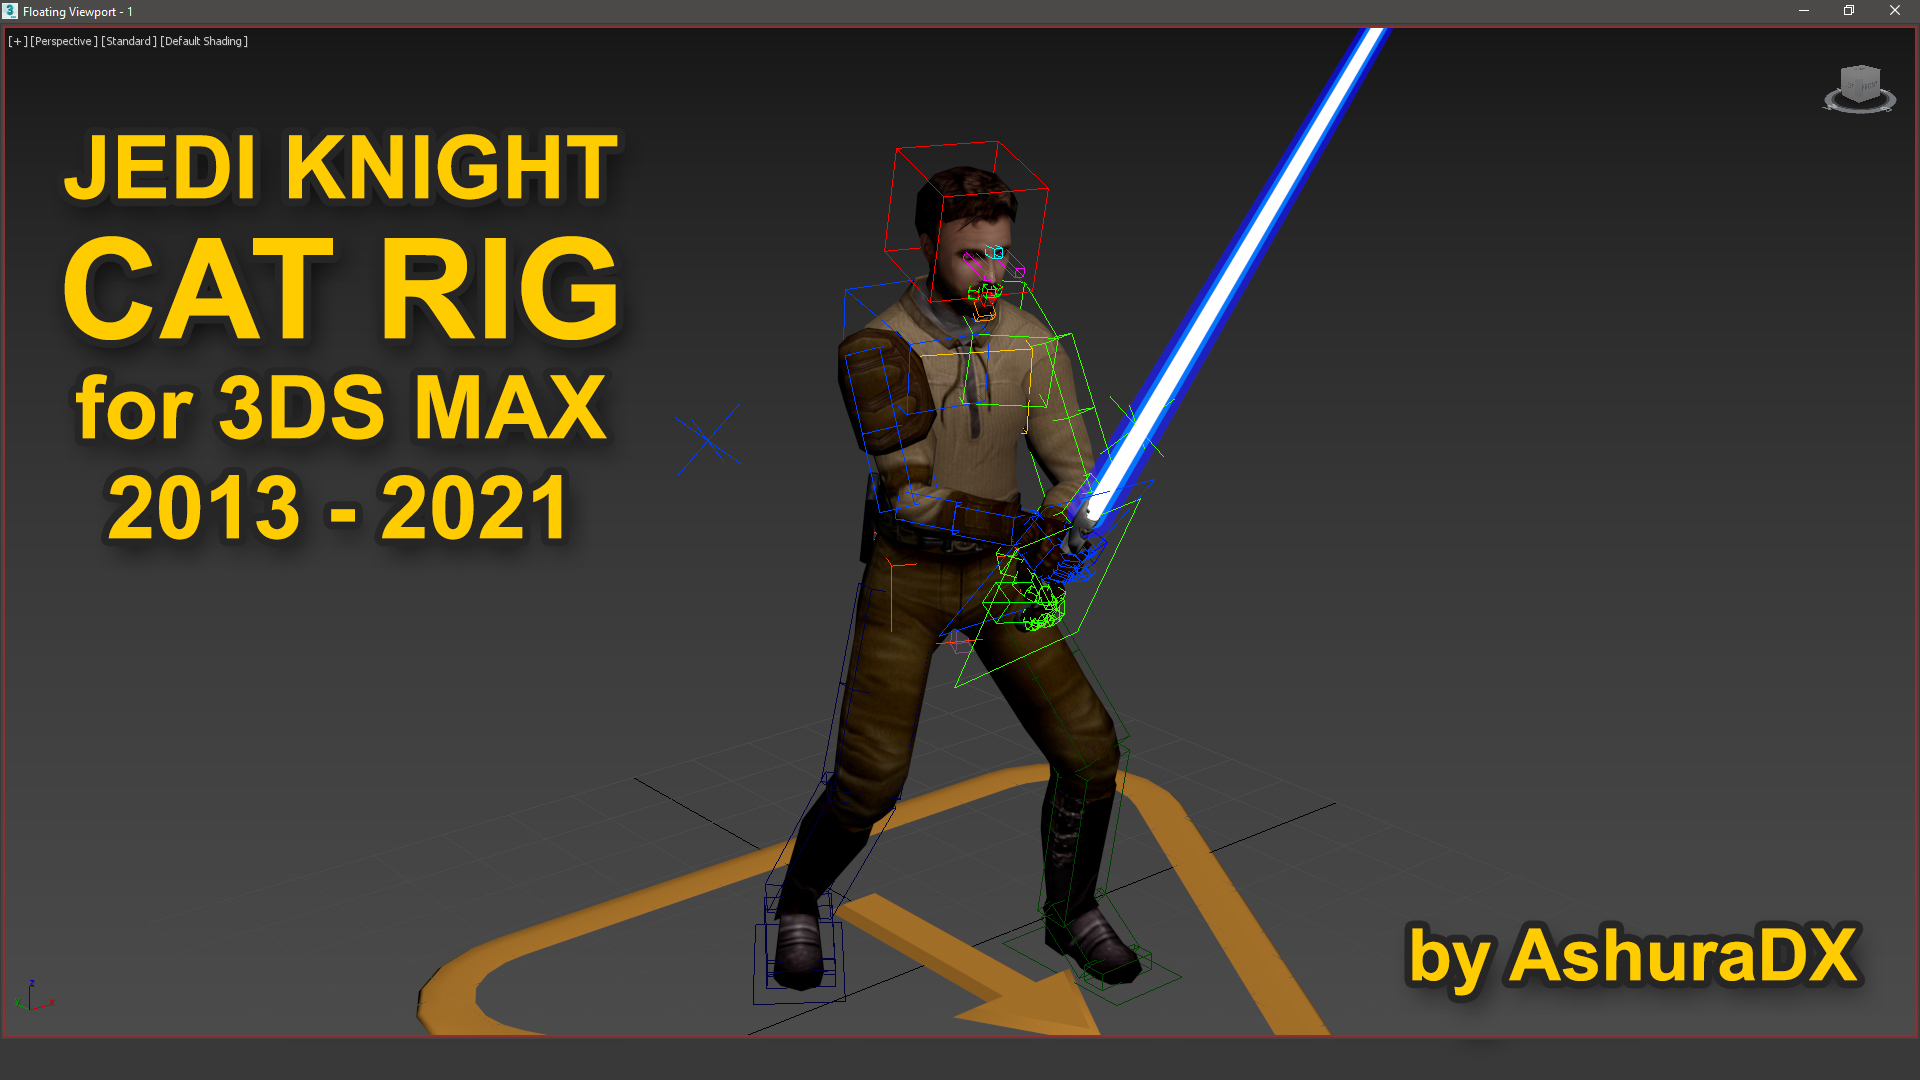
The Jedi Knight CAT Rig *.max file
The core to this tutorial, without this the remaining part of this tutorial might not make much sense to you.
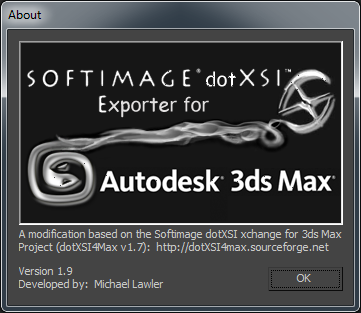
The dotXSI Exporter for your version of 3DS MAX
This is the plugin you need to export your animation as a *.xsi file which we will then run through the animation compiler to create our game-ready-animation.

The JKA SDK Repack
This file contains all of the required tools and source files we need to do this.
A Texteditor
Any Texteditor will do as long as it has a find & replace function. I would recommend Notepad++, but the regular Notepad or even the default Windows Texteditor will work just fine.
Setup & Preparation
After you have downloaded the required files from JKHub, follow these Steps:
- Install the dotXSI Export Plugin for your version of 3ds max following the provided readMe file
-
Unzip the JKA SDKRepack to a Working directory of your choice, e.g. "E:/JKA-SDK-Repack/".
To avoid Problems it's best to avoid having any spaces in the path.
This will give you this directory structure:-
JKA-SDK-Repack
- assets
- codemp
- Tools
- Original SDK readme.txt
- Read Me !.txt
-
JKA-SDK-Repack
-
Add the following branch to your Working directory:
-
JKA-SDK-Repack
- assets
-
base
-
models
-
players
-
_humanoid
- source
-
_humanoid
-
players
-
models
- ...
-
JKA-SDK-Repack
-
Start the Program called Assimilate.exe from the Tools folder, once it opened click Edit > Preferences... on the main-menubar.
Here, we'll need to set up some paths. Replace .../JKA-SDK-Repack with the path to your working directory and follow from there.
Enum file: .../JKA-SDK-Repack/codemp/game/anims.hCompiler: .../JKA-SDK-Repack/Tools/carcass.exeQuake Dir: .../JKA-SDK-Repack/base/Make sure to keep the Trailing "/" on the Quake Dir path!
- Copy all files from "/assets/models/players/_humanoid/*" to "/base/models/players/_humanoid/source/*"
-
Open the _humanoid.car file from ".../_humanoid/source/" in your Texteditor and run the following find & replace.
Make sure that the file is not write protected when you try to do this
Find: "/_humanoid/" => Replace: "/humanoid/source/" -
If done correctly, the last line of the _humanoid.car file should look like this:
$aseanimconvertmdx_noask models/players/_humanoid/source/root -makeskel models/players/_humanoid/source/_humanoid -origin 0 0 24
Now we need to change the part that's highlighted green back to models/players/_humanoid/_humanoid and save the file. This file will function as our source and backup file from now on.
Whenever we open this file in Assimilate.exe, it will read the source files and generate a fresh and completely vanilla _humanoid.gla for us.
Exporting your animation
Now that we are done with the setup part, it's time to export our animation. It's time to jump into 3ds max
Animating a CAT Rig is outside the scope of this tutorial. If you want to learn how to do that, there will be a link to a fantastic Youtube channel at the end of this Tutorial.
First, we have to configure our Timeline, if we haven't done so already. We only want to export the actual animation, so we want to set our timeline to range from Frame 1 to our last keyframe of our animation.

Then, we use the Animation Export Selection Set to select everything we need to export.
Clicking the set will most likely issue a Warning, that hidden/frozen objects are about to be selected. This warning can be safely ignored, so press NO to continue.
The relevant Objects for Animation Export are sensitive to changes and as such are frozen, hidden and mostly secured by constraints by default to prevent any sort of accidental change to them.
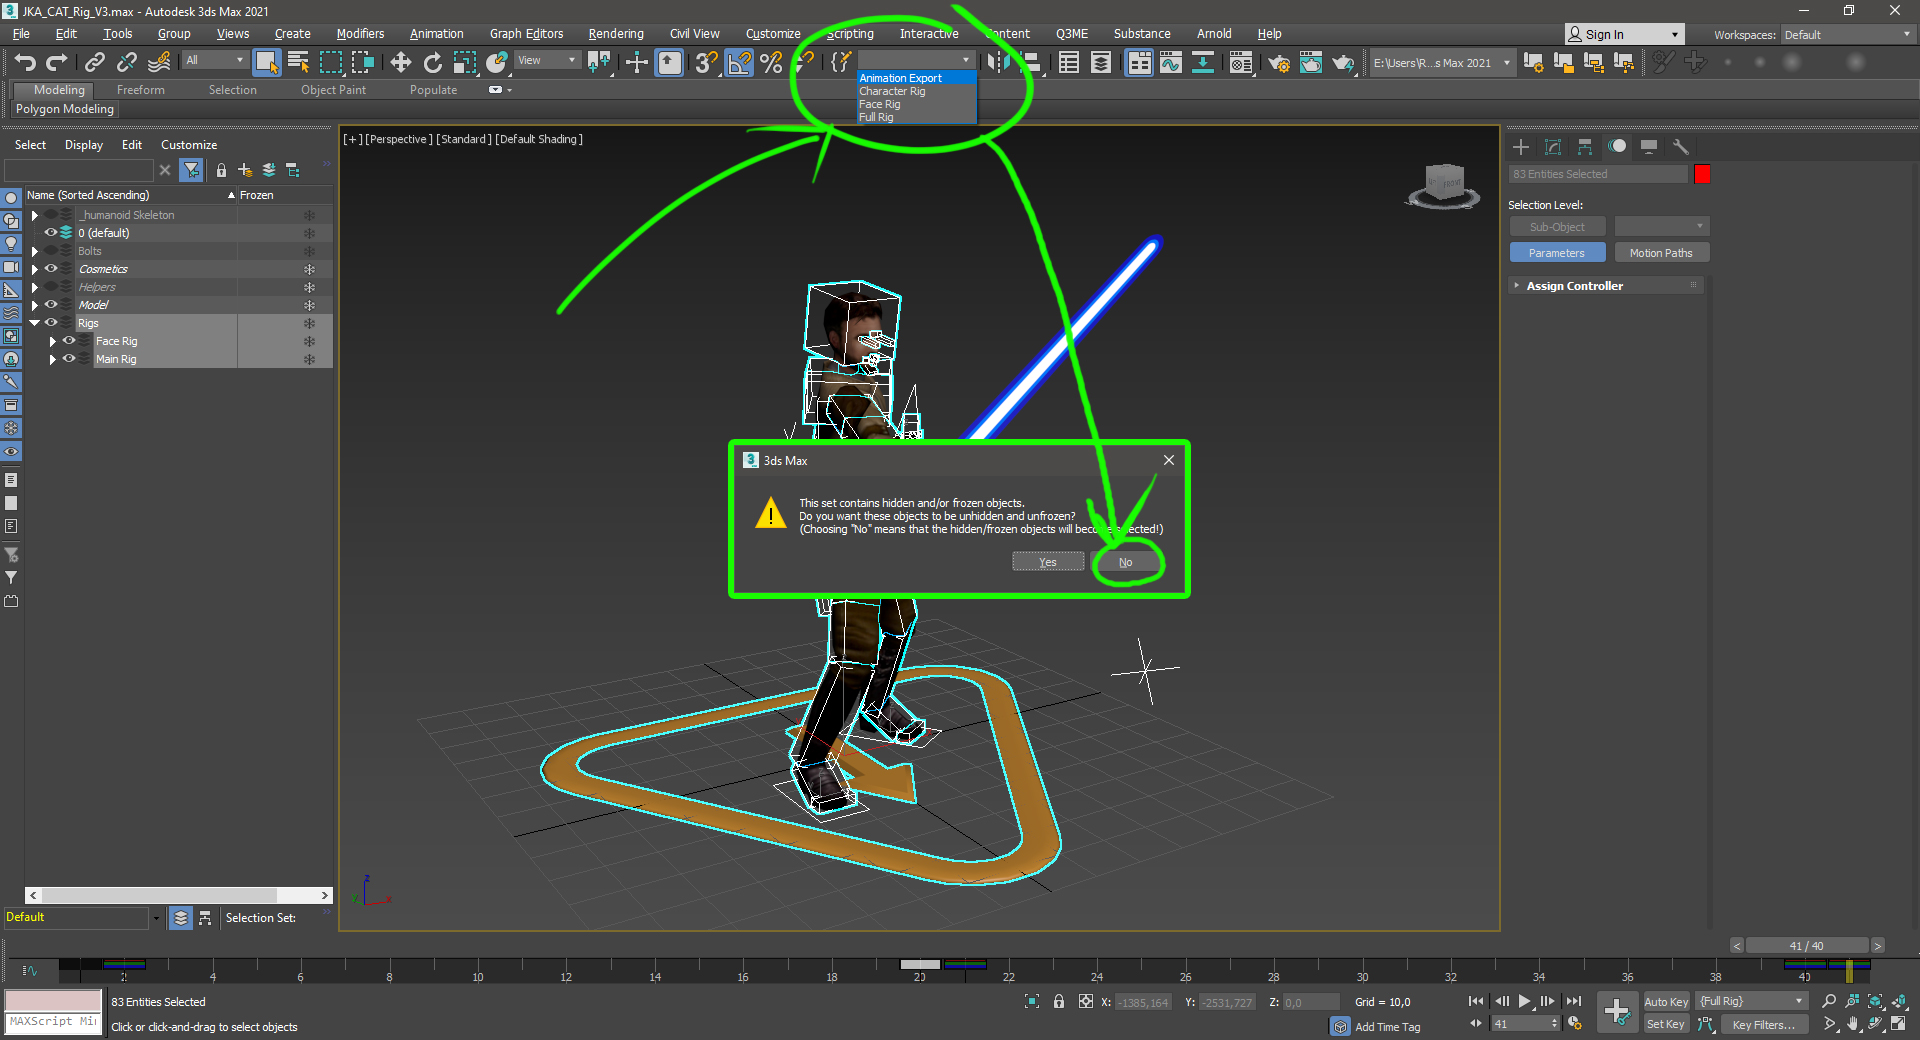
With our Jedi Knight Skeleton selected via the Animation Export Selection Set, we can Export our animation. To do this click File > Export > Export Selected... and export your Animation to your _humanoid folder as a Softimage dotXSI 3.0 (*.xsi) file.
Name your file appropiately, for this Tutorial I saved my file as ".../JKA-SDK-Repack/base/models/players/_humanoid/both_tutorial.xsi".
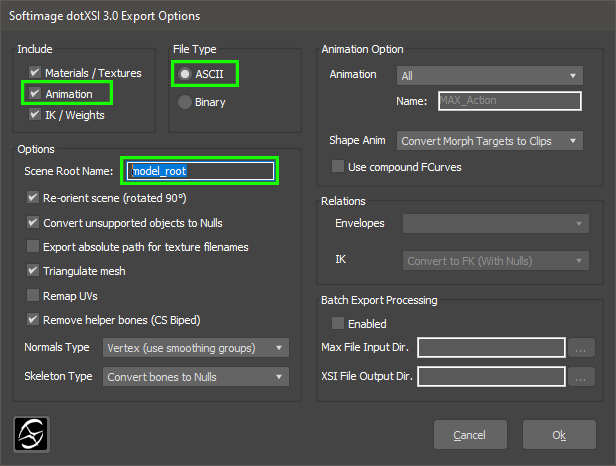
When exporting an animation, your main concern is for 3 Settings in the Export Dialog:
- Animation is checked
- File Type is set to ASCII
- Scene Root Name is set to model_root
These should be the default settings, but it's better to be safe than sorry.
If everything went correctly, we should now have succesfully exported our animation.
Compiling the animation from .xsi to .gla
We are almost done. The last step we need to do is setup our gla compile. Remember the .../source/_humanoid.car file we edited earlier? It is time to copy that file from /_humanoid/source/ to /_humanoid/ and open it in our Texteditor.
I would also suggest renaming it to prevent any accidental overwriting of our source .car file. For this Tutorial I named my file Tutorial.car
What we need to do now, is to add our new .xsi animation to this .car file, to do this we must insert a line with the following pattern into the .car file:
In my case, my Animation filename is models/players/_humanoid/both_tutorial.xsi and since my animation is not meant to loop, I am going to set the loopframe to -1. If your animation should loop, set the loopframe to the frame that the animation should return to after being completed. (usually frame 0).
Our new line should now look something like this:
Last thing left to do before we can compile, is to insert it into the right location in the .car file.
The "right" location, is right above the line
Now all we need to do is to copy & paste our new line right above the root.xsi line, like so:
$aseanimgrab models/players/_humanoid/both_tutorial.xsi -loop -1
$aseanimgrab models/players/_humanoid/source/root.xsi -loop -1
$aseanimgrabfinalize
$aseanimconvertmdx_noask models/players/_humanoid/source/root -makeskel models/players/_humanoid/_humanoid -origin 0 0 24
With our .car file being finished, it's time to open it in Assimilate.exe.
Once open it will take a short while to load in all of the animation files. Once it has completed that, we can press the big B Button on the main Toolbar to build our gla.
Shortly after you clicked it, a CMD/DOS Window will open and rush through a lot of lines detailing its work. If all goes well it will finish and you will be greated by an Info dialog telling you that "Everything seemed to go ok".
Ideally, you will have a freshly compiled GLA File including your new Animation at Hand. If not there will be some troubleshooting required. A link to a list of common Assimilate/Carcass Errors and how to fix them will be at the End of this Tutorial.
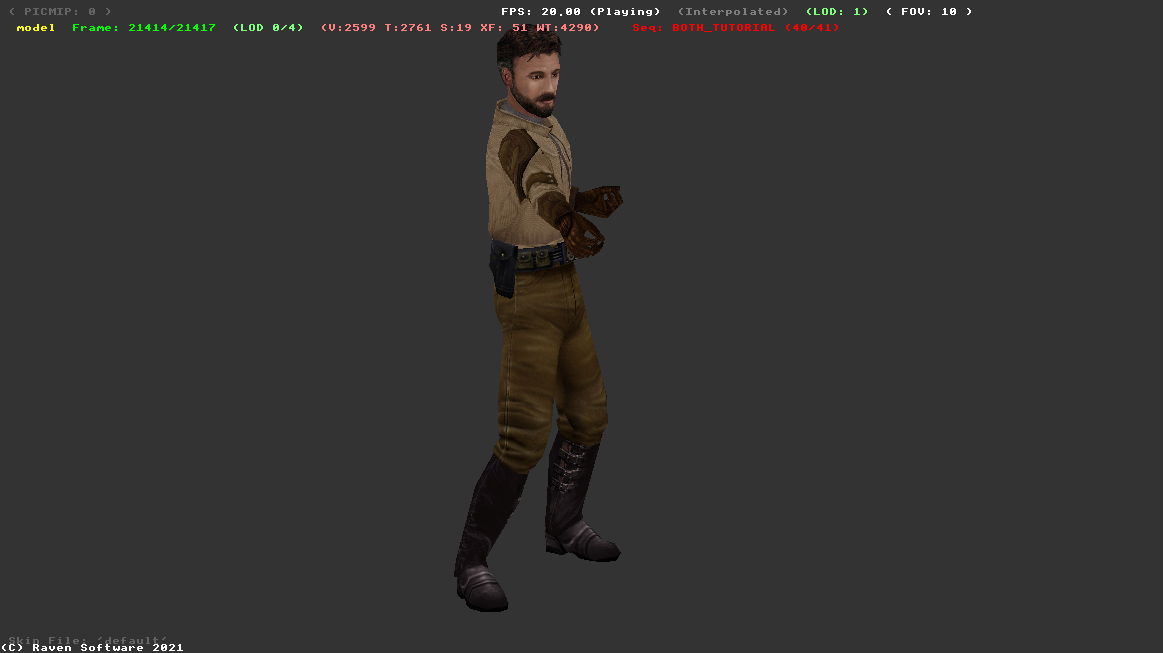
Testing your animation
The moment we've been waiting for is finally here. Now would be a good time to unpack your favourite character model from its pk3 file to your JKA-SDK-Repack base folder and opening it in Modview.
Somewhere at the bottom of the Sequence List you should find your new animation. Double click it to play and view it for the first time in Modview.
Thank you
Thank you for reading this, I hope you learned something new from my rambling. I would also like to thank Miloš Černý for his invaluable Tutorial videos on building CAT Rigs without which I would not have started this project, as well as WC3Tutorial for his rigorous Testing and Feedback on how this Rig and its earlier iterations performed.
If you run into any problems, don't be shy to reach out to me on JKHub or the JK Community Discord.
JKHub Profile JK Community


Recommended Comments
There are no comments to display.
Create an account or sign in to comment
You need to be a member in order to leave a comment
Create an account
Sign up for a new account in our community. It's easy!
Register a new accountSign in
Already have an account? Sign in here.
Sign In Now