
 1st Place Winner Reepray with Rishi Station 2,
  2nd Place Winner chloe with Oasis Mesa, and
  3rd Place Winner Artemis with TFFA Brutal! Amazing submissions by everyone!


Introduction
Ok there we go, this is the first official tutorial about Darth Arth's compiler frontend Q3Map2GUI.
So what is the idea behind this little program, you ask? Well, you may know Q3Map2Build or Q3Map2toolz which are very similar programs. And maybe you don't even know that such programs exist and use Radiant (boooh) to compile your maps, anyway Q3Map2GUI takes all the good features and merge them together, resulting in a small but effective frontend for Q3Map2.
You can download the latest version here.
Hint: Since it is a free program there are some known issues in the current version: The error "Map Leaked" isn't recognized as such and the error/warning windows won't be reset when you start a new Compile.
The Program
After starting Q3Map2GUI you will see something like this:
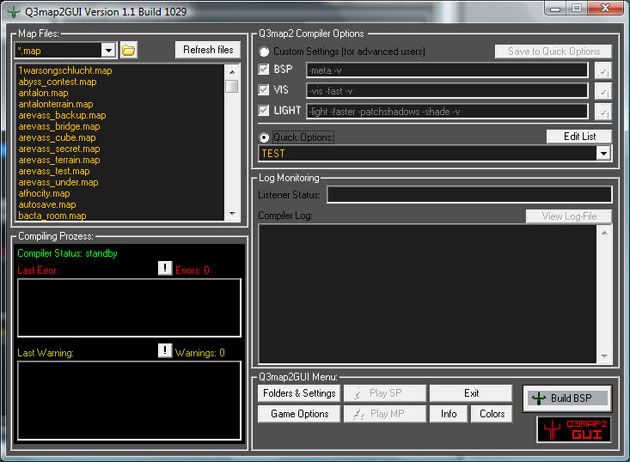
Don't be shocked about all those buttons, trust me, it is really not as hard as you may think. Since this program don't know anything about your folder structure or your favourite compile switches, you have to set it up properly first.
Let's begin with the most important thing: Folders & Settings.

Compiler Settings
Q3Map2.exe location: Type the path or browse to your Q3Map2.exe, that's the Compiler, download the latest version here.
Checkboxes: Those checkboxes are depending on your taste.
Game Settings
Game: Choose the game you want to map for here.
Use devmap: I prefer playing in devmode while testing a map but that's up to you.
Single-Player.exe: Browse to your game's single player.exe (important!).
Multi-Player.exe: Browse to your game's multi player.exe (optional but recommended).
Logging Settings
use logging: I highly recommend using loggin! (7525 is the standard Port)
Log-File Folder: Browse to a folder where all logs will be saved.
Log-File Viewer: Choose Internal Viewer or notepad(++)/wordpad/whatever.
When you are done, click on save.
You can also export your latest settings to backup them or import a saved setting file (import/export buttons).
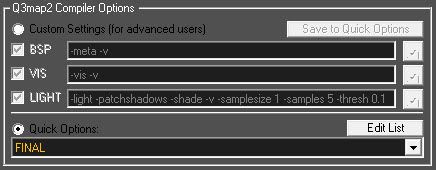
Next on the list is Game Options:
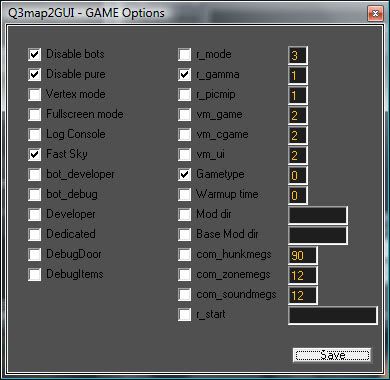
Here you can choose game switches for your server, when you start your map from Q3Map2GUI. I prefer the settings you can see in the image above.
Compile .map
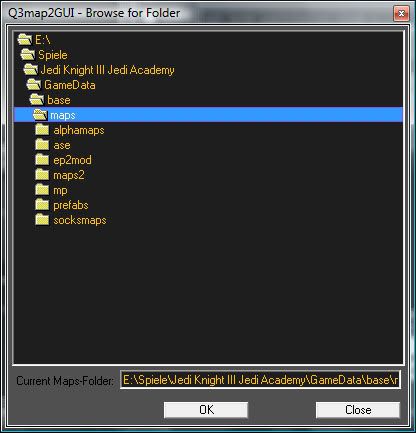
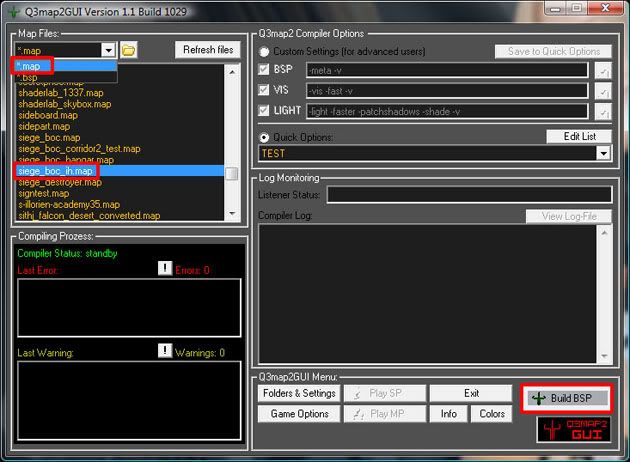
Now to the interesting part - the compile. In the left upper corner of Q3Map2GUI you see the map files list. If there are no maps listed you either set up the wrong path to your single player.exe or you maps folder is just empty. Anyway if you have subfolders in your base/maps folder you can go there by using the browse button:
To compile your map, you have to tell the Compiler (q3map2.exe) which switches it should use. Therefor you have two ways in Q3Map2GUI to do so:
#1 Custom Settings:
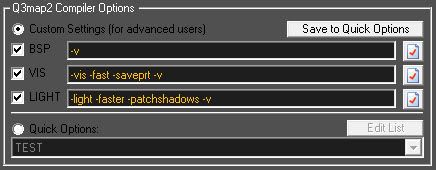
You can write down your switches for each stage by hand or you click on the buttons at the right and choose the ones you want for your map, Q3Map2GUI will add them automatically to the list. You can save those switches now by giving them a name and adding them to the Quick Options List. Here an overview of all switches for each stage:
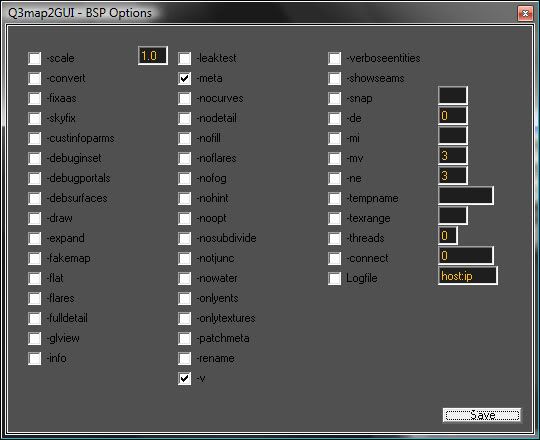
BSP Options:
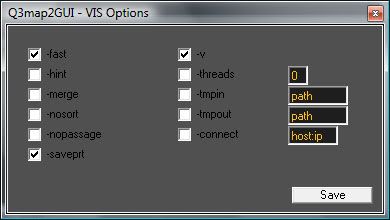
VIS Options:
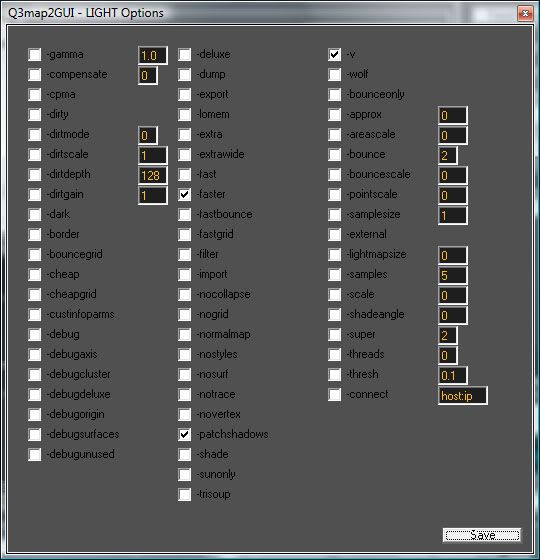
LIGHT Options:
#2 Quick Options:
Quick Options is something you know from Radiant. Pre-saved switches combined to make Compile faster. If you click on "Edit List" a new window will open:

Down there you find the complete list of your Quick Options. (Mine is smaller than yours because i deleted the presaved ones. ) Anyway, when you click on one of them a detailed list of the switches gets displayed on the upper half of the window (looks similar to Custom Settings). There you can add or remove switches and save or delete whole Quick Options. Okay, now that everything is set up, you can compile. Choose the map from the map list, choose the right Custom Setting or Quick Option and press "Build BSP":
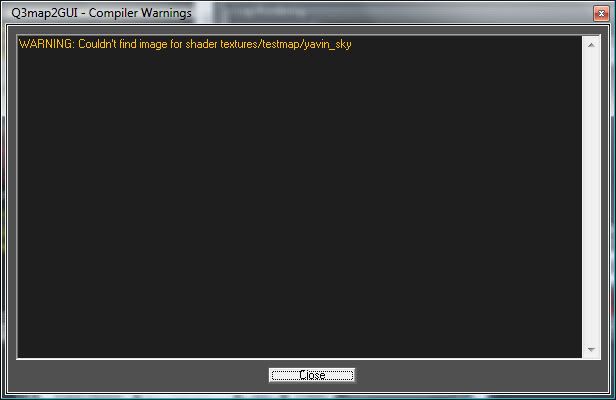
If you get any warnings or errors during compile Q3Map2GUI will create a list of them on the left. You can look at the list by clicking on the exclamation mark.
Warnings:
Errors:

Of course it is always better to have a bug-free compile.
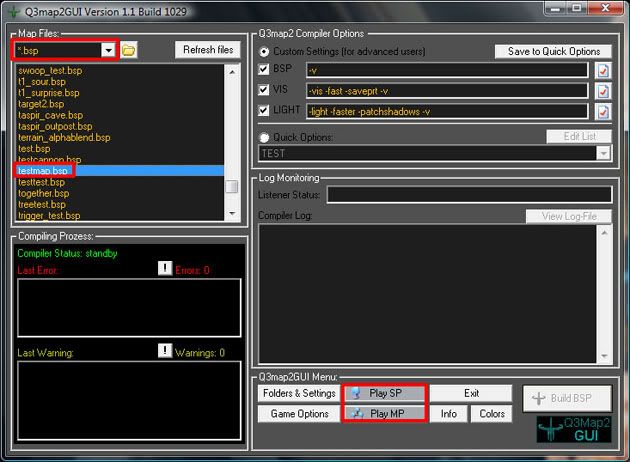
Play .bsp
If that is the case, you can start your map by choosing ".bsp" in the map list view, choosing the right bsp and clicking on "Play SP" or "Play MP".
External Links
Q3Map2: Download
Q3Map2GUI: Download
Switches: Q3Map2 - Wikibook


Recommended Comments
There are no comments to display.
Create an account or sign in to comment
You need to be a member in order to leave a comment
Create an account
Sign up for a new account in our community. It's easy!
Register a new accountSign in
Already have an account? Sign in here.
Sign In Now