About This File
Originall released: 02/19/2003
Asteroid Field (version 1 and 2) by MCG (gameplay, sounds), Mike Majernik (map), Manquesa (vehicles) & 7IM (vehicles)
thanks to Andy867 & Kurgan of jediknight.net for their server, testing and suggestions!
thanks also to Amidala for the use of the linux server (and for writing an awesome manual!) and to Jim Drews for compiling the mod for linux!
Found and uploaded by @keta
Title: Asteroids
Authors: ChangKhan, Zer0-L0gic, Manquesa, 7IM
File Name: asteroids.zip
File Size: 14.10 MB
Date Released: 2/19/03
Description: This is the Asteroids map that has the new vehicles, new maps and new hyperspace effect.
OS: Windows and Linux
Mod Type: TFFA ONLY *YOU CANNOT RUN THIS OUTSIDE OF THE TFFA gametype*
Included in Asteroids Mappack:
- Imperial TIE Interceptor
- Imperial Prototype TIE Advanced (Vader's TIE)
- Rebel A-Wing
- Rebel Y-Wing
- YT-1300 (Millenium Falcon)
- .Map files for Mappers to see the structure of Asteroids
************************************
Installation:
************************************
Method 1(WINZIP):
Just unzip into your gamedata directory with the option Use Folder Names enabled.
It will create a directory asteroids which is the directory of the MOD.
Method 2:
Create a folder in your gamedata folder called asteroids and unzip the contents into that folder.
Either way, the .pk3 and .cfg files should end up in GameData/asteroids and the .bat files should end up in GameData.
************************************
Running the mod:
************************************
Start up your JKA server with +set fs_game asteroids in the startup line.
OR
Use the Asteroids.bat that is enclosed with will essentially do the same thing, but more convenient and is located in the gamedata folder.
************************************
START FILES EXAMPLE For Beginners
************************************
USING THE RAVEN DEDICATED SERVER
****FOR WINDOWS : Use the supplied asteroids.bat file that will be extracted to your gamedata folder to start up JA with the Asteroids Mod
.\jampded +set dedicated 2 +set fs_game asteroids +exec "server.cfg file"
****FOR LINUX : Create a file asteroids in your gamedata directory then write in this file
./linuxjampded +set dedicated 2 +set fs_game asteroids +exec server.cfg
For linux don't forget to give execution right to all ==> chmod +x start_asteroids
Two simple TEAM FFA asteroid-field vehicle combat maps.
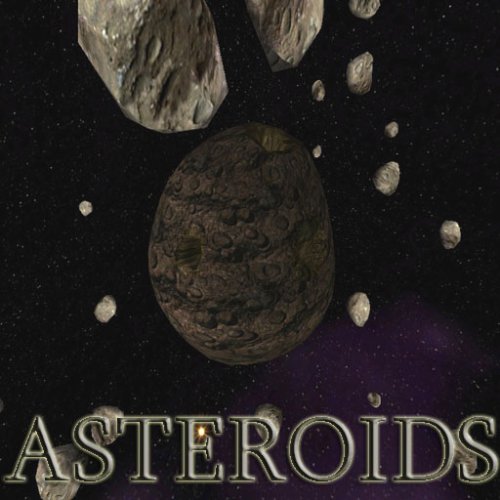
asteroids - Has 2 spawn hangars that hyperspace into the asteroid belt. There are small asteroids (which you can shoot) and one big asteroid (which you can't shoot, but can fly through).
asteroids2 - Has small asteroids but no large asteroid in the middle (for those who just want to dogfight without a bunch of asteroids getting in the way).
Included is a asteroids.bat file that will start MP with the asteroids mod loaded.
Max of 16 players at one time (only 8 ships for each team). Ships will respawn when one is destroyed.
As a bonus, a re-tweaked version of Siege Destroyer (with 5 new ships!) is included. It is "Siege Destroyer 2.0".
NOTE: if you are not running a professional server, read the rate_readme to see how many players your server's upload bandwidth can support!
NOTE: space vehicle combat is pretty CPU-intensive (lots of long, large ghoul2 traces, heh...) so running it on a commercial server that is running 7 other servers is not going to be pretty. You'll notice that the game isn't eating up lots of bandwidth but people are still getting laggy performance. This is because the server has no more CPU cycles available to it and it's running at *less* that 20 frames a second, which is very bad. A dedicated machine or a very robust machine is recommended for hosting more than a few players.
NOTE: even though the map appears as a playable FFA map, it is *not* playable in normal FFA, only *Team* FFA. I had to make it available in FFA for it to show up in the Team FFA map list... 
Also included are the A-Wing, Y-Wing, and TIE Advanced (Vader's TIE) vehicles made by Gregory (Manquesa) Birmingham and the TIE Interceptor vehicle made by Tim (7IM) Oliver.
I tweaked the stats on these ships, though, to balance it with the other ships and to make them more like other games have described them (the A-Wing, for example, is super fast and maneuverable, but very fragile).
To keep things clear, I left the awing and other vehicle files in seperates pk3 files from the asteroids maps.
Finally, I included the working YT-1300 vehicle in a pk3 file, but it's not placed in the map as it's a bit crazy and very unbalancing...  But you can spawn one if cheats are on by typing "\npc spawn vehicle yt-1300".
Have fun!
*VEHICLE ESSENTIALS*
First, know your HUD:
RADAR:
In the top-right of your display. You are in the center, allied ships are green and enemy ships are red. The larger they are, the more likely it is that they're above you. The smaller they are, the more likely it is that they're below you. Sometimes you will see an asteroid on the radar and you'll hear a collision alarm sound. That means you're very close to an asteroid. Also, enemy tracking missiles show up on the radar as a red star or dot. The closer the missile gets, the faster the missile alarm will beep.
If you don't see a radar, bring down the console and make sure cg_drawRadar is set to 1.
HUD:
In the bottom center of your display is the vehicle HUD. This displays the armor, shields (if you have any) and ammo of your ship.
All Rebel ships have shields. Only Rebel ships with Astromech droids (X-Wing and Y-Wing) can recharge their shields (the shields will slowly regenerate unless they're completely gone).
The only Imperial ship that has shields is the TIE Advanced (Vader's prototype TIE Fighter).
All Rebel ships have a secondary missile weapon of some sort. Only the Z-95 cannot lock its missiles onto a target (straight-fire only).
The only Imperial ship that has a secondary weapon is the TIE Bomber. It, too, can lock it's missiles onto a target.
DAMAGE INDICATOR:
On the bottom left of your view is a diagram of your ship. The green ring around the ship is your shields (if you have any). It will flash red when hit and fade to white as they are depleted. Your ship, itself, it divided into 4 quadrants: front, back, left and right. As a part of your ship takes damage, the color will change from green (undamaged) to yellow (lightly damaged) to red (heavily damaged) to black (completely blown away).
CONTROLS:
Move Forward - accelerates
Move Backward - slows down
Strafe Left - moves left
Strafe Right - moves right
Jump - Turbo boosts. The small red vertical bar on the bottom left of the HUD (see the vHUD.jpg for a diagram) indicates green if the turbo is ready to use, red if it's recharging. Turbo lasts different lengths on different ships and has a different top speed for different ships.
Crouch - Brakes (if you need to stop very quickly, you can use this in addition to Move Backwards)
Use Item - Toggles the weapons into synchronous firing mode. What this means is: if your ship has more than one muzzle for a weapon (like the X-Wing, it has 4 muzzles for the laser cannons), they will all fire at once instead of one at a time. But they will fire at a slower rate than normal. Good if you know you have a good shot - more shots will hit and you'll do a lot of damage.
Use Object - Gets in/out of a vehicle
Attack - Fires the primary weapon
Alt-Attack - Fires the secondary weapon (if there is one). If the weapon can lock onto a target, hold down the button with the crosshair over the target and you'll see a sectional red disc appear over the target. When the circle is complete, let go and the missile will track. Some missiles track better than others, so a good pilot may be able to lose the missile. Firing a locked-on missile at someone moving directly towards you has a good chance of being evaded.
Note that, once you take a good amount of damage on part of your ship, the controls may be less responsive or you may lose speed or even wobble as you fly.
TARGETING:
Enemy ships are bracketed in red and there is a lead indicator on them. A dotted line will connect to a red circle. If you line your crosshair up with that circle and fire, your shot has a good chance of hitting the enemy ship.
Enemy ships, if they pass under your crosshair, will also display a damage indicator, on the bottom left of your display.
STRATEGY TIPS:
* Different ships are better/worse for different kinds of missions. Fast, rapid-fire ships are the best interceptors & dogfighters. The A-Wing and TIE Interceptors are about equivalent in this respect. But for objective-based missions where you have to take out a target, bombers are better (the TIE Bomber and the Y-Wing are tough and have a lot of firepower, but are very slow). The remainder of the ships fall somewhere in-between (The Z-95 and TIE Fighter are generally more interceptor-style fighters, the X-Wing and TIE-Advanced can inflict damage but have decent value in a pure dogfight as well). So you may find that the A-Wing and TIE Interceptor are the best for the asteroids dogfight, but the Y-Wing and TIE Bomber are more valuable on a map like the Siege Star Destroyer map... 
* Mix it up and take a wingman. A good tactic may be to take a Y-Wing for heavy firepower and damag absorption and have an A-Wing escort it. Often, the enemies will hone in on the Y-Wing because it's a nice, big, slow target and leave themselves open for an A-Wing to sweep in and wipe them out. Working together is a definite advantage. If everyone gets into one-on-one dogfights, you'll all just end up in a bunch of two-man endless circular fights.
* The A-Wing is a super-fast, super-maneuverable rapid-fire ship (with tracking torpedoes). It may, at first, seem unfair, but remember that it is a very, very fragile ship. One good hit can take it out. The TIE Advanced is kind of the "A-Wing killer" due to it's higher-power, center-mounted blaster cannons. The TIE Interceptor also is a good balance for the A-Wing since it is to maneuverable and fast.
* When going head-to-head with someone, you'll find you're both spraying blaster fire all around each other. One of you may be trying to get a missile lock. Generally, it isn't worth it to wait for the lock because, if the missile slightly misses and passes behind the enemy, it will probably lose the lock. Don't be afraid to fire off a dumb-fire missile in a head-on confrontation, it could really surprise the enemy when he doesn't see it until it's in his face... 
* Remember to use the synchronous firing mode (the key you bound to "Use Item") when it suits your needs. If you have a good shot on your target, it's better to fire all of your cannons at once than one at a time. But if your target's moving a lot, you're better off firing them sequentially and hoping one of them hits as you track them. Note that your synchronous firing setting also applies to your missiles!
* Don't be afraid to use the asteroids to shake a pursuer. If you get good at navigating, you can cause the enemy to smash themselves to bits trying to pursue you (or, you may be able to lure them into a trap - get just out of sight, spin around and wait for them to show up and blast them!).
Most of all, have fun!
This file is not developed, distributed, or endorsed by Activision Publishing, Inc., Raven Software, Lucasfilm Ltd., Disney, Inc., or any of their affiliated entities. All trademarks, copyrights, and intellectual property rights belong to their respective owners. Star Wars®, Jedi®, and Jedi Knight® are registered trademarks of Lucasfilm Ltd.™ and Disney, Inc.™. This file is intended for educational, non-commercial, or fan-based use under the principles of fair use. No copyright infringement is intended. Any claims of ownership or DMCA takedown requests can be submitted here.


