

neomarz1
-
Posts
58 -
Joined
-
Last visited
Content Type
News Articles
Tutorials
Forums
Downloads
Files posted by neomarz1
-
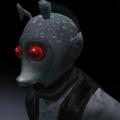
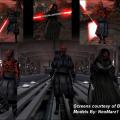
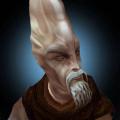
Sith Rodian VM
This is Sith Rodian made by Mars Marshall.
Well I thought it would be great if there was another alien species to represent the Sith, so I decided to make a Sith Rodian. Enjoy! Sincerely Mars
So whats different?
1) The Rodian now has Greenish grey skin to represent his own decay from the Dark side.
2) The belt was turned off (I felt it didnt represent the Sith well). I wanted to turn his vest
off, but the vest was modeled as part of the actual torso.
3) All colors have been darkened.
4) He now is bare chested with vest. Shirt was replaced with bare skin texture.
Enjoy! Sincerely Mars
263 downloads
-
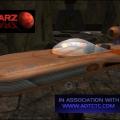
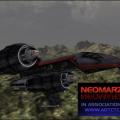
Luke's Speeder VM
This is "Luke's speeder" as seen in a "New Hope".
******************************READ THIS BEFORE PLAYING***************************************
Instructions:
1) In order to spawn the craft you need to acivate cheats heres how you do it.
Singleplayer- Load a level, I suggest the "Trip" levels, the once your in the game make sure you move your character to an area big enough to spawn the craft (big and somewhat flat) hit "shift and tild (~)" to activate the console. Next type "devmapall"...hit enter (cheats are now on)...next type "npc spawn vehicle (vehicle's name)" Example: npc spawn vehicle lukespeeder.
Here are the npc vehicle names for this pack...
lukespeeder
cont... close the console by hitting the tild (~) again. Now this is the most important part, move back to allow the ship to spawn, it may need alot of space. Once the ship spawns you simply move up and hit your "USE" key (usually return). Now you can fly!
**Now read this part carefully**, or you'll end up crashing into everything before you know it. To lift off you push down the space bar, but dont hold it down too long or youll activate the turbo thrust (this will cause a crash almost always), just lift off a little and tap the forward key a few times. The more times you tap the faster you will go. Use turbo only when you know you have enough space to jet.
Multiplayer- To activate cheats, you do thing a little different. activate the console by hitting shift+tild(~). Next type /devmapall "mapname". Example: /devmapall kotor_flight_school. The map will load with cheats activated. Now join the game and find a large area to spawn the craft. Open the console again and type /npc spawn vehicle "vehicle name". Example: /npc spawn vehicle falconvm. Notice that single player you have to put the "/" slash before the command.
2) You can only have so many .veh files or the game wont even load a map. So you may have to pull vehicles out in order to use other ones. I think the limit is 12, but I'm not sure. If you happen to have the "Kotor_flight_school" map, then there are already 3 vehicles added to your overall amount. You may want to remove the map, or open the pk3, and remove the vehicles in the "Kotor" files. I like the Kotor map to fly around in, so of course I chose the second option.
One thing you may want to do is create a folder called "vehicle drop" in your base folder. That way you can shuffle vehicles in or out as needed.
***Trouble shoot***
1) vehicle wont spawn- make sure you have enough space to spawn, make sure you have cheats activated, make sure you use the proper npc name.
2) vehicle wont take off- You may have spawned the vehicle too close to a wall or rock. This will ancor the vehicle so that it wont move.
3) The vehicle keeps crashing- Read instructions up above, if you practice youll find that controlling the craft is pretty easy with practice. Big note here, you need a map with alot of room. Also keep from flying to high because the maps will have an invisible ceiling height that will cause you to crash. If you fly to fast into a cliff wall, you will be sent into a spinning crash! The crash detection is very sensative to fast collisions.
389 downloads
-
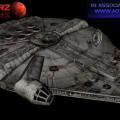
Millennium Falcon VM
These are models that came from Raven's assets within the game. I simply made them to be usable vehicles. Within this pack you will find the Millenium Falcon.
******************************READ THIS BEFORE PLAYING***************************************
Instructions:
1) In order to spawn the craft you need to acivate cheats heres how you do it.
Singleplayer- Load a level, I suggest the "Trip" levels, the once your in the game make sure you move your character to an area big enough to spawn the craft (big and somewhat flat) hit "shift and tild (~)" to activate the console. Next type "devmapall"...hit enter (cheats are now on)...next type "npc spawn vehicle (vehicle's name)" Example: npc spawn vehicle falconvm.
Here is the npc vehicle name for this pack...
falconvm
cont... close the console by hitting the tild (~) again. Now this is the most important part, move back to allow the ship to spawn, it may need alot of space. Once the ship spawns you simply move up and hit your "USE" key (usually return). Now you can fly!
**Now read this part carefully**, or you'll end up crashing into everything before you know it. To lift off you push down the space bar, but dont hold it down too long or youll activate the turbo thrust (this will cause a crash almost always), just lift off a little and tap the forward key a few times. The more times you tap the faster you will go. Use turbo only when you know you have enough space to jet.
Multiplayer- To activate cheats, you do thing a little different. activate the console by hitting shift+tild(~). Next type /devmapall "mapname". Example: /devmapall kotor_flight_school. The map will load with cheats activated. Now join the game and find a large area to spawn the craft. Open the console again and type /npc spawn vehicle "vehicle name". Example: /npc spawn vehicle falconvm. Notice that single player you have to put the "/" slash before the command.
2) You can only have so many .veh files or the game wont even load a map. So you may have to pull vehicles out in order to use other ones. I think the limit is 12, but I'm not sure. If you happen to have the "Kotor_flight_school" map, then there are already 3 vehicles added to your overall amount. You may want to remove the map, or open the pk3, and remove the vehicles in the "Kotor" files. I like the Kotor map to fly around in, so of course I chose the second option.
One thing you may want to do is create a folder called "vehicle drop" in your base folder. That way you can shuffle vehicles in or out as needed.
825 downloads
(5 reviews)0 comments
Updated
-

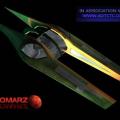
Vader's Tie VM
This model came from Raven's assets within the game. I simply made it a usable vehicle.
******************************READ THIS BEFORE PLAYING***************************************
Instructions:
1) In order to spawn the craft you need to acivate cheats heres how you do it.
Singleplayer- Load a level, I suggest the "Trip" levels, the once your in the game make sure you move your character to an area big enough to spawn the craft (big and somewhat flat) hit "shift and tild (~)" to activate the console. Next type "devmapall"...hit enter (cheats are now on)...next type "npc spawn vehicle (vehicle's name)" Example: npc spawn vehicle tievadervm.
Here is the npc vehicle name for this pack...
tievadervm
cont... close the console by hitting the tild (~) again. Now this is the most important part, move back to allow the ship to spawn, it may need alot of space. Once the ship spawns you simply move up and hit your "USE" key (usually return). Now you can fly!
**Now read this part carefully**, or you'll end up crashing into everything before you know it. To lift off you push down the space bar, but dont hold it down too long or youll activate the turbo thrust (this will cause a crash almost always), just lift off a little and tap the forward key a few times. The more times you tap the faster you will go. Use turbo only when you know you have enough space to jet.
Multiplayer- To activate cheats, you do thing a little different. activate the console by hitting shift+tild(~). Next type /devmapall "mapname". Example: /devmapall kotor_flight_school. The map will load with cheats activated. Now join the game and find a large area to spawn the craft. Open the console again and type /npc spawn vehicle "vehicle name". Example: /npc spawn vehicle falconvm. Notice that single player you have to put the "/" slash before the command.
2) You can only have so many .veh files or the game wont even load a map. So you may have to pull vehicles out in order to use other ones. I think the limit is 12, but I'm not sure. If you happen to have the "Kotor_flight_school" map, then there are already 3 vehicles added to your overall amount. You may want to remove the map, or open the pk3, and remove the vehicles in the "Kotor" files. I like the Kotor map to fly around in, so of course I chose the second option.
One thing you may want to do is create a folder called "vehicle drop" in your base folder. That way you can shuffle vehicles in or out as needed.
381 downloads
-
Zam's Speeder VM
Zam's air speeder from ATOC. I have added blasters to her speeder, since she had intended to add the weapons before her assasin attempt at Corruscant.
******************************READ THIS BEFORE PLAYING***************************************
Instructions:
1) In order to spawn the craft you need to acivate cheats heres how you do it.
Singleplayer- Load a level, I suggest the "Trip" levels, the once your in the game make sure you move your character to an area big enough to spawn the craft (big and somewhat flat) hit "shift and tild (~)" to activate the console. Next type "devmapall"...hit enter (cheats are now on)...next type "npc spawn vehicle (vehicle's name)" Example: npc spawn vehicle zamspeeder.
Here are the npc vehicle names for this pack...
zamspeeder
zamspeedermp
cont... close the console by hitting the tild (~) again. Now this is the most important part, move back to allow the ship to spawn, it may need alot of space. Once the ship spawns you simply move up and hit your "USE" key (usually return). Now you can fly!
**Now read this part carefully**, or you'll end up crashing into everything before you know it. To lift off you push down the space bar, but dont hold it down too long or youll activate the turbo thrust (this will cause a crash almost always), just lift off a little and tap the forward key a few times. The more times you tap the faster you will go. Use turbo only when you know you have enough space to jet.
Multiplayer- To activate cheats, you do thing a little different. activate the console by hitting shift+tild(~). Next type /devmapall "mapname". Example: /devmapall kotor_flight_school. The map will load with cheats activated. Now join the game and find a large area to spawn the craft. Open the console again and type /npc spawn vehicle "vehicle name". Example: /npc spawn vehicle falconvm. Notice that single player you have to put the "/" slash before the command.
2) You can only have so many .veh files or the game wont even load a map. So you may have to pull vehicles out in order to use other ones. I think the limit is 12, but I'm not sure. If you happen to have the "Kotor_flight_school" map, then there are already 3 vehicles added to your overall amount. You may want to remove the map, or open the pk3, and remove the vehicles in the "Kotor" files. I like the Kotor map to fly around in, so of course I chose the second option.
One thing you may want to do is create a folder called "vehicle drop" in your base folder. That way you can shuffle vehicles in or out as needed.
269 downloads
(1 review)0 comments
Submitted
-
Raven's Claw VM
:These are models that came from Raven's assets within the game. I simply made them to be usable vehicles. Within this pack you will find the Raven's claw.
******************************READ THIS BEFORE PLAYING***************************************
Instructions:
1) In order to spawn the craft you need to acivate cheats heres how you do it.
Singleplayer- Load a level, I suggest the "Trip" levels, the once your in the game make sure you move your character to an area big enough to spawn the craft (big and somewhat flat) hit "shift and tild (~)" to activate the console. Next type "devmapall"...hit enter (cheats are now on)...next type "npc spawn vehicle (vehicle's name)" Example: npc spawn vehicle ravensclawvm.
Here is the npc vehicle name for this pack...
ravensclawvm
cont... close the console by hitting the tild (~) again. Now this is the most important part, move back to allow the ship to spawn, it may need alot of space. Once the ship spawns you simply move up and hit your "USE" key (usually return). Now you can fly!
**Now read this part carefully**, or you'll end up crashing into everything before you know it. To lift off you push down the space bar, but dont hold it down too long or youll activate the turbo thrust (this will cause a crash almost always), just lift off a little and tap the forward key a few times. The more times you tap the faster you will go. Use turbo only when you know you have enough space to jet.
Multiplayer- To activate cheats, you do thing a little different. activate the console by hitting shift+tild(~). Next type /devmapall "mapname". Example: /devmapall kotor_flight_school. The map will load with cheats activated. Now join the game and find a large area to spawn the craft. Open the console again and type /npc spawn vehicle "vehicle name". Example: /npc spawn vehicle falconvm. Notice that single player you have to put the "/" slash before the command.
2) You can only have so many .veh files or the game wont even load a map. So you may have to pull vehicles out in order to use other ones. I think the limit is 12, but I'm not sure. If you happen to have the "Kotor_flight_school" map, then there are already 3 vehicles added to your overall amount. You may want to remove the map, or open the pk3, and remove the vehicles in the "Kotor" files. I like the Kotor map to fly around in, so of course I chose the second option.
One thing you may want to do is create a folder called "vehicle drop" in your base folder. That way you can shuffle vehicles in or out as needed.
401 downloads
(4 reviews)0 comments
Submitted
-
Clones VM
By neomarz1 in Player Models
It's Clones and Mandalorians from "Attack of the CLones". Some varients are original creations (Clone Scout, Dak, Ambu, etc...)
AOTC/TC has put this model forward as sneak preview of other work still to come. Please do not use this model in any other MODs unless given permission from Anakin @ AOTC/TC (www.aotctc.com) As you all know, this is exclusive to aotc/tc (see more @ aotctc.com). The AOTC/TC project is a serious project, and I am proud to be working with some of the best talents out there. The staff all strive for perfection, as you will see in these models.
651 downloads
(2 reviews)0 comments
Submitted
-
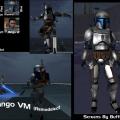
Jango / Boba VM
By neomarz1 in Player Models
Jango, and Boba Fett bounty hunters from the StarWars Universe.
******************************READ THIS BEFORE PLAYING***************************************
Installation:
Place Zclonemando.pk3 into the "StarWars JediKnight Jedi Academy/GameData/basefolder".
Instructions:
1) In order to use NPC's you will need to acivate cheats heres how you do it.
Singleplayer- Once your in the game, hit "shift and tild (~)" to activate the console. Next type "devmapall" (or devmap t1sour)...hit enter (cheats are now on)...next type "npc spawn (the npc's name)" Example: npc spawn jangovm.
Here are the npc model names for this model...
For Enemy: jangokamino (jango with pack as seen in kamino)
jangovm (jango with standard jetpack)
bobavm
Note: you must enter one of the above names when spawning your npc.
cont... close the console by hitting the tild (~) again.
***Special Note for JK Plus users***
You may want to use the packless versions, so that JK Plus jetpack will be rendered by itself. If you use the other versions, you will have two jet packs at the same time (which looks rather ugly).
To use the packless versions: Open up the command console while pushing the shift and ~ (tild) keys together, then enter this commandline.
model clonemando/default_jangonopac
model clonemando/default_bobanopac
To change playermodel: Open up the command console while pushing the shift and ~ (tild) keys together, then enter this commandline.
model clonemando/default
model clonemando/default_jangohelm
model clonemando/default_jangopilot
model clonemando/default_kamino
model clonemando/default_bobahelm
Multiplayer- To activate cheats, you do thing a little different. activate the console by hitting shift+tild(~). Next type /devmapall "mapname". Example: /devmapall mp/duel1. The map will load with cheats activated. Open the console again and type /npc spawn "npc's name". Example: /npc spawn jangovm.. Notice that single player you have to put the "/" slash before the command.
Here are the npc model names for this pack (With a brief description)...
Here are the npc model names for this model...
For Enemy: jangokamino (jango with pack as seen in kamino)
jangovm (jango with standard jetpack)
bobavm
Note: you must enter one of the above names when spawning your npc.
cont... close the console by hitting the tild (~) again.
2,243 downloads
-
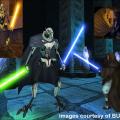
General Grievous VM
By neomarz1 in Player Models
General Grievous from Star Wars Episode III.
6,520 downloads
-
Darth Maul VM
By neomarz1 in Player Models
This is My version of DarthMaul from Episode I (The Phantom menace).
3,667 downloads
-
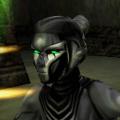
EMP77 VM
The EMP77 was designed to hunt down Jedi. They do not have force powers, but do have the ability to shoot high voltage energy. They have very quick reflexes, and are programmed to use the light saber with the utmost skill. The first models were utilized in the "trade federations" arsenal. They were used to make area control less taxing on the sith lords. These characters are of my own creation, and are not part of the Star Wars universe. They are merely for entertainment purposes.
234 downloads
-
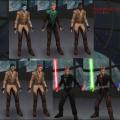
Padawan VM
This is a reskin of the Rosh model in JA. Basically I made varients that represent different Padawan Learners.
Padawan Anakin
Padawan Vermill
Padawan Windu
Padawan Dante
Padawan Chiss
Padawan Chalactan
330 downloads
-
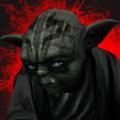
Sith Yoda VM
In order for the force to maintain its balance within the known universe it has to create an alternate entity for all living things. The negative plane of the universe maintains a relative counter force within itself. That is to say that even the great Yoda has a Sith Yoda existing in the negative plane of reality. This concept was created only to support this character, and is not part of the StarWars universe created by Lucas. If you have loaded the "Team Yoda version of the skin, Installing this one will not effect it. Enjoy, Sincerely Mars Marshall... And a Special thanks to "Team Yoda" for this wonderfull model.
808 downloads
(1 review)0 comments
Updated
-
Ki Adi VM
Ok, a lot of credit goes out to both PsykoSith and Grafox for Ki Adi Mundi. Although the skins that Grafox supplied were awesome, I thought I would fine tune the textures a little (Fox's fine work made it easier for me to skin this model). I watched the post for this skin, and couldn't wait to see the outcome. When it was released I knew I had to skin it! Again all credit goes to those who worked on it, This is only my own interpretation of Ki_Adi. This pk3 will not overwrite the original,
so here is whats new...
1) Refined facial texture. Improved face lines, and the eye lids were brighter than the rest of the face (This was the only real nit pik of the skin). Skin was a little brite so I darkened it.
2) Refined Clothing texture. torso brightness/contrast needed to match the sleeves more. Sleeve color changed to more of a Tope.
3) Team colors were pulled to a greyer tone (personal preferance).
4) Unfortunately I had to change the beard (shader). The hair file was huge, and needed to be downsized to jpg format.
5) The end result was a dramatic change in file size! I changed it from 2.44MB to 1.2MB.
467 downloads
-
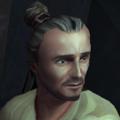
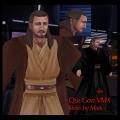
Qui-Gon VM
Most of you are aware of the new Qui-Gon model coming out (created by Tex and finished by Toonces and Arco)... Well I thought I would put out one more version of my Qui-Gon before they released theirs.
This one features a totally refined face texture (which I may use on Tex's model if I can get the o.k.) and the clothing textures have been tweeked a little more. I also added a sith, and trainer varient. Enjoy Sincerely, Mars
411 downloads
-
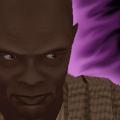
Mace Windu VM
Whats new: I have Re-skinned this model, not because the original was bad (Arco did an incredible job!), but because I wanted to skin this one since Toonces first announced it!
1) New Textures.
2) Sith (Black Robed) varient
3) Robed varient
4) Team Colors
5) Icon Support for all variations (to include robed versions)
6) New Icons
1,384 downloads
(3 reviews)0 comments
Updated
-

Zam Wessel VM
This model is of course based on the Zam Wesell character in episode II. She is a Clawdite bounty hunter, whom is an ally to Jango Fett. Clawdites are shapeshifters capable of morphing into another species (such as human) More details on the character can be found at www.zamwesell.com.
Zam Wesell is easily a skinners dream, Thanks to Moooa she has all kinds of bits that can be turned on or off. This allows the skinner to come up with a variety of characters.
299 downloads
(2 reviews)0 comments
Updated
-
Zam Wesell VME
This model is of course based on the Zam Wesell character in episode II. She is a Clawdite bounty hunter, whom is an ally to Jango Fett. Clawdites are shapeshifters capable of morphing into another species (such as human) More details on the character can be found at www.zamwesell.com.
Zam Wesell is easily a skinners dream, Thanks to Moooa she has all kinds of bits that can be turned on or off. This allows the skinner to come up with a variety of characters.
178 downloads
(2 reviews)0 comments
Updated
-
Qui-Gon VMX
This was modeled by both "Tex360 and Toonces". Many moons ago I was slated to skin this model, but got tied up into doing the Obi model. I finally got a moment and
decided to go ahead and re-skin the model (as promised). The main changes are related to the face, and clothing.
654 downloads
-
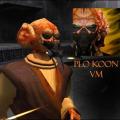
Plo Koon VM
By neomarz1 in Player Models
It's PloKoon duh.......as seen in jedi power battles, and Episode 1
:Aaron did an awesome job on this model, I about wet myself when I saw it. After seeing this model I knew I had to skin it... Thanks to Aaron, I was given a chance to do "Version Mars". Aaron and Myself hope you enjoy this model!
744 downloads
(3 reviews)0 comments
Updated
-
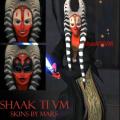
Shaak Ti VM
By neomarz1 in Player Models
It's Shaak Ti as seen in Star Wars Episode II
Aaron did an awesome job on this model, After seeing this model I knew I had to skin it... Thanks to Aaron, I was given a chance to do "Version Mars". Aaron and Myself hope you enjoy this model!
1,268 downloads
(2 reviews)0 comments
Updated
-
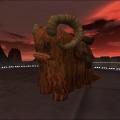
Bantha VM
Bantha 2.0!!! What can I say. I couldnt have done this without "Light Ninja". He is a great animator, I must say he improved the model even more, plus the model sits above ground! Included is a death animation. There is a difference in the mounting procedure... Dont be shocked that when the bantha spawns, you will be inside of him... just back up and jump up on the saddle, and have some fun. Mars out
For some fun: spawn wampa's next to bantha, they will attack him!
Special Thanks to: "Light Ninja".... you fixed this beast!!!! Thanks alot man.
306 downloads
(5 reviews)0 comments
Submitted
-
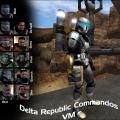
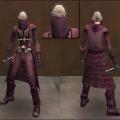
Delta Commandos VM
By neomarz1 in Player Models
Delta Force Republic Commandos. Characters Boss, Fixer, Sev, and Scorch.
******************************READ THIS BEFORE PLAYING***************************************
Installation:
This pack can safely be loaded with the ultmateclones pack, and does not overwrite any files. Place Zclonedelta.pk3 into the "StarWars JediKnight Jedi Academy/GameData/basefolder".
Instructions:
1) In order to use NPC's you will need to acivate cheats heres how you do it.
Singleplayer- Once your in the game, hit "shift and tild (~)" to activate the console. Next type "devmapall" (or devmap t1sour)...hit enter (cheats are now on)...next type "npc spawn (the npc's name)" Example: npc spawn commando_boss.
Here are the npc model names for this model...
For Enemy: commando_boss
commando_fixer
commando_sev
commando_scorch
Note: you must enter one of the above names when spawning your npc.
cont... close the console by hitting the tild (~) again.
To change playermodel: Open up the command console while pushing the shift and ~ (tild) keys together, then enter this commandline.
model clonedelta/default_boss
model clonedelta/default_fixer
model clonedelta/default_sev
model clonedelta/default_scorch
model clonedelta/blue
For helmetless versions
model clonedelta/default_fboss
model clonedelta/default_ffixer
model clonedelta/default_fsev
model clonedelta/default_fscorch
Multiplayer- To activate cheats, you do thing a little different. activate the console by hitting shift+tild(~). Next type /devmapall "mapname". Example: /devmapall mp/duel1. The map will load with cheats activated. Open the console again and type /npc spawn "npc's name". Example: /npc spawn commando_boss.. Notice that single player you have to put the "/" slash before the command.
Here are the npc model names for this pack (With a brief description)...
Here are the npc model names for this model...
For Enemy: commando_boss
commando_fixer
commando_sev
commando_scorch
Note: you must enter one of the above names when spawning your npc.
cont... close the console by hitting the tild (~) again.
To change playermodel: Open up the command console while pushing the shift and ~ (tild) keys together, then enter this commandline.
model clonedelta/default_boss
model clonedelta/default_fixer
model clonedelta/default_sev
model clonedelta/default_scorch
model clonedelta/blue
1,298 downloads
-
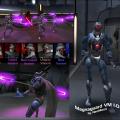
MagnaGuard VM
By neomarz1 in Player Models
Magna Guard... The elite battle droids of Genera Grievous as seen in Star Wars Episode III.
Fixes in Beta... added icon for headless version. fixed shader files.
******************************READ THIS BEFORE PLAYING***************************************
Installation:
Place ZMagnaVM.pk3 into the "StarWars JediKnight Jedi Academy/GameData/basefolder". Make sure you have added the electostaff (included in the zip) file as well. This will allow the bots to be supported correctly.
Weapon Install: If you want the bots to use the electrostaff, then you will need to install the electrostaff.pk3 to the same directory as listed above.
If you already have Hatrus's electrostaff installed, then you may want to replace it with mine, so that the bots use the purple colored staff.
Instructions:
1) In order to use NPC's you will need to acivate cheats heres how you do it.
Singleplayer- Once your in the game, hit "shift and tild (~)" to activate the console. Next type "devmapall" (or devmap t1sour)...hit enter (cheats are now on)...next type "npc spawn (the npc's name)" Example: npc spawn magnaguard.
Here are the npc model names for this model...
For Enemy: magnaguard
Note: you must enter one of the above names when spawning your npc.
cont... close the console by hitting the tild (~) again.
To change playermodel: Open up the command console while pushing the shift and ~ (tild) keys together, then enter this commandline.
model magnaguard
Multiplayer- To activate cheats, you do thing a little different. activate the console by hitting shift+tild(~). Next type /devmapall "mapname". Example: /devmapall mp/duel1. The map will load with cheats activated. Open the console again and type /npc spawn "npc's name". Example: /npc spawn magnaguard.. Notice that single player you have to put the "/" slash before the command.
Here are the npc model names for this pack (With a brief description)...
Here are the npc model names for this model...
For Enemy: magnaguard
Note: you must enter one of the above names when spawning your npc.
cont... close the console by hitting the tild (~) again.
3,149 downloads
(7 reviews)0 comments
Submitted
-
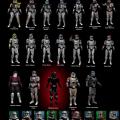
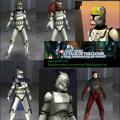
Clones Ultima VM
By neomarz1 in Player Models
This model pack contains just about every clone varient shown in Episode II, and III.
*********Important Note...READ FIRST!!!!!!**********
Not all varients are on the main selection page, some are located on red or blue team selection. Other varients have to be spawned using the "console command" (see below).
The reason for this is so that the clones do not take all your character slots up.
******************************READ THIS BEFORE PLAYING***************************************
Installation:
Place ZClonesUltima.pk3 into the "StarWars JediKnight Jedi Academy/GameData/basefolder".
Instructions:
To access extra clone varients:
Open up the command console while pushing the shift and ~ (tild) keys together, then enter either of these commandlines to access the extra varients.
model cloneclassic/yellowclone
model cloneclassic/greenclone
model cloneclassic/purpleclone
model cloneultarck/commander
Episode III extra varients:
model clonesultima/sky
model clonesultima/212
model clonesultima/default
model clonesultima/dirty
model clonesultima/41st
model clonesultima/default_gree
model clonesultima/default_bly
model clonesultima/default_deviss
model clonesultima/327th
2,428 downloads
(8 reviews)0 comments
Submitted