
General Concepts 101: Lesson 4
Basic
Brushes
Now that you understand the basics of moving around Radiant, it's time to get a little bit fancy. I mean after all, just having big blocks everywhere isn't all that exciting, now is it?
First of all, we need to make a room. A room is any area completely enclosed by brushes. The area outside the brushes is called the void. For a map to compile (make it playable), it must be completely enclosed from the void with no major errors. The easiest way to do this is to use what's called the Hollow Tool.
Load Radiant and Create a New Map. Create a Brush that is
512x512x384 (this will be easiest to do with your grid setting at 64). Set your grid setting to 8. Apply
the "bespin/basic" texture to it. Then click on the Hollow Button
![]() .
.

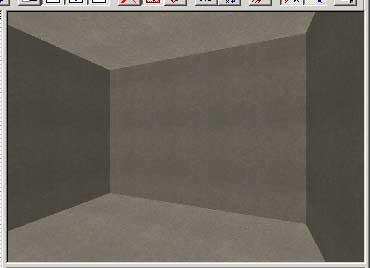
Now you have a room! Notice that the walls are 8 units thick - this is because you set the grid setting to 8 before using the Hollow Tool. Now move the camera inside your room!
Let's go ahead and make this room playable. First, press the Escape (ESC) Key a few times to deselect all brushes. Then, in the XY Top view in the 2D View, right-click and select "Info" and then "info_player_start" at the bottom of the list.
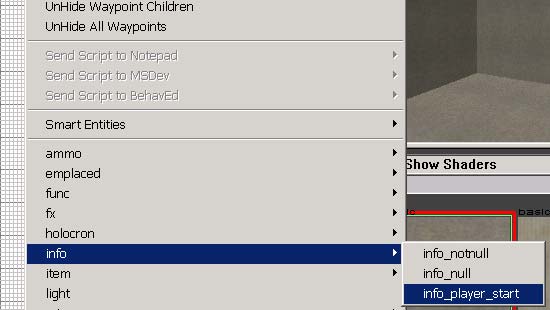
If you don't see "ammo," "emplaced," etc. in the list, then you didn't install Radiant right! Go back to Lesson 2 and start over.
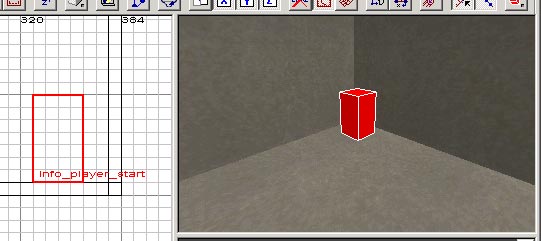
This should make an "info_player_start" entity. Don't worry on exactly what an entity is just yet - we'll get to that in the next lesson. Left-click drag the entity to the northeast corner of the room in XY Top View. Switch to the XZ or YZ View and make sure the bottom of the entity is lined up with the top of the floor brush.
Now, create a "light" entity. Make sure you deselect everything (press ESC) before you create an entity! If you get the error "Entity NOT created, brushes not all from world" in the Status Bar, that means you had something selected before Put it smack dab in the center of the room (in all views).
It's time to save! Select Save As... in the File menu. Name the map something memorable. For our tutorial purposes, I'll use "firstmap.map". Radiant should default to the correct directory - GameData/base/maps/. If it doesn't, you installed Radiant incorrectly, so go back to Lesson 2 and start over. See why the installation was so important? (:
Now up in the BSP menu, choose "BSP FullVis." A DOS windows will pop up. Don't worry if it sits there for a while - even a basic room like this may take up to two minutes depending on what kind of system you have.
When it's done, you'll get a report of how long the process took and any errors in the Status Bar (shouldn't be any errors!). For now, run Jedi Knight 2 SP. Press the ~ Key (Shift + `) once the game loads to bring down the console. Type in the command devmap firstmap.
Voila, your map!
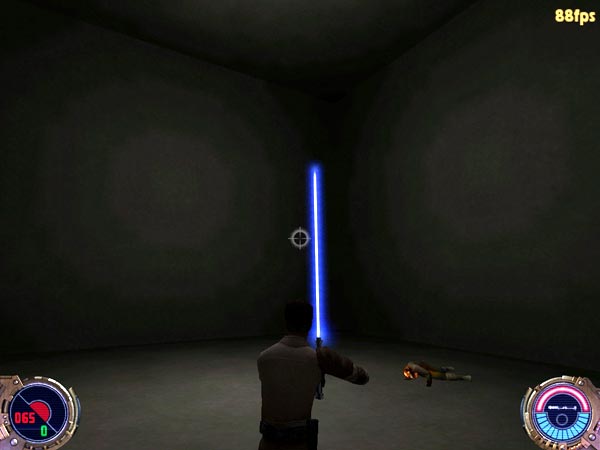
Most people at this point will sit and spawn Reborn to duel with for a few minutes (to a few hours) just because it's fun! I advise you do the same.
Now that that's over with, we need to spruce up the level a bit. We'll start with the level's architecture. Architecture is the first of (my) three core aspects to a map - those three being Architecture, Lighting, and Gameplay. Since our map thus far only consists of a big empty room, let's add something to it.
EDGE TOOL:
Let's start by making a simple ramp and bridge. Create three
brushes (textured with bespin/floor) so that they appear like this...

If you can't create the brushes to make this, review Lesson 3. Now, in the side view pictured here (with all three brushes selected), press the E Key to enter Edge Editing Mode. Drag the bottom edges of the side brushes out to make ramps up to your newly created footbridge.

Now press the E Key again to exit Edge Editing Mode.
CLIP TOOL:
But what if we wanted the sides of the footbridge to be at an angle so
that it looks a little rounded? Is it possible? Of course it is!
You need the most useful brush tool in the whole package: the clipping tool.
In the side view, with all three brushes selected, press the X key to turn on the clipping tool. The clipping tool is a bit complex... you can make either a 2-point or 3-point cut - both cuts will take your existing brush and tentatively slice it into two additional brushes, after you input another command. The advantage to this is that after you make your cut, you can look around at the results of it in the 3D View before you make the cut final.
Make the following cut in a side view (pay attention to which point was put down 1st and 2nd). If you make a mistake, you can Left Click Drag a Cut Point after it has been put down:
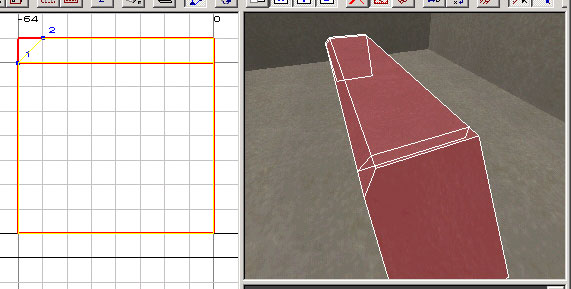
The reason I specifically mention to cut in that order is because that's what determines which side of the brush to cut off by default. Press ESC to cancel your cut and then put down the clipping points in the opposite order.
The brush disappeared! What happened!? Well, this time notice where the yellow line is in the 2D View. The yellow outline in the 2D View determines which part of your brush after a clip will be kept in your map. If you put down your clipping points in the wrong order, press and hold Control while pressing Enter (Control+Enter) to switch which side of your clipping plane is cut down. Make it so that it matches the picture above.
Next, press Enter to make the cut final. To keep both sides of a cut after clipping, press Shift+Enter instead.
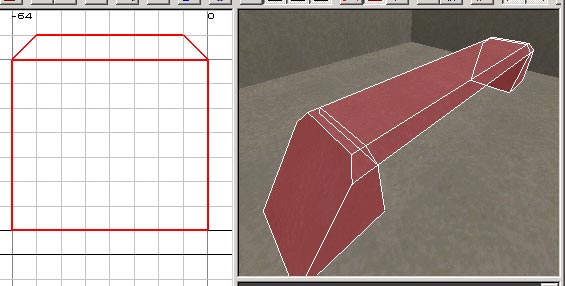
Now duplicate your cut on the other side. You should end up with something like this:
VERTEX TOOL:
Finally comes the Vertex Tool, the most complicated brush tool.
I personally have never found a reason to use the Vertex Tool on a brush,
but this is how, just in case you need you to. To edit the vertices
of a brush, select it and press the V Key. You can now drag any
vertex you want to. This will be much more useful when dealing with
patch meshes and curves, but we won't get to that for a while. Try now
to move a few vertices around just to see how they work. Be warned
though, if you drag a vertex somewhere where you can't drag it back, you
might create an "evil brush" which can have thousands upon thousands of
faces (which causes errors during compiles). Experiment with this tool
now if you want, but make sure that you move all the vertices back where
they were originally.
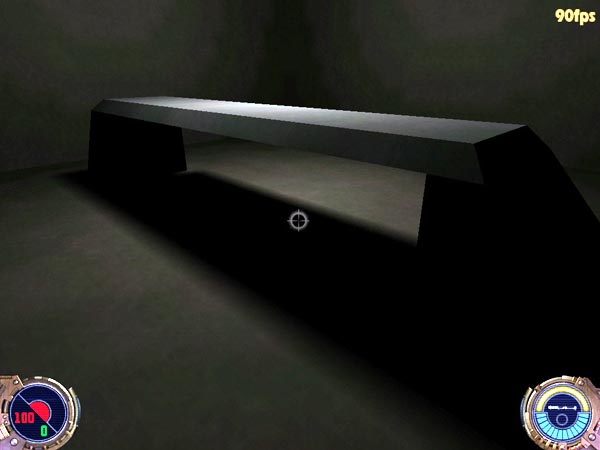
Finally, compile your map again (BSP/FullVis) and run it in JK2 SP. Look! A FOOTBRIDGE! Well done. (:
That's all you need to know about brushes. The rest is all about creativity! See what interesting patterns and shapes you can create with those three brush tools to make a visually interesting map.
Next up... Entities!