
Curves 201: Lesson 5
Spikes
Spikes were a much more useful convention in Q3A than they are in JK2, but you might, perchance, need to use one. The premise is simple - create a bevel and stretch it up - then shape it like a spike. The actual execution can be a little tricky. The first rule to this type of curve is to experiment and find a look you like.
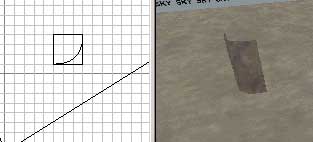
First, make a short, simple bevel:
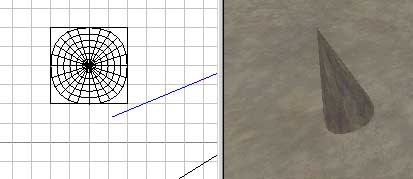
Next, just like with the dome, drag the top (vertically) row of vertices to the center of where the circle will be.

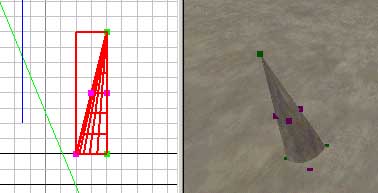
Now, in the side and front view, pull the top vertices up to elongate the spike; then drag IN the middle vertices to make a straight line. To reiterate, you will need to repeat this in both the side and front views. Otherwise, your spike will look out of proportion.
Next, duplicate your one-fourth spike, rotate it, and continue doing so until you have your actual spike. You'll notice that the top vertex for all four bevels is in the same place - the very center. You may also want to make all four spikes into a func_group at this time to more easily select them.
Because we don't want our spike sticking straight up in the air, drag that center vertex (of all four bevels) a few grid units to the side.
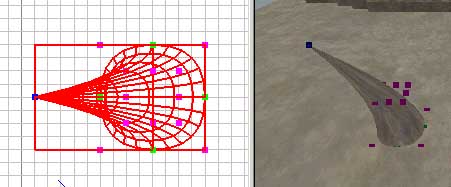
There you
have it! A completed spike. In my map, I want to put a ring of
spikes around the hole we made earlier, so will will use the Free
Rotation Tool ![]() .
Duplicate and rotate each spike until you have a ring around the hole.
A warning, however: do not use free rotation on brushes and curves that you
ever hope to edit again. Because the free rotation tool takes
your brushes/curves off the grid, it makes it virtually impossible to edit
them with any accuracy in the future.
.
Duplicate and rotate each spike until you have a ring around the hole.
A warning, however: do not use free rotation on brushes and curves that you
ever hope to edit again. Because the free rotation tool takes
your brushes/curves off the grid, it makes it virtually impossible to edit
them with any accuracy in the future.

That's it! Your circle of spikes is complete. If you want the spikes to hurt you, you might even try adding a trigger_hurt in... and if you don't know how to do that, I suggest you go read this again.