Shaders 365: Lesson 4
Custom Liquids
In this lesson you will learn how to make your own custom liquid using shaders. First you must make the shader. Lets take a look at a liquid shader and see what each line does:
| 01 02 03 04 05 06 07 08 09 10 11 12 13
|
textures/float/water { qer_editorimage textures/float/water1.jpg qer_trans 0.75 sort banner surfaceparm water surfaceparm nonsolid surfaceparm nomarks surfaceparm trans q3map_material water q3map_tessSize 512 deformvertexes normal 0.1 0.1 deformvertexes wave 64 sin 0 0.5 0.2 1
|
| 14 15 16 17 18
|
{ map textures/float/waterenvmap1 tcGen environment blendFunc GL_ONE GL_ONE }
|
| 19 20 12 22 23
|
{ map textures/float/skyenvmap1 tcGen environment blendFunc GL_DST_COLOR GL_ZERO }
|
| 24 25 26 27
|
{ map $lightmap blendFunc GL_DST_COLOR GL_ZERO }
|
| 28 29 30 31 32 33 34 35
|
{ map textures/float/skyenvmap1_sun tcGen environment rgbGen const ( 1.00 0.95 0.79 ) blendFunc GL_ONE GL_ONE glow } }
|
-
Lines 1-13: These lines list how it is displayed in the editor and give it its attributes. It is the body of the shader.
Line 01: This path is what the game uses to determine what shader to use. This will also affect what texture set this shader gets loaded as. This does not have to be the same name as the texture you are using in the shader.
Line 02: This bracket is very important. It opens the main body for the shader commands.
Line 03: This line tells the editor to display this image when instead of the first one in the stages. This only affects what is displayed in the editor. It has no affect on the actual shader. It is very helpful when doing something like fog, where you don't really have a texture that can be displayed so this must be used so the editor has a picture to use.
Line 04: This sets the transparency of the texture in the editor only. This has no affect on the texture ingame.
Line 05: This allows the user to override the default order in which the textures are displayed by the editor. It is only needed if there is a problem with something drawing over something it's not supposed to.
Line 06: This line is definitely needed for a water shader. It makes the volume of the brush into water and adds the blue water fog.
Line 07: This line will make the texture nonsolid so that the water volume works correctly.
Line 08: This will prevent things like lightsaber marks and gun explosion marks from being drawing on the water. This is needed otherwise your water will look really weird with marks on it.
Line 09: This is needed so that your water is not opaque.
Line 10: This is a q3map_ command so if you change it you will have to do a recompile. It tells the engine to make splashes and play splash sounds when you walk into the water.
Line 11: This is another q3map_ command. This will make the texture subdivide every set amount of units. This is very nice if you are using an environment map on water. Otherwise the environment texture would be stretched across the polys of the water and would look gross. This makes it look a lot better if you set a good value.
Line 12: This will make the water textures appear to move. It adds a nice touch on water. It will affect the way environment maps move mainly.
Line 13: This will make the water bob and move depending on the values you give it.
-
Lines 14-18: These lines start the first shader stage. Stages affect how the texture looks ingame and what texture is displayed ingame. I used this stage to add a bluish tint to the water.
Line 14: This bracket will open the first stage.
Line 15: This is the line that will tell the engine what the actual texture that is displayed in game will be. You must have map before the path.
Line 16: This will tell the engine how to display the texture. This will make it an environment map.
Line 17: This is a blendFunc. This can be the most confusing thing in shaders. This one says GL_ONE GL_ONE. This means that the textures RGB values will be added together and the texture will appear twice as bright. The first one is the source and the second one is the destination. They are added together and sent to the frame buffer which makes them the destination information for the next stage.
Line 18: This bracket will close the first stage.
-
Lines 19-23: These lines start the second shader stage. I used this stage to reflect a picture of my skybox.
Line 19: This bracket will open the second stage.
Line 20: This is the second texture that will be mixed with the first one. Remember that you need map before the path.
Line 21: This will make the stage displayed as an environment map.
Line 22: This is the default blendFunc.The first part, GL_DST_COLOR, is the value of the color data that is currently in the <i>destination</i> (frame buffer). The value depends on the information of the previous stage. The other half, GL_ZERO, when used with GL_DST_COLOR, will make the texture appear like the destination.
Line 23: This bracket will close the second stage.
-
Lines 24-27: This is the lightmap stage. It will make the water receive shadows and light. Your water wouldn't look as nice without it.
Line 24: This bracket will open the third stage.
Line 25: This is the lightmap. It does not have a texture path because lightmaps are generated by the compiler. Make sure it has map in front of it. The $ symbol is needed as well.
Line 26: This is once again the default blendFunc, so the destination colors will stay the same.
Line 27: This bracket will close the third stage.
-
Lines 28-35: This is the final stage in this water shader. This stage will take an image of the sun and make it appear to reflect light off of the water when you face the sun.
Line 28: This bracket will open the forth stage.
Line 29: This points to the texture that will be displayed ingame. Don't forget that map needs to come before the path.
Line 30: This will make the texture environment mapped.
Line 31: This line will let the game know what color to make the glow that will be reflected. It determines the color of the r_dynamicGlow.
Line 32: This blendFunc will make the texture twice as bright. This is needed to make it look like it is glowing.
Line 33: This will let the game know that this texture will be affected by dynamic glow.
Line 34: This bracket will close the forth stage.
Line 35: This bracket will close the shader. It is very important that you remember this. If you forget it, it will mess up all the shaders that are in front of it.
Now that you have your shader, you are
ready to start making the textures for the water and putting the water
ingame. For good looking water that works with the above shader, I
recommend using 1024x1024 size images. I am using 512x512 examples to
save on page load time and room for this tutorial.
To get the images that you need, you can either take the _up image from
the skybox and use it for the envmap, or, you can edit all of the skybox
images (except for the down one!) together and make an image of the sky
part.
Here is my skyboxes _up texture:

If you use the _up image, rotate your copy of it 180 degrees to the
left. It will also help of you desaturate it so that it has a grayscale
look.
The 2 examples below are what I had for my final product.
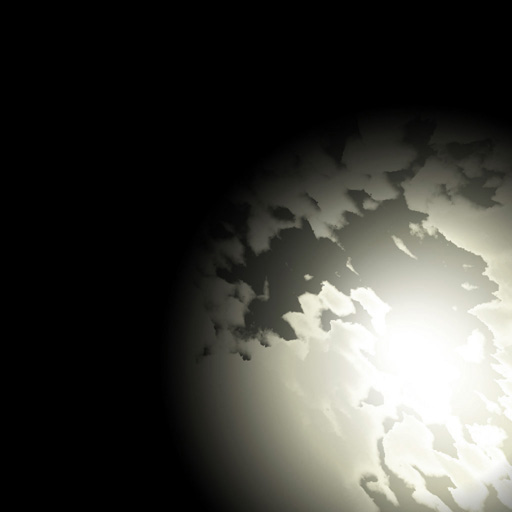
To make the sun reflection image, you will need to do some work with yet
another copy of the _up image or the image that you made. Hopefully the
image you are using has the sun in it. Try and make one that does. Then
you must fade everything around the sun to black.
Here is an example: First is the original, then what it should look
like.

So you should have 2 textures now, a standard reflection texture that
will be used for the main water, and a reflection of the sun.
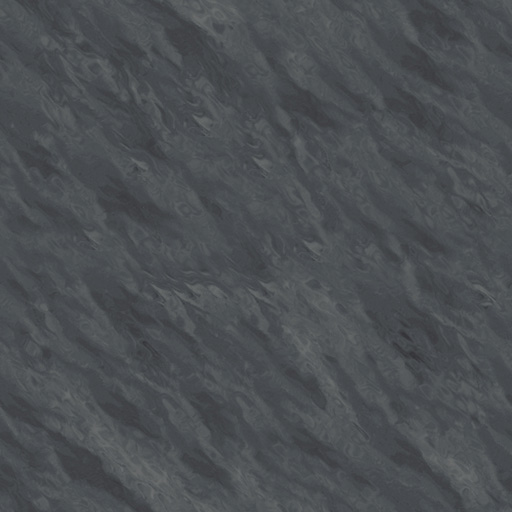
Now to add a little bit of flavor to the water you should also have one
more texture that looks kind of like water.
Here is an example of the one that I am using:
You now need 1 more texture. You need an editor image. I am using a custom one that I made. It is also the one that this shader uses for its editor image.

Now that you have all your images, you are ready to make a map with the
water.
Once you have your shader all setup you can then move on.
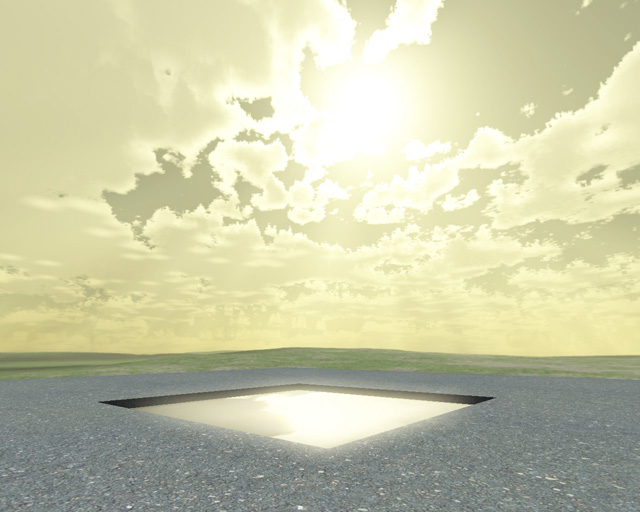
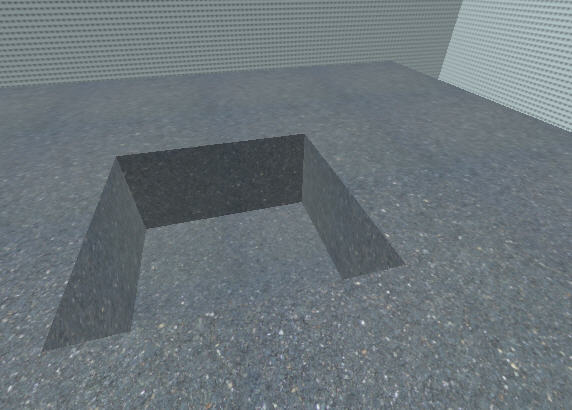
Make a map that looks like the following example with a hole in the
middle for the water.
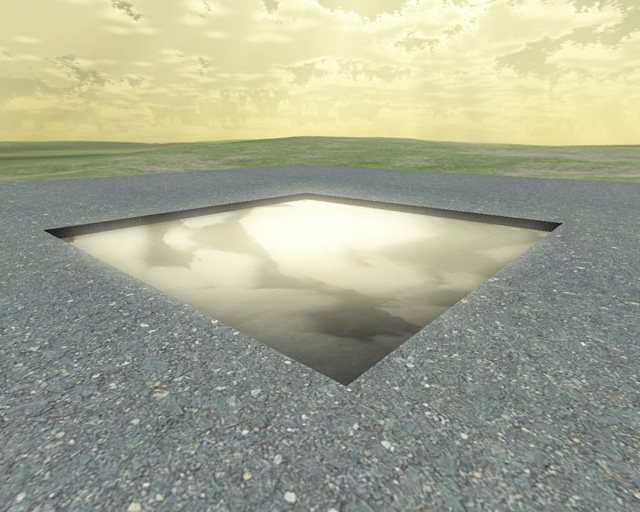
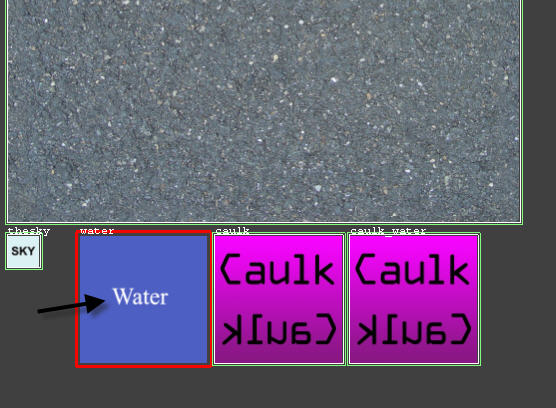
Then load your texture set for your new shader. Use the image that has a white rim around it. It should be the blue editor image that says water on it.
Now you need to fill the hole that you made with your water texture.
Make a brush that fills the hole in the middle and leave an 8 unit or so
space between the actual floor texture where you will be walking to look
at the water.
Like so:

Make sure that you use caulk_water on the other sides of the water
brush. You only need your custom water shader on the top of your brush.
When you are done, it should look something like the following:

If you are using a sky shader with a sun then you don't need to worry
about lighting.
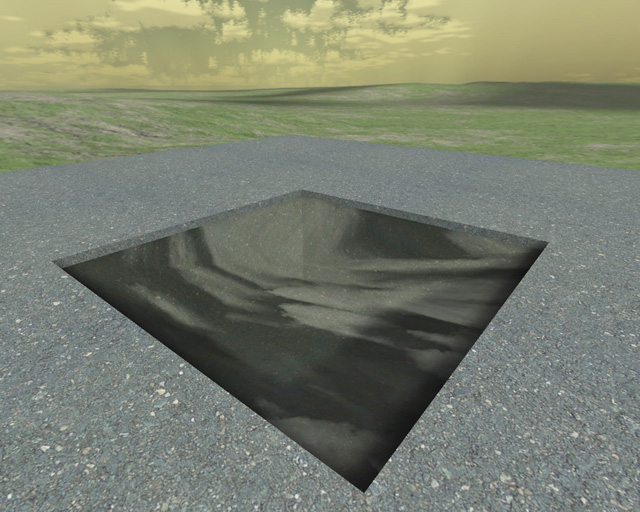
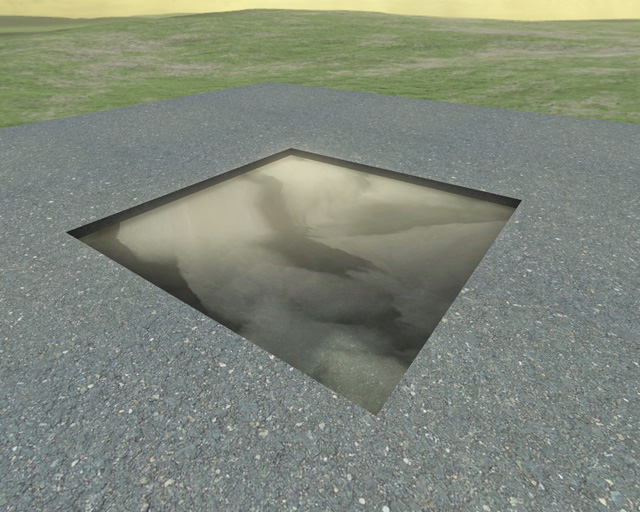
Now to test. Save your map and compile it. Make sure that you do a full
compile with light and all.
It should look something like these shots when you finish.