
Shaders 365: Lesson 2
Light-Emitting Shaders
Among the things that you can do with shaders is create more realistic
looking lighting. This can be done quite easily. Shader lights are better
than entity lights in many ways. For instance, you can just place the light
texture on the surface you want to emit light in the editor. This is also
good in the way that it makes you build structures and sources for your
lighting. This adds lots of realism to a map and is generally good. I will
try to explain this in a simple way. I will show the shader and tell what
everything does. This way you don't just see a light shader and take it, but
you actually learn how to make it and what it does. Lets get started!
|
01 02 03 04 05 06 07 |
textures/richdiesal/light1 { qer_editorimage textures/richdiesal/light1.jpg q3map_surfacelight 7500 q3map_backSplash 0.5 8 q3map_nolightmap q3map_lightRGB 1 1 1
|
|
08 09 10 11 12 |
{ map $whiteimage blendFunc GL_DST_COLOR GL_ZERO rgbGen const ( 1.00 1.00 1.00 ) }
|
|
13 14 15 16 17 18 19 |
{ map $whiteimage blendFunc GL_ONE GL_ONE rgbGen const ( 1.00 1.00 1.00 ) glow } } |
-
Lines 1-6: These lines are the body of the shader. This is where you specify commands for the engine and for the compiler.
Line 01: This path is what the game uses to determine what shader to use. This will also affect what texture set this shader gets loaded as. This does not have to be the same name as the texture you are using in the shader.
Line 02: This bracket is very important. It opens the main body for the shader commands.
Line 03: This line tells the editor to display this image for the shader. Keep in mind that this ONLY sets an editor texture for ease of telling things apart visualy.
Line 04: This command tells the compiler that this surface emits light, as well as how much light. I have found that a value of 7500 in a light shader is about a value of 300 for an entity light.
Line 05: This line determines how much light is reflected back. This can be really helpful for smooth lighting issues. The second value in it is the distance of the backsplash in game units.
Line 06: This tells the compiler that this shader does not have a lightmap stage. Only use this if you don't have a lightmap stage.
Line 07: This line tells the compiler what color the light is. In this case, the light will be white.
-
Lines 8-12: This is the first stage. This stage will be displayed ingame.
Line 08: This line is very importaint. This will open the first stage of the shader.
Line 09: I am using a whiteimage for these light shaders to save on texture space. A whiteimage is a white image that is generated by the engine.
Line 10: This is the defult blendFunc which will allow the stage to blend correctly.
Line 11: This will allow you to set the color of the white image. I don't need this here in this shader because I have a white light by defult due to the $whitelight. Now if you wanted a different color light, you would just add the RGB values in this line.
Line 12: This bracket will close the first stage.
-
Lines 13-19: This is the stage of the shader that will create the dynamic glow or the glow look ingame.
Line 13: This bracket opens the second stage.
Line 14: This is another whiteimage.
Line 15: This is the blendFunc that is used to make the surface look like it is glowing.
Line 16: This is the RGB values again. You can make the texture one color but have the glow a different color! Just change this RGB value to make the glow a different color.
Line 17: This is the line that makes the stage have dynamic glow.
Line 18: This is the closing bracket for the second stage.
Line 19: This is the closing bracket for the entire shader. DO
NOT FORGET THIS! Otherwise all the shaders after it will not work.
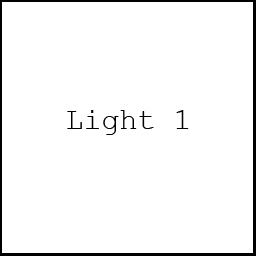
Now that we have our shader, lets test it! We will need to make an
editor image first. Make it something that is clearly labled and easy to
see. Like the example below.
After you have that, you will need to build a light structure. It is up to you what it should look like. Here is mine for example.
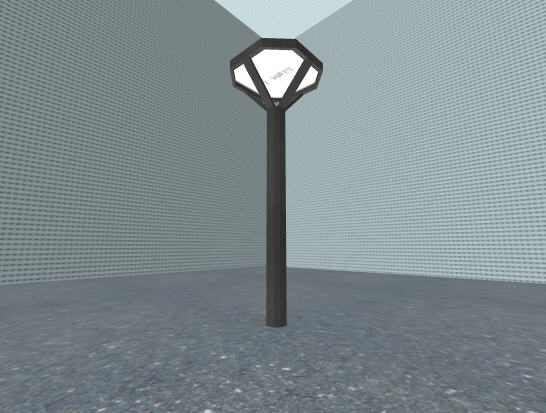
That is what it looks like in editor for me. Now to take a look at it in game.
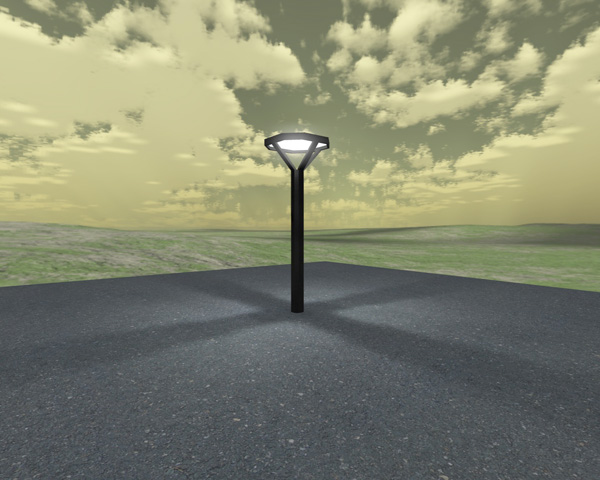
Your light should look similar but it may not be glowing, if this is the
case then you might want to make sure your dynamic glow is enabled by
typing: r_dynamicGlow in the console. If it still isen't
working, then this could be a video card issue.
Congratulations! You have made a shader light! They are easy to make and
once you have them setup, lighting your map is a breeze.