
General Concepts 102: Lesson 7
MP Mapping / Basic Level Distribution
Two major topics here.
Multiplayer Mapping:
First of all, if you want to make a multiplayer map, you'll need to
change the entity definition file. This is because although Raven did
alter the Q3A engine quite a bit for single player, it wasn't modified quite
as much for multiplayer. Thus, some entities' properties are altered
and some don't even exist. To change to the MP definition file, hit
Project Settings... in the File Menu. Change
SP_entities.def to MP_entities.def. Hit OK, quit out of Radiant
and reload it. Now you are set up to make MP maps. Immediately,
if you right click, you'll notice the shorter entity definition list.
It is important to note that the entities you need to use to start a MP map are different than a SP map. A Team FFA map will use info_player_rebel and info_player_imperial (to differentiate teams). A CTF map will use all of the starts/flags located in the team entity set. A Jedi Master or Catch the Ysalamiri map will use info_jedimaster_start to determine where the lightsaber/ysalamiri will spawn at the beginning of the match. All other maps will use info_player_deathmatch.
You will also note the addition of the info_player_intermission entity. Use this to give the viewpoint the player sees when he joins a game or watches in between rounds (this is especially important in duel maps). To make the player's view aim in a specific direction, create an info_notnull in that direction from your info_player_intermission. Then simply target the intermission entity at the notnull entity (Shift-click the info_player_intermission, shift-click the info_notnull, and press CTRL+K).
Basic Level Distribution:
Levelshots:
Second major topic is level distribution. To distribute a map,
there are several things you must do first. First, you need what's
called a levelshot. A levelshot is the image that a
player sees while the map loads. The standard way to record a levelshot is to find the place in your map that you want for your levelshot,
bring down the console and type the word "levelshot". All the 2D
things on your map will disappear and it'll basically take a screenshot and
place it in your levelshots/ directory.
I will now be the first to tell you not to do that. Do not take levelshots because they are low quality. Instead, while testing your map in SP (whether it is actually a SP or MP map):
-
Bind a key to the word "screenshot" (For example, to bind it to the O key, type bind o screenshot in the console).
-
Type the console command cg_draw2D 0 (if in MP, type \cg_draw2D 0). This will make all the 2D aspects of your screen (ammo, health monitor, etc) disappear.
-
Draw your lightsaber (press the 1 Key) and press the 1 Key again to turn it off.
-
Press the P Key to enter 1st-person mode. (I'm assuming you're using the default key configuration).
-
Enter no clipping mode (type noclip in the console) and fly to wherever you want your shot.
-
Press the key you bound to "screenshot."
-
Exit JK2
-
Open up the screenshot in your GameData/base/screenshots/ directory.
-
Rename the screenshot to your level's name (if you map is duel_superstuff, name it duel_superstuff.jpg)
-
Move that picture to GameData/base/levelshots/
-
Edit your picture to change its dimensions to a box shape of either 512x512 or 1024x1024. You can do this with Adobe Photoshop (with the Image Size... option - don't worry, it will look distorted in Photoshop, but it will look fine in-game) or in Microsoft Paint for Windows XP/2000 (Select Attributes in the Image menu). If you don't have either of these programs, just look for a freeware image editor at some place like CNET.
You will now have a much higher quality screenshot to work with.
Arena Files:
If you are making a MP map, you will now need to create an arena script.
An arena script is what tells Jedi Knight 2 where to place your map
when they look at their list of maps in the game (at the Create Server
screen). Create a blank text file and name it yourmap.arena
(replacing yourmap with the name of your map, of course). Then
copy the following template:
{
map "ffa_map"
longname "Map Name"
type "ctf cty duel ffa holocron jedimaster team"
}
For the map field, put the actul name of your map (i.e. ffa_yourmap). For the longname field, put the text you want to appear in the map list. Be warned, only 25 characters (give or take 5) will fit in the server list without being truncated (cut off). For type, leave whichever gametypes you want and delete the rest. (CTY is Capture the Ysalamiri and FFA is Free for All (Deathmatch) if it didn't seem obvious).
Put this file in your GameData/base/scripts/ directory.
PK3 Files:
Now you need to create the file that people will actually install - the
PK3. Download this file.
Rename it to yourmap.pk3 (again, replacing
yourmap with the name of your map). Open this file up in
Pakscape. This is what you will see:
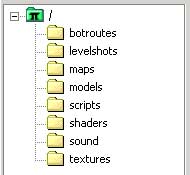
Any file that you created that's not in the regular release of JK2 needs to be dragged into the appropriate folder. Open up your GameData/base folder in a separate window and drag each file you want included into the appropriate folder in Pakscape. For the most basic MP map, this will include maps/yourmap.bsp, maps/yourmap.nav, levelshots/yourmap.jpg, and scripts/yourmap.arena. If you are going to release a MP map publicly, also never release your map until you have Bot Support. A full explanation of bot routing can be found in the Level Distribution 230 class.
Save your .pk3 and put it in the GameData/base/ folder and load up your map!