General Concepts 102: Lesson 4
Basic Curves
We've just been talking in map theory for a couple of lessons now, so let's get back to actual design! Curves, or patches, are a major part of all professional looking levels. In fact, for a quality example of curves in action, load up my map, duel_kamino, and notice how very few of the surfaces in the map are brushes. You can tell a brush from a curve in that the brush will have very small "clip" lines - where nearby lighting bends around a definite corner on a brush, creating an obvious presence of multiple surfaces. Curves will have no visible clip lines and instead, light will fade off evenly over the surface of the curve.
There are three major types of curves. We will go over each in a small amount of detail in this lesson. For further info on curves, you will need to check out Curves 201 after you complete this course.
First, a brief description of each and some general info.:
-
END CAP - A 180 degree arc.
-
BEVEL - A 90 degree arc.
-
PATCH MESH - A flat curve.
I know what you're thinking - "How can you have a flat curve?" Don't worry - it'll make sense in a bit. It is very important to remember that to the VIS process, curves are not solid. This means that a curve can never touch the void. If you have curves on the edges of your maps, you will create a leak in your map.
END CAPS:
First, draw a brush near the corner of your room with the room's full
height. This is what the engine will use as a guide to draw your
curve.

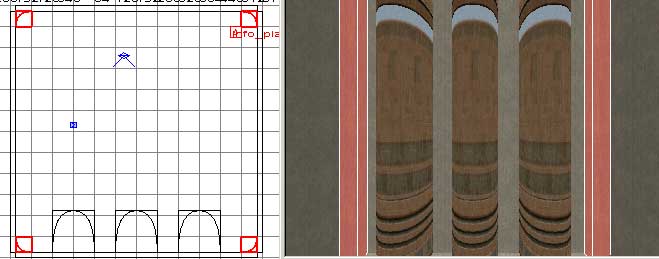
To create your End Cap, select "End Cap" from the Curve Menu. This will convert your brush into an End Cap curve - a 180 degree arc.
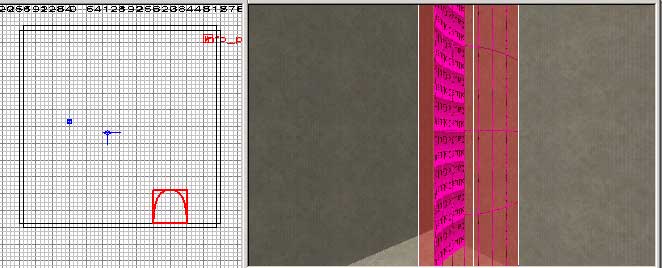
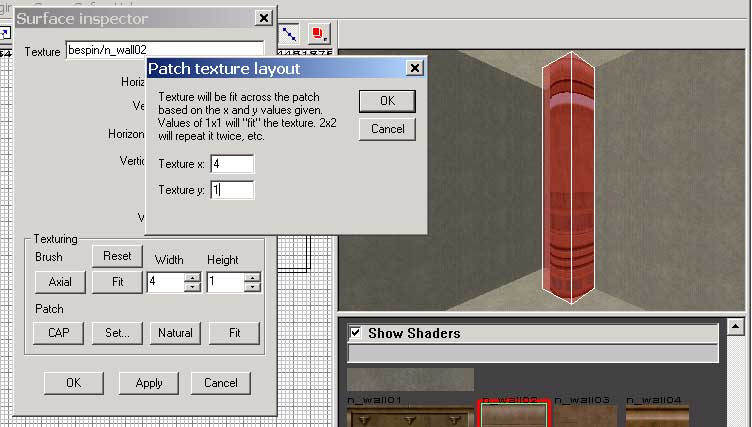
First of all, we must take care of the matrix problem here. The matrix of a curve determines which side of the curve the textures display on. Press CTRL+I to Invert the matrix of a curve. Voila! The textures displays on the outside now. Apply the bespin/n_wall02 texture to the curve (just like you would apply it to a brush - select the curve and click on the texture you want in the texture browser). Now open up the Surface Inspector (S Key). See the section called "Patch"? Remember how curves are called patches? Ah yes, Padawan, now you understand!
The most common setting here you will use for curves is the Set command. Click Set... and select "4" for Texture x and "1" for Texture y. This is basically the same as the "Fit" option for texturing brushes - 4x1 repeats the texture 4 times along the x axis and 1 time along the y axis of the curve.
Now we have a nice Bespin column! Select the curve in the Top XY View and duplicate it (Space Bar) three more times along the wall.

BEVELS:
Now what if we wanted the edges of our room to be curved? An
End Cap would be too wide, so we need a Bevel. Draw a
column like you did before, but this time, in the very corner of the
room. Select Bevel from the Curve Menu and rotate it to
fit in one of the corners.
Next, duplicate your corner curve and rotate it once (use Z-Rotate) to fit into the bottom-left corner. Duplicate and keep rotating for the remaining two corners. You will end up with something like this...
Voila! Rounded corners.
And what if you wanted a flat edge at the end of a bevel or end cap? Simple. Select that curve and "cap" it by going to Cap/Normal in the Curve Menu. Then select the type of curve you want to cap. Note that you may need to invert the matrix of your cap separately from the curve itself.
PATCH MESHES:
When you want curved shapes, it is much better to use bevels and
end caps whenever possible, but occasionally, it's impossible to get
exactly the shape you want. In these cases, you'll want to use
patch meshes. Create a brush whose top edge is near (or even with)
the floor:

Make sure you are in the XY Top View and select "Simple Patch Mesh" from the Curve Menu. The reason you should be in the XY Top View in this case is because Radiant will put the vertices of your patch mesh perpendicular to whatever view you happen to be looking at when you create it. In other words, if you want a patch mesh by default to be lined up along the floor, be in XY Top, but if you want one by default to be lined up with a wall, be in the Side or Front View. Even if you are in the wrong view, you can use the Flip/Rotation Tools to turn it how it should be. If the texture of your patch mesh is on the underside, make sure to Invert the patch mesh's matrix (CTRL+I) to show textures on top. Line up the patch mesh with the floor and you should have something like this:
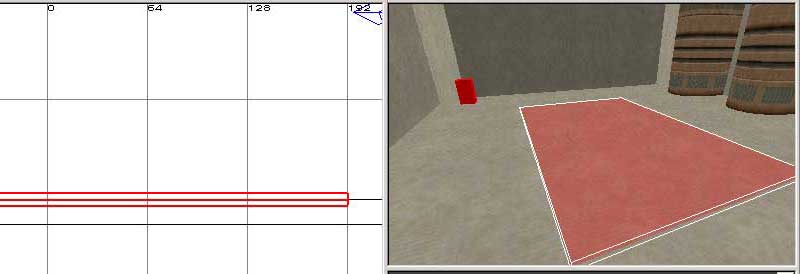
Note that
there is a box and a line in the center here. The line in the center
is the patch mesh itself... the box is called the bounding box,
which is basically just there for your convenience (it's hard to see a mesh
without it's bounding box). You can see all curves without their
bounding boxes by clicking on the Bounding Box Button
![]() .
.
Enter the XY Top View and turn on the Vertex Tool (V Key). Here, you can see the vertices that make up your mesh. Click on the vertex in the center of the mesh. It should turn blue. Now change to the side or front views and drag that vertex up. You'll see the mesh mutate shapes in the 3D View. You can use the vertex tool on any type of patch - bevels, end caps, and meshes alike. If you'd like further information on special techniques to use with patches and the vertex tool, check out the Curves 201 class.
Mess around a bit and try to make a basic bumpy landscape with your patch mesh. Be sure to keep all the vertices on the edges of your mesh in their stating place so that the mesh will be flush with the ground when you compile.
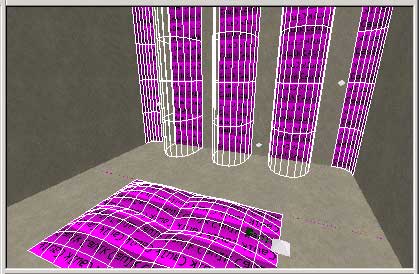
Add some basic lights and compile! Look at all those curves!
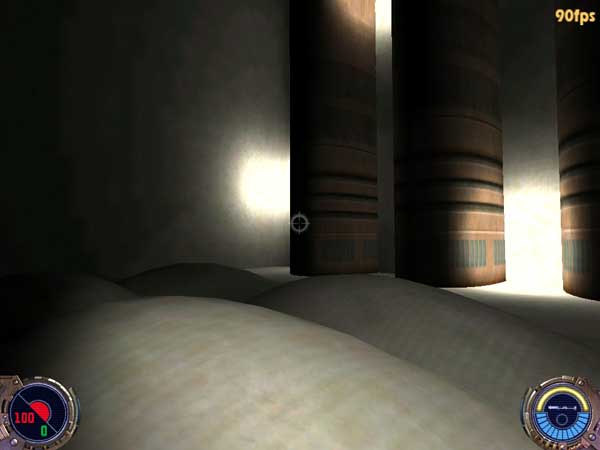
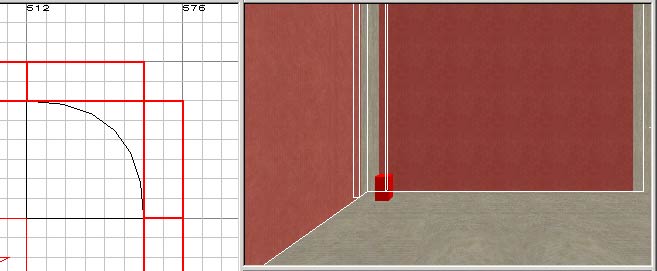
BUT OH NO! What's that behind the curves?
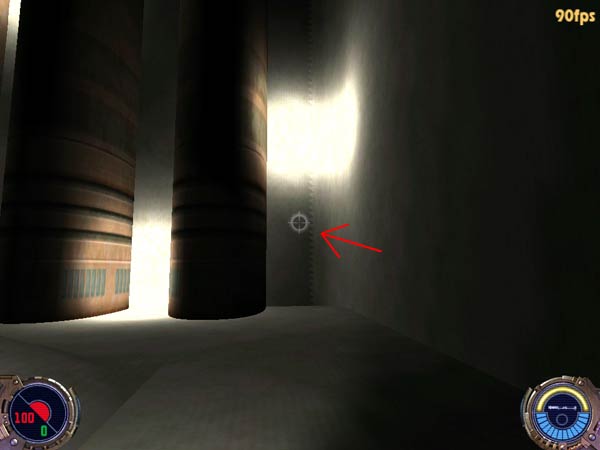
(You may not see this in your own compile depending on your light placement.) This is a form of sparklies. And what remedies sparklies? CAULK!
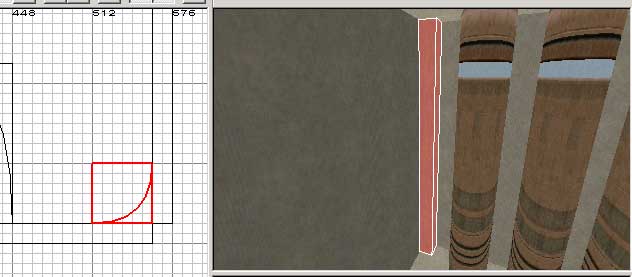
Now, use the Clip Tool to cut the space behind each curve away from the wall it's attached to. At each corner, you should end up with this:
After all
the sides are covered, you can press the Curve Wireframe Button
![]() to view through all the
patches on your map. You should have this:
to view through all the
patches on your map. You should have this:
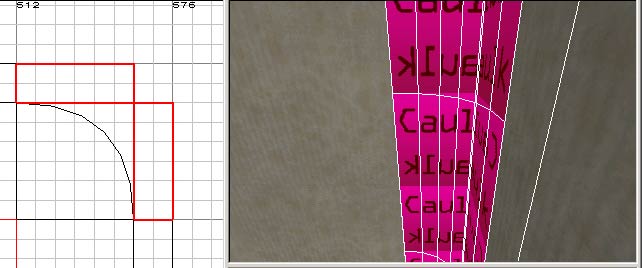
Cover each brush behind the curves with system/caulk and recompile. Voila! No more sparklies.

You should also take the time to caulk below your patch mesh and behind the end caps too. Remember to caulk behind all curves or you run the risk of making a very noticeable mistake. It also taxes the engine to draw more surfaces than it needs to (as JK2 will still draw the brush surface behind the curve whether you can see it or not.)
With the Curve Wireframe Button pressed, your map should appear like the following: