
General Concepts 102: Lesson 1
Caulk
Now that you have a basic understanding of all things Radiant, it's time to add the things that make your map play well and make it easier for you to design what you want to design.
First of all, in General Concepts 101, you learned to use the Hollow Tool to build a room. Never use this tool again. (:
The Hollow Tool is an inefficient shortcut to building a room, just like CSG Subtract is a seriously flawed shortcut to making doorways. First, let's look at why.
In Radiant, when you hollow out a room, you end up with six brushes that overlap each other at all the edges of your room. While this might not seem like a major problem, trust me, it is. Here is an example of where two brushes meet in a hollowed-out room:
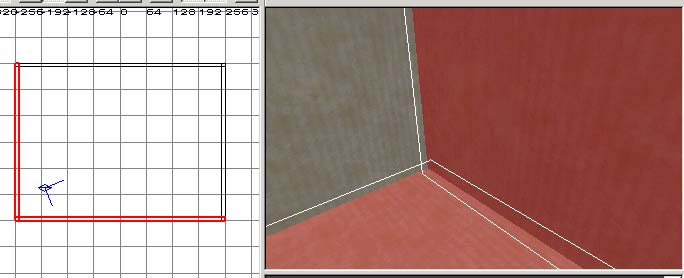
See how the two brushes overlap each other? This is a bad practice - any two brushes in your map that overlap each other can cause a visual problem called "Z-fighting." This occurs in your map where two brushes compete to see which is seen by the player (you) at any one time.
It is also important to note that the JK2 engine must unnecessarily draw the surfaces that are hidden from your eyes. Even though in the game, you yourself can't see that surface, the engine doesn't realize that and draws them anyway. This uses processor and video card cycles that are better spent drawing the rest of your (visible) map.
To remedy the situation, we must first build a room from scratch. Open up a new map in Radiant. Draw a brush that will be the first side of your room. For this tutorial, we want the entire room to end up being 768x768x768, so draw brush to be a wall of your room that is 768x16x768. You'll understand why in a few minutes.
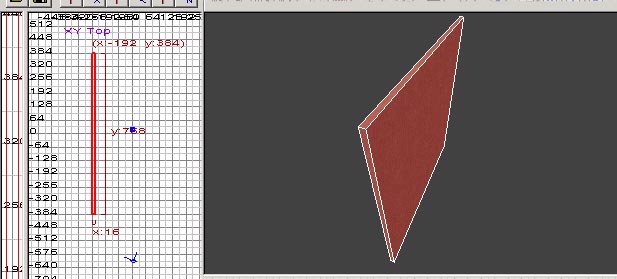
Next, duplicate the brush you're working on (Space Bar), rotate it (Z-Rotate Button) and fit it into the other brush. Repeat this for the four sides of the room. You should end up with these types of corners connecting the four walls of your new room:
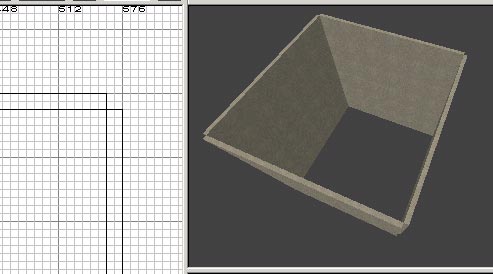
Next, draw a brush the full width and height of the inside area of your room. In this case, it will be 768x768x16 (all of our walls are 16 units thick). Set this brush right on top of the opening. Make sure no surfaces overlap each other. It should be set on top like this:

Make sure all the edges line up! If not, when you compile you'll have a leak. A leak is a place in your map where the "inside" areas open up to the void. This can make your compile times incredibly long and create a strange effect called an HOM Effect, or Hall of Mirrors Effect. An HOM is caused when the JK2 engine doesn't know what texture to draw in your view. Thus, it draws whatever was last in that place on your screen. Effectively, it copies the last seen image over and over and over again - thus a "Hall of Mirrors."
Having done this, go ahead and make your map playable (add an info_player_start and one light entity) as we will be using this for the rest of GC102. Save this map as secondmap.map
Now look at your newly created room... not bad, eh? WRONG! Look at all those textures displaying out into the void! That is wasted video memory that can eventually, with a few more rooms, cause unnecessary video lag and a drop in framerate. Thus, we need something called Caulk.
Caulk is actually what's called a shader - the specifics of which we'll get to later. All shaders appear in your Texture Browser just like regular textures, except they have a white line around them. Load the system texture set. You will notice a large pink square with the words "Caulk" on it.
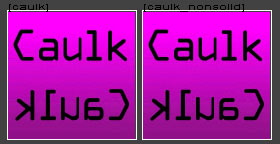
There are two stock Caulk shaders: system/caulk and system/caulk_nonsolid. We will be using only system/caulk for reasons that will become obvious quite a bit later.
Put the camera in the center of your room and select (Shift+Click) all six brushes. Apply system/caulk to them. Then select only the faces and apply the texture you want to them... Thus your brush should look like the left picture from the outside and like the right picture from the inside.


Ugly from the outside, isn't it? Well get used to it. (:
You should build all your brushes in caulk first, and THEN apply textures to all the faces (Ctrl+Shift+Click each face) that the player can see from wherever they might go in the game. Caulk should not only be used on the outside of brushes - it should also be used, for example, on the top of a brush that the player will never be able to see while they're playing. In the game, if the player does happen to see where you placed caulk, it will be completely invisible (you will be able to see the brushes behind the caulk).
Ample and appropriate use of caulk in this manner insures that your map will play at the maximum framerate it can be played at, making the absolute most enjoyable experience for the absolute largest number of players.
It is also extremely important to use caulk to avoid a visual effect called "sparklies." Sparklies can occur wherever two brushes meet and there is a textured surface on either side. The solution to this is caulk! With system/caulk on both sides of the brushes that touch each other, there will be nothing to worry about.