
Brushes 301: Lesson 1
Basic Stairway
Beginners tutorial for simple staircase.
1) Select the caulk * texture from textures/common menu. Draw a brush out:
length = 192 units, width = 16 units, height = 8 units.
2) Press space bar to create a copy and move it into the correct position to
make the second step. (You may need to switch views by pressing Ctrl + Tab
depending on your set-up). Now select both brushes and press space again to
copy it, then move into position. Repeat process for as many steps as you
want. It should be looking like this:

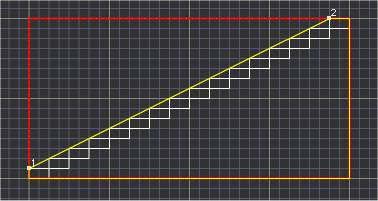
3) Draw out 2 brushes, each one the height and length of the steps and place one on each side as below:
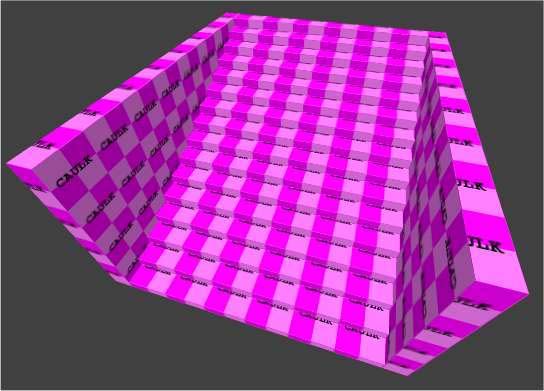
4) With the 2 side brushes selected, change the view port to side view (cycle through with Ctrl + Tab) and switch clip mode on by pressing X. Click at the appropriate points as shown below and a slice mark should appear. The section in red will be deleted so if the lower section is red press Ctrl + Enter to change it (You can see the potential outcome in the 3d view port). Now press Enter to finish the clip. Don't forget to turn clip mode off (X or Escape).
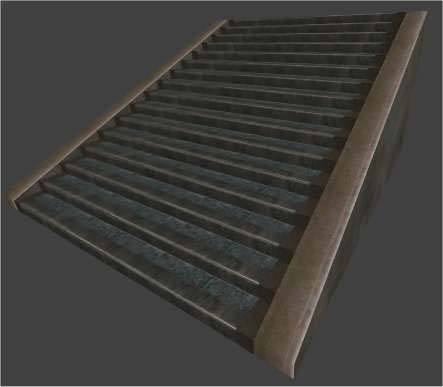
5) You now have the structure complete. Pick some textures for your
staircase, you will find my choices in textures/gothic/floor. In the 3d view
port select the top face on one of your steps by holding down Ctrl + shift
and clicking on the desired face, now click on a texture from the texture
window and it will be applied to your face (no, not the one on your head).
If it is not aligned properly press S for the surface inspector, then alter
it accordingly.
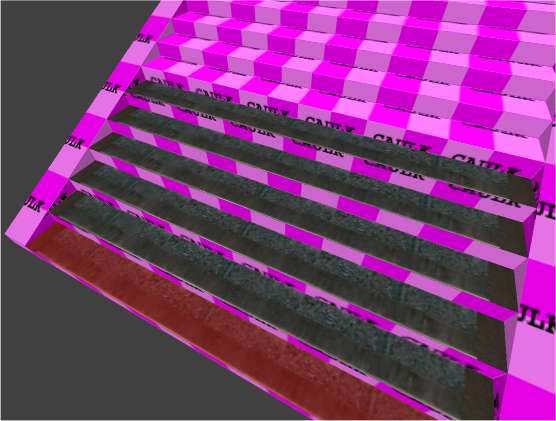
6) If your first step-top is textured correctly it makes the following
procedure very easy. Make sure the step top texture you just applied is
selected (Ctrl + Shift + left click in 3d view port) then while holding down
Ctrl and Shift, MIDDLE click ** on all the other step-tops. This method
tells Radiant to apply the selected texture, AND alignment properties.
7) The instructions from step 6 (no pun intended) can be applied to the
other areas of the structure that need texturing. Note that we are only
texturing the visible faces (see foot notes for caulk).
8 ) Finally we are going to detail *** the stair case. This is as simple as
selecting all the brushes and pressing Ctrl + M. If you want to make sure it
worked, press Ctrl and D to cycle Structural mode.
--- end ---
* The reason we use the caulk texture on unseen faces is because the Quake 3
engine doesn't render them, thus increasing performance.
** Middle click on my mouse is achieved by pressing my mouse wheel in. You
need to make sure "3 button" mouse is enabled in the
preferences.
*** There are two types of brush; structural and detail. Structural brushes
block visibility (within the Q3 engine) and detail brushes do not. I'm not
going to explain all about them here as there is too much to say, but at
least one practical up-shot of detailing this stair case is that the compile
time will be decreased!
NOTE: You may find it quicker to create,
texture and detail one step first, then copy it up to the top.
"Don't mess wit' me! I'm the Stair Master! I've Mastered the Stairs! I wish
I had a step right here, I could step here and here and here and step all
over it!" ;)