Utilities
88 files
-
FBX to Ghoul 2 Converter
By Xycaleth
The FBX to Ghoul 2 converter takes an FBX model and converts it to the GLM model format used by Jedi Knight 2 and Jedi Academy. The FBX model format is widely supported by the majority of 3D modeling programs and so this will allow the largest number of modelers to create models for the Jedi Knight games. This tool allows you to convert static models as well as animated models (which use an existing GLA skeleton).
If you have any questions, comments, improvements or want to report bugs, head towards the thread for this converter at http://jkhub.org/topic/2457-fbx-to-glm-converter/.
Thanks
Alex
223 downloads
-

3DS Max 6 ROFF2 Exporter
This is my first beta version for my 3ds Max ROFF v2 (.ROF) exporter. This exporter generates a .ROF file which is used for brush Model animations via Icarus Scripting.
Place the .dle plugin in your \plugins folder.
See the tutorial and other info that is posted in my WIP: ROFF Exporter thread in the Coding & Scripting section.
*This plugin will only work for 3ds Max 6, 7, or 8. You can find a link to 30-day trial versions for 3ds Max 6, 7, or 8
Interested parties can find downloads for 3ds Max 6, 7, or 8 30-day Trials at modacity.net at this link: http://files.modacity.net/software/3dsmax/
You must apply the Origin.jpg GtkRadiant shader as the Diffuse map texture (using Standard Material) to the Scene Object.
To create notes... you'll need to refer to the 3dsMax help docs. Just select your node and go to TrackView... then switch to DopeSheet mode.
With the node still selected in DopeSheet mode, select the menu: Tracks > NoteTrack > Add.
Then add your note keys (following the tutorial and info in the WIP thread). when you're done... just export to .ROF.
Please post your results.
Thanks.
53 downloads
-
3ds Max 2010/2011 32bit GLM Importer
By DT.
**********************************************
* GLM Importer for 3ds Max 2010/2011 *
**********************************************
Original Code: sfhgp (http://sfhgp.users.sourceforge.net)
Code edits: DT
Recompile for 2010 SDK: DT
Date: 1st December 2013
Max versions Supported: 2010 32bit & 2011 32bit
Installation:
**************
Place GLM_Import2010.dli in your 3ds Max 'plugins' folder
226 downloads
-
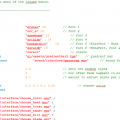
.menu Notepad++ Language
By eezstreet
When installed correctly on Notepad++, this allows you to view syntax highlighting for .menu files. Very straightforward and simple.
This also includes keywords for Jedi Knight Galaxies-specific keywords, if that's your cup of tea.
163 downloads
-
GTK Radiant 1.6.4
By JKHub
This is the most recent pre-release build of GTK Radiant (ZeroRadiant) (v1.6.4)
Noteable improvements:
64-bit q3map2 support
Inbuilt JA support (No need to download a separate gamepack)
Install
Simply extract the contents of the .zip archive to a folder of your choice and run radiant.exe. No install required at present. Select Jedi Academy from the list and point the path to your /GameData folder.
=============================
GtkRadiant is the official level design toolchain for games powered by id Tech engines from id Software, and is maintained by a community of volunteers. GtkRadiant is powered by the GTK+ Project and released under a GPL license.
Repository - https://github.com/TTimo/GtkRadiant
Release notes:
http://icculus.org/pipermail/gtkradiant/2013-August/011885.html
1,617 downloads
-
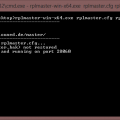
RPLMaster
By ouned
---------------------------------------------
RPLMaster
---------------------------------------------
Author: ouned
Website: http://jk2.ouned.de/master/
Version: 1.0
Description:
This is a masterserver for the quake 3 protocol with advanced features:
- copy IP's from other masterservers
- maximum servers per IP
- maximum requests per IP per second
- backup servers to a file which is used to restore IP's on a crash
Installation:
Run the rplmaster executable for your platform including the name of your configuration file and the name
for your backup file.
e.g. rplmaster.exe jka.cfg jka.bak
See the configuration file for more details.
License:
GPLv3 (http://www.gnu.org/licenses/gpl.html)
Sourcecode can be found in the "src" directory
Example servers for JK2 and JKA are running on master.ouned.de
53 downloads
- Native OS X Support
- Native Linux Support
- (and 2 more)
-
3DS Max 2013 .MAP Exporter
By CaptainCrazy
Very handy tool for creating maps and exporting as .MAP from 3DS Max to GtkRadiant. If you have any questions or problems then let me know!
Note: It seems to work best with GtkRadiant 1.4.0 as this version of Radiant is best suited for JKA.
======================================================================
Just drag and drop "GLBuilderV2_22max4-8.ms" into 3DS Max or 'RUN' it via the Max script menu.
Enjoy!
Copyright © 2013 maple3D.com, All Rights Reserved. Created by Michael Little
Game Level Builder 2.22 (for 3ds max™ 3-2008, Viz and gmax®) updated:7 Dec 2007
Game Level Builder 2.2 Rated Champion of the Month by Pixel (France) in magazine No. 85.
GLB 2.22 is a free tool set for creating convex solid geometry (csg) based game levels in Autodesk's 3ds max®, VIZ® and gmax®, It is an essential tool for building Half-Life®, Counter-Strike® and Quake® Levels. Building your level is easy, all you have to do is draw where you want your walls to be created, and then click on the walls where you would like doors or windows placed. Floors can be created with a single click and then copied to make ceilings. GLB2 is very useful for making buildings of any kind in max. You can make pipes or any other loft based object with PipeMax script (included). It's possible with PipeMax to make, Pipes, Tunnels, Arches, Roofs, Stairs, and even any lathe type object such as a hollow sphere or vase. GLB2 also includes 'Handy Cam' a first person camera that lets you walk around your level easily. 'Handy Cam' can be set to create a spline along the path of the camera, which can then be used to make roller-coaster shaped walls or pipes. Another use for this path is to render walk-throughs of your level. Ever wanted to make a fly-through animation of a building but found moving and keyframing the camera a pain, well not anymore. GLB now includes Map Exporter 1.0 Limited Edition. A custom written script to export your levels to .map files in seconds, allowing you to add entities in WorldCraft® or a similar level editior. Note: Map Exporter LE does not export texture coordinates, for full texture support and much much more, check out Convexity our professional level design package.
NEW features in Version 2.22:
Updated Map Exporter LE so map files are now compatible with GTK Radiant.
All walls are now made convex, so you don't have to worry so much about making walls turn on the level to stop twisted faces.
Floor tool has been improved so that floors created on slopes work more reliably.
Holes that could sometimes occur in floors due to a spline not being correctly extruded have been fixed. Floor pieces are now editable meshes, not extruded splines.
04 version updated for 3ds max 9 - 2008 and has been improved to work with dual monitor setups.
380 downloads
-
ASE to MD3 or GLM file converter
By JKHub
This is an executable that can be run to convert ASE format models to MD3 and GLM format. This was a tool originally released by Raven for Soldier of Fortune 2 for the making of static models so when making GLM models it will not write any bone animation or envelope weight data. This tool can be particularly useful to those who are using 3d software that has no MD3 format export support.
Included are instructions on how to use the program in PDF format.
There are two different model formats used in SoF2, MD3 and Ghoul2. MD3 is used
primarily for static models and have an extension of .md3. Ghoul2 models are used for
ConfusEd entities (for SP), bolt-ons and characters andhave the .glm format. Ghoul2
models also have two different methods of being built, one with bones, and the other
without. Ghoul2 with bones are used for models that require animations (characters and
some ConfusEd models). Ghoul2 without bones are used for non-animated models
such as bolt-ons.
This document gives no explanation on actually modelingobjects. If you are new to
putting models into a game, start with MD3s, as they are far less complex than Ghoul2
models. Also, we use 3DS Max 4 for model creation and our supplied plug-ins work with
Max 4. All following instructions assume Max is being used in the creation of models
300 downloads
-
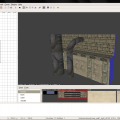
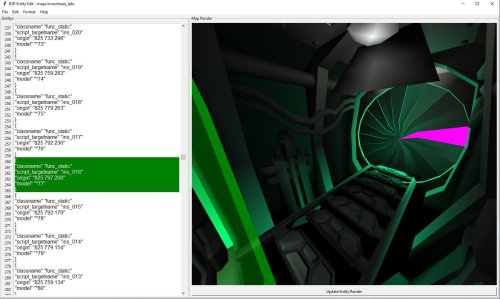
JK2 Map Models - Image Reference Library for JK2/JKA
By Szico VII
JK2/JKA Map Models (v1.0)
Image Reference Library
by Szico VII
May 13th 2013
=====================
CREATED BY Szico VII
MSN: szicovii@gmail.com
E-Mail: szicovii@gmail.com
AIM: Szico VII
http://www.jkhub.org
=====================
Map Models - Screenshot Reference Library (v1.0) for JK2/JKA
Size: 51.78MB
===========
Description
===========
This is a complete compressed (.zip) file containing screenshot references of all the JK2 and JKA model assets,
located in the base/models/map_objects folder. This should make it easier for modders of the game to browse
the models and decide which to use without manually loading each and every model in radiant to check.
You should unzip the entire library to your computer so you can utilise your OS's inbuilt thumbnail viewer.
===========
Notes
===========
- Some models are broken - i.e they are missing texture assets. These are clearly labelled.
- Some models are for JK2 only, so you will need the JK2 asset files for the models to display correctly.
- The above also applies to JK3.
- Some screenshots were taken ingame to better illustrate their ingame appearance, so if they appear
differently in radiant do not be alarmed.
- Any model with a _b suffix in its name was designed for use as a misc_model_static. It is otherwise identical
to its normal counterpart, so there are no screenshots of these models.
---------------------------------------------------------------------------------
IMPORTANT!!!!
---------------------------------------------------------------------------------
I spent a great deal of time compiling this library together so please leave credit if you find it useful in your projects!
You may not redistribute these images or use them for anything other than personal use only.
NO ELEMENTS OF THIS FILE CAN BE RIPPED!
==================================================================================
THIS MODIFICATION IS NOT MADE, DISTRIBUTED, OR SUPPORTED BY ACTIVISION, RAVEN, OR
LUCASARTS ENTERTAINMENT COMPANY LLC. ELEMENTS TM & © LUCASARTS
ENTERTAINMENT COMPANY LLC AND/OR ITS LICENSERS.
==================================================================================
~Szico VII~
527 downloads
- JK2
- 3D Modelling & Animation
- (and 2 more)
-
Q3Map2Toolz
By JKHub
Q3Map2Toolz is an alternative front-end application for Ydnar's Q3Map2 to q3map2build. It is larger than it's build counterpart but for current days still small.
It's main advantage is that it has an included mapacker by Equim which greatly reduces effort in making the .pk3 files.
Additionally, it allows the use of more BSP switches than Q3map2 GUI.
1,429 downloads
(1 review)0 comments
Updated
-

GLAMerge
This program written by Alex Shapiro (aka ASk) allows for merging 2 .gla files, something that is a must when making animations for characters in this game. I take absolutely no credit for this, just uploading since the original authors website is no longer in existence and strongly feel that it is something that cannot be forgotten about.
Original Readme
//========================================================================
//
// GLA Merger version 1.2b
//
// Copyright 2003 by Alex Shapiro (aka ASk)
//
// Additional credits go to (in no particular order):
//
// Wudan, RazorAce, JaiiDerHerr,
// Tchouky,CortoMaltes, Jedistone
// and anyone that I have forgotten
//
//========================================================================
==========================================================================
==
== DISCLAIMER:
== THIS MODIFICATION IS NOT MADE, DISTRIBUTED, OR SUPPORTED BY ACTIVISION,
== RAVEN, OR LUCASARTS ENTERTAINMENT COMPANY LLC. ELEMENTS TM & © LUCASARTS
== ENTERTAINMENT COMPANY LLC AND/OR ITS LICENSORS.
==
== THE AUTHOR IS NOT TO BE HELD RESPONSIBLE FOR ANY DAMAGE THAT THIS PROGRAM
== MAY CAUSE TO USER'S COMPUTER, INCLUDING BUT NOT LIMITED TO: DATA LOSS,
== CRASHES AND INSTABILITY.
== REMEMBER: USE OF THIS PROGRAM IS OF YOUR OWN RISK.
==
==========================================================================
============================= Instructions ==============================
****************** BACKUP FILES BEFORE USING THIS PROGRAM ****************
1) Put the 2 .gla files into the same directory as the program
User .gla file must contain the 'base' pose (the DaVinci pose) as first frame, it will be ignored during merge.
2) Invoke the program as "glamerge.exe firstfile secondfile [-o]|[-l]"
- If invoked in this format, 2 user .gla's may be merged into 1.
- If invoked in "glamerge.exe file" format, _humanoid.gla from the current dir is used as first file.
- The optional -l switch makes the program dump the bone data (hierarchy) from both gla files, then quit.
- The optional -o switch makes the program eliminate any redundant bone data (producing .gla files comparable to the ones produced with carcass.
- If both -o and -l are specified, the second of two (in the order they are specified) will be ignored
- The program rearranges the bones in the correct order, so as long as the hierarchy/origins are the same, it should work
3) Enter the name of output file
4) Add your animations to animations.cfg file
5) Enjoy
360 downloads
-

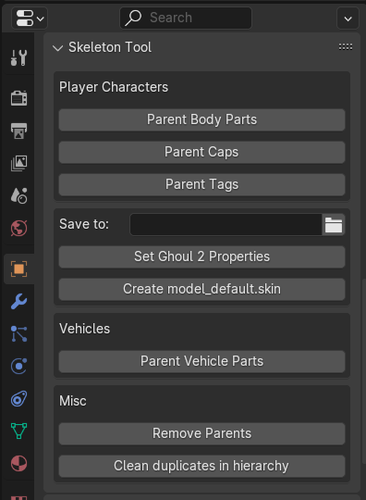
Blender 2.64+ - Jedi Academy Plugin Suite
By mrwonko
New version! Check out my GitHub for the latest pre-release, which supports newer Blender versions and addresses various shortcomings. A new JKHub release will follow at some point.
A manual is included, make sure to read it if you're having problems.
This is a compilation of all my Blender plugins, ported to 2.64:
MD3 Exporter (originally by Xembie, forked a couple of versions ago) ROFF Importer & Exporter ASE Importer & Exporter (specifically for GtkRadiant/Q3Map2 - very simplistic) .map patch exporter - i.e. export as patches GLM/GLA Importer & Exporter and animation.cfg exporter with support for everything, including creation of new playermodels and animations. Installation:
Go to the Blender User Preferences, select "Install Addon" and select this zip.
7,672 downloads
-
Q3map2 (>2GB Memory Usage)
By JKHub
Ydnar's official q3map2 program updated to use >2GB Ram during compiles to avoid safe_malloc error. No other changes,
Requires a 64-bit OS.
643 downloads
-
GtkRadiant 1.5 Complete Version
By Pande
This version of GtkRadiant, which is now no longer available due to the absence of the old QeRadiant website, is the most complete and bugless version of GtkRadiant 1.5 available. Many users complain about 1.5 bugs and therefor tout the 1.4 editor as being better. Anytime I have helped fix the bug, this particular .msi has always done the trick.
Note that the features included in this version are but not limited to:
ShaderPlug
bobtoolz
brushexport2 (convert brushes into .obj)
prtview (view portal divisions, very useful!)
Maya style Translation, Scale, and Rotate (always snap to grid after using these!)
1,268 downloads
-

Dragon
By JKHub
Author: Wudan
-1- General Information
To put it simply, Dragon is an animation creation and editing tool for the Ghoul2 animation file format, .gla, used in both Jedi Knight II: Jedi Outcast and Jedi Knight: Jedi Academy (hereafter referred to as JKA). It's primary purpose is to create animations and write them in to the .gla format, which can then be merged with the existing JKA animations (or other .gla files) for use in-game with little knowledge needed.
Dragon has been created on a machine utilizing an AMD Duron 950, 256 MB ram and an ATI Radeon 9200 videocard, which is a fairly low-end system by today's standards. As such, most computers should be able to handle Dragon program smoothly (but, because of Dragon's avatar system, it is possible to put too much strain on any system.)
Dragon features:
A drag-able and transparant UI
An Avatar system
A Console to do nifty things!
A Complete Bone List to animate
A Standard model
A few example animations
Light Saber Rendering (extremely nifty)
Weapon Rendering (blasters rockets etc)
A floor tile, for better animations
Save and load system
A blending option
And probably much more
-2- Installation
The current release (0.1.0) is just a .zip file - you will need a program such as WinZip or WinRAR to extract Dragon. When you extract Dragon, it is important that you keep the folder hierarchy as it is in the .zip file. If you extract Dragon to C:\, the program will be in C:\Dragon\ All you'd need to do is navigate to that folder using Windows Explorer and double-click Dragon.exe. As of 0.1.0, Dragon has a default model that is loaded using the default Avatar, so you should see a shiny little guy, ready to animate.
-3- Getting Started / Basic Usage
Ok, you've gone through the trouble of downloading Dragon, extracting it, and running the core executeable - now what?
You should see a shiny little gray dude, a box that says "BoneList" and a box that says "SliderBox". Below the gray dude is a little stick thing, made of a white, green, and blue sticks. You still with me? Cool.
Let's focus on the BoneList, since it's basic use is pretty easy. You see a list of bones - model_root is in the middle - the active bone is dislplayed in the middle of this box. You can click on any of the bones listed above or below to switch to those bones - as you change bones you will notice that the stick thing (the white, green, and blue sticks mentioned earlier) change position and orientation.
Ok, now you're ready to do some fun stuff. See that slider box that you've been itching to mess with? This is the heart of Dragon - You have several things in here that are noteworthy - a Reset Button (completely obliterates any posing you've done of the current bone), and two sets of 'Sliders'. The sliders on the left are the important ones - the ones on the right we'll get to in a minute.
Go ahead and select the r_femur_YZ bone in the BoneList. Next, click on the green slider on the left - and hold your mouse down - and move your mouse left or right. You should see the gray guy's leg swing back and forth. You can now try moving the blue slider - his leg will sway from side to side.
Getting from here to making a cool stance is actually pretty easy - it's like playing with GI Joes, or some such action figure - you just pose the model how you want it. It might take some getting used to, but you're on your way
-3- Console Commands / Advanced Usage
Dragon uses a console, designed to be somewhat familiar to people who've played a game based on the Quake3 engine. First up to bring down the console press ` (you may need to enter ASCII code 0126).
Console Commands:
screenshot
Takes a screenshot - saved in the 'screenshots' folder.
fnext
Go to next frame (Hotkey: K)
NOTE: Also used to create frames, hotkey does NOT create a frame
fprev
Go to previous frame (Hotkey: L)
fdel
Delete frame - (deletes the current frame.) After deleting, Dragon will go to either the next frame (if there is one), or the previous frame (if there is not one.)
fcpy <number>
Frame Copy - Copies a specific frame number.
fcpyprev
Frame Copy Previous - Copies the frame before this frame. If there isn't one, it does nothing.
fcpynext
Frame Copy Next - Copies the frame after this frame. If there isn't one, it does nothing.
fspeed <number>
Frame speed, if you want your frames play at a higher rate, you need a high fspeed, you want a slower rate, u need a small fspeed. Default fspeed is 20. Usage: fspeed 20
fblend <number>
This is what makes the animation smooth. Its simple to use once u get used to it. Usage: in frame 1 is a stance in frame 2 is a different stance. U want the switch between stances to be fast, so 10 frames should be right. Bring down the console and type: fblend 8. now u should have a smooth switch from stance to stance. NOTE: To prevent odd bugs from happening cycle trough the animation mannually once before clicking the preview button! Always substract the amount of frames u already have for example if u want an animation to last for 20 frames and u have 5 frames animated than its 20-5 = 15 , fblend 15. Hope that makes sense play around with it.
finsa
Inserts a new frame after the current one.
finsb
Inserts a new frame before the current one.
save <name>
Saves a .cfg file to Dragon's directory. This file describes the animation you are currently working on. You do not need to add the .cfg, Dragon does this for you. So, 'save myanim' creates myanim.cfg in the Dragon directory.
load <name>
Loads an animation over the current animation, creates the necessary number of frames (but doesn't nuke any frames - so if you load a 5 frame anim and have 10 frames, you'll have 5 frames on the end of your workspace that you probably don't need. Use fdel to nuke 'em.
savegla <name>
Saves a .gla file in Dragon's directory under your given name. Usage: savegla my_stance
impframe <number> <number>
Import frames from the loaded .gla - so that you can edit previously finished animations. The first <number> is the starting frame number for your import, and the second <number> is how many frames to import.
It is recommended that you use the save and load commands to work on animations, as saving to gla and reimporting several times introduces compression artifacts - in layman's terms, your animation will be broken and you may need to re-do the entire thing. Importing from the original should be fine, as that's what the target executeable (in most cases, Jedi Academy) does anyway.
NOTE: To load up a gla you have to edit an avatar file, or make a new one. More on this in the avatar section.
-4- Avatar System
The Avatar System is one of the more robust components of Dragon. With it, you can animate multiple models at once, bolt models to those model's bones, change the saber's color, and length. So, how to access this advanced functionality? Listen well, young traveller, for a world of infinite possibility awaits those with a steady hand and an open ear.
Dragon, in 0.1.0b, comes with "avatar/default.cfg". (Now might be a good time to set Notepad to be the default editor for .cfg's, if it isn't already.) Opening that file shows:
Wudan{{org 0.0 0.0 0.0gla _JAhumanoid.glaglm models/players/stormtrooper/model.glmskin models/players/stormtrooper/model_default.skinbolt models/weapons2/saber_dual_5/saber_dual_5.glm rhang_tag_bonecolor 0.05 0.15 0.05length 32.0}}
The syntax is fairly similar to .shader file format, so skinners won't be at a total loss here. There are three main, must-have parts of an avatar file, the 'org', the 'gla', and the 'glm' lines. Oh, and the 'skin' line is fairly important. That said, a basic template to follow for creating new avatars would be:
AvatarName{{org 0.0 0.0 0.0gla INSERT_NAME_OF_ANIMATION_FILEglm INSERT_NAME_OF_MODEL_FILEskin INSERT_NAME_OF_SKIN_FILE}}
The org line has three floating point values past it. These tell Dragon where you want to draw the model at. This is useful because adding multiple models would be confusing if they all were at the '0.0 0.0 0.0' location. The gla line has a filename after it. By default it is _JAhumanoid.gla, which is a really small, single frame animation file that contains all of the skeleton file info. The glm line has a filename after it. This can be any .glm file, it is highly recommended that it be a .glm that was made to work with the gla you've selected. The skin line points to a skin file specifically created for the glm that you have selected. As of 0.0.1b, not loading a .skin file results in a crash.
-5- Tutorial: Replacing Animations
So the reason u downloaded dragon was not to read allot of crap but to get urself some animations done! So here we go! This is much easier than u think, Thanks to dragon. Its not hard either. Ive just written allot of text so it would be clear First we create our workspace. Extract /models/players/_humanoid/ (assets1.pk3) to a easy to find place. I've created:
"C:/Base/Models/Players/_humanoid/"
NOTE: /Base/ has to be there. if not ull get errors Check the _humanoid folder, see if u can see the .gla and the animations.cfg files. Now download GLAmerge written by Ask.
Now, create your animation in Dragon. That's easier said than done, right? Well, once you have a completed animation, you can move on to the next step.
However, before you export to the .gla format, there are a few things to consider - for one, have you saved the file (save command), so you can edit the original animation later? If so, excellent. save, then savegla - I think a good idea would be to automatically save when savegla is called - this could be done for the next release - any thoughts?
Ok, now the tricky part is that you'll need the very first frame of animation be empty - it technically doesn't matter, but you need to understand that this buffer needs to be there because other animators, using packages like XSI and 3dsMax, weren't able to keep the skeleton in-tact when exporting to gla and merging, unless they had made the first frame of their animations the base pose, otherwise the animation could not be successfully merged in with glamerge. Dragon does maintain the skeleton's structure, but uses the same merging program as everyone else.
Anyway, the tricky part is that Dragon currently has a blending system that 'wraps' around the animation - if the last frame of animation has blended bones in it, they blend with the first frame. This helps with walk cycles, but makes exporting to gla format pretty tricky. Since 'unblending' bones does not destroy their position, save your animation, then unblend each bone of the first and last frames, then finsb on frame 0 - you should now have a blank frame 0 and the rest of the frames are working fine - but, because Dragon is finicky about frames, cycle through all the frames before you export. You're ready to export - lucky you!
To export, enter the console and put in
savegla YOURFILENAME
(do not append .gla, Dragon does this already.) Ok, you're done with Dragon, go ahead and exit (you did save, right?)
In the folder where Dragon is located, you will find YOURFILENAME.gla - copy the .gla to the humanoid folder mentioned earlier. Than create a new text document. In that document type the following:
@ECHO OFF"glamerge.exe" "_humanoid.gla" "<gla>" -oPAUSEEXIT
This is a basic setting. replace <gla> with whatever your gla is called. i got this: @ECHO OFF "glamerge.exe" "_humanoid.gla" "my_run.gla" -o PAUSE EXIT (if u are an advanced modder, see the readme of glamerge for more options) Save the txt file as gla_merge.txt Now rename the file to gla_merge.bat (the .bat file tells the program what files to merge) now double click on the .bat file (make sure the following files are in the _humanoid directory. Glamerge, _humanoid.gla, your GLA.) It should now ask u for an output name. I suggest humanoid.gla (NOT _humanoid.gla!). Because this way u can rename the humanoid.gla or delete it when it isnt good while keeping the original (of course its just a copy of the original located in assets1.pk3). But for now lets do new.gla Now create the same directory somewhere else (no need for /base/ now) c:/models/players/_humanoid/ copy the other _humanoid files and paste them here. delete everything except Animations.cfg and new.gla Now rename new.gla to _humanoid.gla. Open up the animations.cfg with good old notepad. Now find the running animation. (U can use modview) k now its time for some small time scripting (not 2 hard dont worry) Now uve found the animation u want to replace BOTH_RUN1 12305 26 0 40 (name) (beginframe) (frames) (loop) 40(framespeed) K now. we have to leave the name the same. Now we find out what the last frame is, if u scroll down a bit ull see that ROOT is the last frame on frame: 21374 and it lasts 2 frame wich comes to a total of 21376.Now we know what to fill in the first, now for the second. How many frames is your animation? really simple if u've paid attention when gla merge was busy you shouldve noticed it counted the frames So there. I got 20 frames. Next is wether u want it too loop or not. 0 = yes, -1=no. We have a running anim so i would say 0, yes. And finally the framespeed. This one u can set whatever u like. in dragon the speed was 20 and i liked it so ill use 20 There we're done analyzing. So lets do this ! BOTH_RUN1 21376 20 0 20 Ahh yes were done! Pack /models/players/_humanoid/ in a .pk3 (the same way u would pack a skin) and place it in your base. Launch JKA. play a game and look at your new animation! NOTE: your next animation has to start on a different frame, see the last frame is 21376, plus the 20 frames u used wich would become 21396 I hope u get the point. Delete the .pk3 and yer jka is back to normal, Isnt it simple? Its only simple thanks to Dragon:The Ghoul2 Animation Tool
-6- Contact
If you need help or got questions or want to report a bug (TO SQUASH!) you can contact Wudan on the following ways:
Mt-Wudan
Dragon Forum
Mail: Wudan07 -AT- gmail.com
Aim: Wudan07
Remember! Report Bugs As soon as u find them! And also please fill in the crash/bug form included! You are able to control how good the next version will be if u go on bug-hunting or if u think of things that could be improved
Credits
Jedi Knight Jedi Academy.......................................LucasArts, Raven, Activision
Ask................................................................................GLAmerge
Wudan......................................................Dragon:The Ghoul2 Animation Tool
Shady-D.........................................................Doing some background stuff
You..........................For reading this and for (hopefully) reporting if u find a bug
626 downloads
-

EffectsEd
By JKHub
This is the EffectsEd utility provided with the Jedi Academy SDK. It is used to create the EFX files that provide the visual effects for many of the games weapons and environments.
DISCLAIMER:
PLEASE READ THIS DISCLAIMER CAREFULLY BEFORE INSTALLING OR USING THE BINARIES AND ASSETS. IF YOU DO NOT AGREE TO BE BOUND BY THE TERMS OF THIS DISCLAIMER, DO NOT INSTALL OR USE THE BINARIES AND ASSETS. These binaries, assets and source code are released by Raven Software Corporation ("Raven") as a non-supported product. Since these binaries and assets are a non-supported product, neither Raven's, nor LucasArts Entertainment Company LLC's ("LucasArts") nor Activision Inc.'s ("Activision") respective technical support centers can answer or help with any issues you may encounter with this release or these binaries and assets. These assets and binaries have received minimal developer testing and may crash your computer or cause other undesirable effects! Raven, LucasArts and Activision make no representation or warranty to you of any kind regarding these assets and binaries or your success in using them. You expressly acknowledge and agree that your use of the assets and binaries is at your sole risk. The binaries and assets and any related documentation or materials are provided "AS IS" and without warranty of any kind. RAVEN, LUCASARTS, AND ACTIVISION EACH EXPRESSLY DISCLAIMS ALL WARRANTIES, EXPRESS AND IMPLIED, INCLUDING, BUT NOT LIMITED TO, THE IMPLIED WARRANTIES OF MERCHANTABILITY, FITNESS FOR A PARTICULAR PURPOSE AND NONINFRINGEMENT. RAVEN, LUCASARTS AND ACTIVISION DO NOT WARRANT THAT THE FUNCTIONS CONTAINED IN THE BINARIES AND ASSETS WILL MEET YOUR COMPUTER'S SYSTEM REQUIREMENTS, THAT THE OPERATION OF THE BINARIES AND ASSETS WILL BE UNINTERRUPTED OR ERROR-FREE, OR THAT DEFECTS IN THE BINARIES AND ASSETS WILL BE CORRECTED. THE ENTIRE RISK AS TO THE RESULTS AND PERFORMANCE OF THE BINARIES AND ASSETS IS ASSUMED BY YOU AND YOU (AND NOT RAVEN, LUCASARTS OR ACTIVISION) ASSUME ANY OF THE COST OF ALL SERVICING, REPAIR AND/OR CORRECTION. SOME JURISDICTIONS DO NOT ALLOW THE EXCLUSION OF IMPLIED WARRANTIES, SO THE ABOVE EXCLUSION MAY NOT APPLY TO YOU.
UNDER NO CIRCUMSTANCES INCLUDING NEGLIGENCE SHALL RAVEN, LUCASARTS OR ACTIVISION, OR THEIR RESPECTIVE DIRECTORS, OFFICERS, EMPLOYEES, LICENSORS OR AGENTS, BE LIABLE TO YOU FOR ANY INCIDENTAL, INDIRECT, SPECIAL OR CONSEQUENTIAL DAMAGES (INCLUDING DAMAGES FOR LOSS OF BUSINESS PROFITS, BUSINESS INTERRUPTION, LOST DATA, LOSS OF BUSINESS INFORMATION, AND THE LIKE) ARISING OUT OF THE POSSESSION, USE, OR MALFUNCTION OF THESE BINARIES OR ASSETS, INCLUDING WITHOUT LIMITATION DAMAGE TO PROPERTY AND, TO THE EXTENT PERMITTED BY LAW, DAMAGES FOR PERSONAL INJURY, EVEN IF RAVEN, LUCASARTS OR ACTIVISION OR AN AUTHORIZED REPRESENTATIVE OF RAVEN, LUCASARTS OR ACTIVISION HAS BEEN ADVISED OF THE POSSIBILITY OF SUCH DAMAGES OR LOSS. SOME JURISDICTIONS DO NOT ALLOW THE LIMITATION OR EXCLUSION OF LIABILITY FOR INCIDENTAL OR CONSEQUENTIAL DAMAGES, SO THE ABOVE LIMITATION OR EXCLUSION MAY NOT APPLY TO YOU. YOU AGREE THAT THE LIABILITY OF RAVEN, LUCASARTS OR ACTIVISION ARISING OUT OF ANY KIND OF LEGAL CLAIM (WHETHER IN CONTRACT, TORT, OR OTHERWISE) WILL NOT EXCEED THE AMOUNT YOU ORIGINALLY PAID FOR THE USE OF THE SOFTWARE.
357 downloads
(0 reviews)0 comments
Updated
-
Q3E Minimizer
By TiM
Author: TiM
Website: http://www.ubergames.net
Permission: https://jkhub.org/images/iasiSjw.png
Uploaded by: @Caelum
Description:
Quake 3 Engine Minimizer (or Q3E Minimizer for short) is a small desktop utility designed to allow users to forcibly minimize any games that were built on the idTech 3 engine, using a set of predefined hotkeys.
For technical reasons, all Quake 3 based games disable the Alt-Tab key command when they are in full screen mode (Presumably this is because the engine takes control of the display's hardware gamma in order to render the game at higher contrast. More on that here). Suffice it to say, this can sometimes be quite frustrating especially if you have any programs you want to reach in the background (such as a music player).
To help get around this, Q3E Minimizer was created to let users set hotkeys that will forcibly minimize the game engine window, and return them to the desktop.
Features of Q3E Minimizer include:
Operates entirely out of the system tray, so it's as invisible as possible.
Can be set to open upon Windows login.
A dynamic detector that determines what idTech 3 games are being played on the system.
A dynamic resolution modifier that will change your screen resolution between desktop and game modes.
Instructions
Open Q3EMinimizerv151_Setup.exe and follow the on-screen instructions.
Once installed, and upon opening Q3E minimizer, the main window will appear. In the drop-down menu located near the bottom of the window, choose which game you would like the minimizer to currently focus on, or leave it at Auto Game Detection, if you wish.
Start up that game as you would normally.
To minimize the game, press the default keys: Control-Z
To restore, press Shift-Control-Z
To configure the hot keys, right-click on your current game's icon in the system tray, and choose "Settings...". From there, use the interface to select your new keys.
To exit the program, right-click on the Q3E Minimizer icon in the system tray and choose 'Exit'.
I hope you enjoy using Q3E Minimizer and that it makes your gaming experience all the more better.
Happy Fragging!!!!!
-TiM
7,918 downloads
-

IBIze-mac
By redsaurus
The command-line application 'IBIze-mac' compiles suitable textfile into Jedi Academy scripts. I threw out my old IBIze-mac code and used proper Raven code found in the Star Trek : Elite Force SP SDK to redo it.
I've also included the Raven icarus scripting manual and the Raven example scripts (whilst their file extension is ".icarus", you can open them fine in TextEdit), and the source code (most of it's just from the ST:EF SDK).
Needs Mac OS X 10.4 or newer. It's only for macs, but works on PPC AND Intel (or should do, at least).
39 downloads
(1 review)0 comments
Updated
-
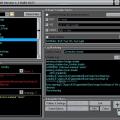
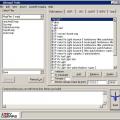
Q3map2 Graphical User Interface
By JKHub
Author: Darth Arth
Why did anybody code a new frontend for old Q3 based engine compiler?
Hmm.., cause i'm still a small active part of german JK-mapping community
Till today i used q3map2build to compile my maps, but i dreamed about a fronted,
which can check the logfile "live", during the compilation.
But the problem was, i couldn't write a working Log-Listener.
I asked DLB for providing me the q3map2build-quellcode, but received no answer
many days after, i did it finally...
... an working log-listener
It was the beginning of q3map2GUI.
Q3map2GUI is simple like q3map2build, but powerfull like q3map2toolz
The most different featuers of q3map2GUI are:
- "live" Log - checking for errors ans warnings (You can see them at one click)
- you can compile and play maps in subfolders! (base/maps/ ...."
- you can specify SP and MP game executables
- this app do not add any registry keys, not one
BSPC is not supported at this time.
833 downloads
(0 reviews)0 comments
Updated
-
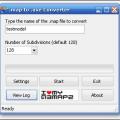
.map to .ase Converter Utility
By Yzmo
This is a small program i made to convert .map files to .ase models,
it will convert and then show the conversion log.
Bugs: There are a few bugs!
1. Program starts with transparent on.. Just change it in the settings
2. Program Freezes when converting, will unfreeze when finished.
3. Some more..
388 downloads
(2 reviews)0 comments
Updated
-
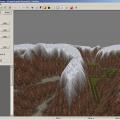
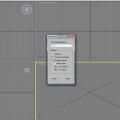
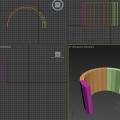
EasyGen
By JKHub
With EasyGen you build up terrains and export them as Radiant source map (including alphamap and metahsaders).
Bitmap import/export is also supported.
Supported games
Quake3
Return To Castle Wolfenstein
Generally all games based on Quake3 engine (Including Jedi Outcast/Jedi Academy), who need a source map(.map), an alphamap(.pcx) and a metashader script(.shader) to compile a terrain entity. (if you want to to learn more about this process read the Official Terrain Manual written by Paul Jaquays contained in the latest GTK installations)
Installation
Make sure to extract all files contained in the zip in the same folder.
After you've extracted the zip, EasyGen folder should looks something like this:
EasyGen\modifiers\*.* - modifiers
EasyGen\templates\*.* - various files (*.shader, *.cfg)
EasyGen\save\ - saved terrains (*.egn)
EasyGen\tutorial\*.* - tutorial stuff (old but sufficient)
EasyGen\EasyGen.exe - executable
EasyGen\btnexgenipl32.dll - a dll
EasyGen\readme.txt - this readme.txt
EasyGen will not run if 'btnexgenipl32.dll' is not in the same folder.
Also EasyGen needs to know your work mod folder under <your_game> root folder (ie baseq3\, missionpack\, main\ etc etc), you will be prompted to browse for that asa you start EasyGen. I repeat for the last time, you need to browse for a MOD folder, not for the <your_game> root folder.
Features
Terrain shape manipulation through several modifiers (Hill,Cone etc etc).
Program your own modifiers with an easy asm like language. Read 'custom_modifier.txt' to learn more.
Direct export source map plus alphamap and metashader script.
Alphamap import/export.
Bitmap import/export.
Models (md3) are loaded automatically from <your_game>/<your_mod>/models/ directory.
Import brushes from a map file. Brushes are only used as space references to aid positiong the terrain entity. Bruhses manipulation is not supported by EasyGen and BRUSHES are NOT exported toghether with the terrain. Only the TERRAIN ENTITY itself is exported and the models you have inserted.
Terrain import from a map file (and related alphamap and metashader). This should work in the most of the cases.
To exclude triangles from export: - select MODIFIER TAB. - click the pink triangle button on the toolbar (the one with the red cross) - SHIFT+LEFTCLK on a triangle
Upgrading shader templates (templates/*.*) is useful if the author of the compiler (ydnar) makes come modifications to the compiler itself (q3map2.exe). Replacing old templates with the new ones will ensure that EasyGen will export shaders hat will work with the new version of the compiler.
760 downloads
(1 review)0 comments
Updated
-
NetRadiant JKA Fix (Mac)
This pack makes NetRadiant compatible with Jedi Knight: Jedi Academy, and contain data for map entities etc. It also contains a copy of Eridan's Q3map2GUI for Mac OSX for your convenience, as it is included with GtkRadiant1.4/1.5 but not with NetRadiant.
65 downloads
(0 reviews)0 comments
Updated
-
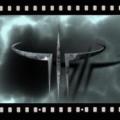
Quake Video Maker
By JKHub
This tool can be used to create RoQ videos inside JK2/JK3
Here is Quake Video Maker. A simple tool to create AVI files with both video and audio.
Import TGA, JPEG, BMP and PNG sequences into scenes
Import AVI movies
Import RoQ (IdSoftware video format)
Import GIF animations
Import RoQ movies
Export to AVI using available video codecs on your PC
Export to RoQ to create ingame videos
Organize your scenes
Make scenes transitions
Special effects (PIP, Overlay, Luma, Monochomatic, ...)
Add your favourite MP3 or WAV file as the movie soundtrack
Include image sequences generated by Flash (or other tools) to create title scenes
765 downloads
-

GtkRadiant
By JKHub
GtkRadiant is the official level design toolchain for id Tech 3 by id Software and is maintained by a community of volunteers. GtkRadiant is powered by the Gtk+ Project and released under a GPL license.
Features
Simple, Intuitive Interface
Enhanced texture browser
Entity inspector
Portal viewer
Wavefront .obj export
Game Engine-Independent
Dark Places
Doom 3
Half-Life
Heretic II
Nexiuz
Prey
Quake
Quake II
Quake III Arena
Quake 4
Return to Castle Wolfenstein
Wolfenstein: Enemy Territory
Soldier of Fortune II: Double Helix
Star Trek: Voyager Elite Force
Star Wars Jedi Knight II: Jedi Outcast
Star Wars Jedi Knight: Jedi Academy
Tremulous
UFO: Alien Invasion
Urban Terror
War§ow
and more...
Powered by Q3Map2
44 downloads
(0 reviews)0 comments
Updated
-
GtkRadiant
By JKHub
GtkRadiant is the official level design toolchain for id Tech 3 by id Software and is maintained by a community of volunteers. GtkRadiant is powered by the Gtk+ Project and released under a GPL license.
Features
Simple, Intuitive Interface
Enhanced texture browser
Entity inspector
Portal viewer
Wavefront .obj export
Game Engine-Independent
Dark Places
Doom 3
Half-Life
Heretic II
Nexiuz
Prey
Quake
Quake II
Quake III Arena
Quake 4
Return to Castle Wolfenstein
Wolfenstein: Enemy Territory
Soldier of Fortune II: Double Helix
Star Trek: Voyager Elite Force
Star Wars Jedi Knight II: Jedi Outcast
Star Wars Jedi Knight: Jedi Academy
Tremulous
UFO: Alien Invasion
Urban Terror
War§ow
and more...
Powered by Q3Map2
844 downloads
(1 review)0 comments
Updated
.thumb.jpg.5dcb19c4514c273ccb909b62bb79a3e3.jpg)


-
For an extensive list of mods we recommend for Jedi Academy for new or old players.
-
Latest Activity
-
137
Jedi Academy: Enhanced
Hello, I absolutely love this mod and just got it installed today, but I ran into one issue I can't resolve or troubleshoot (at least not to the best of my knowledge) and I need help! No matter what I do, Jaden just skates/glides on the ground instead of running! It happens every time, without a fail. I'm not the best when it comes to installing mods, did I not install the mod correctly? Below I will attach a gif of what happens to me to see if anyone can help with my issue. Thanks in advance! - TK-221 -
0
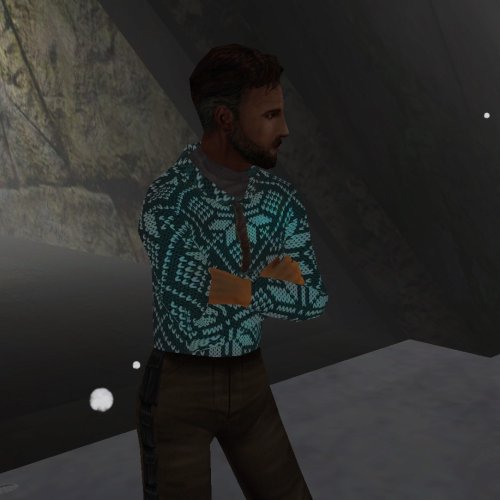
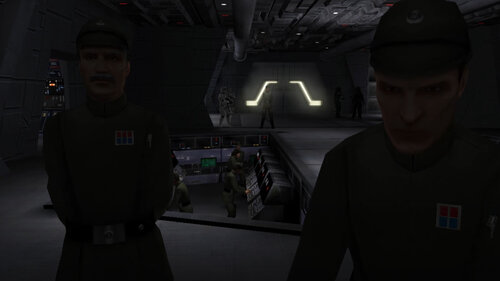
Captain Pellaeon - Heir to the Empire
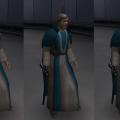
Mods like this always make me smile. The concept is straight forward, but its a character that is super important to anyone that enjoyed the Legacy books. Pellaeon had such a rich and long history and the execution of this model is perfect. The face is unique and lifelike. Very well crafted.- 1
-

-
0
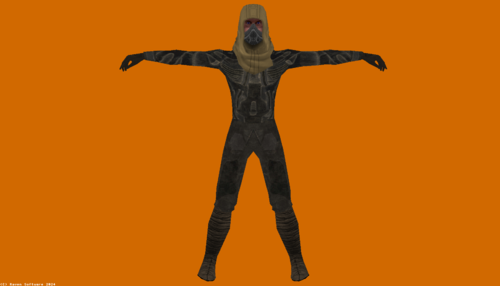
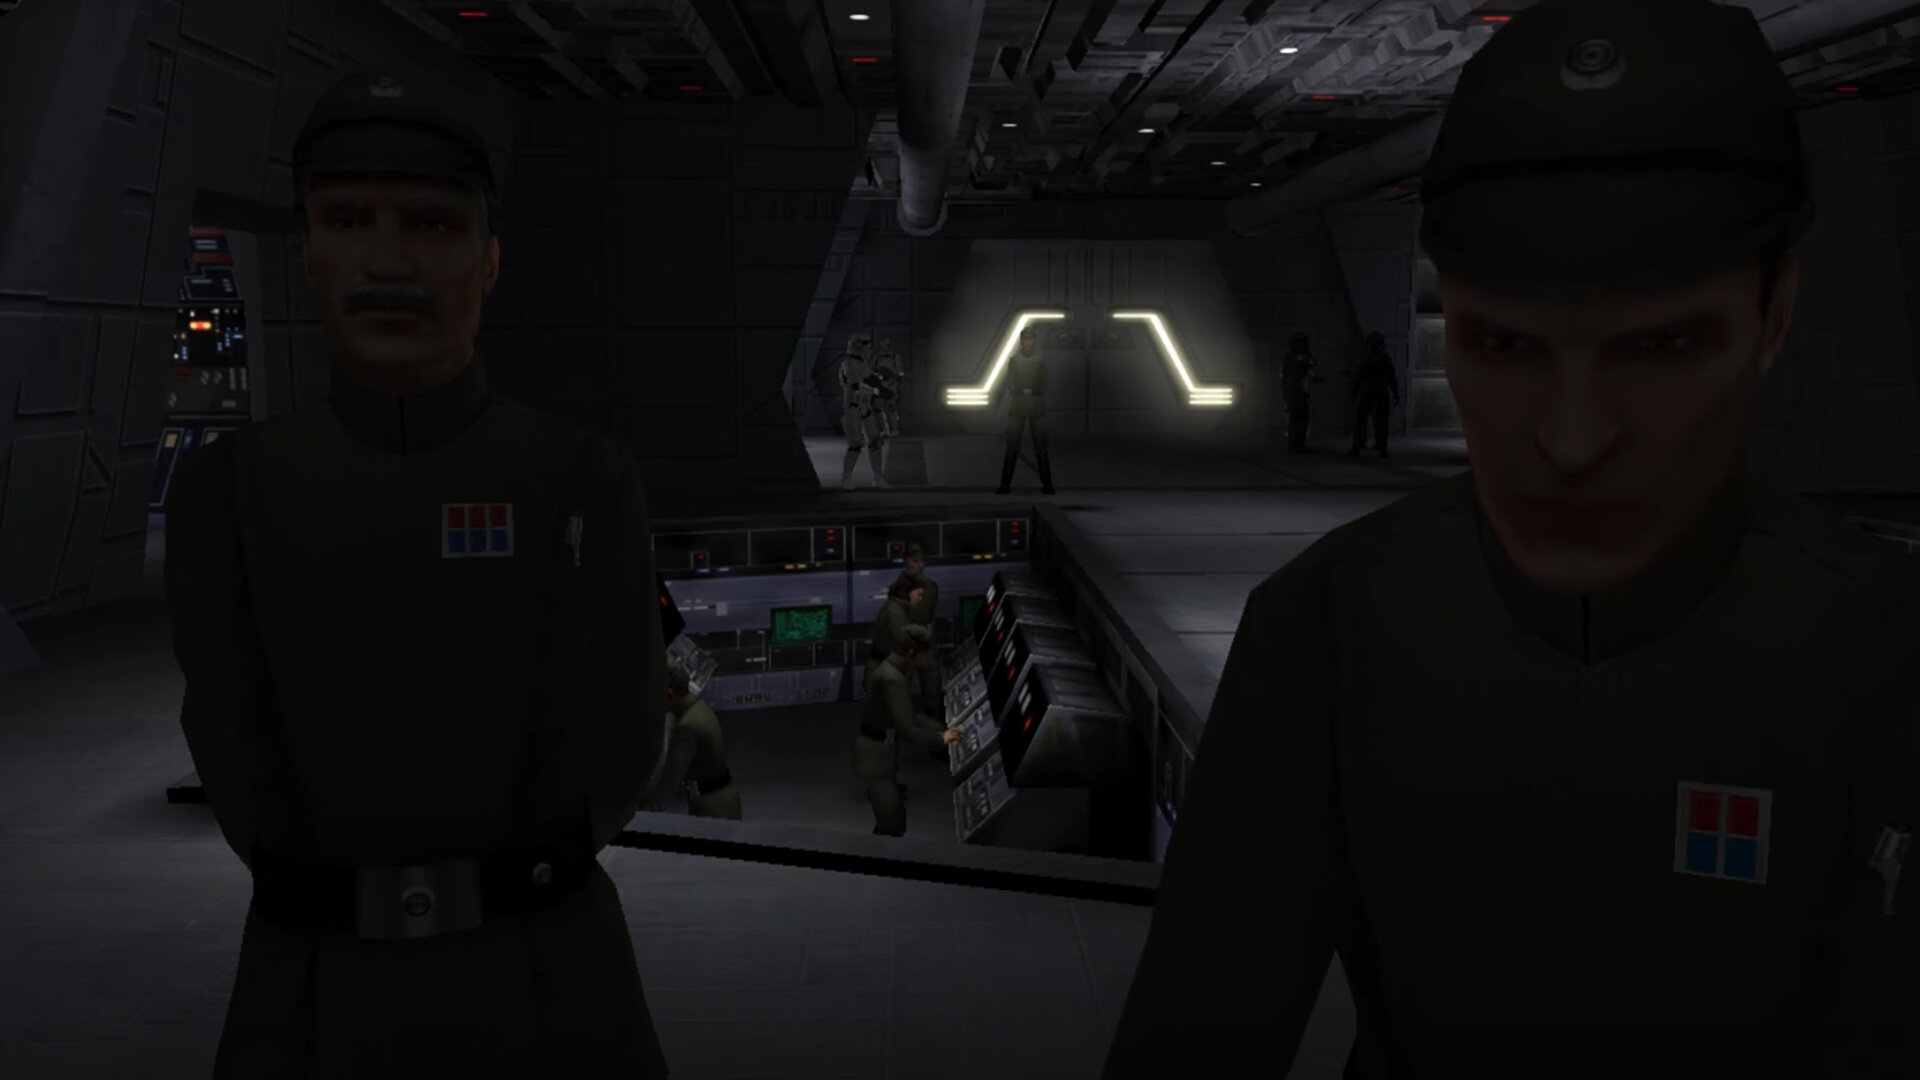
Captain Pellaeon - Heir to the Empire
15 downloads
Based on Heir to the Empire Almost 3,5 years ago I modified Haps Imperial Model to create Captain Pellaeon for a Machinima project Here's Project: https://www.youtube.com/watch?v=G2cFgRXTIME Model, Shader, Texture, Weight Paint by HapSlash Custom Texture by GPChannel Custom Kitbash by DarthValeria NPC Support htte_pellaeon -
3
-
38
Anakin Skywalker (The Chosen One) Pack
can someone please tell me how to play as Anakin using this mod? What is the command?? Great mod btw -
15
-
0
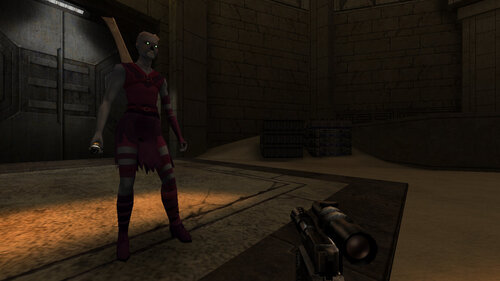
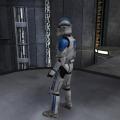
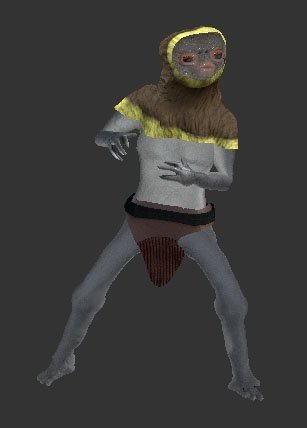
Shadows of the Empire Trooper
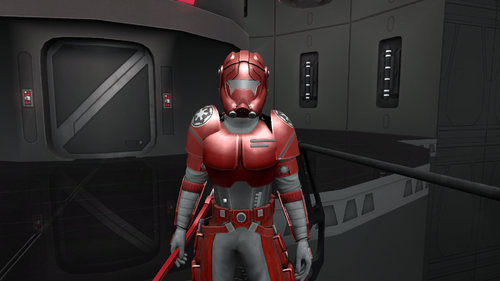
Version 1.0.0
68 downloads
==Shadows of the Empire - Imperial Guard== Based on the Star Wars action figure "Shadow of The Empire - Luke Skywalker in Imperial Guard Disguise" (1996) 3D modeled by Phazzer https://www.cgtrader.com/phazzzer Converted for Jedi Academy by Noodle Texture Baking by Noodle Project commissioned and organized by Zander_Nao --NPC Support-- SOTE SOTERed SOTEBlack -
0
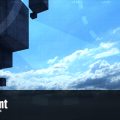
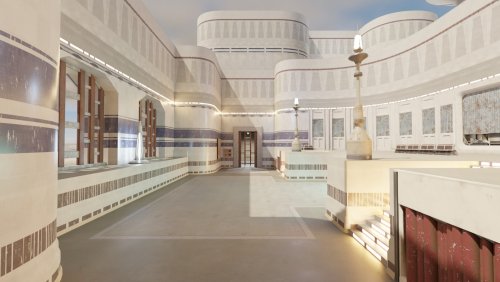
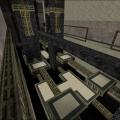
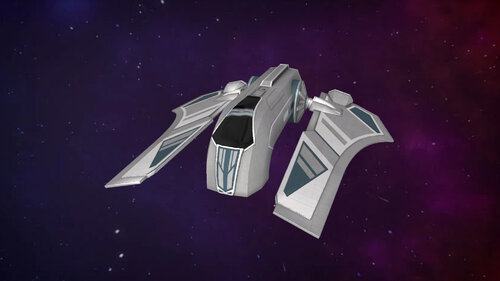
Spaceship Corridor
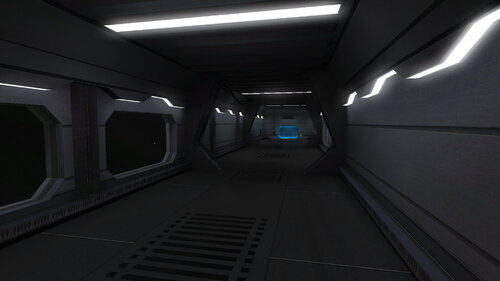
25 downloads
Game Modes: FFA Power Duel Duel Bot support: No New Textures New Shaders Install: Copy wz_spaceship.pk3 to your base folder. UnInstall: Delete wz_spaceship.pk3 from your base folder. Special thanks: (MKBK)Luke - testing (MKBK)Gyut - testing
-
-
Download Statistics
-
Files3,535
-
Comments14,041
-
Reviews17,360
-